
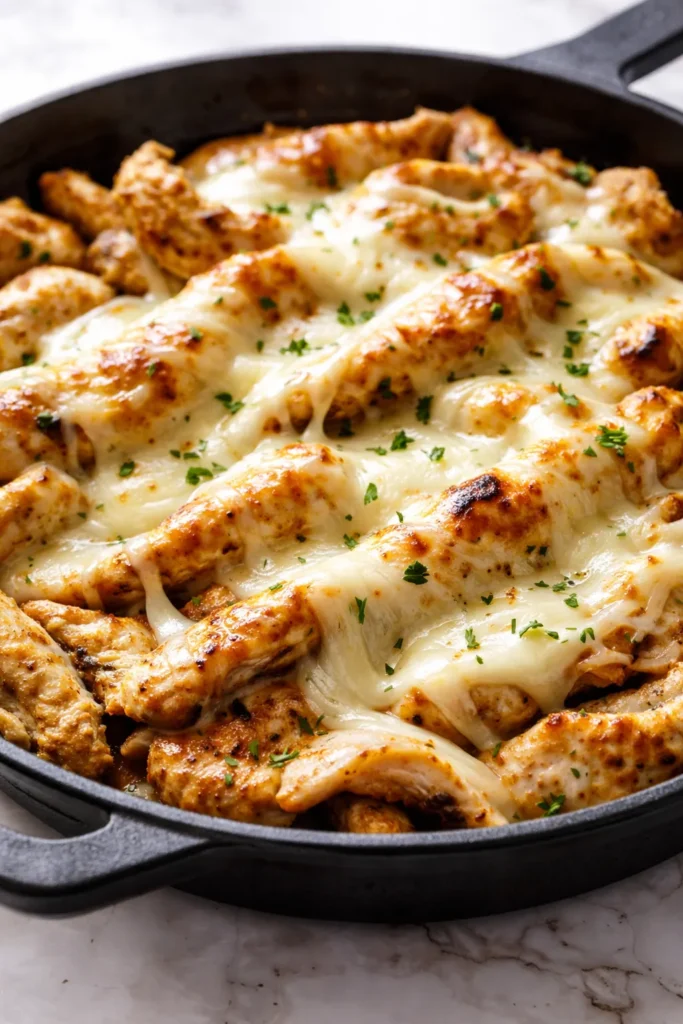
Is there anything better than a Philly cheesesteak? I didn’t think so. But my version swaps the thinly shaved beef for juicy Chicken, keeps all that gooey provolone goodness, and skips the hoagie bun entirely. We’re eating it straight out of the skillet with a fork, and honestly? It’s even better that way. This Chicken Cheesesteak Skillet has become our go-to Tuesday dinner — it’s fast, it’s deeply satisfying, and it makes the whole kitchen smell like a late-night diner in the best possible way.
The short version: A full dinner in one skillet, ready in 30 minutes, with melty cheese, tender chicken, and perfectly sautéed peppers and onions.
I’ve made this more times than I can count since my sister shared the basic idea with me last fall. It’s one of those rare recipes that pleases every single person at my table — including my pickiest eater, who once told me it was ‘better than takeout.’ I nearly dropped my spatula.
- Serves: 4 as a main
- Hands-On Time: 15 min | Total Time: 30 min
- Difficulty: Easy enough for a busy weeknight
- Cost per serving: ~$4.50
- Calories: ~420 per serving
- Dietary Notes: Naturally gluten-free friendly
(Photo above: an overhead shot of the finished skillet dinner, the chicken and peppers glowing under a blanket of melted provolone, a few charred edges catching the light. A wooden spoon rests on the side, and the skillet is still hot enough that a thin wisp of steam rises from the center.)
The Simple Trick That Keeps It from Getting Soggy
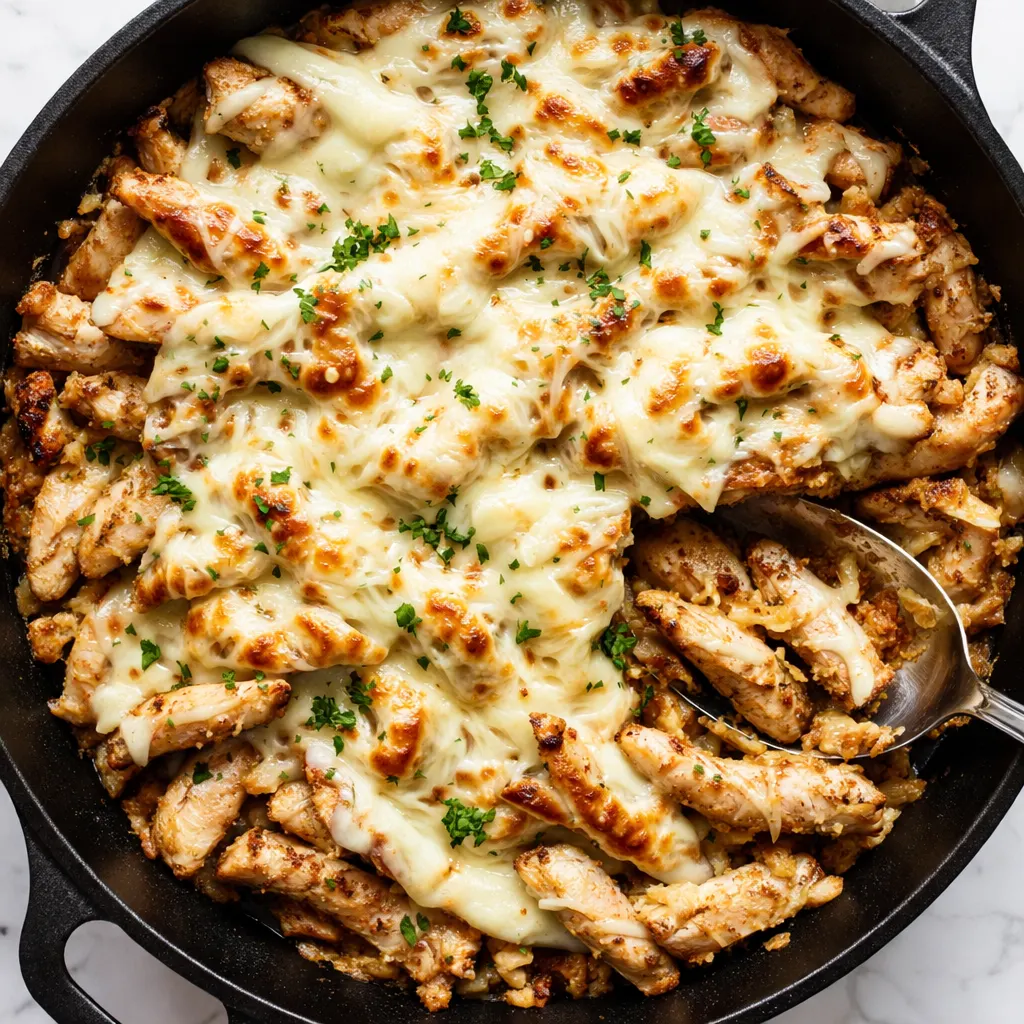
The problem with most skillet cheesesteaks — even the good ones — is the texture. The chicken releases liquid as it cooks, the peppers soften, and you end up with a sort of… wet pile. Edible, sure, but not the kind of thing you text your sister about.
Here’s the fix: you cook the vegetables first, then set them aside. By the time the chicken hits the pan, the heat is high enough to sear rather than steam. You get those beautiful brown bits on the chicken and the peppers retain just enough bite to matter.
Skip this order of operations and you’ll lose the texture entirely. Do it the right way and you’ll have a dinner that feels like a real meal, not a sad weeknight compromise.
Everything You’ll Need (Plus a Few Notes From My Kitchen)
- 1 lb boneless, skinless chicken breasts or thighs: Thighs are more forgiving here — they stay juicier under the heat. I usually use thighs because they don’t dry out if you look away for an extra minute.
- 1 large yellow onion, thinly sliced: The sweetness of a slowly cooked onion is the backbone of this dish. Yellow or sweet — don’t use red here, it’s too sharp.
- 1 large green bell pepper, thinly sliced: Classic. If you’re feeling fancy, swap in a red or yellow bell for sweeter flavor.
- 8 oz cremini mushrooms, sliced: Optional but highly recommended. They add that deep, savory note that makes this taste like it cooked for hours. My kids don’t love mushrooms but they eat them in this without complaint.
- 2 cloves garlic, minced: One clove is not enough. Two is just right.
- 1 tsp dried oregano: The sleeper hit. It brings the whole thing together.
- 1/2 tsp salt: Plus more to taste.
- 1/4 tsp black pepper: Fresh is better, but pre-ground will do.
- 4 slices provolone cheese: This is the classic. It melts beautifully without turning into a greasy puddle.
- 2 tbsp olive oil: For sautéing.
- 1 tbsp butter: For finishing the chicken. It adds flavor and richness.
The Tools You’ll Want Handy
- A 12-inch cast iron skillet or heavy stainless steel pan — the heavier the pan, the better the sear.
- A sharp chef’s knife for slicing the chicken and vegetables.
- A wooden spoon or spatula for stirring.
- A cutting board with a rim (to catch the chicken juices).
Let’s Make It (Step by Step)
This goes fast once it starts, so read through once before you begin. I promise it’s easy — just a few steps done in the right order.
- Prep everything first: This cooks fast once it starts, so slice the chicken into thin strips (against the grain), slice the onion and bell pepper, and mince the garlic. (📸 Photo tip: all your sliced ingredients lined up on the cutting board — it looks beautiful and it means you’re organized.)
- Cook the vegetables: Heat 1 tbsp of olive oil in your skillet over medium-high heat. Add the onion, bell pepper, and mushrooms. Cook, stirring occasionally, until they’re softened and starting to brown at the edges — about 5 to 6 minutes. Transfer them to a plate and set aside.
- Sear the chicken: Add the remaining 1 tbsp of olive oil to the same skillet. Lay the chicken strips in a single layer (work in batches if needed). Let them cook undisturbed for 2 to 3 minutes — you want a deep golden sear, not pale steamed meat. Flip and cook another 2 minutes. This is the most important step. Don’t crowd the pan.
- Add garlic and season: Add the minced garlic, oregano, salt, and pepper to the chicken. Stir and cook for 30 seconds until the garlic smells like heaven.
- Return the vegetables: Toss the cooked peppers and onions back into the skillet. Stir everything together. Reduce the heat to low.
- Top with cheese: Lay the provolone slices over the top of the chicken and vegetable mixture. Cover the skillet with a lid and let it cook for 1 to 2 minutes, until the cheese is completely melted and bubbly. (📸 Photo tip: pull the lid off just as the cheese fully melts — that stringy, steamy shot is the money photo.)
- Serve immediately: Spoon it into bowls or serve it straight from the skillet with a fork. A little sprinkle of fresh parsley or red pepper flakes is nice but entirely optional.
Making It Ahead (Because That’s How Real Life Works)
This one is actually great for meal prep. I make a double batch on Sunday and we eat it for lunch or dinner through Tuesday. The key is to store the cheese separately from the chicken mixture so it doesn’t turn into a gluey mess when you reheat it.
- Fridge: Store the chicken and vegetable mixture in an airtight container for up to 4 days. Keep the cheese slices in their own bag or container.
- Freezer: Yes! The mixture freezes beautifully for up to 3 months. Thaw overnight in the fridge.
- Reheat: Reheat in a skillet over medium heat until hot, then add the cheese and cover until melted. The microwave works too, but the skillet keeps the texture better.
Things I’ve Learned After Making This Too Many Times
- Don’t skip the sear: I know it’s tempting to stir the chicken constantly — it feels like you’re being productive. But letting it sit in the hot pan for those first 2 minutes is what creates the crust. That crust is flavor. Trust the quiet.
- Slice the chicken thin: If your chicken strips are too thick, they’ll release too much liquid and steam instead of searing. Aim for strips about 1/2 inch thick.
- Use a heavy pan: A thin nonstick skillet won’t hold heat the same way a cast iron or stainless steel pan will. The heavy pan keeps the temperature steady so you get a proper sear.
- Cheese matters: Provolone is the classic for a reason. But if you only have mozzarella, it will work — just know it’ll be stretchier and milder.
Ways to Make It Your Own
- Dairy-Free: Use a dairy-free provolone or mozzarella substitute. The texture will be slightly different, but the flavor will still be there.
- Gluten-Free: This recipe is naturally gluten-free! Serve it over rice, quinoa, cauliflower rice, or a bed of greens.
- Spicy: Add 1/2 tsp of red pepper flakes with the garlic, or use pepper jack cheese instead of provolone.
- Kid-Friendly: My kids prefer it with the peppers diced small so they’re harder to pick out. I also use white American cheese for them because it’s what they know.
- Fancy Guest Version: Add 1/4 cup of cream cheese to the skillet along with the garlic. It creates an incredibly rich, creamy sauce that feels much more indulgent.
The Questions I Get About This Recipe
Q: Why did my chicken turn out pale and watery instead of golden and seared?
A: Ugh, I’ve been there. The most likely culprit is that your pan wasn’t hot enough when the chicken hit it, or you had too much chicken in the pan at once. Make sure your pan is nice and hot before you add the oil, and work in batches if you need to. You’ll get that beautiful golden color next time — I promise.
Q: Can I use chicken thighs instead of breasts?
A: Absolutely. I actually prefer thighs for this recipe — they stay juicier and more forgiving. Just slice them thin the same way. No other changes needed.
Q: How long does this last in the fridge, and what’s the best way to reheat it?
A: It keeps in the fridge for up to 4 days in a sealed container. The best way to reheat it is in a skillet over medium heat — add a splash of water or broth to keep it from drying out, then add the cheese and cover until melted. The microwave works too, but the skillet really keeps the texture better.
Q: What do you serve with this skillet?
A: We eat it straight up with a fork because I’m lazy and it’s delicious. But if I’m feeding company, I’ll serve it over crusty bread or a bed of rice to soak up the juices. A simple green salad on the side is also lovely. My family likes it with roast potatoes on the weekend.
More Recipes My Family Makes on Repeat
If you liked this one, here are a few others that get the same reaction at our table:
- [INTERNAL LINK PLACEHOLDER: One-Pan Lemon Chicken and Potatoes] — A complete dinner in one pan with minimal cleanup.
- [INTERNAL LINK PLACEHOLDER: Creamy Mushroom and Spinach Skillet] — The vegetarian answer to the same weeknight craving.
- [INTERNAL LINK PLACEHOLDER: Quick Skillet Quesadillas] — Ready in 15 minutes and my kids ask for them constantly.
This Chicken Cheesesteak Skillet is the dinner I make when I need to get something on the table fast and I want everyone to be happy. No takeout menu required. I hope it becomes that recipe for you too.
If you try it, drop a comment below and let me know how it went — I read every single one and I love hearing your stories. Tag me on Pinterest when you make it so I can see your beautiful skillet!
📌 This chicken cheesesteak skillet recipe is ready in 30 minutes and packed with melty provolone — save it for your next busy weeknight dinner planning session.

30-Minute Chicken Cheesesteak Skillet
Equipment
- 12-inch cast iron or heavy stainless steel skillet
- Sharp chef’s knife
- Wooden Spoon or Spatula
- Cutting Board
Ingredients
- 1 lb boneless skinless chicken breasts or thighs, sliced thin (thighs preferred)
- 1 large yellow onion, thinly sliced
- 1 large green bell pepper, thinly sliced
- 8 oz cremini mushrooms, sliced (optional)
- 2 cloves garlic, minced
- 1 tsp dried oregano
- 1/2 tsp salt
- 1/4 tsp black pepper
- 4 slices provolone cheese
- 2 tbsp olive oil
- 1 tbsp butter
Instructions
- Prep everything first: slice the chicken into thin strips against the grain, slice the onion and bell pepper, and mince the garlic.
- Cook the vegetables: heat 1 tbsp olive oil in a 12-inch skillet over medium-high heat. Add the onion, bell pepper, and mushrooms. Cook, stirring occasionally, until softened and starting to brown at the edges, about 5 to 6 minutes. Transfer to a plate and set aside.
- Sear the chicken: add the remaining 1 tbsp olive oil to the same skillet. Lay the chicken strips in a single layer (work in batches if needed). Let them cook undisturbed for 2 to 3 minutes – you want a deep golden sear. Flip and cook another 2 minutes. This is the most important step for texture.
- Add garlic and season: add the minced garlic, oregano, salt, and pepper to the chicken. Stir and cook for 30 seconds until fragrant.
- Return the vegetables: toss the cooked peppers and onions back into the skillet. Stir everything together. Reduce heat to low.
- Top with cheese: lay the provolone slices over the chicken and vegetable mixture. Cover the skillet with a lid and let it cook for 1 to 2 minutes, until the cheese is fully melted and bubbly.
- Serve immediately straight from the skillet with a fork. A sprinkle of fresh parsley or red pepper flakes is optional.
Notes
Related posts:
 The Slow Cooker Cowboy Casserole That Saves Tired Weeknights (No Soggy Tots Allowed)
 Quick Lemon Ricotta Pasta for Busy Weeknights: Creamy, Bright, and on the Table in 20 Minutes
 Lemon Garlic Butter Baked Salmon in Foil That’s Ready in 25 Minutes — No Fuss, No Mess
 Lipton Onion Soup Meatloaf for Tuesday Nights: Moist, Savory, and the Only One You’ll Ever Need
 Kielbasa Sausage Cheesy Potato Casserole That Tastes Like Sunday Dinner — In Under an Hour
 Quinoa Chicken Sausage Bowls That Are Ready in 30 Minutes (And Actually Keep Well)