
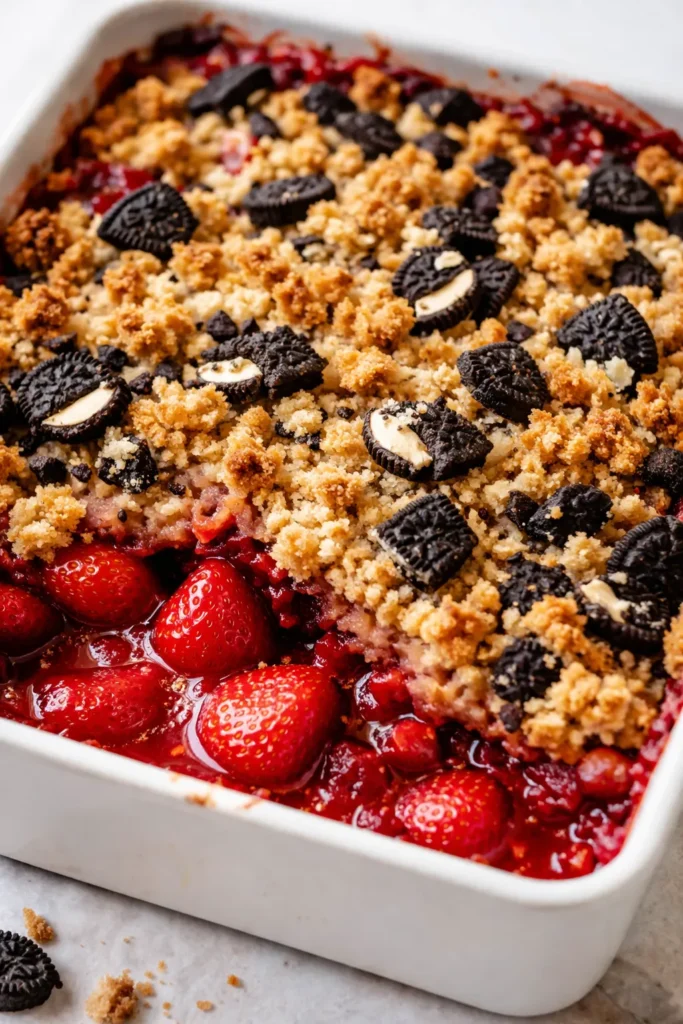
I know the Oreo thing sounds like something my teenage daughter, Nora, would come up with when she was rummaging through the pantry — and honestly, she did suggest it one summer when we were out of graham crackers for a regular crisp. I almost said no. It felt too casual, too much like a snack you’d eat on the couch rather than a dessert you’d bring to a barbecue.
But then I tried it. The first batch came out of the oven and my neighbor, Sharon, who was over for coffee, asked for the recipe before she’d finished her first bowl. The strawberries get jammy and thick in the oven, the crumble turns deeply buttery and golden, and the Oreos… they soften just slightly on the edges but keep their crunch in the middle. The cream centers melt into the berry syrup and create these little pockets of vanilla fudge that taste incredible with the tart fruit.
It’s my most-requested potluck dish now. People always ask what makes it taste so familiar-but-different. I always tell them the same thing: “It’s the cookies.” They never guess. They just reach for seconds.
The short version: Juicy strawberries under a buttery shortcake crumble studded with Oreos, baked until golden and bubbling.
I’ve made this about a dozen times now — for July Fourth, for Sunday suppers, for the night my sister came to visit and we ate the whole dish between the two of us. It works every single time.
- Serves: 8 as a dessert
- Hands-On Time: 20 min | Total Time: 50 min
- Difficulty: Easy enough for a Tuesday night, impressive enough for company
- Cost per serving: ~$2.50
- Calories: ~380 per serving (with ice cream, closer to 450)
- Dietary Notes: Naturally vegetarian. Adaptable for gluten-free.
(Photo above: A wide 9×13 baking dish on a worn wooden table, the strawberry filling bubbling at the edges, the crumble topping deeply golden with dark chocolate Oreo pieces scattered across the surface. A scoop of vanilla ice cream melts into the corner of the dish, forming a creamy puddle. Afternoon light from a side window catches the steam rising from the berries.)
Why the Oreos Work Here (It’s Not a Gimmick)
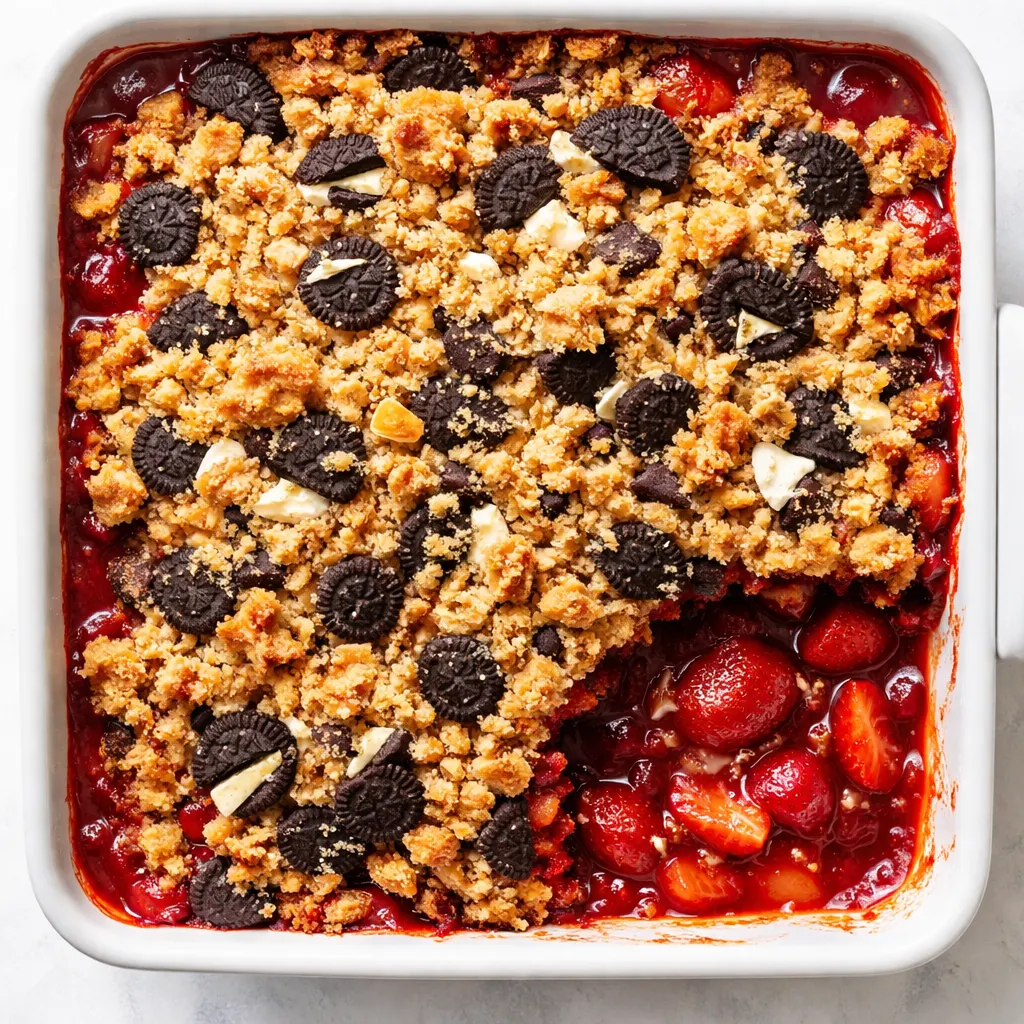
I was skeptical too. Chocolate and strawberry is a classic combination, sure, but Oreos felt almost too casual for a crumble. Here’s why they work: the dark cocoa in the cookie part toasts in the oven, which deepens the chocolate flavor until it’s almost fudgy. The cream center melts down and thickens the syrup from the berries just slightly, so you get these pockets of vanilla sweetness mixed into the tart fruit.
And the texture — a soft, jammy berry with a crunchy chocolate shortbread bite? It’s the same reason we put potato chips on sandwiches. Sometimes the contrast is exactly right.
My kids have never once left leftovers of this. Not once.
Everything You Need (Plus My Honest Notes)
- 2 lbs fresh strawberries, hulled and halved (If they’re huge, quarter them. Frozen berries will work in a pinch, but fresh gives you that firm-tender texture that holds up better in the oven. Use peak-season berries if you can — it makes a real difference.)
- 1/3 cup granulated sugar (plus more to taste) (Strawberries vary wildly in sweetness. If yours are tart, add another tablespoon or two. I learned this the hard way after an embarrassingly sour crumble one spring.)
- 1 tbsp fresh lemon juice (This brightens everything. Don’t skip it.)
- 2 tbsp cornstarch (This is what keeps the filling from being watery. Toss the berries with it like your dessert depends on it — because it does.)
- 1 tsp vanilla extract
- 1 1/2 cups all-purpose flour
- 1/2 cup cold unsalted butter, cubed (Cold is non-negotiable. I pop my cubed butter in the freezer for 10 minutes before I start. It makes the crumble flaky instead of greasy.)
- 12 Oreos, roughly chopped (Regular or Double Stuf both work. I’ve also made this with Golden Oreos for a birthday cake vibe — it’s excellent.)
The Setup (It’s Minimal, I Promise)
- A 9×13 baking dish (or an 8×8 if you want a deeper crumble — just add 5-10 minutes to the bake time)
- Two mixing bowls
- A pastry cutter or your fingers (I use my hands — Marta never owned a pastry cutter)
- A sharp knife for the Oreos
Here’s How I Do It
This goes fast. Read through once before you start so you’re not scrambling to cube butter while the berries sit.
Prep: Preheat your oven to 375°F. Butter your baking dish or spray it with cooking spray.
- Toss the berries: In a large bowl, combine the strawberries, sugar, lemon juice, cornstarch, and vanilla. Stir gently until everything is evenly coated. Let this sit while you make the crumble — the berries will start releasing their juices, which is exactly what you want.
- Make the crumble: In another bowl, whisk together the flour, 1/3 cup sugar, baking powder, and salt. Add the cold cubed butter. Using your fingers or a pastry cutter, work the butter into the flour mixture until it looks like coarse meal with some pea-sized butter lumps remaining. (Those lumps are what create the flaky, tender texture — don’t overwork it.)
- Add the Oreos: Gently fold the chopped Oreos into the crumble mixture. Reserve a handful to scatter on top later — this gives you those nice dark chocolate spots on the surface.
- Assemble: Pour the strawberry mixture into the prepared baking dish and spread it into an even layer. Sprinkle the crumble evenly over the top. Scatter the reserved Oreos over the crumble. (📸 Photo tip: At this point, you should see an even layer of pale crumble with dark Oreo pieces scattered across the surface — the berries shouldn’t be peeking through anywhere.)
- Bake: Place the dish on a baking sheet (it catches any drips) and bake for 35–45 minutes, until the filling is bubbling thickly at the edges and the top is deep golden brown. If the top is browning too quickly, tent loosely with foil. (📸 Photo tip: The visual cue is the thick bubbles at the edge — thin, watery bubbles mean it needs more time. The kitchen will smell like a county fair.)
- Rest: This is the hardest step. Let the crumble cool for at least 10 minutes before serving. I know the whole house smells incredible, but if you dig in right away, the filling will run all over the place. Ten minutes changes everything.
How I Meal Prep This for the Week
This is one of those desserts that’s truly best the day it’s made — the crumble stays crunchy, the berries hold their shape. But I’ve found a few ways to get ahead without sacrificing quality.
- Fridge: Assemble the entire dish (steps 1-4) but don’t bake. Cover tightly and refrigerate for up to 24 hours. Add about 10 minutes to the bake time since you’re starting from cold.
- Freezer: Bake and cool completely. Wrap the whole dish tightly in plastic wrap and foil. Freeze for up to 3 months. Thaw overnight in the fridge and reheat at 350°F for 15-20 minutes to bring back the crunch.
- Reheat: The microwave works in a pinch but the oven is much better — it re-crisps the crumble topping. 350°F for 10 minutes does the trick.
My Honest Advice After Making This a Dozen Times
- Use cold butter. I cannot stress this enough. Cold butter = flaky, tender crumble. Soft butter = greasy, flat topping. If your kitchen is warm, pop the crumble mixture in the freezer for 10 minutes before baking. It makes a real difference.
- Don’t skip the resting time. I know it’s hard when the whole house smells like strawberry-chocolate heaven. But that 10-minute rest is what allows the cornstarch to fully set the filling. Cut into it too soon and you’ll have strawberry soup under your crumble. Trust the process.
- Taste your berries first. Strawberries are unpredictable. A tablespoon of extra sugar can save a tart batch. I’ve done this so many times that I now taste a berry before I even start measuring — it’s just habit.
- Crush the Oreos in the bag. If you’re in a hurry (which I usually am), put the Oreos in a ziplock bag and give them a few firm whacks with a rolling pin. Less mess, same result. My kids actually prefer this method — they get to be involved.
Swaps That Actually Work
- Gluten-Free: Use a 1:1 gluten-free flour blend in the crumble. Classic Oreos are actually gluten-free, so you’re all set on that front. I’ve made this for my friend Jen who has celiac and she said it was the best crumble she’d had in years.
- Dairy-Free: Use melted coconut oil or a dairy-free butter substitute in the crumble. I use the same amount by weight. It won’t be quite as flaky, but it’s still delicious.
- Golden Oreos: These make a “birthday cake” version that’s dangerously good. My daughter Nora requested this for her birthday last year and it disappeared faster than the cake.
- Mixed Berries: Swap half the strawberries for blueberries, raspberries, or blackberries. The combination of berries with the chocolate crumble is incredible.
Questions I Get About This All the Time
Q: Why did my crumble turn out soggy?
A: Ugh, I’ve been there. The usual culprit is not enough cornstarch or the oven not being hot enough. Toss those berries with the full 2 tablespoons of cornstarch like your dessert depends on it. Also, make sure your oven is fully preheated to 375°F before the dish goes in. If the oven runs cool, the berries release too much water before the crumble has a chance to set.
Q: Can I use frozen strawberries?
A: Yes, but don’t thaw them first. Toss them frozen with the sugar, lemon, and cornstarch, and add about 10 minutes to the bake time. The texture will be slightly softer, but it’s still a great dessert — I do this all winter when fresh berries aren’t at their best.
Q: How long does this last in the fridge?
A: Covered tightly, it keeps for about 3 days. The crumble will soften over time, but a quick reheat at 350°F for 10 minutes brings back some of the crunch. I wouldn’t recommend freezing the assembled leftovers — the texture really does change.
Q: What do you serve with this?
A: Vanilla ice cream is the classic choice — the cold creaminess against the warm, jammy berries and crunchy crumble is perfect. But I also love it with a dollop of lightly sweetened whipped cream or a drizzle of balsamic glaze for something a little more grown-up. My kids like it with a glass of cold milk, which is honestly a pretty good call too.
More Recipes My Family Makes on Repeat
If you liked this one, here are a few others that get the same reaction at our table:
- Classic Strawberry Shortcake — The version my grandmother taught me, with tender biscuits and barely-sweetened berries.
- Summer Berry Crisp with Oat Crumble — When I want a crunchier topping, this is my go-to. Works with any berry combination.
- No-Churn Strawberry Ice Cream — The perfect partner for this crumble, and you don’t need an ice cream maker.
This strawberry shortcake crumble with Oreos is the kind of dessert that makes people linger at the table a little longer. It’s not fancy. It’s not complicated. But it tastes like summer in a way that’s hard to replicate with anything else.
If you try it, drop a comment below — I love hearing how it goes for you. And if you make it for a barbecue, don’t be surprised if someone asks for the recipe before they leave. It happens every single time.
📌 This Oreo strawberry shortcake crumble recipe is the perfect easy summer dessert — save it for your next barbecue, potluck, or Sunday dinner.
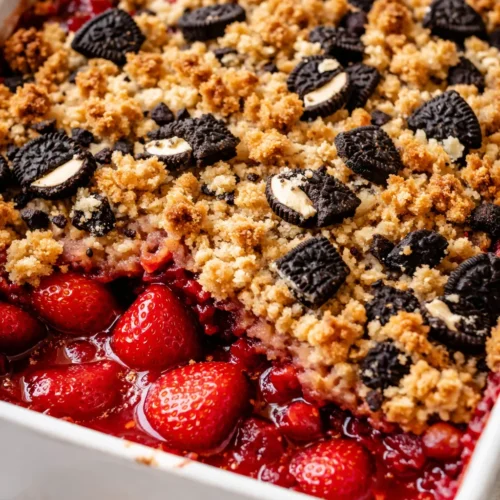
Strawberry Shortcake Crumble with Oreos
Equipment
- 9×13-inch baking dish
- Large Mixing Bowl
- Medium Mixing Bowl
- Pastry cutter or fingers
- Sharp knife (for Oreos)
Ingredients
- 2 lbs fresh strawberries, hulled and halved (or quartered if large)
- 1/3 cup granulated sugar (plus more to taste)
- 1 tbsp fresh lemon juice
- 2 tbsp cornstarch
- 1 tsp vanilla extract
For the crumble topping
- 1 1/2 cups all-purpose flour
- 1/2 cup cold unsalted butter, cubed
- 12 Oreos (regular or Double Stuf), roughly chopped
Instructions
- Preheat oven to 375°F. Butter a 9×13 baking dish.
- Toss the berries: In a large bowl, combine strawberries, 1/3 cup sugar, lemon juice, cornstarch, and vanilla. Stir gently. Let sit while making crumble.
- Make the crumble: In another bowl, whisk together flour, remaining 1/3 cup sugar, baking powder, and salt. Add cold butter. Work in with fingers or pastry cutter until coarse meal with pea-sized butter lumps remains. Fold in chopped Oreos; reserve a handful for topping.
- Assemble: Pour berry mixture into dish. Sprinkle crumble evenly over top; scatter reserved Oreos. Bake 35-45 minutes until filling bubbles thickly at edges and top is deep golden brown. Tent with foil if browning too fast.
- Rest: Let cool at least 10 minutes before serving. Filling will set. Serve with vanilla ice cream or whipped cream.
Notes
Gluten-free: Use 1:1 GF flour and classic Oreos (GF labeled).
Dairy-free: Use dairy-free butter or coconut oil (some flakiness lost).
Mixed berries: Swap half strawberries for blueberries or raspberries.
Related posts:
 The Super Simple Chocolate Cake for Dad That Disappears in Minutes
 My Grandmother’s Peach Cobbler with the Biscuit Topping That Stays Crispy Every Time
 My Grandmother’s Chocolate Wafers for the Ultimate Homemade Oreo Ice Cream Sandwiches
 The DIY Caramel Crunch Frappe That Beats the Drive-Thru (In 5 Minutes)
 Zucchini Carrot Muffins That Are Actually Fluffy (Not Soggy) – Ready in 35 Minutes
 The Best French Toast Iced Latte You’ll Make at Home — Ready in 5 Minutes