
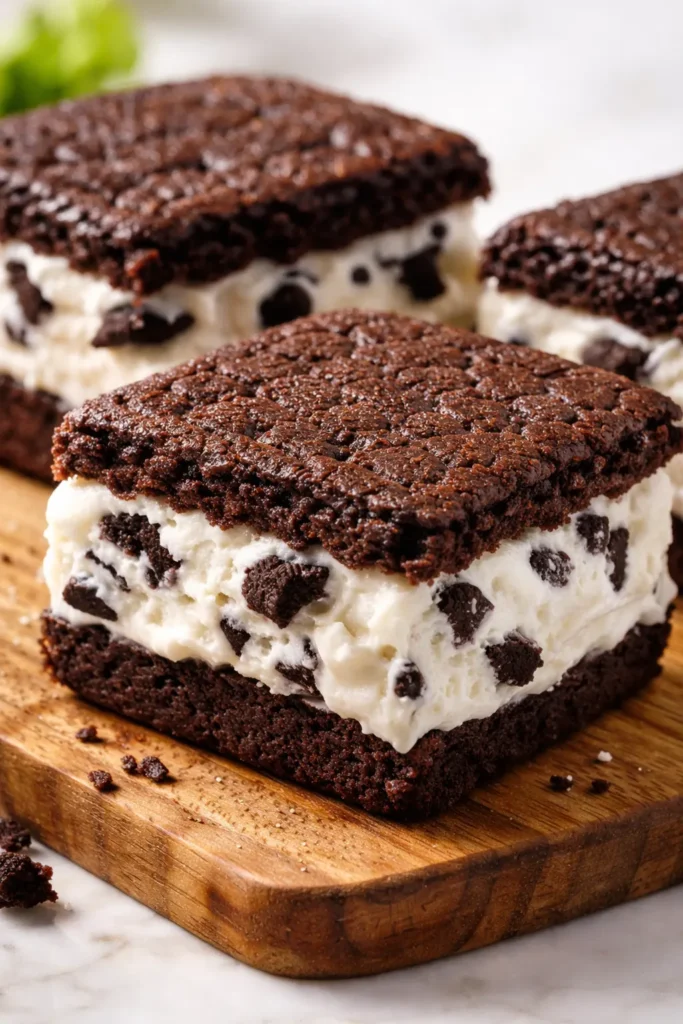
The first bite of these Homemade Oreo Ice Cream Sandwiches is a study in contrasts. The chocolate wafer gives way with a soft, fudgy crumble — not a hard snap, not a frozen brick — just a gentle surrender against the cold, velvety vanilla center studded with dark cookie chunks. My grandmother Marta kept a version of this chocolate wafer recipe clipped to a card in her oilcloth-covered recipe box, and I’ve spent years perfecting the ratio so it holds up beautifully against a thick layer of homemade ice cream without turning into a jaw-breaker in the freezer.
The short version: Tender, fudgy chocolate wafers wrapped around a creamy vanilla Oreo ice cream center that comes together in about 30 minutes of active work.
I’ve been making these for summer gatherings for over a decade now, and they disappear faster than just about anything else I bring. My daughter Nora, who is nineteen and lives in Savannah now, still requests a batch whenever she comes home for a visit. She says they taste like the summers she remembers — which is exactly what I was going for.
- Serves: 12 generous sandwiches
- Hands-On Time: 30 min | Total Time: 3 hr 30 min (includes freezing and chilling)
- Difficulty: Easy enough for a weekend project, impressive enough for a party
- Cost per serving: ~$1.50
- Calories: ~420 per sandwich
- Dietary Notes: Vegetarian. Can be adapted gluten-free and dairy-free.
(Photo above: A close-up, slightly angled shot of a finished ice cream sandwich on a rustic wooden board, cut in half to reveal the thick, creamy vanilla center studded with Oreo chunks sandwiched between two dark, fudgy chocolate wafers. A few crumbs are scattered on the board, and a tall glass of milk sits blurred in the background.)
The Trick That Keeps the Cookies From Freezing Solid
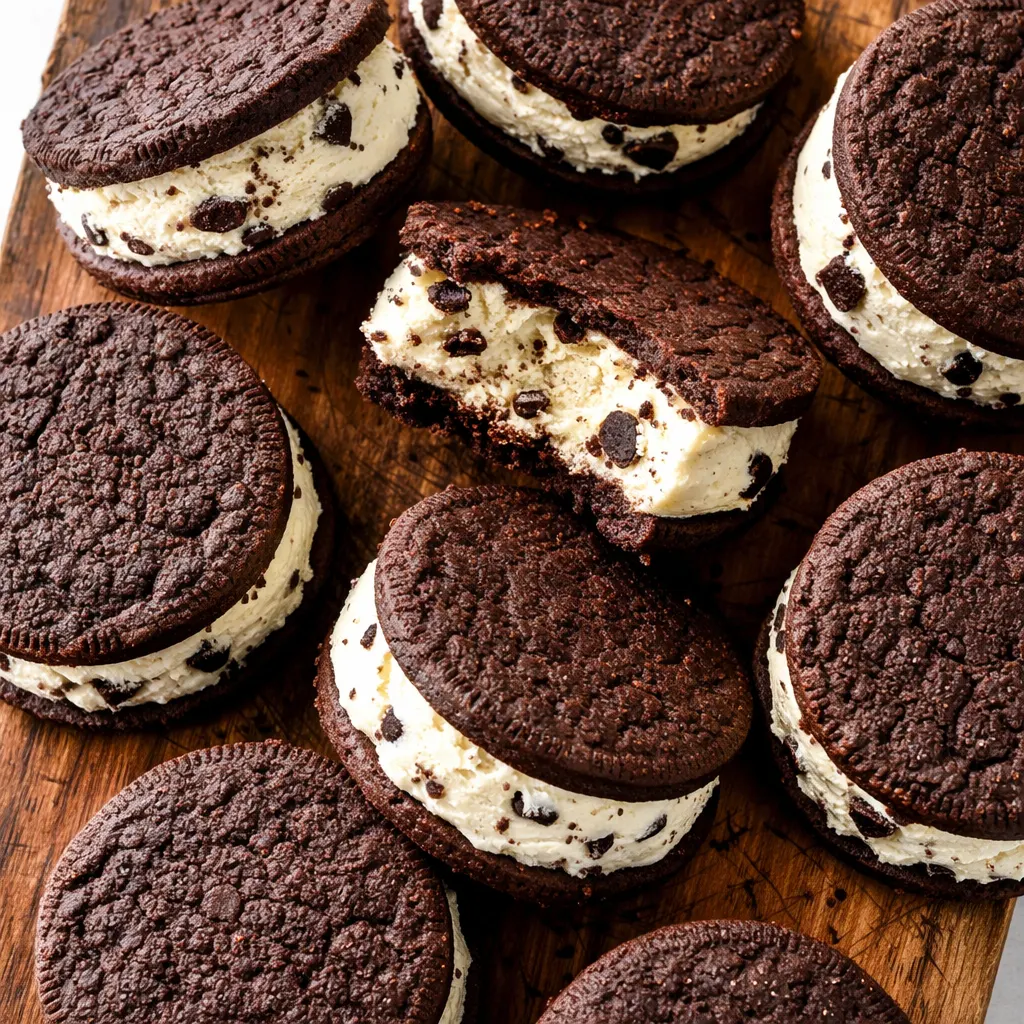
The biggest problem with homemade ice cream sandwiches is what happens to the cookies in the freezer. Most recipes produce a wafer that’s either too soft and falls apart, or so hard you risk a dental situation when you bite into one straight from the freezer. Marta’s chocolate wafers solve this with a high ratio of brown sugar to granulated sugar. Brown sugar retains moisture thanks to the molasses it contains, which means the cookies stay tender and scoopable even after hours in the deep cold. I learned this the hard way after my first batch came out of the freezer hard as hockey pucks. Marta’s recipe used brown sugar for exactly this reason — she just never told me why until I called her, frustrated, from my tiny first-apartment kitchen.
The second trick is pulling the cookies from the oven while they still look slightly underdone. They continue to set as they cool on the baking sheet, and that extra minute or two of bake time makes the difference between a fudgy wafer and a crunchy one. You want fudgy here. Trust me on this.
What Goes In (Plus My Honest Notes)
- 2 cups heavy cream: The backbone of the ice cream. Full-fat is non-negotiable here — the texture just isn’t the same with anything lighter. Marta always used cream from the dairy down the road, and I look for a local brand when I can.
- 1 cup whole milk: Balances the richness of the cream. I’ve tried this with 2% milk and it worked, but the ice cream was noticeably icier.
- 3/4 cup granulated sugar (for the ice cream) + 1 cup packed brown sugar and 1/2 cup granulated (for the cookies): The split sweeteners do different jobs. The granulated gives structure, the brown gives moisture and depth. My kids can tell when I’m out of dark brown sugar and use light instead — the cookies are still good, but they’re missing that deep molasses note.
- 5 large egg yolks: These make the custard base rich and silky. Save the whites for omelets or meringues.
- 1 tablespoon pure vanilla extract (for the ice cream) + 1 teaspoon (for the cookies): In a recipe this simple, every flavor counts. Please use pure vanilla. Imitation has that sharp, artificial edge that stands out against the dark chocolate.
- 12 Oreo cookies, crushed into a rough rubble: Not crumbs — chunks. You want distinct pieces of cookie and cream running through the vanilla base. I crush them in a zip-top bag with a rolling pin. It’s deeply satisfying and my nine-year-old nephew loves helping with this part.
- 1 3/4 cups all-purpose flour: Spoon and level it. Scooping directly from the bag packs in too much flour and makes the cookies dry.
- 3/4 cup Dutch-process cocoa powder: This gives the wafers their dark, dramatic color and deep fudge flavor. Natural unsweetened cocoa works in a pinch, but the color won’t be as striking against the white ice cream. I buy Droste or Guittard when I’m planning to photograph these, but store brand actually works fine.
- 1 cup unsalted butter, softened: Let it sit out for a good hour. Cold butter doesn’t cream properly, and that step is what gives the cookies their tender structure.
- 1 large egg: Room temperature. If you forget to set it out, place it in a bowl of warm water for five minutes.
- Pinch of flaky salt (for finishing): Optional but wonderful. A few flakes on top of each cookie before baking balances the sweetness and makes the chocolate taste even more chocolatey.
What to Pull Out Before You Start
- Stand mixer or hand mixer: For creaming the butter and whipping the cream. A whisk and strong arm works too, but I’m not that ambitious on a Tuesday.
- Two half-sheet baking pans: Line them with parchment paper for easy cleanup.
- 8×8 or 9×9 baking pan: For shaping the ice cream layer. Line it with parchment paper so the ice cream lifts out cleanly.
- Ice cream maker: I use my old Cuisinart, the one with the bowl that needs to freeze for 24 hours before you churn. You can use store-bought ice cream to skip this step entirely, and I won’t tell a soul.
- Sharp chef’s knife: A hot knife makes the cleanest cuts through the ice cream block. More on that below.
Let’s Make Them (Start to Finish)
The ice cream needs time to chill, and the cookie dough needs time to chill, so the order matters. Start the ice cream base first, then make the cookie dough while the base cools, and you’ll be exactly on track.
Make the ice cream: This is a classic custard base. Take it slow and low and you’ll be rewarded with the creamiest texture.
- Heat the dairy: In a medium saucepan, combine the heavy cream and whole milk. Place over medium heat and bring it just to a simmer — small bubbles around the edge, not a rolling boil. Remove from heat.
- Whisk the yolks and sugar: While the cream heats, whisk the egg yolks and 3/4 cup granulated sugar together in a large bowl until pale and slightly thickened, about 2 minutes.
- Temper the eggs: Slowly pour about 1 cup of the hot cream mixture into the egg yolks, whisking constantly. This raises the temperature of the eggs gradually so they don’t scramble. Then pour the egg mixture back into the saucepan with the remaining cream. (📸 Photo tip: The mixture should look smooth and pale yellow at this point — no streaks of egg white.)
- Cook the custard: Place the saucepan over low heat and stir constantly with a wooden spoon or silicone spatula until the mixture thickens enough to coat the back of the spoon, about 5-7 minutes. You should be able to run your finger across the coated spoon and leave a clean trail.
- Chill: Pour the custard through a fine-mesh strainer into a clean bowl to catch any cooked bits of egg. Stir in the 1 tablespoon of vanilla extract. Cover and refrigerate until completely cold, at least 2 hours or overnight.
- Churn: Once the base is cold, churn it in your ice cream maker according to the manufacturer’s instructions. It should be the texture of soft serve when it’s done.
- Layer and freeze: Fold the crushed Oreo chunks into the churned ice cream. Spread the mixture evenly into your parchment-lined 8×8 or 9×9 pan. Press a piece of plastic wrap directly onto the surface and freeze until firm, at least 2 hours. (📸 Photo tip: Make sure the Oreo chunks are distributed evenly — you want some in every bite.)
Make the chocolate wafers: While the ice cream base chills, make the cookie dough. This gives it time to firm up for slicing.
- Cream the butter and sugars: In the bowl of a stand mixer fitted with the paddle attachment, beat the softened butter, brown sugar, and remaining 1/2 cup granulated sugar together on medium speed until light and fluffy, about 3 minutes. Scrape down the sides.
- Add the wet ingredients: Beat in the egg and 1 teaspoon of vanilla extract until combined.
- Add the dry ingredients: In a separate bowl, whisk together the flour, cocoa powder, 1/2 teaspoon of salt, and 1/2 teaspoon of baking soda. Gradually add this to the wet mixture on low speed, mixing just until no streaks of flour remain. The dough will be thick and fudgy.
- Shape and chill: Turn the dough out onto a piece of plastic wrap. Shape it into a log about 2 inches in diameter. Wrap tightly and refrigerate for at least 1 hour, or up to 3 days.
- Slice and bake: Preheat your oven to 350°F. Line your baking sheets with parchment paper. Slice the chilled dough log into 1/4-inch thick rounds. Place them about 2 inches apart on the prepared sheets. If you’re adding flaky salt, sprinkle a few flakes on top of each round now.
- Bake: Bake for 9-11 minutes. The cookies will look puffed and slightly underdone in the center when you pull them out. That is exactly what you want. (📸 Photo tip: They will look soft and almost fragile straight from the oven. Let them rest on the baking sheet for 5 minutes before transferring to a wire rack.) Cool completely.
Assemble the sandwiches:
- Cut the ice cream: Remove the frozen ice cream block from the pan by lifting the parchment paper. Place it on a cutting board. Use a sharp chef’s knife heated under hot water and wiped dry to cut the block into 12 squares, or 6 rectangles if you prefer a more traditional sandwich shape.
- Sandwich and freeze: Place a square of ice cream on the flat side of one chocolate wafer. Top with a second wafer, flat side down. Gently press to adhere. Repeat with the remaining cookies and ice cream. Place the assembled sandwiches on a parchment-lined baking sheet and freeze for at least 1 hour to firm up again. This rest is crucial — it lets the cookies and ice cream bond without squishing the filling out the sides.
How I Make a Big Batch for the Summer
I almost always double this recipe. One batch disappears on the first day, and the other goes into the freezer for the weekend when the cousins come over. My secret for keeping them organized: I wrap each sandwich individually in plastic wrap and stack them in a labeled freezer bag. That way the kids can grab one without any drama about “who took the last one.”
- Fridge: Not recommended. The texture is best straight from the freezer.
- Freezer: Individually wrapped in plastic wrap + freezer bag. They keep perfectly for up to one month. After that, the cookies slowly absorb moisture from the ice cream and lose their tender crumb.
- Reheat: No reheating here. Just let them sit at room temperature for 2-3 minutes. This softens the ice cream just enough and lets the cookie come back to that perfect fudgy texture.
Hard-Earned Advice After a Decade of Making These
- Bake the cookies slightly underdone. This is the single most important piece of advice I can give you. If you bake them until they look “done” in the oven — firm and set — they will be too crisp once frozen. Pull them when they look puffy and soft in the center. The carryover heat finishes the job.
- Don’t skip chilling the cookie dough. I know it’s tempting to roll and slice right away, but warm dough spreads into thin, crispy disks. Chilled dough gives you thick, fudgy wafers with a nice structure that stands up to the ice cream. An hour in the fridge makes all the difference.
- Use a hot knife for the cleanest cuts. Run your knife under hot water, wipe it dry, and make one swift, confident cut through the ice cream block. Repeat for each cut. It’s the most satisfying way to get those perfect, clean edges.
- Let the assembled sandwiches rest in the freezer. I know you want to bite into one immediately. I do too. But that final hour of freezing lets the cookies and ice cream set into a cohesive sandwich. If you cut into them too soon, the ice cream squishes out the sides and you lose the beautiful layers.
Make Them Yours: Easy Variations
- Gluten-Free: Substitute the all-purpose flour with a 1:1 gluten-free baking blend (the kind with xanthan gum). The cookies will be slightly more delicate, so handle them gently. I’ve tested this with Bob’s Red Mill 1:1 and it works beautifully.
- Mint Chocolate Chip: Add 1 teaspoon of peppermint extract to the ice cream base and fold in mini chocolate chips instead of Oreos. It tastes like a Thin Mint in ice cream sandwich form. My kids request this version in December for some reason.
- Strawberry Shortcake: Use vanilla wafers for the cookies and strawberry ice cream for the filling. It’s a completely different dessert, but just as nostalgic. I do this in the summer when the farmers market has fresh strawberries.
- Dairy-Free: Use a high-quality coconut or oat milk-based vanilla ice cream (I like the So Delicious brand) and a plant-based butter substitute in the cookies. The texture is slightly different — a bit softer — but the flavor holds up well.
The Questions I Get Every Single Time I Post These
Q: Why did my cookies turn out hard as rocks?
A: Ugh, I’ve been there! This almost always happens if the cookies are baked a minute too long OR if the dough wasn’t chilled enough. Make sure you pull them when they look just set in the center. They’ll be soft and almost fragile when they come out of the oven. Trust the process — they firm up as they cool.
Q: Can I use store-bought ice cream to save time?
A: Absolutely. Soften 1.5 quarts of good quality vanilla ice cream (I use Häagen-Dazs or Tillamook), stir in the crushed Oreos, spread it in the pan, and freeze until firm. The texture won’t be quite as silky as the homemade custard base, but it’s still delicious and cuts the active time in half.
Q: How long do these last in the freezer?
A: Wrapped well in plastic wrap and stored in a freezer bag, they are perfect for up to a month. After that, the cookies can start to absorb moisture from the ice cream and lose their snap. I label the bags with the date so I don’t forget.
Q: What’s the best way to cut the ice cream block?
A: A sharp chef’s knife, heated under hot water and wiped dry between cuts. It makes the cleanest, most satisfying slices without breaking the cookies. Trust me, a dull knife is a recipe for frustration and squished edges.
More Frozen Treats We Love
If you liked this one, here are a few others that get the same reaction at our table:
- No-Churn Brown Sugar Peach Ice Cream — Made with summer peaches and rich brown sugar, no ice cream maker needed.
- Grandma Marta’s Fudgy Brownies — The brownies that started it all. They freeze beautifully if you want to make brownie ice cream sandwiches.
- The Perfect Vanilla Bean Cake — A simple, buttery vanilla cake that pairs with any ice cream flavor you can dream up.
These Homemade Oreo Ice Cream Sandwiches are the kind of dessert that makes a regular Tuesday feel like a celebration. My daughter Nora, now an art student in Savannah, calls me sometimes just to ask if I’ve made a batch recently. She says the combination of the dark, fudgy cookies and the cold, creamy filling tastes like the summers she remembers — running through the sprinkler, the smell of cut grass, the screen door slamming behind her as she came in for a frozen treat.
Comment below and let me know your favorite Oreo mix-in — or tag me on Pinterest so I can see your beautiful creations!
📌 Save this Homemade Oreo Ice Cream Sandwich recipe for your next summer party, weekend BBQ, or just-because Tuesday treat — it’s the frozen dessert everyone will ask for!
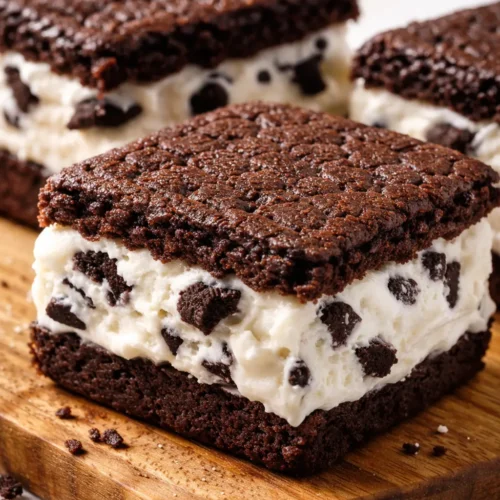
My Grandmother’s Chocolate Wafers for the Ultimate Homemade Oreo Ice Cream Sandwiches
Equipment
- Stand mixer or hand mixer
- Two half-sheet baking pans
- 8×8 or 9×9 baking pan
- Ice cream maker
- Sharp chef’s knife
- Parchment Paper
- Wooden spoon or silicone spatula
- Fine-mesh strainer
Ingredients
- 2 cups heavy cream
- 1 cup whole milk
- 3/4 cup granulated sugar (for the ice cream)
- 5 large egg yolks
- 1 tablespoon pure vanilla extract (for the ice cream)
- 12 Oreo cookies, crushed into chunks
For the cookies:
- 1 cup packed brown sugar
- 1/2 cup granulated sugar
- 1 cup unsalted butter, softened
- 1 teaspoon pure vanilla extract
- 1 large egg, room temperature
- 1 3/4 cups all-purpose flour
- 3/4 cup Dutch-process cocoa powder
- 1/2 teaspoon salt
- 1/2 teaspoon baking soda
- Flaky sea salt (for finishing, optional)
Instructions
- Make the ice cream: In a medium saucepan, combine heavy cream and whole milk. Bring just to a simmer over medium heat. Remove from heat.
- Whisk egg yolks and 3/4 cup granulated sugar together in a large bowl until pale and thickened, about 2 minutes.
- Temper the eggs: Slowly pour about 1 cup of hot cream into yolk mixture, whisking constantly. Pour egg mixture back into saucepan with remaining cream.
- Cook custard over low heat, stirring constantly, until mixture thickens enough to coat the back of a spoon, 5-7 minutes. Do not let it boil.
- Strain custard through a fine-mesh strainer into a clean bowl. Stir in 1 tablespoon vanilla. Cover and refrigerate until completely cold, at least 2 hours or overnight.
- Churn in ice cream maker according to manufacturer’s instructions until soft-serve consistency. Fold in crushed Oreo chunks.
- Spread ice cream evenly into a parchment-lined 8×8 or 9×9 pan. Press plastic wrap directly onto surface. Freeze until firm, at least 2 hours.
- Make the cookies: In a stand mixer, beat softened butter, brown sugar, and 1/2 cup granulated sugar until light and fluffy, about 3 minutes. Beat in egg and 1 teaspoon vanilla.
- In a separate bowl, whisk together flour, cocoa powder, 1/2 teaspoon salt, and baking soda. Gradually add to wet mixture on low speed until combined.
- Turn dough onto plastic wrap and shape into a 2-inch diameter log. Wrap tightly and refrigerate for at least 1 hour (up to 3 days).
- Preheat oven to 350°F. Line baking sheets with parchment. Slice dough into 1/4-inch rounds. Place 2 inches apart on sheets. Sprinkle with flaky salt if desired.
- Bake for 9-11 minutes – cookies should look puffed and slightly underdone in center. Let cool on baking sheet 5 minutes, then transfer to wire rack to cool completely.
- Assemble: Remove frozen ice cream block from pan using parchment. Cut into 12 squares with a hot knife. Place a square on the flat side of one chocolate wafer, top with another wafer, flat side down. Press gently. Repeat.
- Place assembled sandwiches on a parchment-lined baking sheet and freeze for at least 1 hour to firm up before serving. Let sit at room temperature 2-3 minutes before eating.
Notes
- Bake cookies slightly underdone – they continue to set as they cool. Pull when puffy and soft in center.
- Don’t skip chilling the dough. Warm dough spreads into thin, crispy disks; cold dough gives thick, fudgy wafers.
- Use a hot knife for cleanest cuts through the ice cream block.
- Let assembled sandwiches rest in freezer for at least 1 hour before serving to let cookies and ice cream bond.
Related posts:
 The Super Simple Chocolate Cake for Dad That Disappears in Minutes
 Easy French Toast Cups You Can Make in 20 Minutes (They Taste Like Custard-Filled Pastry)
 My Grandmother’s Peach Cobbler with the Biscuit Topping That Stays Crispy Every Time
 High-Protein Overnight Oats That Actually Taste Like Breakfast (Not a Chalky Disaster)
 The Slow Cooker Cowboy Casserole That Saves Tired Weeknights (No Soggy Tots Allowed)
 Quick Lemon Ricotta Pasta for Busy Weeknights: Creamy, Bright, and on the Table in 20 Minutes