
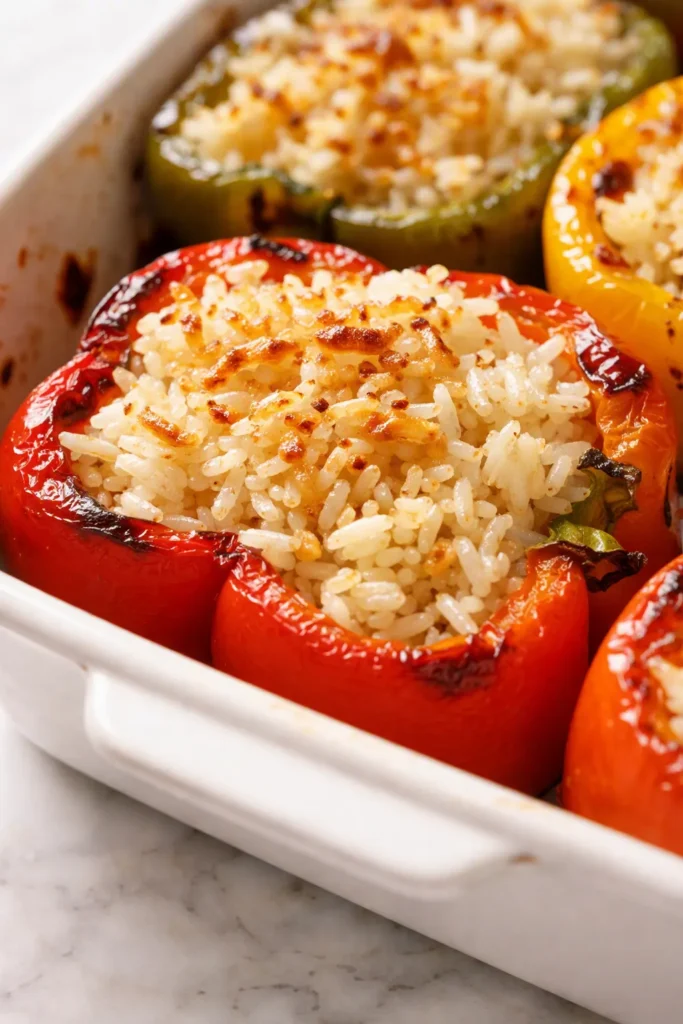
Every time I make Italian stuffed bell peppers, I think about the first time Nonna Rose handed me a fork in her tiny kitchen in Jersey. I was twenty-two, fresh off the bus from Georgia with an accent as thick as my mama’s sweet tea, and she watched me cut into one of those peppers while the mozzarella stretched and the steam fogged her kitchen window. “Mangia, sweetheart,” she said. That first bite tasted like warmth and Sundays and everything I ever wanted to learn how to cook.
Twelve years and countless batches later, these peppers are still the dish my family asks for by name. My middle kid — the one who survives mostly on goldfish crackers and sheer stubbornness — has never once left a stuffed pepper on her plate. Not once. Around here, that’s not a brag; it’s a certified miracle.
The short version: tender peppers, saucy Italian filling, and a golden cheese crust — all done in 75 minutes with zero fancy skills.
I’ve carried this recipe all the way from that Jersey kitchen to my own busy house in the South, and it has delivered for game-day dinners, weeknight rescues, and the in-laws’ holiday table. My sister-in-law — the one married into the “real” Italian side — asked me for it. In our family, that’s the highest honor there is.
- Serves: 6 generous peppers as a main dish
- Hands-On Time: 25 min | Total Time: 75 min
- Difficulty: Easy enough for a Tuesday, impressive enough for company
- Cost per serving: About $3.50
- Calories: ~420 per stuffed pepper
- Dietary Notes: Adaptable for gluten-free, vegetarian, or lighter ground turkey
(Photo above: Overhead shot of six stuffed peppers nestled in a white ceramic baking dish, one pepper cut open to show the gooey cheese pull, a few scattered fresh basil leaves, red-checkered dish towel underneath, warm late-afternoon light coming from the kitchen window.)
The Trick That Keeps These Peppers From Turning to Mush (Don’t Skip It)
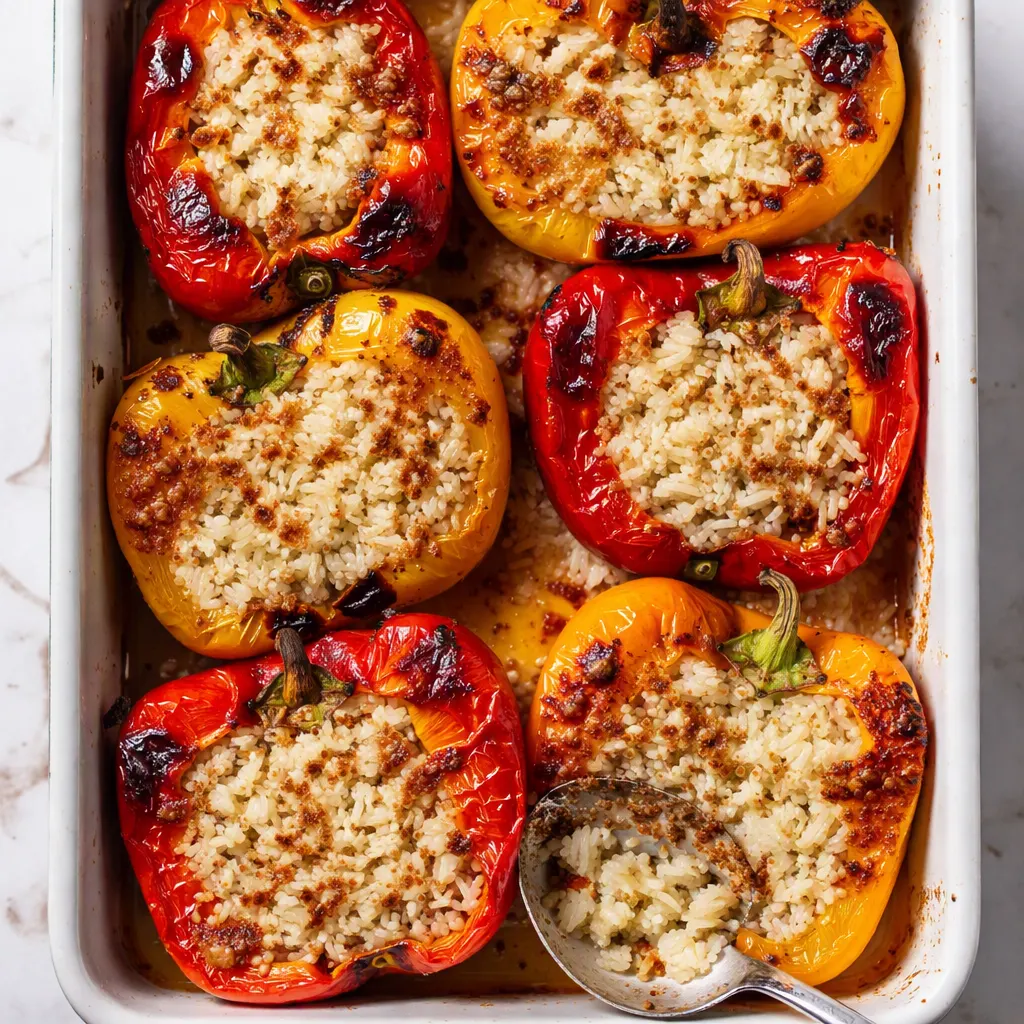
Before I figured this out, every stuffed pepper recipe I tried ended the same way: floppy peppers, watery filling, or peppers still strangely crunchy in the middle while the cheese on top burned. The fix is almost embarrassingly simple — you pre-bake those empty pepper shells for 10 minutes before you add a single spoonful of filling.
That one step starts softening the peppers so they finish cooking at the same time as the filling, and it helps them hold their shape instead of collapsing into what my husband still calls “the pepper soup incident” from our first year of marriage. Trust me, you don’t want a pepper soup incident of your own.
Then there’s the filling itself. A beaten egg plus two kinds of cheese hold everything together so each bite is cohesive and saucy — no crumbly rice rolling off your fork. It’s the difference between good stuffed peppers and the ones people text home about.
Everything You Need (Plus a Few Notes Straight From My Kitchen)
- 6 medium bell peppers (mixed colors): I lean toward red, yellow, and orange because they’re sweeter and milder than green. Green works in a pinch, but if your kids are sensitive to that bitter edge, the warm colors are the way to go. My youngest calls these “rainbow bowls,” and honestly, that’s exactly what they look like on a plate.
- 1 lb ground beef (80/20): The extra fat keeps the filling tender. If you want to be really Italian about it, do half beef and half bulk sweet Italian sausage — that sausage adds a little fennel magic you won’t get from plain beef.
- 1 cup cooked white rice: Leftover rice is perfect here, so this is a great fridge-cleaner recipe. If starting from scratch, cook ⅓ cup dry rice in ⅔ cup water. I’ve even used leftover takeout rice in a pinch, and nobody complained.
- 1 small yellow onion, diced: Sautéed until soft and sweet before it ever meets the meat. If you have a kid who hunts for onion pieces, chop it small and cook it long — it basically disappears.
- 3 cloves garlic, minced: Italian cooking without garlic is just sad. Add it for the last minute of cooking so it doesn’t burn and turn bitter.
- 1 egg, beaten: The secret glue that keeps your filling from crumbling into a pile.
- 1½ cups marinara sauce, divided: Use a good jarred sauce or your own homemade, just make it a flavorful one. Nonna would have used whatever she canned last summer. I use the jar with the prettiest label at my grocery store.
- 1 cup shredded mozzarella, divided: Half goes in the filling, half goes on top for that stretchy cheese pull. Fresh mozzarella works too, but it’s more watery — shredded is my weekday friend.
- ½ cup grated Parmesan, divided: The salty, nutty backbone of the whole dish.
- 1 tsp dried oregano and 1 tsp dried basil: Classic, familiar, just right. No need to get fancy here.
- ½ tsp salt and ¼ tsp black pepper: Adjust to taste, but don’t skip them entirely.
- 2 tbsp olive oil: For sautéing the aromatics and giving the peppers a slick coat before their pre-bake.
- ¼ cup Italian-seasoned breadcrumbs: The crispy crown on top. If yours aren’t Italian-seasoned, add a pinch of garlic powder and oregano to make up for it.
What to Pull Out Before You Start
- A 9×13-inch baking dish — glass or ceramic works great. I use the same white one my mama had back in the 90s.
- A large skillet (12-inch if you’ve got one)
- A medium saucepan if you’re cooking rice from scratch
- A sharp knife and a sturdy cutting board
- A mixing bowl big enough to hold all that filling
- A sheet of aluminum foil for covering the dish during part of the bake
Let’s Make It (Step by Step)
This comes together in about the time it takes to unload the dishwasher and referee one minor sibling disagreement. Read through once before you start, and you’ll feel like a pro.
- Preheat your oven to 375°F. One temperature for everything — nice and simple.
- Cook the rice: If you don’t have leftovers, simmer ⅓ cup dry rice with ⅔ cup water, covered, for about 15 minutes until tender. When I’m really tired, I use the frozen microwavable rice packets. No shame — they work.
- Slice and clean the peppers: Cut each pepper in half lengthwise from stem to bottom, then pull out the seeds and white membranes. Drizzle the halves with 1 tablespoon of olive oil, sprinkle with a pinch of salt, and arrange them cut-side up in the baking dish. This is the step where my kids use spoons to scoop seeds — they think it’s the best job in the house. (📸 Photo tip: You should see 12 glistening pepper halves, like little red and orange boats, lined up in neat rows.)
- Pre-bake the peppers: Slide the dish into the oven for 10 minutes. This is the don’t-skip step we talked about — it keeps them from turning into mushy soup carriers. Set a timer. I’ve wandered off and forgotten these more times than I’d like to admit.
- Sauté the aromatics: While the peppers bake, warm the remaining olive oil in your skillet. Cook the onion over medium heat for 4 to 5 minutes until soft and translucent, then add the garlic and cook for one more minute until you can smell it across the kitchen. That garlic moment is the smell of dinner doing something right.
- Brown the meat: Add the ground beef (and sausage if you’re using it) and break it up with a wooden spoon. Cook until no pink remains, about 6 to 8 minutes, then sprinkle in the oregano, basil, salt, and pepper. Let it get some brown color on it — that’s where the flavor lives. Drain off excess fat if there’s a lot, but leave a little for flavor.
- Make the filling: Take the skillet off the heat and stir in the cooked rice, beaten egg, 1 cup of the marinara, ½ cup of the mozzarella, and ⅓ cup of the Parmesan. Stir until it all comes together like a big, happy Italian casserole in one pan.
- Stuff the peppers: Pull the pre-baked peppers out of the oven and spoon the filling into each half, mounding it slightly above the top. Don’t pack it down like you’re making snowballs — keep it light and fluffy. (📸 Photo tip: The peppers should be glossy and just starting to soften, with a steamy pile of filling mounded high on each one.)
- Top them off: Spoon the remaining ½ cup of marinara over the tops, then sprinkle with the rest of the mozzarella, the remaining Parmesan, and the breadcrumbs. This is the layer that turns into a golden, crispy crown — let it shine.
- Bake, covered then uncovered: Cover the dish with foil and bake for 30 minutes. Then remove the foil and bake for 10 to 15 more minutes until the cheese is bubbly and the breadcrumbs are golden brown. The peppers are ready when a fork slides into the side with almost no resistance.
- Rest before serving: Let the peppers sit for 5 to 10 minutes. I know you want to dive right in, but that rest lets the filling set so it doesn’t fall apart the second you cut into it. Use those minutes to call everyone to the table and pour the tea.
Sunday Prep = Stress-Free Weeknights
I make a double batch of these on Sunday afternoons while I’m already in the kitchen. We eat one batch that night, and the second batch saves us on a busy Tuesday when I look at the clock and wonder where the day went.
- Fridge: Store leftovers in an airtight container for up to 4 days. Reheat at 350°F for about 15 minutes to keep that breadcrumb crust crispy. The microwave works in a pinch, but it softens the topping.
- Freezer: Yes! Freeze baked peppers individually on a sheet pan, then transfer to a freezer bag for up to 3 months. You can also assemble them unbaked, freeze the whole dish tightly wrapped, and bake straight from frozen — just add 15 minutes to the bake time.
- Reheat: Thaw overnight in the fridge, then warm at 350°F until heated through. Use the oven if you care about texture; use the microwave if you just want dinner on the table before everyone melts down.
Things I Wish I’d Known the First Time (Saving You the Trouble)
- Pick peppers that are roughly the same size: If some are huge and some are tiny, they cook at different speeds. I aim for peppers around 4 to 5 inches tall and grab two or three of each color. My store always sells them in 3-packs, so I just buy two packs and call it a day.
- Don’t overpack the filling: The filling puffs a little while it bakes, so mound it gently and leave a little room at the top. I’ve over-stuffed before, and the middles don’t cook as evenly. Even if you do it, though, it’ll still taste great — I’ve done it a dozen times.
- Never skip the pre-bake: I know it feels like an extra step, but it’s the difference between peppers that hold their shape and peppers that collapse into a puddle. My husband thought I was overcomplicating it until he tried both versions side by side. That ended the pepper soup era for good.
- Double the recipe: You will regret not having leftovers. These taste even better on day two, which is basically a Christmas miracle in a house that usually hates leftovers. They also make the best work lunch — your coworkers will be appropriately jealous.
Swaps That Actually Work
- Gluten-Free: Use gluten-free breadcrumbs or skip them entirely and double down on the Parmesan for the crust. Check your marinara label — most are gluten-free, but a few brands sneak in thickeners. My nephew needs GF at our family dinners, and he’s never once noticed the swap. Shhh.
- Lighter Version: Swap ground beef for ground turkey or ground chicken and stir 1 tablespoon of olive oil into the filling so it doesn’t dry out. Brown rice works beautifully in place of white. My sister makes this version during marathon training season and swears by it.
- Low-Carb / Keto: Swap the rice for cauliflower rice — no need to cook it first, just squeeze out as much water as you can and stir it in raw. I’ve tested this, and it honestly works. You lose a little heartiness but gain a lot of guilt-free eating.
- Vegetarian: Skip the meat entirely, double the rice, and add a can of drained cannellini beans or a cup of chopped mushrooms sautéed with the onions. My daughter’s best friend is vegetarian and requests these every time she sleeps over.
- Spicy Italian: Use hot Italian sausage instead of the ground beef and add a pinch of red pepper flakes to the filling. My husband gets this version on game days; the kids stay on the mild batch.
The Questions Y’all Ask Me About These Peppers
Q: Why did my peppers turn out watery or mushy?
A: Ugh, I’ve been there — that’s exactly why I bake the empty pepper shells before stuffing them. If you skip that step, the peppers release liquid as they bake and flood the whole dish. Next time, don’t skip the 10-minute pre-bake, and make sure you’re baking covered with foil for the first stretch, not simmering the dish on the stovetop. You’ve got this — that one little change makes a world of difference.
Q: Can I make these with ground turkey or without rice?
A: Absolutely! Ground turkey works great — just add 1 tablespoon of olive oil to the filling so it stays moist, since turkey is so lean. And for the rice, you can swap in cauliflower rice, quinoa, or even riced broccoli if you’re counting carbs. I’ve tested all three, and they all hold together fine. The picky kids in my house didn’t blink at any of them.
Q: How long do these last in the fridge? Can I freeze them?
A: You’ll get 4 good days in the fridge in an airtight container. For freezing, I like to freeze them fully baked — wrap each pepper in foil, pop them in a freezer bag, and they stay happy for up to 3 months. Reheat in the oven at 350°F for 15 to 20 minutes from the fridge, or about 40 minutes from frozen. The microwave is fine in a pinch, but it softens that crispy breadcrumb top.
Q: What do you serve with Italian stuffed bell peppers?
A: In our house, these are a full meal on their own. But if you want to round things out, garlic bread is non-negotiable for scooping up the extra marinara in the bottom of the dish, a simple green salad balances everything nicely, and on Sundays we sometimes add a pot of Southern green beans with bacon. My kids would also tell you buttered noodles never hurt anybody.
More Recipes My Family Makes on Repeat
If this one found its way into your dinner rotation, here are a few other dishes that get the same happy reception at our table:
- [INTERNAL LINK PLACEHOLDER: Nonna’s Baked Ziti with Crispy Edges] — the one my daughter requests for her birthday every single year, cheese pull included.
- [INTERNAL LINK PLACEHOLDER: Easy Italian Meatballs in Tomato Sauce] — my Sunday gravy recipe that makes the whole house smell like my mother-in-law’s kitchen.
- [INTERNAL LINK PLACEHOLDER: One-Pan Sausage and Peppers] — the 30-minute weeknight version of that Italian classic, perfect for when you look up and it’s already 5:30.
One Last Thing Before You Go
Whether you’re feeding your family on a rushed Tuesday or pulling out the nice dishes for a Sunday supper, these Italian stuffed bell peppers show up. They’re forgiving, they’re beautiful, and they taste like the kind of food that makes people slow down and pass the plate twice. I’ve never once put these on the table and watched somebody leave unhappy.
If you try them, come back and tell me how it went. Drop a comment below, or tag me on Pinterest when you snap a photo of those golden, cheese-topped pans — I genuinely love seeing them out in the wild.
📌 Italian stuffed bell peppers that taste like Sunday dinner — save this recipe for your next cozy weeknight or family supper.
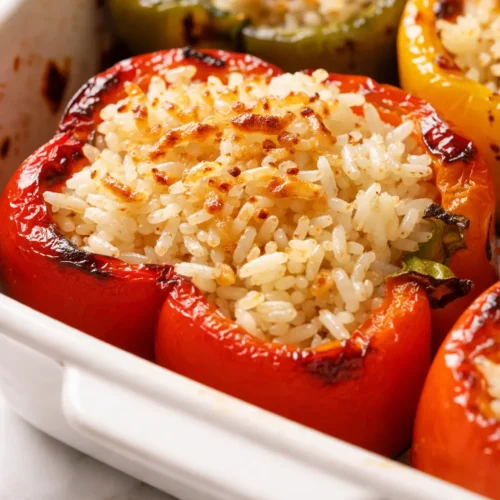
Italian Stuffed Bell Peppers That Taste Like Sunday Dinner
Equipment
- 9×13-inch baking dish
- Large Skillet
- Medium Saucepan
- Sharp Knife
- Cutting Board
- Mixing Bowl
- Aluminum foil
Ingredients
For the Peppers
- 6 medium bell peppers, mixed colors
- 2 tbsp olive oil, divided
For the Filling
- 1 lb ground beef (80/20)
- 1 cup cooked white rice
- 1 small yellow onion, diced
- 3 cloves garlic, minced
- 1 egg, beaten
- 1 1/2 cups marinara sauce, divided
- 1 cup shredded mozzarella, divided
- 1/2 cup grated Parmesan, divided
- 1 tsp dried oregano
- 1 tsp dried basil
- 1/2 tsp salt
- 1/4 tsp black pepper
For the Topping
- 1/4 cup Italian-seasoned breadcrumbs
Instructions
- Preheat your oven to 375°F.
- If you don’t have leftover rice, simmer 1/3 cup dry rice with 2/3 cup water, covered, for about 15 minutes until tender.
- Cut each pepper in half lengthwise from stem to bottom, then pull out the seeds and white membranes. Drizzle the halves with 1 tablespoon of olive oil, sprinkle with a pinch of salt, and arrange them cut-side up in a 9×13-inch baking dish.
- Pre-bake the empty pepper shells for 10 minutes. This keeps them from turning mushy.
- While the peppers bake, warm the remaining olive oil in a large skillet. Cook the onion over medium heat for 4 to 5 minutes until soft and translucent, then add the garlic and cook for one more minute.
- Add the ground beef and break it up with a wooden spoon. Cook until no pink remains, about 6 to 8 minutes, then season with oregano, basil, salt, and pepper.
- Take the skillet off the heat and stir in the cooked rice, beaten egg, 1 cup of the marinara, 1/2 cup of the mozzarella, and 1/3 cup of the Parmesan.
- Pull the pre-baked peppers out of the oven and spoon the filling into each half, mounding it slightly above the top. Don’t pack it down.
- Spoon the remaining 1/2 cup marinara over the tops, then sprinkle with the rest of the mozzarella, the remaining Parmesan, and the breadcrumbs.
- Cover the dish with foil and bake for 30 minutes. Remove the foil and bake for 10 to 15 more minutes until the cheese is bubbly and the breadcrumbs are golden brown.
- Let the peppers rest for 5 to 10 minutes before serving so the filling sets.
Notes
Related posts:
 The Slow Cooker Cowboy Casserole That Saves Tired Weeknights (No Soggy Tots Allowed)
 Quick Lemon Ricotta Pasta for Busy Weeknights: Creamy, Bright, and on the Table in 20 Minutes
 Lemon Garlic Butter Baked Salmon in Foil That’s Ready in 25 Minutes — No Fuss, No Mess
 Lipton Onion Soup Meatloaf for Tuesday Nights: Moist, Savory, and the Only One You’ll Ever Need
 Quinoa Chicken Sausage Bowls That Are Ready in 30 Minutes (And Actually Keep Well)
 Creamy Chicken Penne Pasta That’s Silky Smooth in 30 Minutes (No Heavy Cream Required)