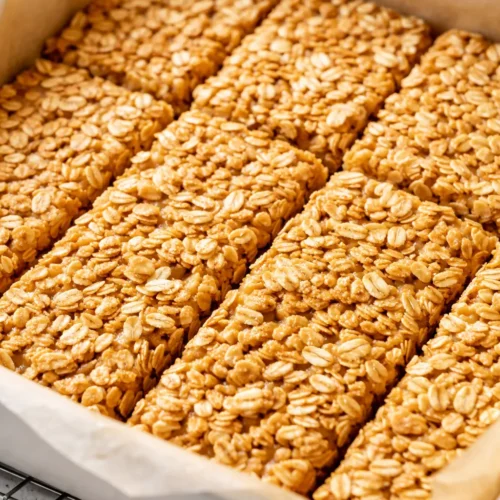
Homemade No Bake Granola Bars
After two years of crumbly failures, I finally cracked the ratio for no bake granola bars that actually hold together. The secret is a tablespoon of coconut oil and pressing the mixture hard enough to make you wonder if the pan will survive. These are chewy, sweet, and ready in 15 minutes of hands-on time. Keep them in the fridge for a grab-and-go snack that disappears from lunchboxes faster than anything store-bought.
Equipment
- 8x8 baking dish
- Parchment Paper
- Medium Saucepan
- Wooden spoon or silicone spatula
- Measuring cup for pressing
Ingredients
- 2 cups rolled oats (not quick oats)
- 1 cup creamy peanut butter (or almond butter), well stirred
- 1/2 cup honey (or maple syrup)
- 1/4 cup coconut oil
- 1 teaspoon vanilla extract
- 1/2 teaspoon salt
Mix-Ins
- 1 cup total mix-ins: dark chocolate chips, dried cherries, chopped almonds, sunflower seeds, flaked coconut, or any combination
Instructions
- Toast the oats: Spread the rolled oats on a rimmed baking sheet. Toast at 350°F for 10 minutes, stirring once halfway through. You're looking for a light golden color and a warm, nutty smell that fills the kitchen. (Photo tip: They should be just barely golden — not dark brown. If they look pale, give them two more minutes.)
- Line the pan: Cut a sheet of parchment paper long enough to overhang two opposite sides of your 8x8 dish. Press it into the corners. This is what lets you lift the finished slab out without any mangling.
- Warm the binders: In a medium saucepan, combine the peanut butter, honey, coconut oil, vanilla, and salt. Warm over low heat, stirring constantly, until everything is smooth and runny. Don't let it boil. You just want it warm enough to stir easily — about 90 seconds total. (Photo tip: It should look glossy and pour off the spoon like thick cream. If it looks separated or grainy, you got it too hot — take it off the heat and stir in a tablespoon of warm water.)
- Combine everything: Pour the warm binder over the toasted oats and mix-ins. Stir until every single oat is coated. The mixture should look glossy and smell deeply nutty and sweet — like the best part of breakfast.
- Press firmly: Transfer the mixture to your parchment-lined dish. Press it down HARD with the bottom of a measuring cup. I mean really lean into it. Get the corners especially — an unpacked corner will crumble first. (Photo tip: You should see a uniform, packed-down surface with no visible air pockets. If you see loose oats, press more.)
- Chill: Refrigerate for at least 1 hour (or up to 24 hours if you're planning ahead). When you lift the parchment, the slab should feel firm and solid — no bending at the center.
- Cut and enjoy: Use a sharp chef's knife to cut cleanly through the slab. Cut straight down — no sawing motion. I get 12 bars out of one batch.
Notes
Storage: Keep in an airtight container in the refrigerator for up to 2 weeks, or freeze individually wrapped in parchment in a freezer bag for up to 3 months. Let stand at room temperature for 2 minutes before eating for a chewier texture.
Troubleshooting: If your bars are too crumbly, add an extra tablespoon of honey next time. If too hard, add a teaspoon more coconut oil. The pressing technique is critical — use the bottom of a measuring cup and really lean into the corners.
Variations: For a nut-free version, use sunflower seed butter and add an extra pinch of salt. For gluten-free, use certified gluten-free oats. For a fancy version, drizzle with melted dark chocolate and flaky sea salt after cutting.