
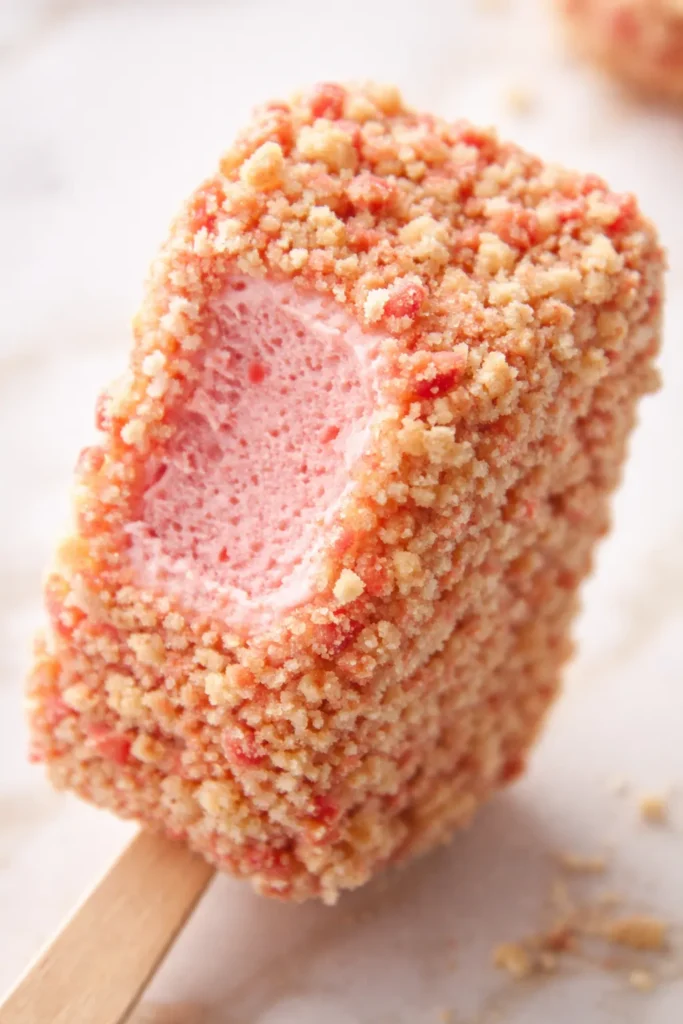
I have a confession: I have never owned an ice cream maker. Not once. For years I thought that meant I couldn’t make real ice cream bars at home — the kind with a crunchy crust and a creamy center that actually tastes like strawberries, not pink sugar. These strawberry shortcake ice cream bars changed all of that.
The short version: A buttery shortbread crust, a no-churn vanilla ice cream that is impossibly creamy, and a real strawberry swirl that tastes like July.
My daughter Nora — who is 19 and an art student in Savannah, very particular about her desserts — asked if she could take a whole tray back with her after her first bite. That does not happen often. I have made these about a dozen times since then, tweaking the crust so it stays crunchy, testing how cold the jam needs to be to swirl just right. This version is the one my neighbor Sarah requests for every block party. It is also the one my pickiest nephew asked for seconds of.
- Serves: 12 as a generous dessert bar
- Hands-On Time: 25 min | Total Time: 4 hours 25 min (including freezing)
- Difficulty: Easy enough for a weekend project with kids
- Cost per serving: ~$1.75
- Calories: ~390 per serving
- Dietary Notes: Vegetarian. Easily adaptable for gluten-free.
(Photo above: Overhead shot of the finished ice cream bars on a wooden board, one bar cut in half to show the clean layers — a golden shortbread crust, creamy white ice cream, and bright red strawberry ribbons. Natural afternoon light from the left. A few fresh strawberries scattered around for color.)
Why These Beat the Boxed Version Every Time
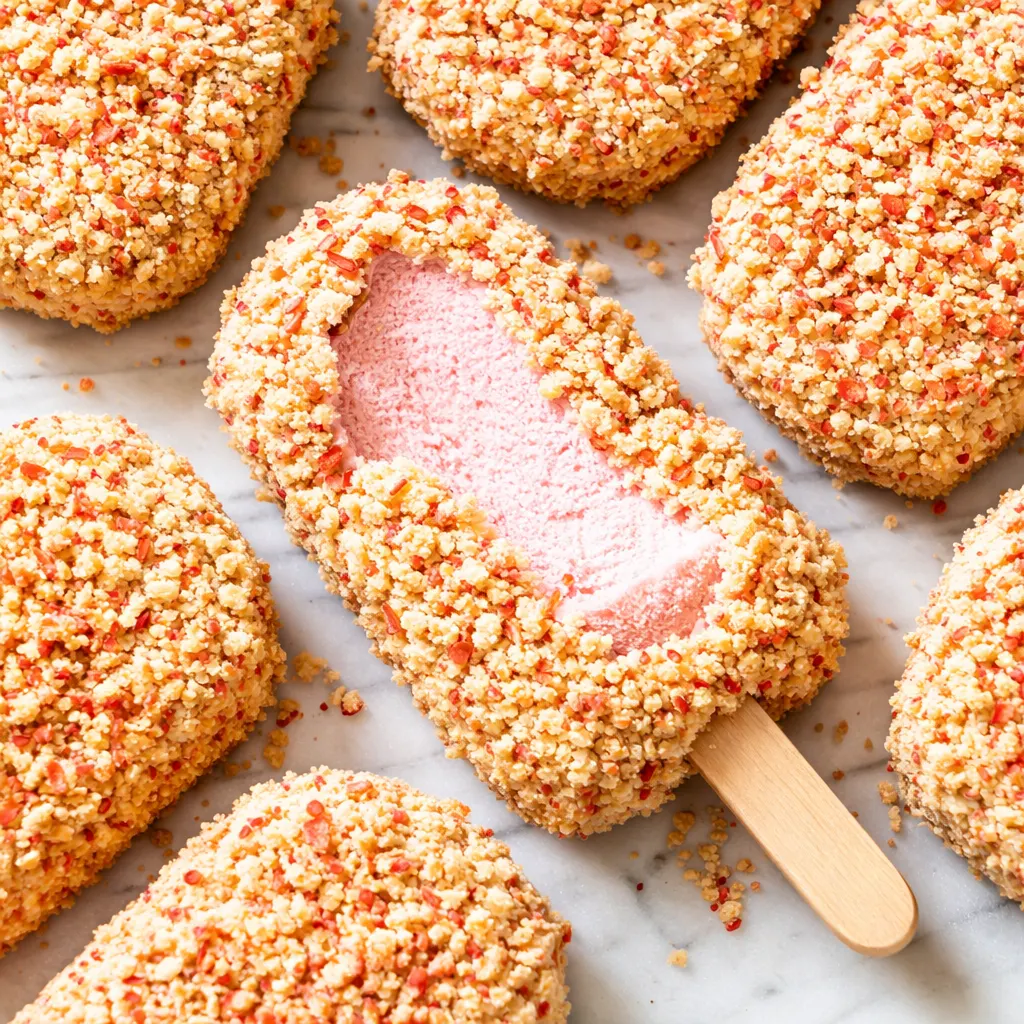
The store-bought ones always taste a little hollow to me. Too much air, not enough strawberry, and that strange artificial flavor that lingers on your tongue. These are the opposite. The crust is the thing I am proudest of — it is a simple shortbread, pre-baked until it is golden and firm. That pre-bake is the trick. It creates a barrier that keeps the crust from getting soggy when the ice cream goes on. No sogginess. Just a satisfying crunch against the cold, creamy filling.
The strawberry swirl is another place these stand apart. I cook the berries down just enough to concentrate their flavor, then cool them completely before swirling. If you swirl warm jam into the ice cream base, it melts everything into a pink mess. Cold jam creates those beautiful ribbons of real fruit that taste bright and tangy, not cloyingly sweet.
The best part is the texture of the ice cream itself. There is no condensed milk taste here. The heavy cream and vanilla do the heavy lifting, and the folding method keeps it light and scoopable. The result tastes like you spent hours churning, when really you just whipped some cream and let the freezer do the work.
What You’ll Need (Plus the Berry Notes I Always Add)
- For the shortbread crust:
1 ½ cups all-purpose flour
½ cup granulated sugar
¼ teaspoon salt
½ cup cold unsalted butter (cubed)
½ teaspoon vanilla extract
1 tablespoon cold milk (only if needed to bring the dough together)
This is the crust my grandmother Marta used for everything from pies to cookies. The cold butter is non-negotiable — warm butter makes a tough shortbread, and we want something that shatters when you bite it. - For the strawberry swirl:
2 cups fresh strawberries (hulled and chopped)
¼ cup granulated sugar
1 tablespoon lemon juice
My kids love helping mash the strawberries for this. It is messy in the best way. If you use frozen strawberries, thaw them first and drain off the extra liquid, or the swirl will be too watery. - For the no-churn ice cream base:
2 cups heavy cream (very cold)
1 can (14 oz) sweetened condensed milk
1 ½ teaspoons vanilla extract
⅛ teaspoon salt
There is a low-fat condensed milk out there — do not use it. The full-fat version gives you the creamy texture that makes this taste like real ice cream, not frozen foam.
Tools That Make This Easy
- A 9×9-inch baking pan (metal or glass both work, but metal gives a crisper crust)
- Parchment paper (for the sling — makes lifting the bars out so much easier)
- A food processor or pastry cutter for the shortbread
- A stand mixer or hand mixer for the whipped cream
- A rubber spatula for folding
Here’s How I Do It — Start to Finish
This goes faster than you’d think, but the freezing time is non-negotiable. Read through once before you start so everything has time to cool when it needs to.
- Preheat and Prep the Pan: Preheat your oven to 350°F. Line your 9×9 pan with a parchment paper sling — two long pieces crisscrossed so the ends hang over all four sides. This makes lifting the finished bars out so much easier.
- Make the Shortbread Crust: In a food processor, pulse the flour, sugar, and salt together. Add the cubed cold butter and vanilla. Pulse until the mixture looks like coarse sand with a few pea-sized butter pieces remaining. If it does not hold together when you squeeze it, add the milk and pulse once or twice. Press the mixture evenly into the bottom of the prepared pan. Prick it all over with a fork.
(📸 Photo tip: The dough should be pressed firmly and evenly — no thick corners or thin spots in the middle.) - Bake the Crust: Bake for 18 to 22 minutes, until the edges are lightly browned and the center looks dry and golden. The smell at this point is browned butter and vanilla. Let the crust cool completely in the pan on a wire rack. Do not skip this cooling step. Warm crust + cold ice cream = a melted mess.
(📸 Photo tip: The edges should be a shade darker than the center — that is how you know it is done all the way through.) - Make the Strawberry Swirl: While the crust bakes, combine the chopped strawberries, sugar, and lemon juice in a small saucepan. Cook over medium heat, stirring occasionally, until the berries break down and the liquid thickens slightly — about 8 to 10 minutes. It should coat the back of a spoon. Remove from heat and let cool completely. You can speed this up by spreading it on a plate and popping it in the fridge.
- Make the No-Churn Ice Cream Base: In a large bowl, whip the cold heavy cream with an electric mixer until soft peaks form — meaning the cream holds its shape when you lift the beaters, but it is still soft and billowy, not stiff. In a separate bowl, whisk together the sweetened condensed milk, vanilla, and salt. Gently fold the whipped cream into the condensed milk mixture. Fold, do not stir. You want to keep as much air in the cream as possible — that is what makes it light and scoopable.
- Assemble the Bars: Pour the ice cream base over the cooled crust. Spread it evenly with the spatula. Drop spoonfuls of the cooled strawberry swirl over the top. Use a knife or skewer to swirl it through the ice cream — just a few figure-eight motions. Do not over-swirl, or you will lose the distinct ribbons.
- Freeze: Cover the pan tightly with plastic wrap or foil. Freeze for at least 4 hours, but preferably 6 to 8. Overnight is even better. The bars need to be fully solid to slice cleanly.
- Slice and Serve: Use the parchment sling to lift the entire block out of the pan. Place it on a cutting board. Let it sit at room temperature for 5 minutes — this softens it just enough for a clean cut. Use a sharp chef’s knife, wiping it clean between slices. Serve immediately.
How I Prep These for a Crowd (or Just Us on a Wednesday)
I almost always make a double batch in a 9×13 pan during strawberry season. One pan for the week, and one to stash in the back of the freezer for when company shows up unannounced. Here is how I store them:
- Fridge: This is a freezer recipe, not a fridge recipe. Keep it frozen until you are ready to serve.
- Freezer: Once the bars are fully frozen (after about 6 hours), you can slice them and wrap each piece individually in plastic wrap and then foil. They stay good for up to 2 weeks. Longer than that and the crust starts to lose its crunch.
- Reheat: Do not microwave these. Just let them sit at room temperature for 3 to 5 minutes before serving. That is all they need to soften to the perfect scoopable texture.
Things I Learned the Hard Way So You Don’t Have To
- Chill the Jam Completely: I know it is tempting to swirl the jam while it is still warm so it is easy to spread. Do not do it. Warm jam will melt the whipped cream base, and instead of beautiful ribbons, you will get a uniformly pink ice cream that is less creamy. Cool the jam completely. I even chill it in the fridge for 15 minutes while I whip the cream.
- Do Not Over-Bake the Crust: The shortbread should be golden at the edges and only lightly browned in the center. If it gets too dark, it will taste bitter and the texture will be too hard to cut through cleanly when frozen. Set a timer for 18 minutes and check it.
- Fold, Do Not Stir: This is the rule for any no-churn ice cream. Stirring the whipped cream into the condensed milk will deflate all the air bubbles you just spent minutes creating. Use a rubber spatula and cut through the center, then fold the edge over the top. Turn the bowl as you go. It takes about 30 seconds, and it makes the difference between a light, scoopable texture and a dense, icy block.
- Wipe the Knife Between Slices: This is the secret to clean, layered bars. The strawberry swirl will smear onto the knife after the first cut. Wipe it clean with a damp paper towel between each slice, and your bars will look like something from a bakery case.
Switch It Up for Your Family
- Gluten-Free Version: Swap the all-purpose flour for a good 1-to-1 gluten-free baking flour. I have tested this with Bob’s Red Mill 1-to-1 and the crust bakes up just as crunchy. The trick is to chill the dough for 15 minutes before pressing it into the pan — gluten-free dough tends to be softer.
- Mixed Berry Swirl: Swap half the strawberries for raspberries or blackberries. The combination is lovely and the seeds add a little texture. My husband prefers this version.
- Dairy-Free Adaptation: Use a full-fat canned coconut cream in place of the heavy cream. Use sweetened condensed coconut milk. The texture will be slightly less scoopable — more like a frozen mousse — but it is genuinely good. I make this for my sister-in-law and she never feels left out.
- Chocolate Drizzle: Melt ½ cup of dark chocolate chips with 1 tablespoon of coconut oil. Drizzle it over the top before serving. My kids call these “fancy bars.”
Questions I Get About This Recipe All the Time
Q: Why did my ice cream turn out icy instead of creamy?
A: I have definitely made this mistake. It usually happens for one of two reasons. Either the heavy cream was not whipped to soft peaks before folding (the air is what keeps the ice cream from turning into a block of ice), or the ice cream base was over-mixed. Fold gently, whip the cream until it is billowy but not stiff, and you will get a smooth, creamy texture every time.
Q: Can I make this with frozen strawberries?
A: Yes. Thaw them first, drain off the extra liquid, and then cook them down as usual. Frozen berries are often sweeter because they are picked at peak ripeness, so you might want to reduce the sugar in the swirl by a tablespoon. I have done this in the winter when fresh berries are pale and flavorless — it works beautifully.
Q: How long do these last in the freezer?
A: Wrapped tightly, they stay good for about 2 weeks. The crust will start to soften after that, and the ice cream can pick up freezer odors if it is not sealed well. I wrap the pan in a layer of plastic wrap and then a layer of foil. For the best crunch, I do not slice them until I am ready to serve.
Q: What do you serve with these?
A: Honestly, they are perfect on their own — the shortbread crust is the finishing piece. But if I am serving them at a party, I sometimes put out a bowl of fresh sliced strawberries and a dollop of whipped cream so people can dress them up. My kids love them crumbled over a bowl of vanilla ice cream. Yes, ice cream on ice cream. Do not knock it until you try it.
More Recipes My Family Makes on Repeat
If you liked these, here are a few others that get the same reaction at our table:
- [INTERNAL LINK PLACEHOLDER: No-Churn Peach Ice Cream] — Creamy, swirled with caramelized summer peaches, and just as easy as these bars.
- [INTERNAL LINK PLACEHOLDER: Easy Mixed Berry Crumble] — The same buttery crust vibe, but warm and bubbly. Perfect for when you want the oven on.
- [INTERNAL LINK PLACEHOLDER: Classic Lemon Bars] — For when you want a bright, citrusy dessert that cuts through the heat.
The first bite of these bars is the sound of the shortbread breaking under your teeth — that sharp little crunch — followed by the cold creaminess of the ice cream and the bright, real taste of strawberries. It is summer in a single square. And honestly? It is one of the few desserts where I will gladly wait the four hours for the payoff.
If you try these, drop a comment below — I love hearing how they go in your kitchen. And if your kids are anything like mine, you might want to hide a few in the back of the freezer before they are all gone.
📌 Save this strawberry shortcake ice cream bar recipe for your next hot afternoon — it is the no-churn dessert your whole family will ask for all summer long.
Strawberry Shortcake Ice Cream Bars
Equipment
- 9×9-inch baking pan (metal or glass)
- Parchment Paper
- Food processor (or pastry cutter)
- Stand mixer or hand mixer
- Rubber spatula
- Chef’s Knife
Ingredients
For the shortbread crust
- 1 ½ cups all-purpose flour
- ½ cup granulated sugar
- ¼ teaspoon salt
- ½ cup cold unsalted butter (cubed)
- ½ teaspoon vanilla extract
- 1 tablespoon cold milk (only if needed)
For the strawberry swirl
- 2 cups fresh strawberries (hulled and chopped)
- ¼ cup granulated sugar
- 1 tablespoon lemon juice
For the no-churn ice cream base
- 2 cups heavy cream (very cold)
- 1 can (14 oz) sweetened condensed milk
- 1 ½ teaspoons vanilla extract
- ⅛ teaspoon salt
Instructions
- Preheat your oven to 350°F. Line a 9×9 baking pan with a parchment paper sling – two long pieces crisscrossed so the ends hang over all four sides.
- In a food processor, pulse the flour, sugar, and salt together. Add the cubed cold butter and vanilla. Pulse until the mixture looks like coarse sand with a few pea-sized butter pieces remaining. If it doesn’t hold together when squeezed, add the milk and pulse once or twice. Press the mixture evenly into the bottom of the prepared pan. Prick all over with a fork.
- Bake the crust for 18 to 22 minutes, until the edges are lightly browned and the center looks dry and golden. Let the crust cool completely in the pan on a wire rack. Do not skip cooling.
- While the crust bakes, combine the chopped strawberries, sugar, and lemon juice in a small saucepan. Cook over medium heat, stirring occasionally, until the berries break down and the liquid thickens – about 8 to 10 minutes. Let cool completely (spread on a plate in the fridge to speed it up).
- In a large bowl, whip the cold heavy cream with an electric mixer until soft peaks form. In a separate bowl, whisk together the sweetened condensed milk, vanilla, and salt. Gently fold the whipped cream into the condensed milk mixture. Fold, do not stir.
- Pour the ice cream base over the cooled crust and spread evenly. Drop spoonfuls of the cooled strawberry swirl over the top. Use a knife or skewer to swirl it through – just a few figure-eight motions. Do not over-swirl.
- Cover the pan tightly with plastic wrap or foil. Freeze for at least 4 hours, but preferably 6 to 8 or overnight.
- Use the parchment sling to lift the entire block out of the pan. Let sit at room temperature for 5 minutes. Slice with a sharp chef’s knife, wiping clean between slices. Serve immediately.
Notes
Related posts:
 High-Protein Overnight Oats That Actually Taste Like Breakfast (Not a Chalky Disaster)
 The Slow Cooker Cowboy Casserole That Saves Tired Weeknights (No Soggy Tots Allowed)
 Quick Lemon Ricotta Pasta for Busy Weeknights: Creamy, Bright, and on the Table in 20 Minutes
 Lemon Garlic Butter Baked Salmon in Foil That’s Ready in 25 Minutes — No Fuss, No Mess
 Moist Chocolate Zucchini Bread That Doesn’t Turn Out Rubbery — Finally
 Creamy Homemade Strawberry Dole Whip (That Tastes Just Like the Real Thing)