
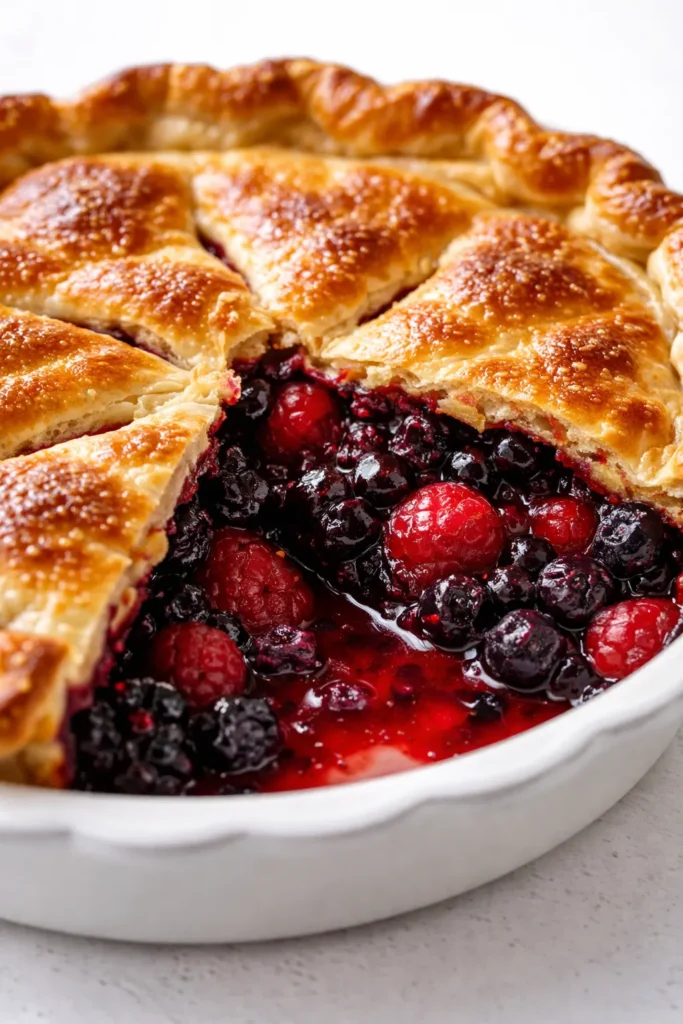
That first slice — the one where the filling holds its shape, the berries are suspended in a jammy, deep-purple gloss, and the bottom crust is crisp enough to shatter under your fork — that’s the slice I chased for ten years. Every version I made before this one was a beautiful mess. Delicious? Yes. But soupy. The kind of pie that looks at you apologetically from the plate, leaking its gorgeous insides all over the place. I tried everything. More cornstarch. Pre-baking the crust. Even a layer of breadcrumbs on the bottom (don’t ask). Nothing worked the way I wanted it to.
The fix wasn’t in the crust, though a good crust is non-negotiable. It was in the berries. How I treated them before they ever touched the rolling pin. This triple berry pie recipe is the one I’ve made for every 4th of July, every summer potluck, and every quiet Tuesday when I needed to feel Marta’s kitchen in my own. It starts with a small step that feels wrong, but I promise you — it’s the only way to get that perfect, sliceable slice.
The short version: A triple berry pie with a foolproof, non-soggy bottom, a jammy-but-not-runny filling, and a flaky all-butter crust that tastes like pure summer. No par-cooking the berries. Just one smart trick my grandmother taught me.
I’ve made this pie 22 times over the last three summers, testing every variable I could think of. Fresh vs. frozen. Cornstarch vs. flour. Pre-cooking the berries vs. letting them sit. This version — the one where we macerate and drain the berries — won every single time. My neighbor Lucy, who is notoriously picky about fruit pies, ate half of one in a single sitting and asked for the recipe before she left the porch.
- Serves: 8 as dessert
- Hands-On Time: 35 min | Total Time: 5 hours (includes chilling and cooling)
- Difficulty: Doable on a weekend morning — easier than you think
- Cost per serving: ~$3.50
- Calories: ~420 per serving
- Dietary Notes: Naturally vegetarian. Adaptable for gluten-free with a good measure-for-measure flour blend.
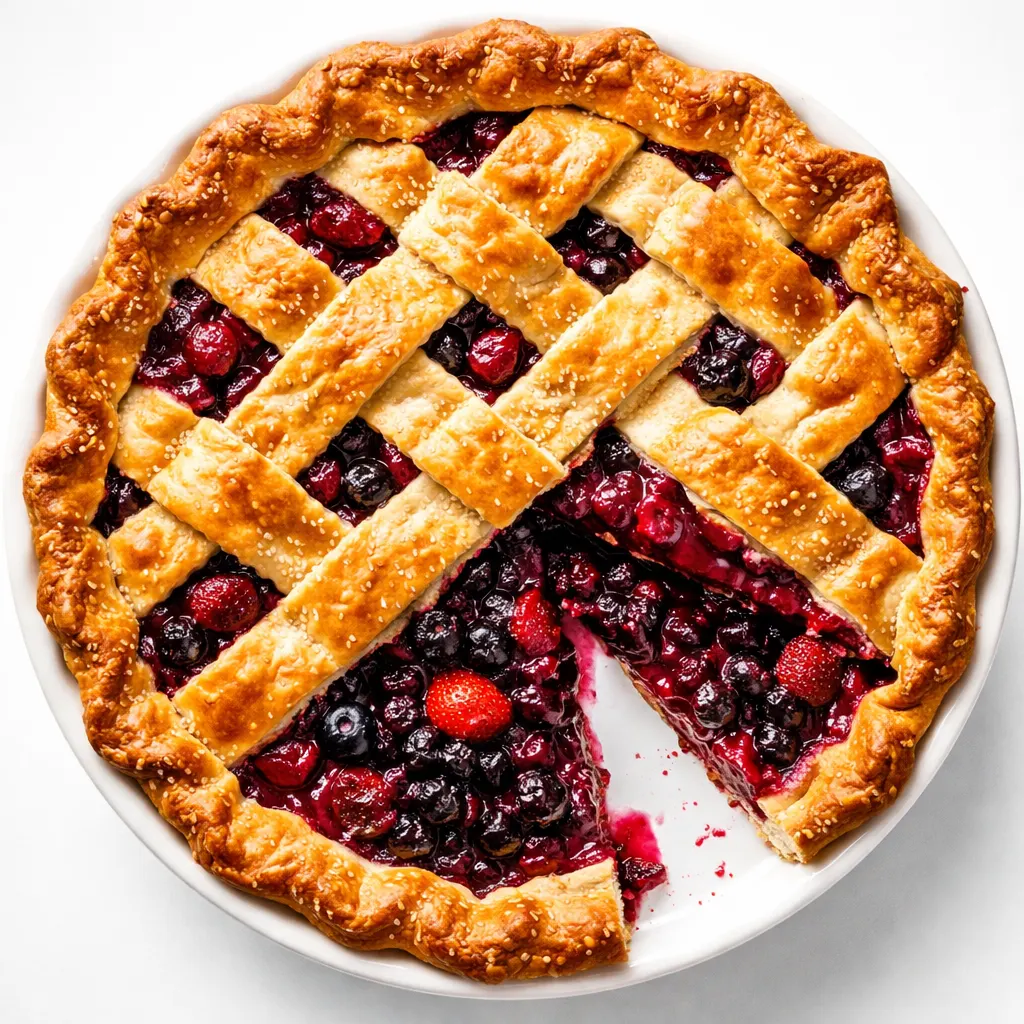
(Photo above: A slice of triple berry pie on a cream-colored ceramic plate, held at a slight angle so the cross-section is visible — deep purple filling studded with blackberries and raspberries, a golden, flaky all-butter crust, and a lattice top that’s lightly browned at the edges. A small pool of berry juice has just started to seep onto the plate, proof it was baked through but still perfectly jammy. Afternoon light from the kitchen window softens the whole scene.)
The One Step Everyone Skips (Don’t Skip It)
The biggest lie in fruit pie baking is that you can toss fresh berries with sugar and cornstarch, dump them into a crust, and hope for the best. You can. It will taste good. But it will be soupy. Here’s why: berries are mostly water. When they heat up, that water releases, and if you haven’t accounted for it, you get pie soup. I learned this the hard way after way too many soggy slices.
Marta’s trick — which I initially resisted because it felt like extra work — is to macerate the berries with sugar for about an hour, then drain off the liquid that pools at the bottom of the bowl. That liquid is pure berry flavor, yes, but it’s also the enemy of a crisp crust. We simmer that liquid down into a syrup, then add it back to the berries. You get all the concentrated flavor, without the excess water that turns your bottom crust into a sad, wet mess.
The first time I tried it, I pulled the pie out of the oven and saw the bottom crust was actually golden and crisp. I almost cried. It’s not magic — it’s just letting the berries do their thing, and being patient enough to let them. The result is a filling that’s intensely berry-forward, jammy enough to hold its shape on a plate, and a bottom crust that stays shatteringly crisp. No food science degree required — just a colander and a little patience.
Everything You Need (And a Few Notes From Me)
- 2 ½ cups (300g) all-purpose flour: Spoon and level it — scooping straight from the bag packs the flour down and makes the crust tough. I’ve tested this with King Arthur and Gold Medal; both work beautifully. But if you’re feeling fancy, a low-protein Southern flour like White Lily gives an impossibly tender crumb.
- 1 cup (226g) cold unsalted butter, cubed: This is the only fat in the crust. We’re not using shortening. The butter gives flavor and creates steam pockets that make it flake. My kids like to help cut the butter in — their little hands are warm, so I chill the bowl between batches. Works every time.
- 1/2 cup (100g) ice water (plus more): Not cold water. Ice water. The colder the better. Fill a measuring cup with water and a few ice cubes, let it sit while you work, then measure from that.
- 1 tablespoon apple cider vinegar: This sounds weird, but it relaxes the gluten in the dough, making it harder and more tender. You won’t taste it in the finished pie — I promise.
- 6 cups (about 900g) mixed fresh berries: I use a 1:1:1 ratio of strawberries, blueberries, and blackberries. Or raspberries instead of blackberries if they’re in season. Don’t use frozen here — the water content is too unpredictable. Fresh berries from the farmers’ market are worth the trip.
- 3/4 cup (150g) granulated sugar: This sweetens the berries and helps draw out the liquid during maceration. Don’t reduce it — the berries need it to create the syrup.
- 1/4 cup (32g) cornstarch: This thickens the macerated syrup. I’ve tried flour, instant tapioca, and arrowroot. Cornstarch gives the clearest, most stable gel for this triple berry pie.
- 2 tablespoons lemon juice + 1 tablespoon lemon zest: Brightens the whole thing and balances the sweetness. One big lemon will cover both.
- 1 egg + 1 tablespoon water (egg wash): For that golden, bakery-style sheen on the crust. Sprinkle with a little turbinado sugar before baking for crunch.
What to Pull Out Before You Start
- 9-inch pie dish (glass or ceramic — glass lets you see how brown the bottom crust is getting, which is my favorite cheat for doneness)
- Rolling pin (a clean wine bottle works in a pinch — I’ve done it)
- Large bowl for macerating
- Colander set over a saucepan (this is your draining setup — it catches the syrup directly)
- Pastry cutter or two knives (for the butter)
- Pastry brush (for the egg wash)
- Baking sheet (place the pie on it to catch drips — saves your oven floor)
No food processor? No problem. The pastry cutter method gives you more control. I prefer it, honestly. Marta never used a food processor. She said the heat from the blade melted the butter before it ever hit the flour. She used a pastry cutter and her hands, and she worked fast. I do the same, and I think about her every time I feel the butter and flour come together.
The Method — No Fancy Skills Required
This pie has three phases: the maceration, the dough, and the assembly. Read through once so you know the rhythm. It all comes together beautifully, I promise.
Start with the maceration:
- Prep the Berries: Rinse the berries gently under cold water. Spread them out on a clean kitchen towel and pat them dry. Wet berries are the enemy of a good filling — they add water you’ll have to cook off later. Hull the strawberries and halve them (or quarter them if they’re huge). Leave the blueberries and blackberries whole. If you’re using raspberries, handle them like they’re made of glass — they’re fragile, and broken raspberries release seeds and liquid into the filling.
- Macerate: In a large bowl, toss the berries with the sugar, lemon juice, and lemon zest. Let them sit at room temperature for 45 minutes to 1 hour. You’ll see a pool of deep ruby liquid at the bottom — that’s what we’re after. (📸 Photo tip: You should see a pool of deep ruby liquid at the bottom of the bowl — that’s what we’re after.)
- Drain and Reduce: Pour the berries into a colander set over a medium saucepan (don’t press on them). Let them drain for 5 minutes. Bring the liquid in the saucepan to a boil over medium-high heat, then reduce heat and simmer for 10-12 minutes, until it’s syrupy and reduced by about half. Whisk in the cornstarch during the last two minutes — it will thicken into a beautiful, glossy gel. (📸 Photo tip: The syrup should coat the back of a spoon — that’s your sign it’s ready.)
- Combine: Gently fold the reduced syrup back into the drained berries. Let the mixture cool completely. This is crucial — warm filling will melt your butter crust before it even hits the oven. I pop it in the fridge for 20 minutes if I’m impatient.
While the berries macerate, make the crust:
- Cut the Butter: Whisk the flour and salt together. Add the cold butter cubes and toss to coat. Using a pastry cutter or your fingertips, work the butter into the flour until it resembles coarse meal with some pea-sized pieces remaining. The pea-sized pieces are what create the flaky layers — don’t overwork it.
- Add Water and Vinegar: Drizzle the ice water and apple cider vinegar over the flour mixture. Stir with a fork until the dough just comes together. It should look shaggy and barely cohesive — that’s perfect.
- Chill: Turn the dough out onto a floured surface, gather it into a ball, then divide in half. Flatten each half into a disk, wrap in plastic wrap, and refrigerate for at least 1 hour. Overnight is even better — the gluten relaxes and the flavor deepens.
Assemble and bake:
- Roll the Bottom Crust: On a floured surface, roll one disk of dough into a 12-inch circle. Transfer it to your 9-inch pie dish, gently pressing it into the corners. Trim the excess, leaving a 1/2-inch overhang. Don’t stretch the dough — it will shrink back during baking. (📸 Photo tip: You should see a golden circle of dough nestled into the dish, with a clean edge overhanging evenly all around.)
- Fill the Pie: Spoon the cooled berry filling into the crust. Dot with 1-2 tablespoons of cold butter if you want an extra-rich filling. This is optional, but Marta always did it for her berry pies.
- Roll the Top Crust (Lattice or Full): Roll the second disk. I love a lattice top for summer pies — it shows off that beautiful deep purple filling. If you’re nervous about weaving, here’s my trick: roll the top crust out on a piece of parchment. Cut your strips. Weave them on the parchment, using a ruler to keep them straight. Then slide the whole thing onto a baking sheet and pop it in the freezer for 10 minutes. Once it’s firm, you can flip it onto the pie easily without the strips shifting. It was a game-changer for me. (📸 Photo tip: A lattice top lets you see the bubbling purple filling peek through — it’s pure summer on a plate.)
- Chill, Egg Wash, and Bake: Pop the assembled pie in the freezer for 15 minutes while the oven preheats to 400°F. This chills the butter, which guarantees flakiness. Brush with egg wash and sprinkle with turbinado sugar. Bake for 20 minutes at 400°F, then reduce heat to 375°F and bake for 35-45 minutes more. Cover the edges with foil if they’re browning too fast. The filling should be bubbling through the vents in thick, glossy bubbles — that’s how you know it’s done.
- Cool Completely: This is the hardest step. Let the pie cool on a wire rack for at least 4 hours. I know the house smells incredible. I know you want to cut into it. But if you cut it warm, the filling will run. It needs time to set. The windows open, a summer breeze carrying the scent of baked berries and butter across the porch — it’s a beautiful torture. I’ve ruined many slices learning this lesson.
How I Prep This for a Crowd (Or a Quiet Weekend)
This triple berry pie is my go-to for our 4th of July block party. I make three pies that morning, and here’s how I keep my sanity: I make the dough and the macerated filling the night before, then assembly is just rolling and baking. My secret is keeping the berries and syrup separate until I’m ready to fill the crust — that way the berries stay firm and the syrup is ready to go. It takes the pressure off the day-of and means I can actually enjoy a slice with my coffee before the guests arrive.
- Fridge: Baked pie keeps at room temperature (covered with a cake dome) for 2 days, or in the fridge for up to 5 days. The crust softens slightly in the fridge, so I reheat slices in the oven at 350°F for 10 minutes to bring back that shatter.
- Freezer: You can freeze the unbaked pie (without egg wash) for up to 3 months. Wrap it tightly in plastic wrap and foil. Bake from frozen — add 15-20 minutes to the baking time. Or freeze the baked, cooled pie whole. I always keep one in the freezer for unexpected guests.
- Reheat: Oven is best. 350°F for 10-12 minutes for slices. The microwave works in a pinch but the crust gets soft. If I’m honest, leftover pie for breakfast straight from the fridge is my favorite way to eat it — it’s like the most decadent cold cereal you’ve ever had.
Things I Wish I’d Known the First Time (After 22 Pies)
- Don’t skip the chill on the assembled pie: Ten minutes in the freezer before baking solidifies the butter. Solid butter steams, creates pockets, and makes the crust flake. Warm butter melts into the flour and makes it tough. I’ve skipped it when I was in a hurry and regretted it every single time. Set a timer — it’s worth it.
- Put a baking sheet under the pie: I don’t care how good your pie dish is — fruit pies bubble over. A rimmed baking sheet on the rack below catches the drips and saves your oven from a smoky mess. Plus, it gives you something to grab onto when the pie is done. It’s the simplest thing and it saves so much cleanup.
- Trust the color, not just the timer: The filling should be bubbling through the vents in thick, glossy bubbles. If it’s still thin and watery at the edges, it needs more time. The crust should be deep golden brown. If it’s pale, let it ride. My oven runs hot, so I start checking at the 40-minute mark. Every oven is different — learn yours and let it guide you.
- Cooling is not optional: I know I said this, but it’s the most important tip. The filling needs time to set up — it’s actively thickening as it cools. If you cut into it at 2 hours, it will be delicious but messy. At 4 hours, it holds its shape. At 8 hours (overnight), it’s perfect. Patience is the ingredient nobody talks about, but it’s the one that separates a good pie from a great one.
Swaps That Actually Work (And Some That Don’t)
- Gluten-Free: Use a 1:1 gluten-free baking flour (I like Bob’s Red Mill). The crust will be more tender, so handle it gently. The filling is naturally gluten-free — just check your cornstarch. I’ve made this for my friend Sarah, who has celiac, and she said it was the best pie she’d had in years.
- No-Berry Options: This method works beautifully with sliced peaches, plums, or cherries. Adjust the sugar based on sweetness. Peaches need less sugar; cherries need more. My mom does a peach-blueberry version that’s her signature at family reunions — it’s gone in about ten minutes.
- Spiced Version: Add ½ teaspoon of cinnamon and ⅛ teaspoon of nutmeg to the macerating berries. It turns a summer pie into something that tastes amazing in the fall. My husband thinks it tastes like the holidays — he requests it for his birthday in November every year.
- Dairy-Free: Use a vegan butter stick (like Miyoko’s) in the crust. It’s not quite as flaky, but it’s still very, very good. I made this for a friend with a dairy allergy and she nearly cried — in a good way. Just make sure it’s well-chilled before you cut it in.
The Triple Berry Pie Questions My Readers Keep Asking
Q: Why did my pie crust shrink down the sides of the dish?
A: Ugh, I’ve been there. It usually means the gluten got overworked. A few things to check: Did you use ice water? Did you chill the dough long enough? And the biggest culprit — did you stretch the dough to fit the dish? Dough needs to be laid in gently, not pulled. If it resists, let it rest for a few minutes. You’ve got this next time — it’s a learning curve, and every pie teaches you something.
Q: Can I use frozen berries instead of fresh?
A: I really don’t recommend it for this triple berry pie. Frozen berries release way more water than fresh, and they don’t macerate the same way. If you have to use them, don’t thaw them first. Toss them in the sugar and cornstarch dry, and skip the maceration step. Expect a slightly runnier filling, and add 10 minutes to the bake time. I’ve tested it, and fresh is genuinely worth the trip to the store — the texture is worlds apart.
Q: How long does this pie last? Can I freeze it?
A: It lasts 2 days at room temperature on the counter (covered) or up to 5 days in the fridge. The fridge softens the crust, so I reheat slices at 350°F for 10 minutes to bring back the crunch. And yes, you can freeze it! Freeze the whole baked, cooled pie, wrapped in plastic and foil, for up to 3 months. Thaw overnight in the fridge and reheat in the oven. I always keep one in the freezer for unexpected guests — it’s a lifesaver.
Q: What do you serve with triple berry pie?
A: The classic answer is vanilla ice cream, and I won’t argue with that. But my family loves it with a dollop of lightly sweetened whipped cream and a sprig of mint. My mom serves it with a slice of sharp cheddar cheese on the side — don’t knock it until you’ve tried it, the salty-sweet thing is unreal. And on summer mornings, I’ve been known to eat a slice for breakfast with my coffee. It’s basically toast with jam, right?
More of My Favorite Summer Desserts
If you loved this triple berry pie, here are a few others that never last long at my house:
- [INTERNAL LINK PLACEHOLDER: Brown Butter Peach Galette] — Less fussy than a pie, and the brown butter takes it over the top. It’s my go-to when I want something impressive but don’t feel like rolling a lattice.
- [INTERNAL LINK PLACEHOLDER: Classic Lemon Bars with a Shortbread Crust] — The perfect balance of tart and sweet, and they travel beautifully for picnics. My daughter Nora requests them every time she comes home from school.
- [INTERNAL LINK PLACEHOLDER: No-Churn Blackberry Swirl Ice Cream] — No ice cream maker needed, and it uses the same fresh summer berries. It’s the cool, creamy counterpart to a warm slice of pie.
This triple berry pie is the one I make when I want to feel Marta in the kitchen with me. That first slice — the one that holds its shape, the one with the shattery crust and the jammy, deep-purple filling — it’s the one I chased for years. Now it’s the one I share with you. I hope it becomes that for your family, too.
If you make it, tag me on Pinterest or drop a comment below. I love hearing about your summer baking — especially the messy parts, because that’s where the learning lives. Happy baking, friend.
📌 Pin this triple berry pie recipe that holds its shape — save it for your next summer potluck or 4th of July celebration!
The Triple Berry Pie That Doesn’t Get Soggy (Finally!)
Equipment
- 9-inch pie dish
- Rolling Pin
- Large Bowl
- Colander
- Saucepan
- Pastry cutter
- Pastry Brush
- Baking Sheet
- Wire Rack
Ingredients
For the All-Butter Crust
- 2 ½ cups all-purpose flour (300g)
- 1 cup cold unsalted butter, cubed (226g)
- ½ cup ice water (plus more if needed), (100g)
- 1 tablespoon apple cider vinegar
- 1 teaspoon salt
For the Triple Berry Filling
- 6 cups mixed fresh berries (strawberries, blueberries, blackberries or raspberries), about 900g
- ¾ cup granulated sugar (150g)
- ¼ cup cornstarch (32g)
- 2 tablespoons lemon juice
- 1 tablespoon lemon zest
- 2 tablespoons cold butter (optional, for dotting)
For Assembly and Glaze
- 1 egg (for egg wash)
- 1 tablespoon water (for egg wash)
- turbinado sugar (for sprinkling)
Instructions
- Prep the berries: Rinse them gently and pat dry. Hull and halve strawberries; leave blueberries and blackberries whole. Handle raspberries carefully to avoid breaking.
- Macerate: In a large bowl, toss berries with sugar, lemon juice, and lemon zest. Let sit at room temperature for 45 minutes to 1 hour until a pool of liquid forms at the bottom.
- Drain and reduce: Pour berries into a colander set over a medium saucepan (do not press). Let drain 5 minutes. Bring the liquid to a boil, then simmer for 10-12 minutes until syrupy and reduced by half. Whisk in cornstarch during the last 2 minutes to thicken into a glossy gel.
- Combine: Gently fold the reduced syrup back into the drained berries. Cool completely (pop in the fridge for 20 minutes if impatient).
- Make the crust: Whisk flour and salt together. Add cold butter cubes and toss. Using a pastry cutter or fingertips, work butter into flour until it resembles coarse meal with pea-sized butter pieces remaining.
- Add liquids: Drizzle ice water and apple cider vinegar over flour mixture. Stir with a fork until dough just comes together (shaggy and barely cohesive).
- Chill dough: Divide dough in half, flatten into disks, wrap in plastic, and refrigerate at least 1 hour (overnight is better).
- Roll bottom crust: On a floured surface, roll one disk to a 12-inch circle. Transfer to a 9-inch pie dish, gently pressing into corners. Trim excess to a ½-inch overhang.
- Fill the pie: Spoon cooled berry filling into crust. Optionally dot with 1-2 tablespoons cold butter.
- Roll top crust: Roll second disk. For lattice: cut strips, weave on parchment, freeze 10 minutes, then flip onto pie. Or place full top crust and cut vents.
- Chill, egg wash, and bake: Freeze assembled pie 15 minutes while oven preheats to 400°F. Brush with egg wash (1 egg beaten with 1 tbsp water) and sprinkle with turbinado sugar. Bake at 400°F for 20 minutes, then reduce to 375°F and bake 35-45 minutes more, covering edges with foil if browning too fast. Filling should bubble in thick, glossy bubbles when done.
- Cool completely: Let pie cool on a wire rack for at least 4 hours before slicing. Cutting too early will cause the filling to run.
Notes
Related posts:
 High-Protein Overnight Oats That Actually Taste Like Breakfast (Not a Chalky Disaster)
 The Slow Cooker Cowboy Casserole That Saves Tired Weeknights (No Soggy Tots Allowed)
 Quick Lemon Ricotta Pasta for Busy Weeknights: Creamy, Bright, and on the Table in 20 Minutes
 Lemon Garlic Butter Baked Salmon in Foil That’s Ready in 25 Minutes — No Fuss, No Mess
 Moist Chocolate Zucchini Bread That Doesn’t Turn Out Rubbery — Finally
 Creamy Homemade Strawberry Dole Whip (That Tastes Just Like the Real Thing)