
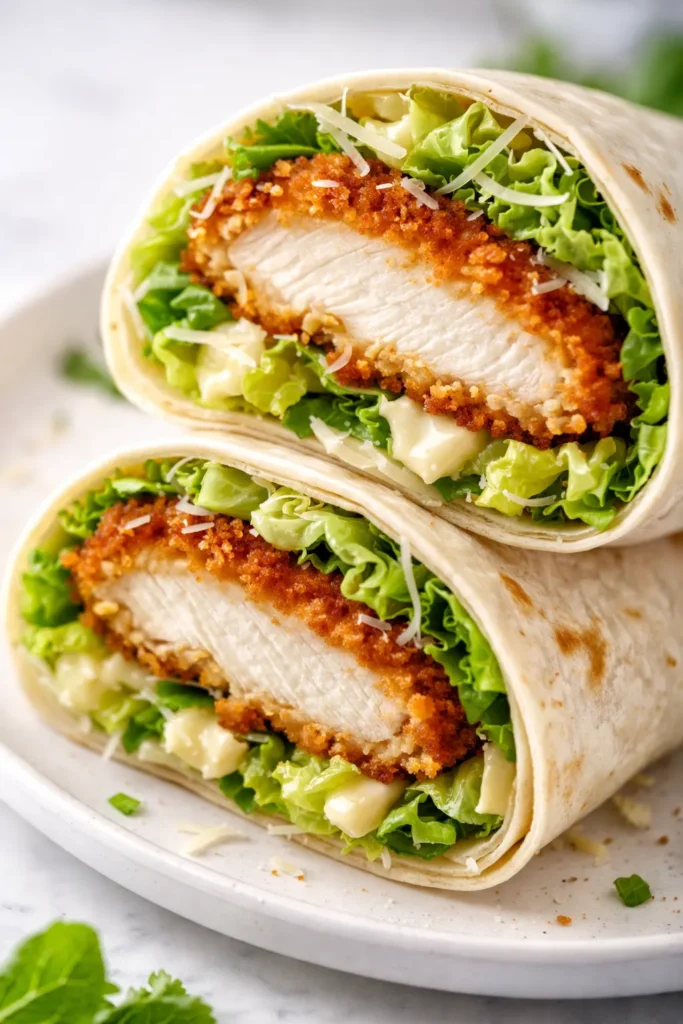
The second the chicken hits the hot skillet — that sharp sizzle, the smell of garlic and pepper — I know dinner is going to be one of those rare ones my family fights over. These wraps are exactly what a weeknight meal should be: fast enough for a Tuesday, good enough that you’ll text your sister the recipe before you’ve finished eating. Crispy-edged, juicy chicken, a 5-minute Caesar dressing, and a wrap that stays crunchy until the very last bite. Ready in 25 minutes.
My youngest, who usually picks the croutons out of her salad, asked for them three weeks in a row. I’ve made this enough times now that I don’t even need the recipe card — but I wrote it all down for you anyway.
- Serves: 4 as a main course
- Hands-On Time: 15 min | Total Time: 25 min
- Difficulty: Easy — great for a busy weeknight or meal prep
- Cost per serving: ~$3.50
- Calories: ~480 per wrap
- Dietary Notes: Can be adapted for gluten-free or low-carb (lettuce wraps)
(Photo above: Close-up overhead shot of the finished wrap, sliced diagonally on a wooden cutting board, showing the crisp golden-brown chicken, shaved parmesan, and bright green romaine peeking out the sides. A small bowl of extra dressing sits in the corner.)
The Secret to Chicken That Stays Crispy in a Wrap
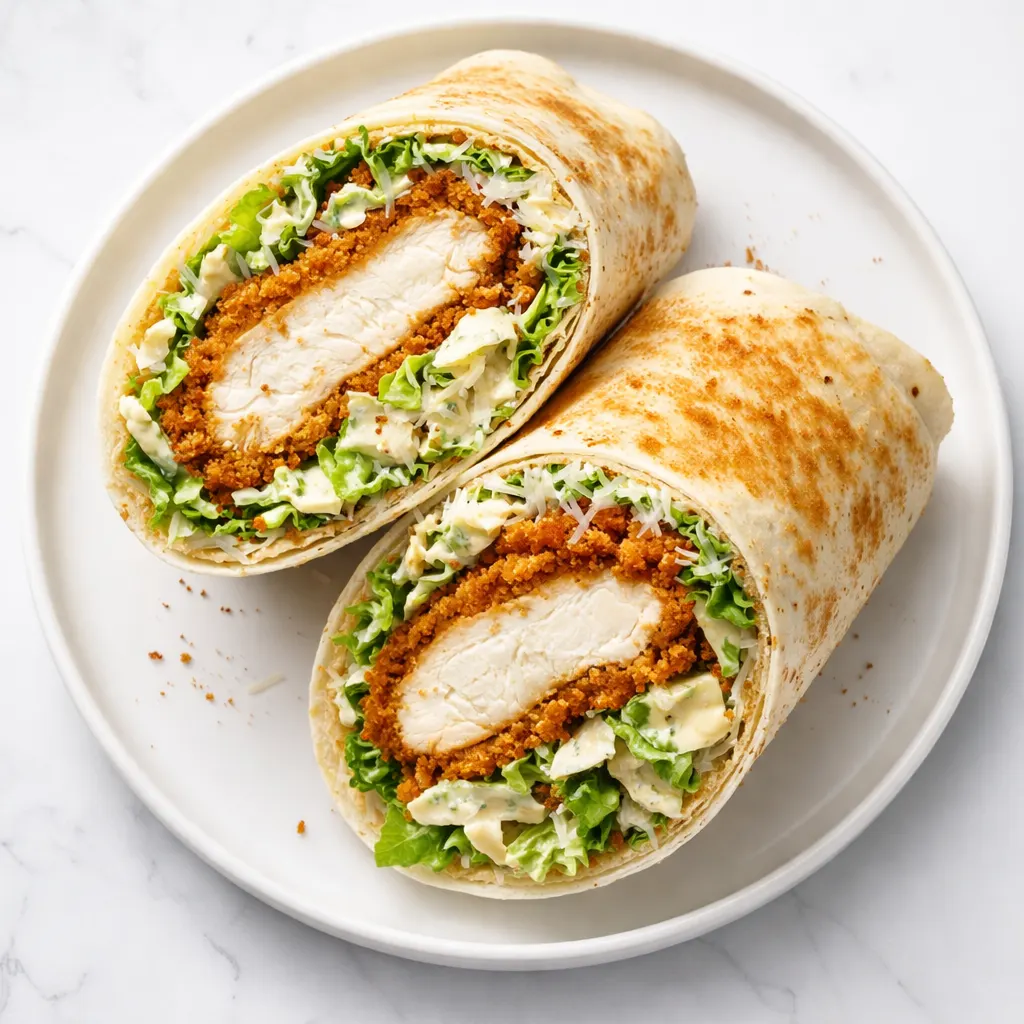
The problem with most chicken wraps is the chicken itself — it’s either dry or it goes soggy in five minutes. The trick here is two-fold: First, we’re pounding the chicken thin so it cooks fast and stays juicy. Second, we’re searing it hard in a screaming hot skillet with a little cornstarch. That cornstarch creates a thin, crunchy crust that holds up beautifully against the dressing and doesn’t turn into a sad, rubbery mess by lunch the next day.
I learned this the hard way after too many soggy wraps. My grandmother Marta used cornstarch in her schnitzel and I realized one day — why wouldn’t it work for chicken in a wrap? It does. It really, really does.
What Goes Into the Perfect Chicken Caesar Wrap
- Chicken cutlets (or boneless skinless breasts, pounded thin): Thin is the goal — it cooks in about 4 minutes and gets way more crispy surface area. My grocery store sells pre-pounded cutlets and I grab them every time. If you have to pound them yourself, a rolling pin works just as well as a meat mallet.
- Cornstarch (not flour): This is the crunchy-crust secret. I know it sounds weird, but it gets way crispier than flour and doesn’t get gummy. My kids have no idea it’s in there — they just know the chicken is better than the restaurant version.
- Good parmesan (freshly grated): The pre-shredded stuff has anti-caking agents that don’t melt right. I grate a block of Parmigiano-Reggiano while the chicken cooks. It takes 30 seconds. Worth every second for that nutty, salty kick.
- Caesar dressing (my 5-minute version): Mayo, lemon, anchovy paste (or Worcestershire if you’re feeding kids), garlic, and parm. That’s it. It’s better than any bottle I’ve ever bought. My husband, who claims to hate anchovies, loves this dressing. Don’t tell him what’s in it.
- Romaine hearts and large flour tortillas: Romaine holds up better than delicate lettuce. Large burrito-sized tortillas (10-12 inches) make rolling easier and keep everything inside. I keep the romaine whole and unwashed until I’m ready to assemble — it stays crisp that way.
Tools That Make This Easy
- 12-inch cast iron skillet (or heavy stainless steel) — holds heat best for the sear
- Meat mallet or rolling pin (for pounding the chicken)
- Microplane or box grater (for the garlic and parm)
- Sharp chef’s knife
Let’s Make Crispy Chicken Caesar Wraps
This moves fast once you start cooking, so get everything chopped and measured before you turn on the stove.
Prep the chicken and dressing:
- Pound and season: If using chicken breasts, slice them in half horizontally to make two thin cutlets. Place them between two sheets of plastic wrap and pound to an even ¼-inch thickness. Season both sides generously with salt and pepper. Sprinkle lightly with cornstarch — about 1 teaspoon per cutlet — and rub it in so it disappears.
(📸 Photo tip: You should see a thin, dusty film on the chicken — that’s the cornstarch. It will look matte, not wet.) - Make the dressing: In a small bowl, whisk together ¼ cup mayo, 1 tablespoon lemon juice, 1 teaspoon anchovy paste (or Worcestershire), 1 clove grated garlic, and 3 tablespoons grated parmesan. Taste it. If it needs more salt, add a tiny pinch. Set aside.
Cook and assemble:
- Sear the chicken: Heat your cast iron skillet over medium-high heat for 3 minutes — it should be good and hot. Add a thin layer of neutral oil (about 1 tablespoon). Lay the chicken in a single layer. Don’t touch it for 3 minutes. The edges should look golden and crispy. Flip and cook 2 minutes more.
- Rest and slice: Transfer chicken to a cutting board and let it rest for 2 to 3 minutes. This keeps the juices inside. Slice into 1-inch strips across the grain.
- Assemble the wraps: Warm your tortillas in the microwave for 15 seconds or in a dry skillet for 10 seconds per side — this makes them pliable and easier to roll. Lay one tortilla on a clean surface. Spread a generous spoonful of dressing in the center, leaving a 2-inch border around the edges. Add a handful of chopped romaine, a few slices of crispy chicken, a shower of shaved parmesan, and a crack of black pepper.
- Roll it up: Fold the sides of the tortilla inward over the filling. Then fold the bottom flap up and over the filling, tucking it tightly. Roll away from you until the seam is sealed. Slice diagonally in half.
(📸 Photo tip: The cross-section should show tight, even layers — no gaping holes. That’s how you know it’s rolled right.)
How I Meal Prep These for the Week
I make a double batch of the chicken and dressing on Sunday. Everyone in my house grabs one for lunch and it’s honestly the highlight of my packed-sandwich season. The key is storing the components separately.
- Fridge: Store sliced chicken and dressing separately in airtight containers for up to 4 days. Keep romaine whole and unwashed until assembly.
- Freezer: I don’t recommend freezing the assembled wraps — the lettuce and dressing get watery. The cooked chicken freezes well for up to 2 months.
- Reheat: To bring the chicken back to crispy, reheat it in a dry skillet over medium heat for 60 seconds per side. The microwave works but the skillet brings back the crunch.
Things I Learned After Making This 30 Times
- Don’t overcrowd the pan: If your skillet is crowded, the chicken steams instead of sears. Cook in batches if you have to. It’s worth the extra 4 minutes.
- Dry the chicken well: Pat the chicken dry with paper towels before seasoning. Water is the enemy of a good sear. I learned this the hard way after a sad, pale batch.
- Warm the tortillas: Cold tortillas crack when you roll them. 15 seconds in the microwave makes them bendable and soft. Don’t skip this or you’ll have a mess.
- Taste the dressing before assembling: Garlic and lemon vary in intensity. Taste it. Trust yourself. Adjust the salt or acid. Even if you mess this part up a little, it’ll still taste good — I’ve done it.
Ways to Make It Your Own
- Gluten-Free: Use your favorite GF tortillas — they roll best when warmed. The cornstarch stays. This is the version I make for my neighbor who has celiac and she loves it.
- Lower Carb / Keto: Use large lettuce leaves (butter or iceberg) instead of tortillas. I do this for myself sometimes and it’s just as satisfying without the carbs.
- Add Heat: A drizzle of sriracha or a pinch of red pepper flakes in the dressing. My husband adds hot sauce to almost everything, and this is no exception.
- Make it a Salad Bowl: Skip the tortilla, pile everything over extra romaine, and drizzle with the dressing. My daughter’s preferred method — she says it’s “more elegant.”
Questions People Always Ask About This Recipe
Q: Why did my chicken turn out tough?
A: It probably cooked too long or was pounded unevenly. Thin, even cutlets cook fast — 3 minutes per side on high heat is usually perfect. Letting it rest is also crucial. You’ve got this next time.
Q: Can I use grilled chicken instead?
A: Absolutely! Grilled chicken works in a pinch, but you’ll lose some of that crispy texture that makes this wrap special. If I’m using leftover rotisserie chicken, I crisp it up in a dry skillet for 60 seconds first.
Q: How long do the ingredients last in the fridge?
A: The dressing keeps for a full week. The cooked chicken stays good for 4 days. I keep the components separate and assemble fresh — it takes 2 minutes and avoids soggy wraps.
Q: What goes well with these wraps?
A: Honestly, they’re a meal on their own. But if I’m serving guests, I add a simple roasted tomato soup or a bowl of seasoned potato wedges. A cold glass of iced tea is my favorite pairing.
More Weeknight Dinners We Make on Repeat
If you liked this one, here are a few others that get the same reaction at our table:
- [INTERNAL LINK PLACEHOLDER: One-Skillet Lemon Herb Chicken and Rice] — The juiciest chicken thighs with a lemony, garlicky rice that soaks up all the flavor.
- [INTERNAL LINK PLACEHOLDER: Creamy Sun-Dried Tomato and Spinach Pasta] — A 20-minute pasta my kids call “the pink one” and beg for constantly.
- [INTERNAL LINK PLACEHOLDER: Easy Black Bean and Corn Tacos] — Meatless, fast, and everyone builds their own. My go-to for busy Taco Tuesdays.
I love that a recipe this simple can feel like a treat — a little crispy, a little creamy, and totally satisfying after a long day.
If you make these, come back and tell me how it went in the comments, or tag me on Pinterest so I can see your beautiful wraps!
📌 Save this crispy chicken Caesar wrap recipe for your next busy weeknight dinner or packed-lunch win — it comes together in just 25 minutes and stays crunchy!
Crispy, Pan-Seared Chicken Caesar Wraps with a Garlicky Dressing
Equipment
- Large Cast-Iron Skillet
- Meat Mallet
- Mixing Bowl
- Sharp Knife
Ingredients
Chicken
- 4 pieces chicken cutlets or boneless skinless breasts, pounded thin
- 2 tablespoons cornstarch
- Salt and pepper to taste
- 1 tablespoon neutral oil (such as avocado or grapeseed)
Caesar Dressing
- 1/4 cup mayonnaise
- 1 tablespoon fresh lemon juice
- 1 teaspoon anchovy paste (or Worcestershire sauce)
- 1 clove garlic, grated
- 3 tablespoons freshly grated Parmesan cheese
For Assembly
- 4 large flour tortillas (10-12 inch)
- 2 hearts romaine lettuce, chopped
- Shaved Parmesan cheese for topping
- Freshly cracked black pepper
Instructions
- Pound and season: If using chicken breasts, slice in half horizontally. Place between plastic wrap and pound to 1/4-inch thickness. Season with salt and pepper. Sprinkle lightly with cornstarch (about 1 teaspoon per cutlet) and rub in.
- Make the dressing: In a small bowl, whisk together mayonnaise, lemon juice, anchovy paste, grated garlic, and Parmesan. Taste and adjust salt.
- Sear the chicken: Heat a cast iron skillet over medium-high heat for 3 minutes. Add oil, then lay chicken in a single layer. Cook without moving for 3 minutes, until golden and crispy. Flip and cook 2 minutes more.
- Rest and slice: Transfer chicken to a cutting board and rest 2-3 minutes. Slice across the grain into 1-inch strips.
- Assemble: Warm tortillas for 15 seconds in microwave. Spread dressing in center, leaving border. Add romaine, chicken, shaved Parmesan, and black pepper.
- Roll and serve: Fold sides in, then bottom flap over filling. Roll tightly away from you. Slice diagonally and serve immediately.
Notes
Related posts:
 The Slow Cooker Cowboy Casserole That Saves Tired Weeknights (No Soggy Tots Allowed)
 Quick Lemon Ricotta Pasta for Busy Weeknights: Creamy, Bright, and on the Table in 20 Minutes
 Lemon Garlic Butter Baked Salmon in Foil That’s Ready in 25 Minutes — No Fuss, No Mess
 Lipton Onion Soup Meatloaf for Tuesday Nights: Moist, Savory, and the Only One You’ll Ever Need
 Kielbasa Sausage Cheesy Potato Casserole That Tastes Like Sunday Dinner — In Under an Hour
 Quinoa Chicken Sausage Bowls That Are Ready in 30 Minutes (And Actually Keep Well)