
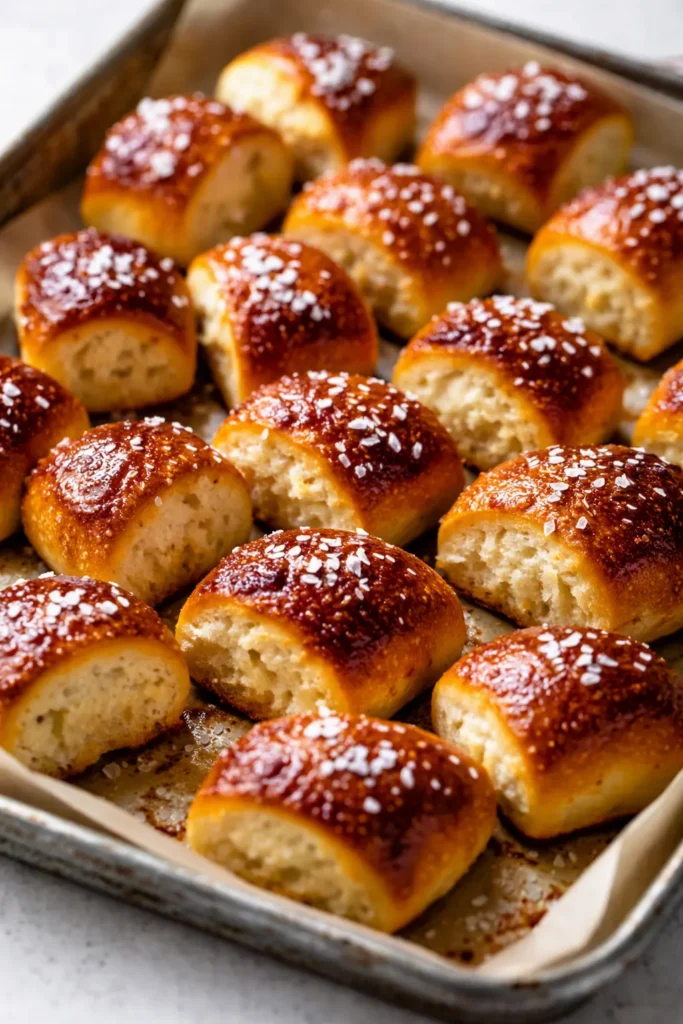
That first warm bite — the one where your teeth sink through the golden, butter-glazed outside into the soft, chewy middle — is the exact reason my kids request these every single Saturday. Every. Single. Saturday. They claim these taste just like the mall pretzels, and honestly? They’re better. These buttery soft pretzel bites come together in 45 minutes from start to finish, and they don’t require any fancy shaping skills or a bread machine.
The short version: Soft, salty, buttery pretzel bites in 45 minutes flat — no bread machine, no fancy twisting, no stress.
I’ve made these at least thirty times since we started Saturday movie nights, and they’ve never once disappointed. My picky seven-year-old — the one who usually survives on air and buttered noodles — ate twelve of the first batch and asked if we could have them “every day forever.” That’s basically a five-star review from her.
- Serves: 8 as a snack or appetizer (about 6–8 bites each)
- Hands-On Time: 25 min | Total Time: 45 min
- Difficulty: Easy — the shaping is forgiving and beginner-friendly
- Cost per serving: ~$0.50
- Calories: ~280 per serving
- Dietary Notes: Vegetarian; easily made dairy-free with vegan butter
(Photo above: overhead shot of a ceramic bowl piled with golden-brown, butter-glazed pretzel bites on a wooden farmhouse table, one bite pulled apart to show the fluffy interior, a small ramekin of cheese sauce in the corner, warm afternoon light coming from the left.)
The One Trick That Keeps Them Tasting Like the Real Deal
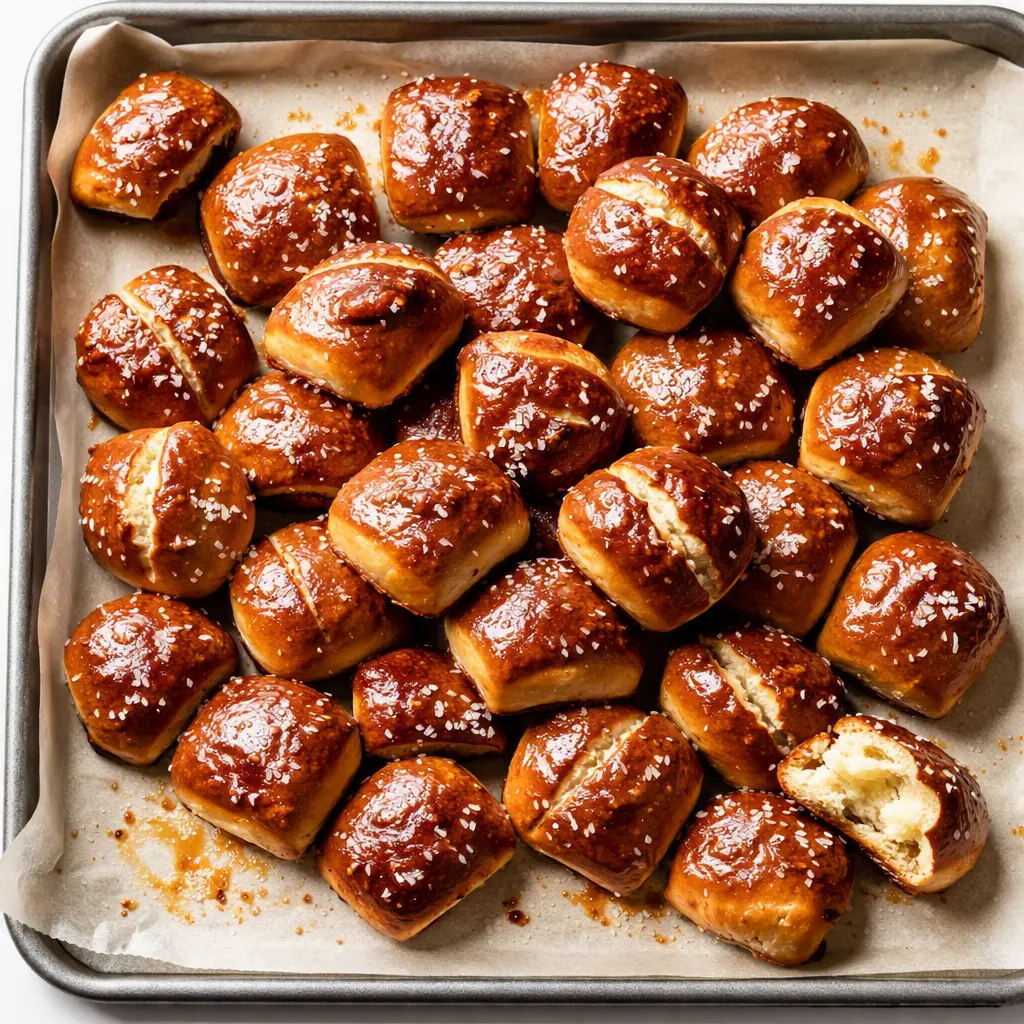
Here’s the thing about pretzels: it’s not the dough that makes them taste like pretzels — it’s the bath. Every pretzel you’ve ever loved at the mall or the fair gets dunked in a baking soda bath before it goes in the oven. That’s what gives them that deep golden-brown color, that smooth shiny skin, and that signature chew that regular bread just doesn’t have. Yes, it sounds weird to boil your dough. I know. My husband watched me do it the first time and asked if I’d lost my mind. But thirty seconds in hot water is exactly what turns ordinary bread dough into something that tastes like it came from a metal cart in the food court.
The second non-negotiable is the butter. Brush it on while the bites are still blazing hot out of the oven so it soaks into every nook and cranny instead of just sitting on top. Then hit them with a shower of flaky salt while the butter’s still glistening. That combination — the chewy outside, the soft pillowy middle, the salty-buttery finish — is what makes these disappear in about eleven minutes at our house.
What Goes In (Plus My Honest Notes)
- 1½ cups warm water (about 110°F): This is the temperature that wakes up the yeast without killing it. If you don’t have a thermometer, it should feel like warm bath water — not hot.
- 1 packet active dry yeast (2¼ teaspoons): The heart of the whole thing. If your yeast is old, this is where you’ll find out — and trust me, better to find out now than after all that kneading.
- 1 tablespoon brown sugar: Feeds the yeast and adds a subtle sweetness that makes the salt pop. My kids have no idea there’s no actual sugar taste, and I’m not telling them.
- 4 cups all-purpose flour: Regular old flour — no bread flour needed. We’re keeping this pantry-friendly. For a slightly chewier texture you can swap in bread flour, but I never bother.
- 1 teaspoon fine salt: For the dough itself. Don’t skip it — it balances everything.
- ⅓ cup baking soda + 3 cups water: The magic combo. Boiling your bites in this mixture is what creates that unmistakable pretzel flavor and deep brown crust. It might look like a weird science experiment, but I promise it’s the secret.
- 4 tablespoons salted butter, melted: The “buttery” in buttery soft pretzel bites. Use the good stuff. I’ve made these with plant-based butter for my sister, who’s dairy-free, and they’re still amazing.
- Flaky sea salt or coarse pretzel salt, for topping: Please don’t skip it! The crunchy salt against the soft, buttery dough is honestly the whole experience.
What to Pull Out Before You Start
- A large mixing bowl: Big enough that the dough doesn’t make a break for it while you’re stirring.
- A baking sheet lined with parchment paper: Non-negotiable. These bites get sticky after their bath, and parchment saves you from a serious scrubbing session.
- A wide pot: Wide enough that the bites have room to float without crowding. I use my Dutch oven.
- A slotted spoon: For fishing the bites out of the boiling water bath.
- A pastry brush: For that glorious butter bath at the end. If you don’t have one, a spoon works in a pinch.
- A kitchen thermometer (optional): Helps with the water temperature, but if you don’t have one, the wrist test works — the water should feel like a warm, comfortable bath.
Let’s Make Them (Step by Step)
This goes faster than you think, so give the steps a quick read before you start. The boiling part moves quickly, and you don’t want to be caught off guard.
Preheat and Prep: Heat your oven to 425°F and line a baking sheet with parchment paper.
- Proof the yeast: In a large bowl, stir together the warm water, brown sugar, and yeast. Let it sit for 5 minutes until it’s foamy on top. If it doesn’t foam, your water was probably too hot or the yeast is past its prime — better to find out now. (📸 Photo tip: You’re looking for a thick, creamy foam on top, like the froth on a latte. That’s your green light.)
- Make the dough: Add the flour and salt to the yeast mixture and stir until a shaggy dough forms. Turn it out onto a lightly floured surface and knead for about 5 minutes until it’s smooth and slightly tacky to the touch — like a baby’s cheek, but less creepy.
- Let it rest: Cover the dough with a clean kitchen towel and let it rest for 10 minutes. It won’t rise much — and that’s totally fine. This short rest is all we need because we’re going for dense and chewy, not fluffy bread.
- Cut the bites: Divide the dough in half. Roll each half into a long rope about 1 inch thick, then slice into 1-inch pieces. They don’t need to be perfect — my kids help with this part, and the wonky ones taste just as good. (📸 Photo tip: Little pillow-shaped pieces of dough, roughly equal sizes, scattered on a lightly floured board.)
- Boil the bath: While the dough rests, bring 3 cups of water to a rolling boil in your pot, then carefully stir in the baking soda — it will bubble up, so give it a sec to settle. Drop the bites in a batch (about 8–10 at a time) and boil for 30 seconds. They’ll float to the top and look slightly puffy and a little wrinkled. That wrinkling is normal and the baking soda smell will fade in the oven. Remove with the slotted spoon and transfer to the parchment-lined sheet. (📸 Photo tip: The bites should look slightly dimpled and shiny as they come out of the bath — that’s how you know the pretzel crust is happening.)
- Bake: Bake at 425°F for 10–12 minutes until they’re deep golden brown and glossy. Tap one with your finger — if it sounds hollow, they’re done. Your kitchen is about to smell incredible, by the way.
- Butter bath: The second they come out of the oven, brush each bite generously with melted butter while they’re still steaming. This is the step that makes them taste like the mall — don’t skip it and don’t wait.
- Sprinkle and serve: Finish with a shower of flaky salt while the butter is still shiny. Serve warm, ideally within five minutes of coming out of the oven, because warm is when they’re at their absolute peak.
Making These Ahead (Because We’re All Busy)
I make a double batch on Sunday afternoons and we snack on them for the first half of the week — that is, if the kids don’t find them first. The secret is to freeze them right after the boiling step and before the oven, so you can bake them fresh whenever the craving hits. It’s the best of both worlds: fresh pretzel bites with almost zero effort on a random Tuesday.
- Fridge: Baked bites keep in an airtight container at room temperature for up to 3 days. Reheat in a 350°F oven for 5 minutes to bring back the chew — the microwave will make them sad and tough.
- Freezer: Yes! After the baking soda bath, let the bites dry on the baking sheet (no need to bake), then pop the whole sheet in the freezer for an hour. Transfer frozen bites to a zip-top bag and keep for up to 3 months.
- Reheat: Bake frozen bites straight from the freezer at 425°F for 12–14 minutes, then butter and salt as usual. They come out tasting practically fresh-baked — nobody will ever know they weren’t made that day.
Things I Learned After My First (Very Sad) Batch
- Don’t skip the boiling bath: I know it seems like an annoying extra step, but it’s the entire difference between pretzel bites and dinner rolls. I tried skipping it once to save time, and my family asked what was wrong with the “bagel dough.” Never again.
- Keep the water at a full rolling boil: If you drop the bites into water that’s barely simmering, they come out pale and doughy instead of shiny and brown. Let it boil hard for a full minute before the baking soda goes in, and keep it boiling between batches.
- Don’t over-knead: Stop the moment the dough feels smooth. Over-kneaded dough makes tough, dense pretzels — and not in a good way. You want soft, so be gentle. The dough should feel slightly tacky but not sticky.
- Butter them while they’re screaming hot: If you wait even a few minutes, the butter just sits on the surface instead of soaking in. I’ve done both. Hot butter-brushing wins every single time — that’s what gives them that glossy, melt-in-your-mouth finish.
- Even if you mess up the shapes, they’ll still taste amazing: My first batch was a lumpy disaster — some bites were twice the size of others, a few were weirdly twisted from my attempt at pretzel knots. They still disappeared in ten minutes. This is a forgiving recipe, I promise.
Swaps and Twists That Actually Work
- Dairy-Free: Use vegan butter for the brushing. I make this version for my sister, and honestly, she can’t tell the difference. The flaky salt does a lot of heavy lifting.
- Gluten-Free: Use a 1:1 gluten-free flour blend. The texture comes out a little more cakey than chewy, but the flavor is still spot-on. It’s the version I make for my nephew, and he’s never complained once.
- Cinnamon Sugar: Skip the flaky salt and toss the buttered bites in a cinnamon-sugar mix instead. I use about ¼ cup sugar plus 1 teaspoon cinnamon. My kids call these “dessert pretzels,” and they are absolutely right.
- Spicy Adult Version: Mix a pinch of cayenne into the melted butter before brushing and finish with flaky salt. My husband and I do this version after bedtime. Don’t tell the kids.
- Garlic Butter: Stir one pressed garlic clove into the melted butter before brushing. It turns these into something dangerously close to garlic knots — we’ve been known to fight over the last ones.
The Questions I Get About These All the Time
Q: Why did my pretzel bites come out pale and doughy?
Ugh, I’ve been there. It’s almost always the water bath — it wasn’t hot enough. Make sure it’s at a full rolling boil before you drop the bites in, and keep it boiling the whole time. Also, don’t overcrowd the pot; work in batches so the water stays hot. You’ve got this next time!
Q: Can I use instant yeast instead of active dry yeast?
Yes, absolutely! With instant yeast, you don’t need to proof it in the water first — just mix it right into the flour and go. Use the same amount (2¼ teaspoons), skip the 5-minute foaming step, and add the water straight into the dry ingredients. The rest of the recipe stays exactly the same.
Q: How long do these last? Can I freeze them?
Baked and stored in an airtight container, they’ll stay good at room temperature for about 3 days — though in my house they never last that long. For freezing, I recommend freezing after the boiling step so you can bake them fresh later. Bake frozen at 425°F for 12–14 minutes, then butter and salt as usual. They taste practically fresh-baked.
Q: What do you serve with pretzel bites?
Cheese sauce is the classic at our house — my kids would swim in it if I let them. The grown-ups also love spicy brown mustard, and my personal secret is honey butter whipped with a pinch of cinnamon. For a full game-day spread, these are perfect next to wings and veggie sticks with ranch.
More Recipes My Family Makes on Repeat
If these buttery soft pretzel bites made it into your rotation, here are a few others that get the same reaction at our table:
- [INTERNAL LINK PLACEHOLDER: Easy Garlic Knots] — Same soft dough, brushed with garlic butter, gone before you can say “dinner’s ready.”
- [INTERNAL LINK PLACEHOLDER: Cinnamon Sugar Monkey Bread] — Our go-to for lazy Sunday mornings when everyone wants something warm and sticky.
- [INTERNAL LINK PLACEHOLDER: Cheesy Beer Bread] — Zero rise time, one bowl, and it makes the whole house smell incredible.
These buttery soft pretzel bites have become our Saturday tradition, and I love knowing they’re just as doable on a random Tuesday when the kids get off the bus hungry and cranky. If you make them, drop a comment below — I genuinely love hearing how they turn out for you. And if you snap a photo, tag me on Pinterest or Instagram so I can see your butter-glazed beauties!
📌 Buttery soft pretzel bites recipe that tastes like the mall — save this for your next movie night, game day, or any day you need a warm snack in 45 minutes.
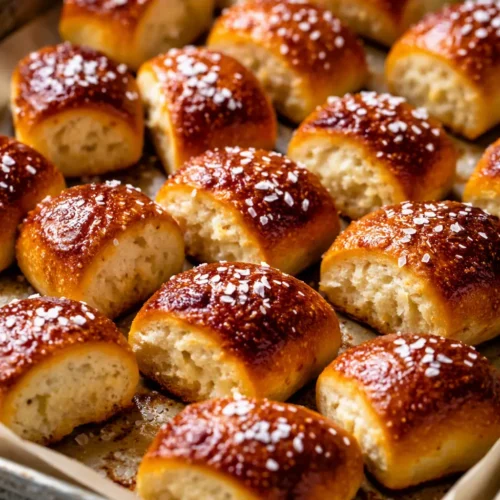
Buttery Soft Pretzel Bites That Taste Like the Mall
Equipment
- Large Mixing Bowl
- Baking sheet lined with parchment paper
- Wide pot (Dutch oven)
- Slotted Spoon
- Pastry Brush
- Kitchen thermometer (optional)
Ingredients
For the Dough
- 1 1/2 cups warm water (about 110°F)
- 1 packet active dry yeast (2 1/4 teaspoons)
- 1 tablespoon brown sugar
- 4 cups all-purpose flour
- 1 teaspoon fine salt
For the Bath and Finish
- 1/3 cup baking soda
- 3 cups water
- 4 tablespoons salted butter, melted
- to taste flaky sea salt or coarse pretzel salt, for topping
Instructions
- In a large bowl, stir together the warm water, brown sugar, and yeast. Let it sit for 5 minutes until it is foamy on top. If it doesn’t foam, the water was probably too hot or the yeast is past its prime.
- Add the flour and salt to the yeast mixture and stir until a shaggy dough forms. Turn it out onto a lightly floured surface and knead for about 5 minutes until it is smooth and slightly tacky to the touch.
- Cover the dough with a clean kitchen towel and let it rest for 10 minutes. It won’t rise much, and that is totally fine. This short rest keeps the bites dense and chewy.
- Divide the dough in half. Roll each half into a long rope about 1 inch thick, then slice into 1-inch pieces. They don’t need to be perfect.
- Bring 3 cups of water to a rolling boil in a wide pot, then carefully stir in the baking soda. Drop the bites in a batch (about 8-10 at a time) and boil for 30 seconds. Remove with a slotted spoon and transfer to a parchment-lined baking sheet.
- Bake at 425°F for 10-12 minutes until deep golden brown and glossy. Tap one with your finger — if it sounds hollow, they’re done.
- The second they come out of the oven, brush each bite generously with melted butter while still steaming. Don’t wait.
- Finish with a shower of flaky salt while the butter is still shiny. Serve warm, ideally within five minutes.
Notes
Related posts:
 The Slow Cooker Cowboy Casserole That Saves Tired Weeknights (No Soggy Tots Allowed)
 Lemon Garlic Butter Baked Salmon in Foil That’s Ready in 25 Minutes — No Fuss, No Mess
 Moist Chocolate Zucchini Bread That Doesn’t Turn Out Rubbery — Finally
 Creamy Homemade Strawberry Dole Whip (That Tastes Just Like the Real Thing)
 Blueberry Peach Bread That Doesn’t Sink or Turn Mushy — Finally
 Quinoa Chicken Sausage Bowls That Are Ready in 30 Minutes (And Actually Keep Well)