
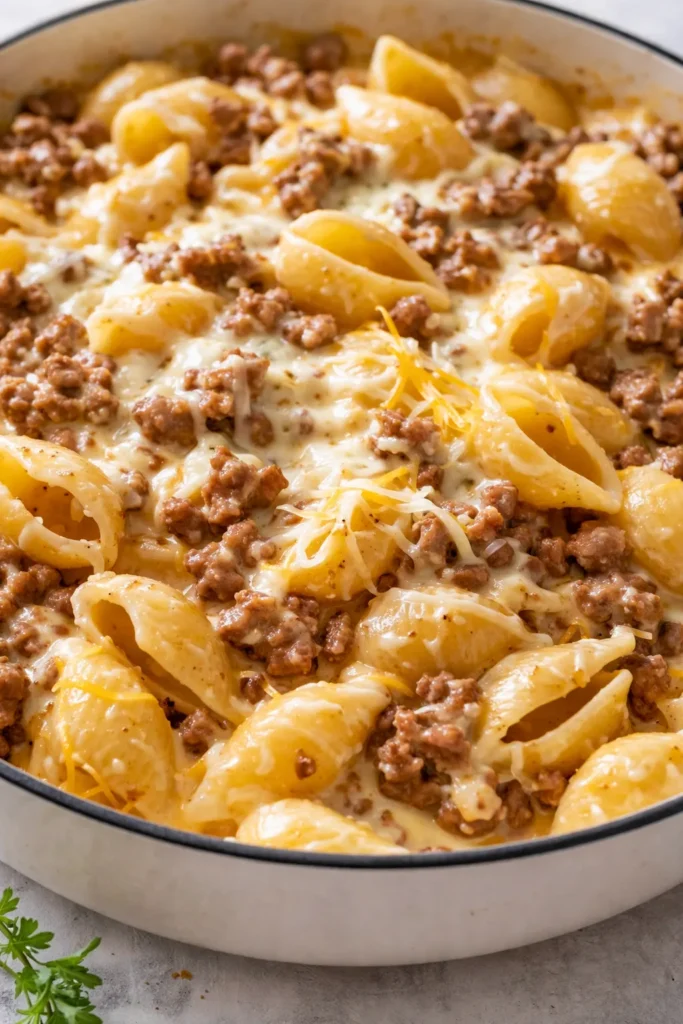
The first time I made this from scratch, my youngest looked up from her bowl and said, “Mom, this tastes like a hug.” I wasn’t trying to reinvent the boxed version or get fancy. I was just trying to make a Tuesday night dinner that didn’t feel like a compromise — something creamy, something savory, something that would make the whole family wander into the kitchen before they were even called.
The short version: This comes together in one pot, in about half an hour, and my kids have never once left leftovers.
I’ve made this version close to thirty times now, tweaking the liquid ratio and the cheese blend until it was exactly what we wanted — creamy but not gluey, beefy but not greasy, with a sauce that clings to every single shell. I think I’ve finally got it.
- Serves: 4-6 as a main
- Hands-On Time: 15 min | Total Time: 30 min
- Difficulty: Easy enough for a Wednesday night
- Cost per serving: ~$3.50
- Calories: ~520 per serving
- Dietary Notes: Freezes well. Can be adapted for gluten-free.
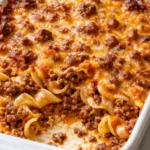
(Photo above: An overhead shot of a shallow white bowl filled with creamy beef and shells, a fork lifting a bite-sized twirl of pasta and seasoned beef, the sauce clinging to every ridged surface, wisps of steam rising in the cool evening light against a rustic wooden table.)
The One Step That Makes It Actually Creamy (Not Gluey)
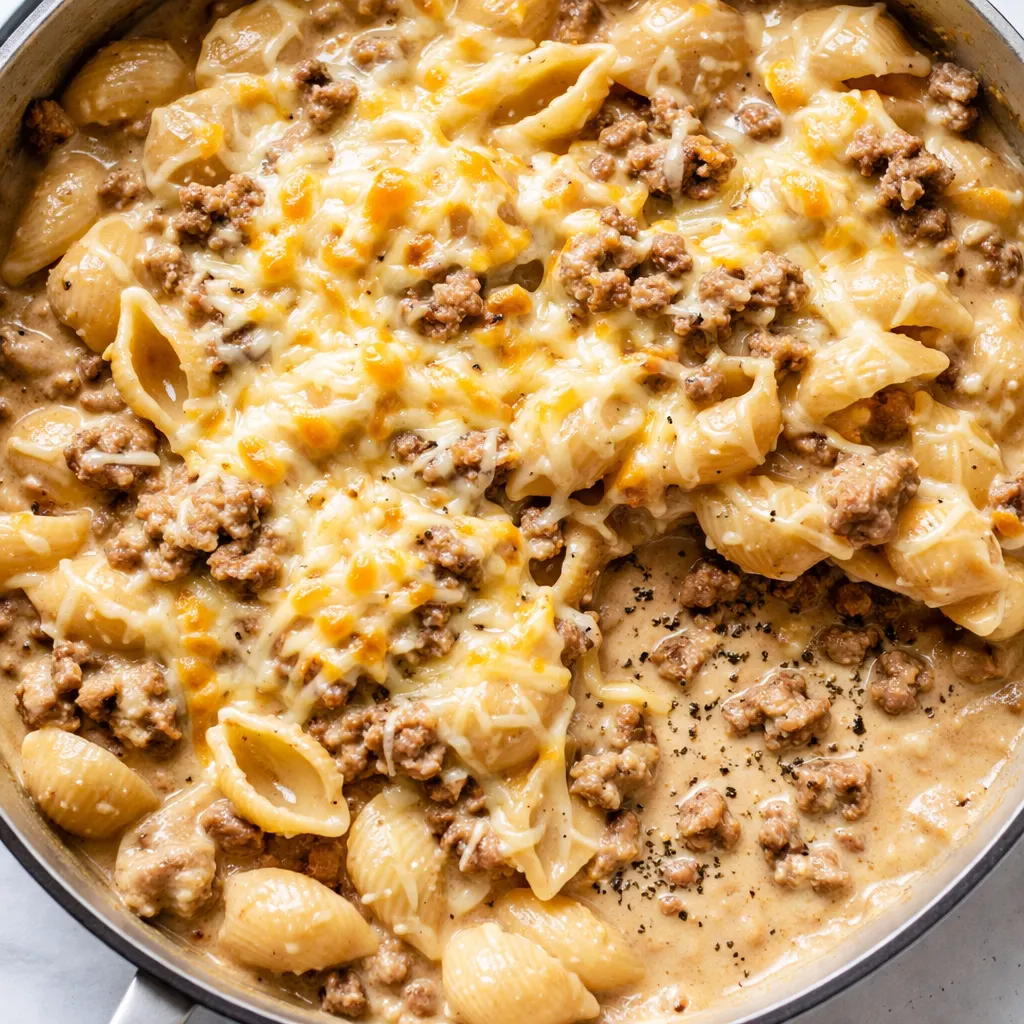
The trick here isn’t a secret ingredient. It’s the method. Most versions of this dish either end up too watery or too thick, like the sauce just gave up halfway. The fix is cooking the pasta right in the broth and milk mixture, uncovered, so the starches release and thicken the sauce from the inside out. No separate pot to drain, no extra dishes, and the sauce wraps around every shell like it belongs there.
The other thing I learned the hard way? Adding the cheese off the heat. If the pot is still boiling when you toss in the cheddar, it can turn grainy and separate. Turn the heat off, stir it in, and let the residual warmth do the work. It melts into a silky finish every single time.
This is the kind of meal that tastes like a win even on a Wednesday. The kind where everyone goes quiet for a minute, then asks for seconds.
What Goes In (Plus My Honest Notes on a Few of Them)
- 1 lb ground beef (80/20): You want some fat here for flavor. If you use leaner beef, add a small pat of butter to the pan when you’re browning it. I’ve tried both and the 80/20 version wins every time.
- 2 cups medium pasta shells: The ridges and curves are made for catching creamy sauce. If you don’t have shells, elbows work fine. My kids call these “the little cups” and they love how the sauce gets inside.
- 1 small yellow onion, diced: Cooked down until soft and translucent. It melts into the background and leaves its sweetness behind.
- 2 cloves garlic, minced: I add mine after the onion is soft, then cook it just until fragrant — about 30 seconds. Garlic that burns turns bitter fast. I’ve done it and it’s sad. Don’t rush this part.
- 2 tbsp all-purpose flour: This is the base for the roux that thickens everything. Cook it for a full minute after you sprinkle it in, otherwise it tastes raw.
- 1 ½ cups beef broth: Use a good quality one here. The broth is most of the liquid base, so if it’s too salty or too weak, the whole dish follows. I like the low-sodium kind so I can control the salt level myself.
- 1 cup whole milk: Whole milk gives the creamiest result. I’ve used 2% in a pinch and it still works, but save the skim milk for your cereal. The fat in the milk helps the sauce come together without separating.
- 1 tbsp tomato paste: Adds depth and a tiny bit of acid to cut through the richness. Don’t skip it. I buy it in a tube now so I don’t waste a whole can for one tablespoon.
- 1 ½ cups freshly shredded cheddar cheese: This is non-negotiable in my kitchen. Pre-shredded cheese has anti-caking agents that prevent it from melting smoothly. Shred it yourself from a block. It takes two extra minutes and the difference is huge. I promise.
- ½ tsp onion powder, ½ tsp garlic powder, ¼ tsp paprika: These season the sauce without adding extra moisture. I don’t typically measure spices when I’m just cooking for us, but I’ve written them down here so you can get the same result.
- Salt and black pepper to taste: The cheese and broth both have salt, so taste before you add more. Fresh cracked pepper at the end is a good habit.
The Setup (You Probably Already Have It)
- Large pot or Dutch oven (5.5 qt or larger): You need something with a wide bottom and a matching lid. A 12-inch skillet with deep sides works too, as long as it holds everything without boiling over.
- Wooden spoon or silicone spatula: For scraping the fond off the bottom of the pan — that browned bit is pure flavor.
- Box grater: For your block of cheddar. Better melting, better flavor, better texture. It’s worth the two minutes.
Making It: The Step-by-Step (It Moves Fast)
Read through once before you start. This one comes together quickly, especially once the liquids go in.
- Cook the aromatics: Heat a drizzle of oil in your pot over medium heat. Add the diced onion and cook, stirring occasionally, until it’s soft and translucent — about 4-5 minutes. Add the minced garlic and cook for another 30 seconds until it smells nutty and fragrant. (📸 Photo tip: The onions should look glossy and soft, not browned. You’ll know the garlic is ready when the smell shifts from sharp to sweet.)
- Brown the beef: Add the ground beef to the pot, breaking it up with your spoon. Cook until it’s browned and no pink remains, about 5-6 minutes. If there’s a lot of excess grease, spoon most of it out, leaving about a tablespoon in the pot for flavor.
- Add the tomato paste and flour: Stir in the tomato paste and cook it for a minute until it deepens in color and smells rich. Sprinkle the flour over the beef and stir it in completely. Cook for another minute, stirring constantly. This cooks the raw flour taste out. (📸 Photo tip: The mixture will look thick and almost pasty at this point — that’s normal and good. It should coat the beef without being dry.)
- Pour in the liquids: Slowly pour in the beef broth while stirring and scraping the bottom of the pot with your spoon to release all the browned bits. Then pour in the milk. Add the onion powder, garlic powder, and paprika. Stir until everything is smooth.
- Cook the pasta: Bring the liquid to a gentle simmer — not a raging boil, but a steady, bubbling low boil. Stir in the dry pasta. Cover the pot, reduce the heat to medium-low, and let it cook for about 12-15 minutes, stirring once or twice so the pasta doesn’t stick to the bottom.
- Check the pasta: The shells are done when they’re tender and most of the liquid has been absorbed into a creamy sauce that clings to the pasta. If it still looks a little thin, let it simmer uncovered for 2-3 more minutes. The sauce will continue to thicken as it sits.
- Finish with cheese: Remove the pot from the heat completely. Sprinkle the shredded cheddar over the top and stir it constantly until it melts into the sauce. Taste and add salt and black pepper to your preference.
How I Make This Work for Our Busy Week
This recipe is my go-to for busy nights because it really does come together in one pot. But if I’m trying to get ahead on a Sunday, I’ll prep a few things so dinner on Tuesday is genuinely just “stir and simmer.” I brown a double batch of the beef with the onions and garlic, then cool and store it in the fridge. When I’m ready to cook, I just pick up where the recipe starts with the flour and liquids. Saves me about ten minutes on a school night.
- Fridge: Store cooled leftovers in an airtight container for up to 4 days. The sauce will thicken as it sits — add a splash of milk or broth when you reheat.
- Freezer: Yes, it freezes well for up to 3 months. The pasta will soften a little, but the flavor stays great. Thaw in the fridge overnight.
- Reheat: The stovetop is best — add a splash of milk and warm it over medium-low heat, stirring gently. The microwave works in a pinch but the texture won’t be quite as creamy.
My Best Advice After Making This 20 Times
- Cook the flour the full minute: I know it’s tempting to just pour the broth in right after the flour disappears into the meat, but that raw flour taste doesn’t cook out in the liquid. Give it a full minute of stirring over heat. It makes the base of the sauce much smoother.
- Shred your own cheese: I’ve said it already, but it’s the most important tip in this whole article. The pre-shredded bags have potato starch or cellulose powder added to prevent clumping, and that powder prevents the cheese from melting into a smooth sauce. You get a grainy sauce instead of a creamy one. A block of cheddar and a box grater will change this dish completely.
- Turn the heat off before you add the cheese: If you dump the cheese into a pot that’s still over the heat, especially a boil, the fat separates from the milk solids and you end up with a greasy, grainy mess. Take it off the heat, stir the cheese in, and let the residual warmth do the work. It melts slowly and smoothly that way.
- Resist the urge to over-stir during the simmer: The pasta needs to sit in the liquid to cook properly. Stirring too often can break the starches down too fast and make the sauce gluey. Just give it a gentle stir every 4-5 minutes to keep it from sticking.
Ways to Make It Your Own
- Gluten-Free: Use a gluten-free pasta blend and swap the all-purpose flour for a 1:1 gluten-free flour blend or a cornstarch slurry (1 tablespoon cornstarch mixed with 2 tablespoons cold water, stirred in at the end). Cook time will vary, so check the pasta a few minutes early.
- Add some vegetables: My kids accept finely chopped mushrooms or shredded zucchini in this if I add them right after the onions. The zucchini disappears into the sauce and the mushrooms just taste like savory goodness. My version for the adults sometimes gets a handful of fresh spinach stirred in at the very end until it wilts.
- Make it spicy: I add a pinch of red pepper flakes along with the other spices when I’m making a batch just for my husband and me. It cuts through the richness nicely.
- Use ground turkey: It works, but add a tablespoon of olive oil or butter to the pan before the turkey goes in, since it’s much leaner than beef. The flavor is milder, so you might want to bump the garlic powder up a bit.
- Different cheeses: Try a mix of cheddar and Monterey Jack for extra meltiness. A little sharp white cheddar adds a nice tang. I usually do half sharp cheddar and half mild cheddar for the best balance.
The Questions I Always Get About This One
Q: Why did my sauce turn out grainy?
A: Ugh, I’ve been there. It usually comes down to one of two things. Either the cheese went in while the pot was still too hot — the heat made the fat separate — or you used pre-shredded cheese with anti-caking agents. Turn the heat off first, use freshly shredded cheese, and stir it in gently. You’ve got it next time.
Q: Can I use ground turkey or chicken instead of beef?
A: Yes, totally. Just add a tablespoon of olive oil or butter to the pan before you cook the meat, since poultry is much leaner and you need some fat for the flavor to carry. The rest of the recipe stays the same.
Q: How long does this last in the fridge and can I freeze it?
A: It keeps in the fridge for up to 4 days in an airtight container. The pasta will soak up some of the sauce overnight, so add a splash of milk or broth when you reheat it on the stovetop. And yes, it freezes well for about 3 months — the pasta softens a little but the flavor stays great. Thaw it in the fridge overnight before reheating.
Q: What do you serve with creamy beef and shells?
A: I usually keep it simple. A crisp green salad with a sharp vinaigrette cuts through the richness nicely. My kids love it with a side of steamed broccoli or green beans. And if I’m feeling extra, I’ll pull out some crusty bread to soak up any sauce left on the plate.
More Recipes My Family Makes on Repeat
If this one worked for you, here are a few others that get the same reaction at our table:
- Best Easy Hobo Casserole — The one that made my kid say “this is better than restaurant spaghetti.”
- 5 Ingredient Ground Beef Casserole — Our go-to for cold Sundays when we want something to simmer all afternoon.
- Lasagna Roll Ups — The creamiest stovetop mac you’ve ever made, no roux required.
This creamy beef and shells is the kind of dinner that makes everyone slow down for a minute. It’s warm, it’s filling, and it tastes like someone actually took the time to make something good — even if that someone was just you on a regular Tuesday night after a long day.
If you try it, drop a comment below and let me know how it went. I love hearing which variation your family loved most.
📌 Save this creamy beef and shells recipe for the nights you need a guaranteed win — a one-pot dinner that comes together in 30 minutes and tastes like a hug in a bowl.
Creamy Beef and Shells
Equipment
- Large pot or Dutch oven (5.5 qt or larger)
- Wooden spoon or silicone spatula
- Box Grater
Ingredients
- 1 lb ground beef (80/20)
- 2 cups medium pasta shells
- 1 small yellow onion, diced
- 2 cloves garlic, minced
- 2 tbsp all-purpose flour
- 1 1/2 cups beef broth (low-sodium recommended)
- 1 cup whole milk
- 1 tbsp tomato paste
- 1 1/2 cups freshly shredded cheddar cheese (from a block)
- 1/2 tsp onion powder
- 1/2 tsp garlic powder
- 1/4 tsp paprika
- Salt and black pepper to taste
Instructions
- Heat a drizzle of oil in your pot over medium heat. Add the diced onion and cook, stirring occasionally, until soft and translucent, about 4-5 minutes. Add the minced garlic and cook another 30 seconds until fragrant.
- Add the ground beef, breaking it up with your spoon. Cook until browned, about 5-6 minutes. Spoon out excess grease, leaving about a tablespoon in the pot.
- Stir in the tomato paste and cook for 1 minute until it deepens in color. Sprinkle the flour over the beef and stir it in completely. Cook for another minute, stirring constantly.
- Slowly pour in the beef broth while stirring and scraping the bottom of the pot to release the browned bits. Then pour in the milk. Add the onion powder, garlic powder, and paprika. Stir until smooth.
- Bring the liquid to a gentle simmer. Stir in the dry pasta. Cover the pot, reduce heat to medium-low, and cook for 12-15 minutes, stirring once or twice to prevent sticking.
- Check the pasta: shells should be tender and most liquid absorbed into a creamy sauce. If still thin, simmer uncovered 2-3 more minutes.
- Remove the pot from heat completely. Sprinkle the shredded cheddar over the top and stir constantly until melted. Season with salt and black pepper to taste. Serve immediately.
Notes
Related posts:
 Creamy Smothered Chicken and Rice for the Weeknights You Need Real Comfort: Rich, Velvety, One Pot
 Easy Beef and Broccoli That’s Better Than Takeout in 30 Minutes
 The Grilled Nectarine Burrata Prosciutto Salad That Balances Sweet, Salty, and Creamy Perfectly
 The Ground Beef and Potato Skillet That Doesn’t Get Soggy — Finally
 The Watermelon Arugula Salad That Doesn’t Get Soggy — A 10-Minute Trick Changes Everything
 The 5-Ingredient Ground Beef Casserole That Saves My Weeknights