
I honestly stopped counting how many enchilada recipes I tried before this one actually worked. The tortillas would crack, the filling would fall out, or the whole pan came out dry and I’d be piling on sour cream just to make it edible. The night I finally nailed this version, my son asked for thirds before I’d even sat down, and my husband gave me that “okay this one’s a keeper” look across the table. You know the one.
The short version: These ground beef enchiladas come together in 45 minutes, they’re outrageously cheesy, and the filling stays moist without turning the tortillas into mush.
I’ve made this exact recipe at least four dozen times in the last three years, and it’s the one dinner we all agree on — even on nights when everyone’s cranky and nothing sounds good.
- Serves: 6 as a main dish (or 4 really hungry adults)
- Hands-On Time: 20 min | Total Time: 45 min
- Difficulty: Easy, even on a school night
- Cost per serving: ~$2.75
- Calories: ~480 per serving
- Dietary Notes: Naturally nut-free; adaptable for gluten-free with corn tortillas
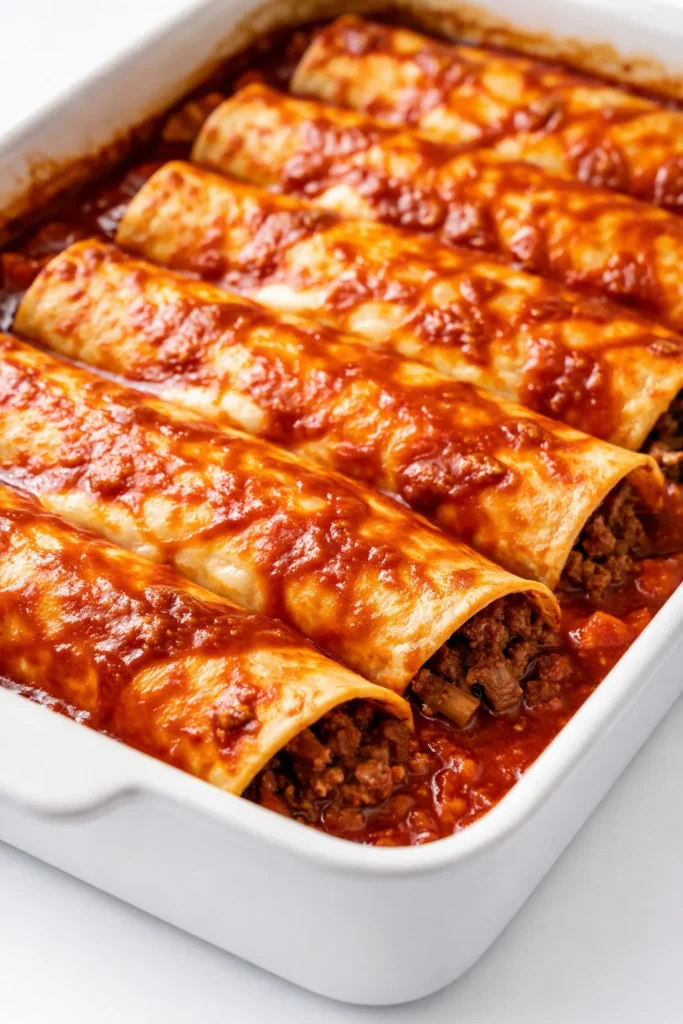
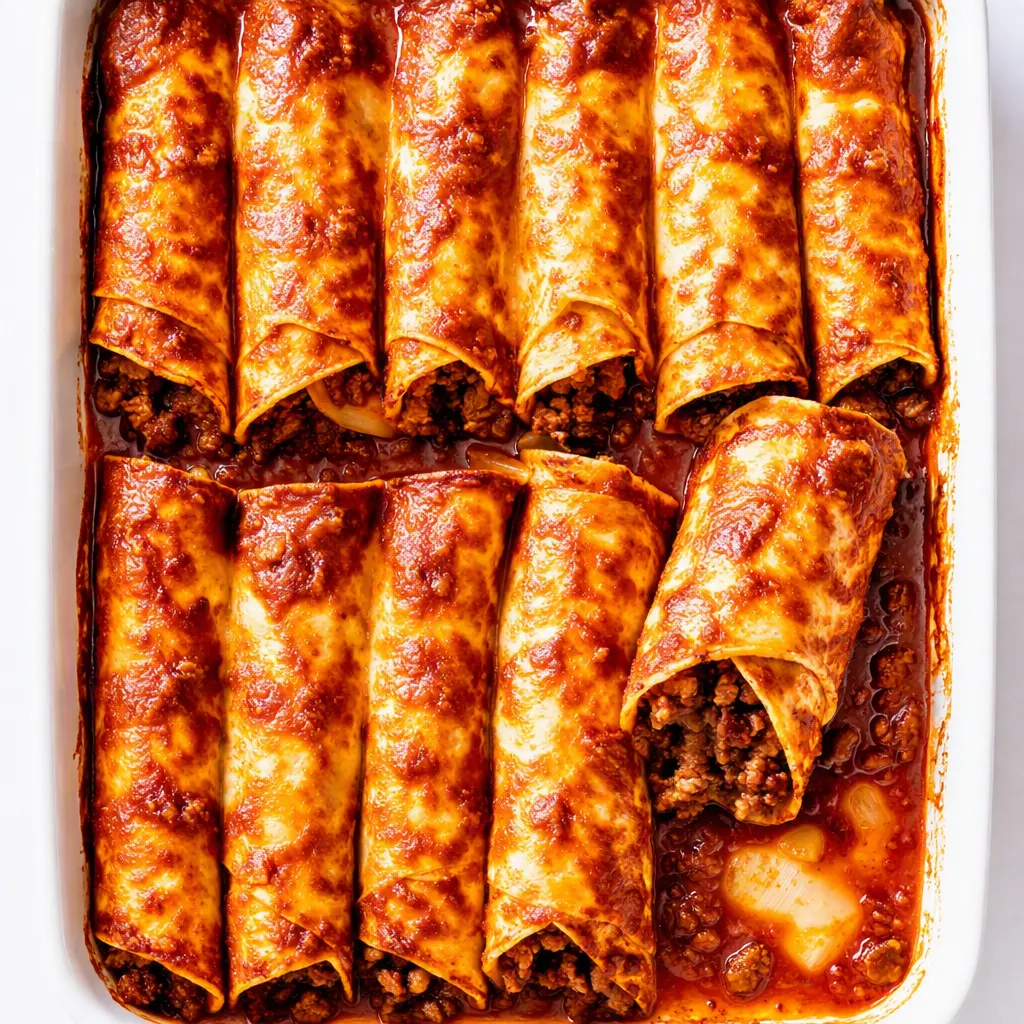
(Photo above: overhead shot of the finished ground beef enchiladas in a worn blue baking dish, cheese melted and golden in spots, a spoon lifting one corner to show the saucy filling, natural afternoon light from a kitchen window.)
The Thing That Makes These Actually Creamy (Not Dry)
Most of the time, homemade enchiladas dry out because the filling loses moisture in the oven and the sauce alone can’t fix it. I learned that the hard way after way too many pans of dry, tough enchiladas. The game-changer here is a quick mix-in right before you fill the tortillas: a little sour cream stirred into the beef along with a splash of the enchilada sauce. It sounds almost too simple, but trust me — that creamy combo locks in moisture and gives the whole dish a velvety texture.
The other trick that took me embarrassingly long to figure out is lightly coating the bottom of the baking dish with sauce and then also spreading a thin layer of sauce over the rolled tortillas before adding the cheese. You’d be shocked how many recipes skip that and wonder why the enchiladas turn out stiff. This double-sauce method steams the tortillas as they bake, so they soften and soak up flavor instead of drying out.
When you pull this pan out of the oven, the cheese is bubbly, the sauce is rich, and every bite tastes like the filling was meant to be exactly that saucy — not dry, not falling apart, just right.
Everything You Need (And a Few Notes From Me)
- 1 lb lean ground beef (90/10): You need some fat for flavor, but not so much that the filling gets greasy. I’ve used 80/20 in a pinch — just drain it well after browning. My son calls this the “meat part” and always asks if there’s more in the fridge.
- 1 small yellow onion, diced: This cooks down with the beef and adds a sweetness you don’t want to skip. My picky nine-year-old doesn’t even notice the onion once it’s all mixed in — that’s the real test.
- 3 cloves garlic, minced: Because what’s a good enchilada without garlic? Fresh, please — the jarred stuff just doesn’t hit the same.
- 1 packet (1 oz) taco seasoning (or 2 tablespoons homemade): I keep a jar of my own blend on hand, but the store-bought packet works beautifully here. If you’re watching sodium, use half and taste before adding any extra salt.
- 1 can (15 oz) refried beans: I use traditional refried pinto beans — they make the filling slightly creamy and stretch the meat a little further without anyone complaining. My kids have no idea there are beans in these, and I’m not telling.
- 1/2 cup sour cream, plus more for serving: Mixed right into the beef for that moisture-locking creaminess. I’ve also used plain Greek yogurt when I was out of sour cream, and it worked surprisingly well — a little tangier, but still good.
- 2 cups shredded Mexican blend cheese, divided: Pre-shredded is fine — no judgment here. But if you grate your own, it melts a little silkier.
- 1 can (19 oz) red enchilada sauce: I reach for mild, because my household runs scared of spice. Use whatever heat level your family loves. If you’ve got time, homemade is incredible, but I’m a realist — I grab a can 95% of the time.
- 8 flour tortillas (7-8 inch): Flour tortillas are more pliable and less likely to crack when you roll them. Corn tortillas work if you need gluten-free, but warm them first so they don’t tear.
- Optional toppings: Chopped cilantro, sliced jalapeños, diced avocado, extra sour cream. My husband dumps hot sauce on everything, so the bottle is always on the table.
What to Pull Out Before You Start
- A large skillet (12-inch works great) for browning the beef
- A 9×13-inch baking dish — glass or ceramic, light-colored so the cheese doesn’t over-brown
- Measuring cups and spoons
- A mixing spoon or spatula
- Aluminum foil (to cover the dish for the first part of baking)
- A spoon for spreading the sauce — nothing fancy
Let’s Make It (Step by Step)
This goes fast, so read through once before you start. The filling comes together in about 15 minutes, and then you’re just rolling and baking.
First, get the oven going and prep your dish: Preheat your oven to 375°F (190°C). While it’s heating, spread about 1/4 cup of the enchilada sauce over the bottom of a 9×13-inch baking dish — just enough to barely cover it. This prevents sticking and adds extra sauciness from the bottom up.
- Brown the beef and onion: In a large skillet over medium-high heat, cook the ground beef and diced onion together, breaking up the meat with a spoon, until the beef is no longer pink and the onion is soft — about 6-7 minutes. Drain off any extra fat. (📸 Photo tip: The beef should be crumbly and browned, with translucent bits of onion — that’s your doneness cue.)
- Add the garlic and taco seasoning: Stir in the minced garlic and the taco seasoning. Cook for about 30 seconds, just until the garlic is fragrant. If you cook it much longer, the garlic can turn bitter. Trust me, I’ve done it the distracted way and regretted it.
- Mix in the refried beans and sour cream: Take the skillet off the heat. Add the refried beans and the 1/2 cup of sour cream. Stir really well until everything’s combined and the mixture is creamy. This is the step that keeps the filling from drying out, so make sure you don’t skip it. (📸 Photo tip: The filling should look like a cohesive, slightly saucy meat mixture — not stiff or crumbly.)
- Stir in half the cheese and a splash of sauce: Add 1 cup of the shredded cheese and about 1/3 cup of the enchilada sauce to the beef mixture. Stir until the cheese just starts to melt into the filling. This gives you pockets of cheese inside each enchilada and another layer of moisture. The mixture will be a bit loose, and that’s exactly what you want.
- Fill and roll the tortillas: Lay the tortillas out on your work surface. Spoon about 1/3 cup of the filling down the center of each tortilla — don’t overstuff, or they’ll burst. Roll them up snugly but not too tight, and place them seam-side down in the prepared baking dish. Nestle them side by side; a little crowding is fine.
- Top with the rest of the sauce and cheese: Pour the remaining enchilada sauce evenly over the rolled tortillas, making sure all the edges are coated. Sprinkle the remaining 1 cup of cheese over the top. This part always makes me smile — that thick blanket of cheese is the best.
- Cover and bake, then uncover: Cover the dish tightly with aluminum foil and bake for 20 minutes. The trapped steam softens the tortillas. Then remove the foil and bake for another 10-12 minutes, until the cheese is bubbly and starting to turn golden in spots. If you like really crispy cheese edges, you can switch to broil for the last minute, but watch it closely — the difference between perfect and burnt is about 15 seconds.
- Rest before serving: Let the enchiladas sit for 5 minutes out of the oven. This lets the filling set a little so they don’t fall apart when you scoop them out. I use that time to chop cilantro and call everyone to the table.
How I Meal Prep These for the Week
I make a double batch on Sundays and we eat the leftovers for lunches until Wednesday. Honestly, these ground beef enchiladas reheat so well that I sometimes think they’re even better the next day. The trick is storing the sauce separately when you assemble them for meal prep — otherwise the tortillas can get soggy. I roll the filled tortillas, wrap the dish tightly, and keep the extra sauce and cheese in a container. Right before baking, I pour on the sauce and cheese and pop it in the oven.
- Fridge: Leftover enchiladas (already baked) keep in an airtight container for up to 4 days. Reheat individual portions in the microwave for 1-2 minutes, but the cheese won’t be as crisp. For better texture, warm them in a 350°F oven for 10 minutes covered with foil.
- Freezer: Absolutely — I do this all the time. Assemble the enchiladas (without the sauce and cheese on top), wrap the dish in a layer of plastic wrap then foil, and freeze for up to 3 months. Thaw overnight in the fridge, add sauce and cheese, and bake as directed, adding maybe 5 extra minutes to the covered time if it’s still cold.
- Reheat: If you’re reheating a whole pan from the fridge, cover with foil and bake at 350°F for about 20 minutes, then uncover for 5 to revive the cheese. The microwave works in a pinch but makes the tortillas a little soft — still tastes great, though.
My Honest Advice After Making This So Many Times
- Don’t skip warming the tortillas: Even flour tortillas can crack if they’re cold. Pop them in the microwave for about 20 seconds with a damp paper towel over them. They’ll be way more flexible and less likely to tear when you roll them.
- Go heavy on the sauce: If you think you’ve used enough, add a little more. Dry enchiladas are the worst, and a generously sauced pan never disappoints. I often use an extra 1/4 cup of sauce just because.
- The rest time is non-negotiable: I know it’s hard to wait when the cheese is bubbling, but if you cut into them right away, the filling will spill out everywhere. Give them 5 minutes — it makes all the difference for neat slices.
- Even if you overstuff one or tear a tortilla a little, it’s going to be okay: Just push it back together in the pan and smother it with sauce. My first few batches had torn corners and nobody noticed under all that cheese. You’ve got this.
Make It Yours: Easy Variations
- Gluten-free: Use corn tortillas instead of flour, but definitely warm them well (wrap in damp paper towels and microwave 30 seconds) and oil the baking dish a little more to prevent sticking. This is the version I make for my niece who has celiac, and she asks for it every time we get together.
- Kid-friendly (even milder): Skip the taco seasoning and just use a pinch of cumin and paprika. Use mild enchilada sauce and skip any jalapeño toppings. My kids need the mild version, and honestly, they still devour it.
- Spicy adult version: Stir a minced chipotle pepper in adobo sauce into the beef, and use a hot enchilada sauce. Top with sliced fresh jalapeños and a drizzle of chipotle crema. I make this after bedtime when my husband and I want a little heat.
- Vegetarian swap: Replace the ground beef with an extra can of black beans (drained and rinsed) and some sautéed bell pepper and corn. Use the same seasonings and method — it’s just as hearty.
- For a crowd: Double the recipe and use two 9×13 pans. You can assemble them the night before and bake just before serving — perfect for game day or family gatherings.
Questions I Get About This Recipe All the Time
Q: Why did my tortillas turn out soggy?
A: Ugh, I’ve been there. Soggy tortillas usually happen when the sauce is too thin or the filling was super wet. Make sure you drain any extra grease from the beef and don’t add more sour cream than the recipe calls for. Also, fluff the tortillas with a little heat before rolling — it helps them stay intact. If you’re still having trouble, use a slightly thicker enchilada sauce or less sauce on the bottom of the dish. You’ve got this next time.
Q: Can I make these with corn tortillas? I need gluten-free.
A: Yes, absolutely. Corn tortillas can be a little more fragile, so warm them thoroughly (15-20 seconds in the microwave between damp paper towels) before filling. I’d also lightly spray the baking dish with oil before adding the sauce to prevent sticking. They’ll be a bit more rustic-looking but taste wonderful — I’ve done it plenty of times.
Q: How long do the leftovers last, and can I freeze them?
A: In the fridge, they keep beautifully for up to 4 days. For freezing, assemble the enchiladas without the sauce and cheese on top, then wrap tightly. Thaw overnight and bake with sauce and cheese. They’ll taste nearly fresh. I always keep a pan in the freezer for crazy weeks — it’s a lifesaver.
Q: What do you serve with ground beef enchiladas?
A: I almost always put out a big bowl of Mexican rice and some cilantro lime slaw on the side. My kids love it with refried beans on the plate (yes, more beans — they can’t get enough). On weekends, we’ll also make a quick guacamole and some queso for dipping chips. If you want to keep it lighter, a simple side salad with avocado dressing works great.
More Recipes My Family Makes on Repeat
If you liked this one, here are a few others that get the same reaction at our table:
- [INTERNAL LINK PLACEHOLDER: One-Pan Mexican Rice with Black Beans] — The 20-minute side that my son calls “the best rice in the world.”
- [INTERNAL LINK PLACEHOLDER: Easy Chicken Tinga Tacos] — Smoky, saucy, and ready in 30 minutes; perfect for Taco Tuesday.
- [INTERNAL LINK PLACEHOLDER: Creamy Cilantro Lime Slaw] — Crunchy, tangy, and the ultimate enchilada companion.
I really hope these ground beef enchiladas become a weeknight staple for you the way they are for us. There’s something so comforting about a pan of cheesy, saucy enchiladas that everyone digs into without complaining. If you try it, drop a comment below — I love hearing how it goes for you! And if you snap a picture of that cheesy pull, tag me on Pinterest or Instagram so I can see yours.
📌 Easy ground beef enchiladas recipe that’s cheesy, saucy, and ready in 45 minutes — save it for your next busy weeknight or Sunday meal prep!
Ground Beef Enchiladas
Equipment
- Large Skillet
- 9×13-inch baking dish
- Measuring Cups and Spoons
- Mixing Spoon or Spatula
- Aluminum foil
Ingredients
Main Ingredients
- 1 lb lean ground beef (90/10)
- 1 small yellow onion, diced
- 3 cloves garlic, minced
- 1 packet (1 oz) taco seasoning
- 1 can (15 oz) refried beans
- 1/2 cup sour cream, plus more for serving
- 2 cups shredded Mexican blend cheese, divided
- 1 can (19 oz) red enchilada sauce
- 8 flour tortillas (7-8 inch)
Optional Toppings
- 1/4 cup chopped cilantro
- to taste sliced jalapeños
- 1 diced avocado
- to taste extra sour cream for serving
Instructions
- Preheat oven to 375°F (190°C). Spread 1/4 cup of enchilada sauce over the bottom of a 9×13-inch baking dish.
- In a large skillet over medium-high heat, cook ground beef and diced onion until beef is no longer pink and onion is soft, about 6-7 minutes. Drain excess fat.
- Stir in minced garlic and taco seasoning; cook for 30 seconds until fragrant.
- Remove from heat. Mix in refried beans and 1/2 cup sour cream until creamy.
- Add 1 cup shredded cheese and 1/3 cup enchilada sauce; stir until cheese melts slightly.
- Spoon about 1/3 cup filling down the center of each tortilla, roll snugly, place seam-side down in prepared baking dish.
- Pour remaining enchilada sauce over rolled tortillas, coating all edges. Sprinkle remaining 1 cup cheese on top.
- Cover dish tightly with aluminum foil and bake for 20 minutes. Remove foil and bake another 10-12 minutes until cheese is bubbly and golden. Optionally broil for 1 minute for crispy edges.
- Let enchiladas rest 5 minutes before serving. Add optional toppings as desired.
Notes
Related posts:
 The Slow Cooker Cowboy Casserole That Saves Tired Weeknights (No Soggy Tots Allowed)
 Quick Lemon Ricotta Pasta for Busy Weeknights: Creamy, Bright, and on the Table in 20 Minutes
 Lemon Garlic Butter Baked Salmon in Foil That’s Ready in 25 Minutes — No Fuss, No Mess
 Lipton Onion Soup Meatloaf for Tuesday Nights: Moist, Savory, and the Only One You’ll Ever Need
 Kielbasa Sausage Cheesy Potato Casserole That Tastes Like Sunday Dinner — In Under an Hour
 Quinoa Chicken Sausage Bowls That Are Ready in 30 Minutes (And Actually Keep Well)