
Every zucchini boat I made for years came out watery. The bottoms were soggy. The filling slid off in a sad little heap. I’d stand at the counter eating the whole sorry tray with a spoon, wondering why something so simple looked so easy in pictures and turned into soup on my sheet pan.
Then I figured out the two steps I’d been skipping — salting the shells and giving them a head start in the oven — and everything changed. These ground beef zucchini boats come out with edges you can pick up with your fingers, a filling that stays exactly where it belongs, and a blanket of melted mozzarella that browns in spots. My kids ask for them all summer long, and that’s saying something for a vegetable that used to get hidden under napkins around here.
The short version: 25 minutes of hands-on work gets a sheet pan of cheesy, filling zucchini boats on the table in about 50 minutes, and they reheat like a dream.
I’ve made these 30-something times since June, and even Nora — my 19-year-old, who’s busy being a college art student in Savannah — will text me a picture of the sheet pan and ask if there’s any left.
- Serves: 4 as a main (2 boats each)
- Hands-On Time: 25 min | Total Time: 50 min
- Difficulty: Easy, even on a Tuesday night
- Cost per serving: ~$2.75
- Calories: ~550 per serving
- Dietary Notes: Naturally gluten-free if your marinara is; easy to make dairy-free
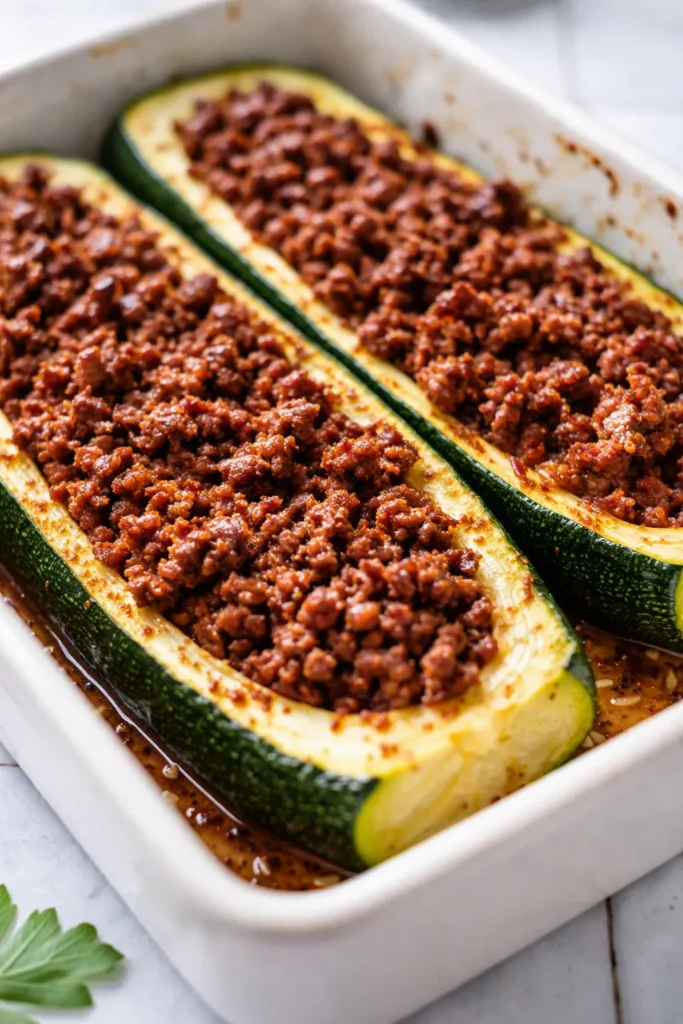
(Photo above: overhead shot of six zucchini boats on a white ceramic platter, their mozzarella tops browned in patches, a few torn basil leaves scattered around the edges, warm afternoon light coming in from the left.)
The Two Steps That Keep These From Turning to Mush
Here’s what I learned the slow way. Zucchini is mostly water. You already know that — it’s the whole joke about summer squash. But the fix is simpler than you’d think, and it’s not about cooking the zucchini to death or drowning it in breadcrumbs.
First, you salt the cut shells and let them rest. That draws the water out before it ever gets near the oven. You’ll see actual beads of moisture on the cut surface ten minutes later — like the side of a sweet tea glass on a July afternoon. Then you pat them dry and give the empty boats a 10-minute head start in a hot oven, cut-side up. That second step tightens the flesh just enough that it doesn’t collapse the minute the filling goes in.
Do those two things and you get a zucchini boat with actual structural integrity. Skip them and you get what I got for two years: a delicious filling floating in a pale green puddle. The filling matters, but the shell is the whole point of a boat.
Everything You Need (Plus a Few Notes From My Kitchen)
- 4 medium zucchini (about 8 inches long): You want them on the smaller side. Giant ones are full of seeds and water, and the texture turns grainy. If you find a few different sizes at the farm stand, use the skinnier ones — they hold up better.
- 1 pound ground beef (80/20): The 80/20 matters. You need a little fat for flavor, and you’re going to drain most of it off anyway. My husband tried it once with lean ground turkey and we both agreed it wasn’t the same — the beef gives the filling that deep, savory base.
- 1 small yellow onion, diced: Cooked down until sweet, it gives the filling something to hold onto and a softness that balances the meat.
- 3 cloves garlic, minced: This is the part that makes everyone wander into the kitchen asking what’s for dinner.
- 1 ½ cups marinara sauce: Use one you actually like eating cold on a spoon. It’s the backbone of the filling. My favorite is the one from the farm co-op with the little basil leaf on the label, but any good jarred sauce works.
- 1 cup cooked rice or quinoa: This is the stretcher that soaks up extra moisture and makes the filling feel like a real meal. Leftover rice from takeout night works perfectly — my kids have no idea I’m recycling it into dinner like a weird little hero.
- 1 ½ cups shredded mozzarella: Grate it yourself if you can. The pre-shredded stuff has starch on it that keeps it from melting into that stretchy, golden blanket. I know it costs an extra 90 seconds. I also know it’s the difference between a boat that looks like the photo and one that looks like a pale cap.
- ⅓ cup grated Parmesan: The salty, nutty note that makes everything taste more finished.
- 1 tablespoon olive oil: For brushing the shells before the pre-bake.
- 1 teaspoon Italian seasoning: Or a pinch each of dried oregano and thyme if you’re out.
- Salt and black pepper: Enough said.
- Fresh basil, for serving: Torn over the top at the very end. It’s not a garnish — it’s the smell of the whole dish waking up.
What to Pull Out Before You Start
- A rimmed baking sheet (the rim matters — there will be a little juice)
- A colander or a cooling rack that fits in your sink
- Paper towels (a whole stack — you’ll use them)
- A large skillet (12-inch is ideal)
- A small spoon for scooping — a grapefruit spoon with the serrated edge works wonders
- A bowl for the filling
Nothing fancy. If you don’t have a grapefruit spoon, a regular teaspoon works — just don’t dig too deep.
Let’s Make These Boats (Step by Step)
This goes fast once the oven’s hot, so read through once and lay out your ingredients. You’ve got this.
- Preheat and prep: Heat the oven to 375°F. Halve each zucchini lengthwise. Use your spoon to scoop out the seeds and a thin layer of the flesh, leaving a ¼-inch wall all the way around. Don’t dig too deep — you want a boat, not a canoe.
- Salt and rest: Sprinkle the cut sides of each shell with salt — a generous pinch per half. Place them cut-side up on a cooling rack set over a sink or bowl and let them rest for 10 minutes. You’ll see beads of water rising to the surface. That’s your proof — the water is leaving before it can ruin your dinner.
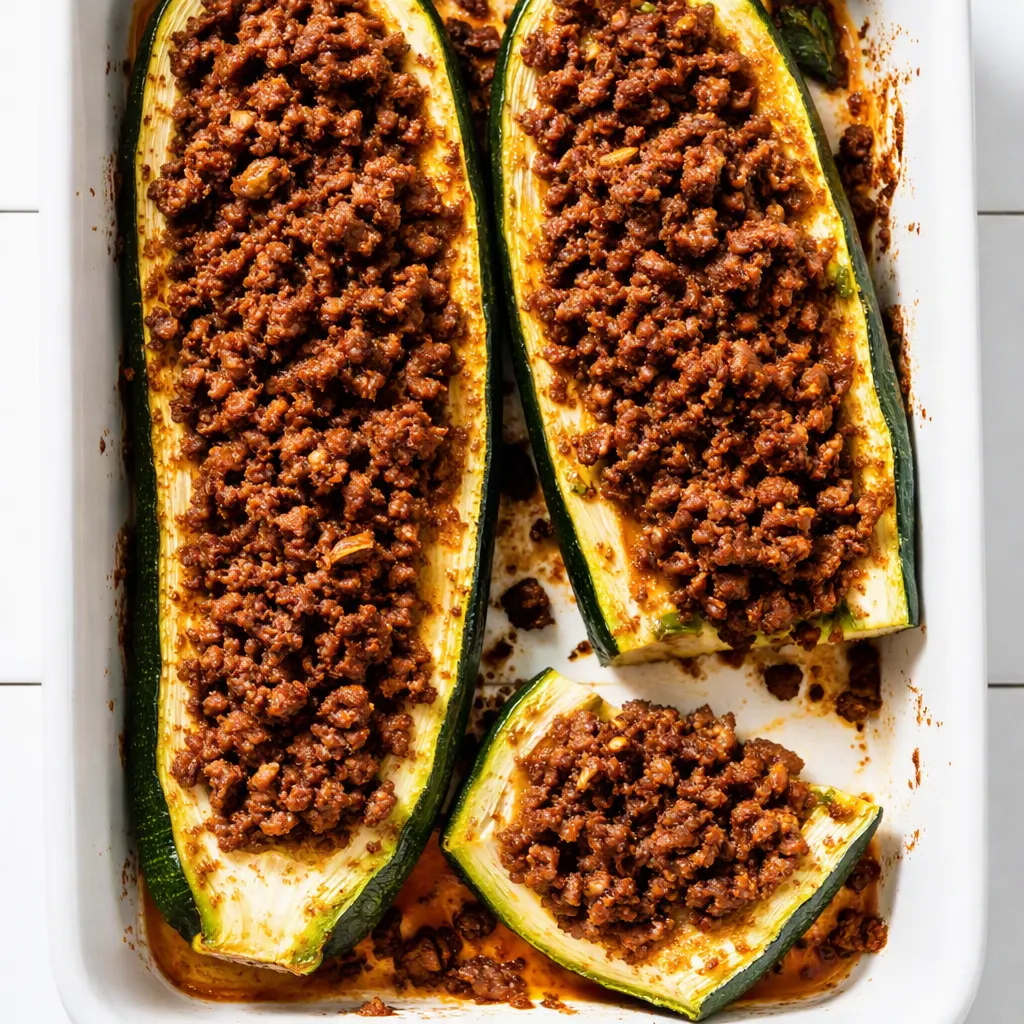
- Dry and pre-bake: Pat the shells dry with paper towels, pressing gently. Brush the cut sides and outsides with olive oil. Arrange them cut-side up on the baking sheet and bake for 10 minutes. The flesh will turn from raw green to a slightly deeper, more matte color. (📸 Photo tip: this is the step to photograph if you want to show the “before” — the pale flesh, the clean scooped hollow, the glisten of oil.)
- Brown the beef: While the shells pre-bake, heat a large skillet over medium-high heat. Add the ground beef and let it sit without moving for 2-3 minutes, until it browns on the bottom. Break it up with a spatula, add the onion, season with salt and pepper, and keep cooking until the onion is soft and translucent, about 5 minutes. Add the garlic and cook until fragrant, 30 seconds. That smell — browning beef and sweet onion — is the one that makes kids appear in the kitchen doorway unprompted.
- Drain and fill: Drain off the excess fat — I tilt the pan and blot it with a paper towel held in tongs. Return to the heat and stir in the marinara, the cooked rice, the Italian seasoning, and half the Parmesan. Cook for another 2-3 minutes so everything gets friendly and the sauce thickens slightly.
- Assemble the boats: Spoon the filling into the pre-baked shells, mounding it slightly. You want a generous pile — it’ll settle as it bakes. Top with the shredded mozzarella and the remaining Parmesan. (📸 Photo tip: this is your money shot moment — a side-angle close-up of the filling mounded high, the cheese piled like a snowcap, just before it goes in the oven.)
- Bake: Bake for 20-25 minutes, until the filling is bubbling around the edges and the mozzarella is melted and starting to brown in patches. If you want more color on top, switch the oven to broil for the last 2 minutes and watch it like a hawk — I learned that lesson the hard way over a tray of blackened cheese.
- Rest and serve: Let the boats sit for 5 minutes before serving. This is not the time to be impatient — the filling needs a minute to settle so it doesn’t slide off the shell. Sprinkle with torn basil and serve warm.
Make-Ahead Notes (Because Summer Evenings Should Be Easy)
These are genuinely great for a Sunday-afternoon assembly session. The filling holds and the shells keep their shape, which means you can get everything ready ahead of time and bake when your people are actually hungry. I’ll prep a double batch on Sunday afternoon — it takes about the same amount of effort as one — and we’re set until Wednesday.
- Fridge: Assemble the boats fully and store them covered in the fridge for up to 2 days. Bake as directed — you’ll probably need an extra 5 minutes since they’re starting cold.
- Freezer: Yes, but freeze before baking. Arrange the assembled raw boats in a single layer on a baking sheet until frozen solid, then transfer to a freezer bag. They’ll keep for up to 2 months. Bake from frozen at 375°F for about 30-35 minutes.
- Reheat: For leftovers, the oven is your friend — 350°F for 10 minutes keeps the shells from going limp. The microwave works in a pinch but it’ll soften the zucchini. I’ve done it. You’ll still eat it happily.
Things I Learned the Hard Way So You Don’t Have To
- Don’t skip the salting: I know it sounds like an annoying extra step — 10 minutes of waiting while dinner sits there. It’s not optional. Salting draws out the moisture that would otherwise pool on the sheet pan and steam the shells into mush. I tried skipping it exactly once, and my family ate soggy boats in polite silence.
- Keep your hollows shallow: The goal is a ¼-inch wall. If you scoop out too much flesh, the shell gets fragile and floppy. If you scoop too little, there’s no room for filling and you end up making zucchini toast topped with beef. Find the sweet spot and stop there.
- Don’t over-bake: The boats are done when the filling bubbles and the cheese melts. You want the zucchini tender but with a little life left — a fork should slide in easily, but the shell should still hold its shape when you lift it. Check them at 20 minutes and trust your eyes, not just the timer.
- If the top browns too fast, use foil, not a panic: Tent the tray loosely with foil if the cheese is getting too dark before the filling is bubbly. Even if you mess up the broil step a little and get some charred spots, they’ll taste like campfire dinner and nobody will complain. I’ve been there.
Swaps That Actually Work
- Dairy-free: Use dairy-free mozzarella shreds and skip the Parmesan, or add a tablespoon of nutritional yeast to the filling for that salty, nutty note. I made this for my nephew who can’t do dairy and he went back for seconds, which felt like a small personal victory.
- Ground turkey or chicken: Yes, but add a splash of olive oil to the skillet — lean poultry needs the help. The flavor is a little milder, so don’t skimp on the Italian seasoning.
- Spicy version: Add ½ teaspoon red pepper flakes to the filling, or use hot Italian sausage in place of the ground beef. My husband thinks spicy is the only correct version; my kids side with the mild one. I make two boats of each and everyone wins.
- Gluten-free: The recipe is naturally gluten-free as written — just double-check your marinara and use rice or quinoa instead of breadcrumbs, which I already do.
- Extra veggies: Grate half a carrot or a small handful of mushrooms into the browning beef. It disappears into the filling and adds vegetables your kids will never identify. I’ve done this thirty times and the only person who has ever noticed is me.
Questions I Get About These Boats All the Time
Q: My zucchini boats always turn out watery at the bottom. What am I doing wrong?
A: Ugh, I’ve been there — it’s the classic zucchini boat heartbreak. It’s almost always one of two things: you skipped the salting step, or your zucchini sat someplace steamy before baking. Give them the full 10-minute salt rest, pat them very dry, and give them that head start in the oven before the filling goes in. Do those three things and the water has nowhere to go. You’ve got this next time.
Q: Can I make this with ground turkey instead of ground beef?
A: Absolutely. Just add a little olive oil to the skillet before you add the turkey — it’s leaner than beef and needs the fat to brown properly. The filling will be milder, so go a little heavier on the Italian seasoning. I’ve tested this with turkey and it works great.
Q: How long do these last in the fridge? Can I freeze them?
A: Baked boats keep in a covered container in the fridge for up to 3 days — the flavor actually settles overnight, and my leftover lunch situation is always improved by their presence. For freezing, assemble the boats raw, freeze them solid on a tray, then bag them. They’ll keep about 2 months, and you can bake from frozen at 375°F for 30-35 minutes. The oven is the reheating MVP — the microwave turns the shell soft.
Q: What do you serve with these?
A: We do a simple green salad with lemon vinaigrette to cut the richness, or a baguette with good butter if it’s that kind of night. On weekends I make a big pan of garlicky green beans to go alongside. But honestly? They’re a full meal on their own — my youngest does not understand the concept of side dishes past the first one.
More Recipes My Family Makes on Repeat
If you liked this one, here are a few others that get the same reaction at our table:
- Cheesy Ground Beef and Rice Skillet — one pan, 20 minutes, and the leftover situation is something I actively look forward to.
- Summer Vegetable Stuffed Peppers — the same stuffed-vegetable energy for the peppers in your CSA box.
- Easy Weeknight Meat Sauce — the sauce I make when I want the whole house to smell like Sunday without the four-hour simmer.
These boats are the kind of dinner that makes summer feel like summer — the kitchen is warm, the basil is from the garden, and there’s a sheet pan involved that makes cleanup almost suspiciously easy. Make them on a Tuesday. Save one for tomorrow’s lunch. Your future self will understand why.
If you try them, drop a comment below — I love hearing how it goes for you, especially the part where your kids ask for them again.
📌 Ground beef zucchini boats with a golden mozzarella top and a filling that stays put — save this for your next busy summer weeknight when you want something that tastes like real dinner without real effort.
Ground Beef Zucchini Boats That Never Get Soggy – the Summer Dinner My Kids Actually Ask For
Equipment
- Rimmed Baking Sheet
- Cooling Rack or Colander
- Paper towels
- Large Skillet (12-inch)
- Small Spoon or Grapefruit Spoon
- Mixing Bowl
Ingredients
- 4 medium zucchini (about 8 inches long)
- 1 pound ground beef (80/20)
- 1 small yellow onion, diced
- 3 cloves garlic, minced
- 1 1/2 cups marinara sauce
- 1 cup cooked rice or quinoa
- 1 1/2 cups shredded mozzarella
- 1/3 cup grated Parmesan
- 1 tablespoon olive oil
- 1 teaspoon Italian seasoning
- Salt and black pepper
- Fresh basil, for serving
Instructions
- Preheat the oven to 375°F. Halve each zucchini lengthwise and scoop out the seeds and a thin layer of flesh, leaving a 1/4-inch wall all the way around. Don’t dig too deep – you want a boat, not a canoe.
- Sprinkle the cut sides generously with salt and place them cut-side up on a cooling rack set over a sink or bowl. Rest for 10 minutes until beads of moisture appear, then pat dry with paper towels.
- Brush the shells with olive oil, arrange them cut-side up on a rimmed baking sheet, and bake for 10 minutes until the flesh turns slightly deeper and matte.
- While the shells pre-bake, heat a large skillet over medium-high heat. Add the ground beef and leave it undisturbed for 2-3 minutes until browned on the bottom. Break it up, add the onion, season with salt and pepper, and cook until the onion is soft and translucent, about 5 minutes. Add the garlic and cook for 30 seconds until fragrant.
- Drain off the excess fat. Stir in the marinara, cooked rice, Italian seasoning, and half the Parmesan. Cook for 2-3 minutes until the sauce thickens slightly.
- Spoon the filling into the pre-baked shells, mounding it slightly, and top with the shredded mozzarella and remaining Parmesan.
- Bake for 20-25 minutes until the filling bubbles around the edges and the mozzarella is melted and browning in patches. For extra color, broil for the last 2 minutes, watching closely.
- Let the boats rest for 5 minutes before serving so the filling settles, then sprinkle with torn basil and serve warm.
Notes
Related posts:
 The Slow Cooker Cowboy Casserole That Saves Tired Weeknights (No Soggy Tots Allowed)
 Quick Lemon Ricotta Pasta for Busy Weeknights: Creamy, Bright, and on the Table in 20 Minutes
 Lemon Garlic Butter Baked Salmon in Foil That’s Ready in 25 Minutes — No Fuss, No Mess
 Lipton Onion Soup Meatloaf for Tuesday Nights: Moist, Savory, and the Only One You’ll Ever Need
 Kielbasa Sausage Cheesy Potato Casserole That Tastes Like Sunday Dinner — In Under an Hour
 Quinoa Chicken Sausage Bowls That Are Ready in 30 Minutes (And Actually Keep Well)