
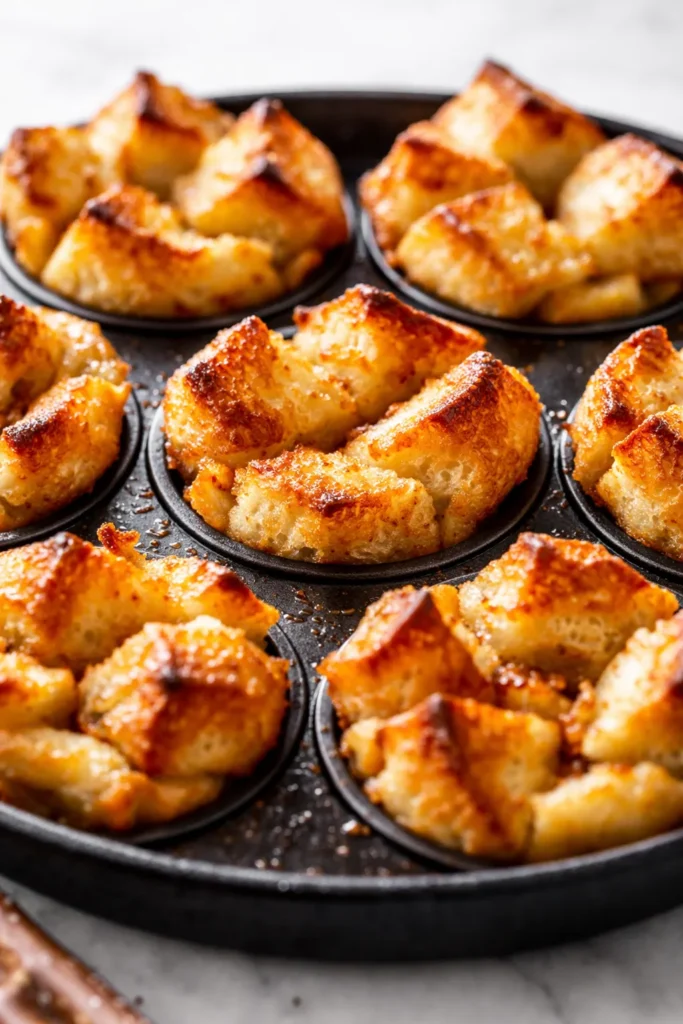
The first time I made these, Nora stood at the oven door watching them puff up like little golden pillows. That was three years ago, and they’re still the only breakfast I can make on a school morning that gets her out of bed before the second alarm. These aren’t soggy casseroles or dry bread cubes—they’re tender, custard-filled cups with caramelized edges that taste like the best part of a French toast breakfast, minus the standing at the stove flipping slices.
The short version: Stale bread cubes, a quick custard, a hot oven, and 20 minutes to a breakfast my kids ask for by name.
I’ve tested this with brioche, challah, and plain sandwich bread when I was out of the good stuff—every single time, they disappeared before I could pour my own coffee. The trick is drying the bread first, and I learned that one the hard way after a batch of soggy cups that went straight to the chickens.
- Serves: 12 cups (6 hungry people, or 4 very happy ones)
- Hands-On Time: 15 min | Total Time: 35 min
- Difficulty: Easy — your kids can help whisk the custard
- Cost per serving: ~$0.65
- Calories: ~210 per cup
- Dietary Notes: Can be made dairy-free with simple swaps
(Photo above: overhead shot of a basket of golden French toast cups on a rustic wooden table, a small pitcher of warm maple syrup in the corner, morning light streaming from the left. The edges are caramelized and dark in spots, the tops dusted with a light snowfall of powdered sugar.)
The Secret to Custard Cups That Aren’t Soggy
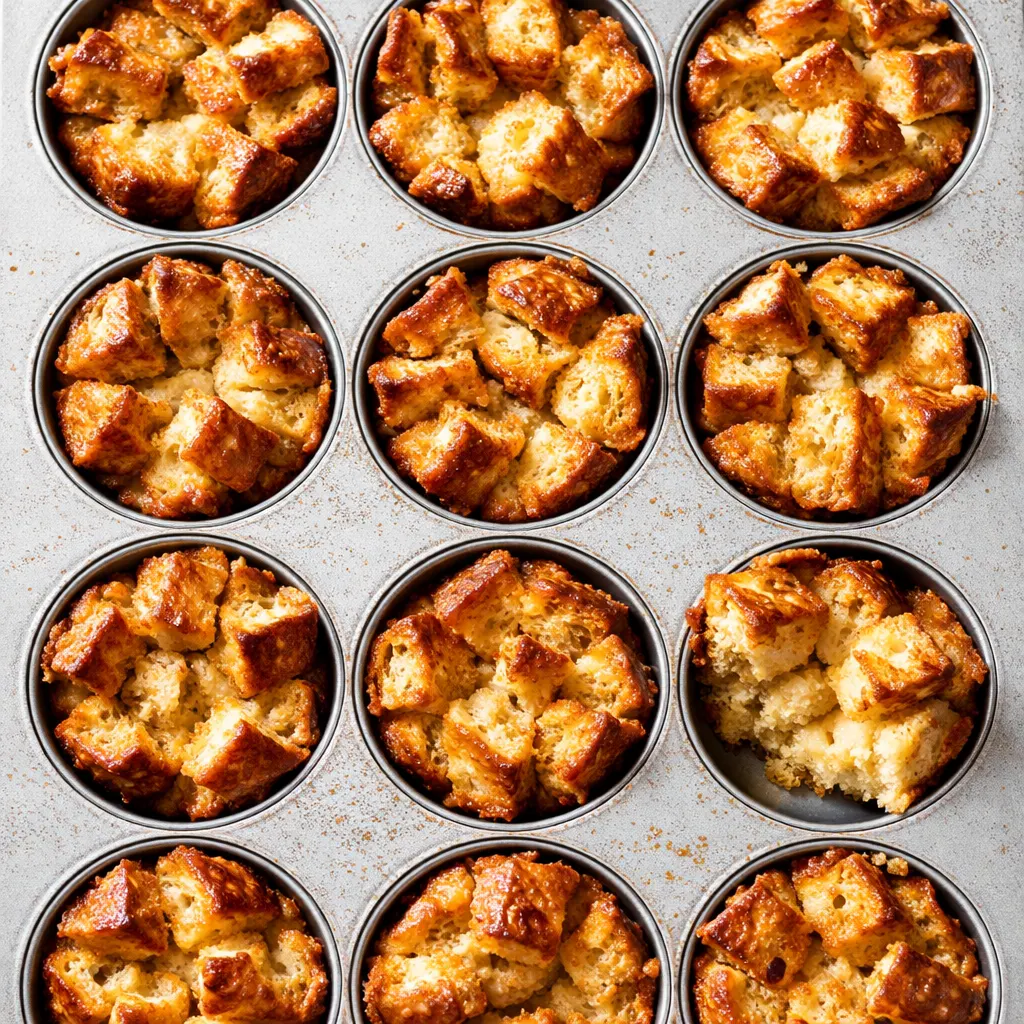
The problem with most baked French toast casseroles is the dreaded soggy middle. These cups solve it three ways. First, the bread-to-custard ratio is precise — enough liquid to soak through, but not so much that it pools at the bottom. Second, you toast the bread cubes before they go into the tin. That extra five minutes of drying them out in the oven is the insurance policy you didn’t know you needed. Third, baking them in a hot oven in individual cups means every edge gets exposed to direct heat. You get more golden, caramelized surface area per bite. Crisp outside, soft custard inside. That’s the whole goal.
The Few Things You’ll Need (and Why They Matter)
- Bread (6 cups, cubed, about 8 oz): Stale or day-old brioche or challah is best. It soaks up the custard like a sponge and holds its shape. Plain sandwich bread works, but it won’t be as rich or hold up as well. Nora used to pick out the raisins I added to the original recipe, so I left them out. You can add them back in if your family likes them.
- Eggs (4 large): The structure. Room temperature if you remember, but straight from the fridge works too.
- Whole Milk (1 cup) & Heavy Cream (1/2 cup): The cream makes it luscious. You can use all milk, but the texture won’t be quite as luxurious. I’ve used oat milk for dairy-free friends and it still works, just slightly less tender.
- Maple Syrup (1/4 cup) & Brown Sugar (2 tbsp): Maple for flavor, brown sugar for deeper caramelization. Don’t skip the brown sugar — it’s what gives those dark, crispy edges.
- Vanilla Extract (1 tsp) & Cinnamon (1 tsp): The classic duo. Use real vanilla if you have it. I grate a little fresh nutmeg on top sometimes, the way Marta did.
- Butter (for the pan): Don’t skip it. It’s the flavor base and the release agent. I use salted butter because that’s what I keep on the counter.
What to Pull Out of the Drawer
- 12-cup standard muffin tin — nonstick or well-seasoned
- Baking sheet — for drying the bread cubes
- Large mixing bowl — for whisking the custard
- Whisk — a fork works in a pinch but a whisk is faster
- Ice cream scoop or large spoon — for even filling without splashing custard everywhere
Here’s How I Do It — Step by Step
This comes together fast, so I like to get the bread in the oven to dry while I whisk the custard. Read through once before you start and you’ll fly through it.
Prep and Preheat: Set your oven to 375°F. Butter your muffin tin generously — don’t be shy here, it’s flavor and non-stick insurance.
- Cube and toast the bread: Cut the bread into 1-inch cubes. Spread them on a baking sheet and toast for 5-7 minutes, until dry but not brown. This is the step that keeps them from getting soggy. Don’t skip it. (📸 Photo tip: The bread should look slightly dried out, like day-old croutons. No color needed, just a little stiffness.)
- Make the custard: While the bread toasts, whisk the eggs, milk, cream, maple syrup, brown sugar, vanilla, and cinnamon in a large bowl until smooth. You’re looking for a uniform pale tan color — no streaks of egg white or sugar settled at the bottom. (📸 Photo tip: The custard should be smooth and homogenous, like a thin pancake batter.)
- Fill the cups: Divide the toasted bread cubes evenly among the 12 cups. Pour the custard evenly over the bread. Press the bread down gently with the back of your scoop or a spoon so it absorbs the liquid. The bread should look soaked but not swimming.
- Rest: Let them sit for 10 minutes (or refrigerate overnight if you’re prepping ahead). This rest is when the bread really drinks in the custard.
- Bake: Bake for 18-22 minutes, until the tops are golden brown and the center is set. A knife inserted in the middle should come out clean, or the cups should spring back when pressed gently.
- Cool and release: Let them cool in the pan for 5 minutes. Run a knife around the edges to release them. The butter should have done most of the work for you.
How I Make These for the Week (Or Freeze for Later)
This is the kind of breakfast that makes you feel like you have your life together. I make a double batch on Sundays, and we eat them all week long. They reheat beautifully, which is more than I can say for most breakfast bakes.
- Fridge: Store in an airtight container for up to 4 days. Reheat in the toaster oven or air fryer at 350°F for 5-7 minutes to crisp up the edges. The microwave works in a pinch but it makes the edges soft — I don’t recommend it.
- Freezer: Yes! Freeze in a single layer on a baking sheet, then transfer to a freezer bag. They keep for 2 months. Reheat straight from frozen in the oven at 350°F for 10 minutes.
- Reheat: Please don’t microwave them. I know it’s tempting. It makes them rubbery. The toaster oven or air fryer is worth the 5 extra minutes.
Things I Learned the Hard Way (So You Don’t Have To)
- Dry the bread thoroughly: This is the difference between a custard cup and a bread pudding that’s too wet. Don’t skip the toasting step. Even if your bread seems stale, give it the 5 minutes in the oven. It’s insurance.
- Fill the cups evenly: Use a cookie scoop or a measuring cup to divide the bread and custard evenly. The cups bake at the same rate if they’re the same size. Uneven cups mean some are done and some are still liquid in the center — I’ve been there.
- Don’t overbake: They finish as they cool. Pull them out when the center is just set — it will continue to cook in the hot pan. A slight jiggle is better than a dry, rubbery cup.
- Let them rest: That 5-minute rest in the pan is non-negotiable. It sets the structure and makes them release cleanly from the tin. If you try to pull them out immediately, they’ll fall apart.
Ways to Make Them Your Own (My Family’s Favorites)
- Dairy-Free: Use oat milk or almond milk and vegan butter. The texture will be slightly less custardy, but still delicious. I’ve tested this and it holds up well.
- Kid-Friendly: My kids love when I add mini chocolate chips and a pinch of sea salt on top before baking. It disappears faster than I can get them to the table.
- Savory Version: Omit the maple syrup, brown sugar, and vanilla. Add 1/2 tsp salt, 1/4 tsp black pepper, 1/2 cup shredded Gruyère, and 1/4 cup cooked bacon bits. A grown-up breakfast that feels decadent.
- Berry Lover’s: Gently fold 1 cup of fresh blueberries or raspberries into the bread cubes before adding the custard. The berries burst and create little jammy pockets.
- Spiced: Add 1/4 tsp cardamom and a pinch of cloves along with the cinnamon. It makes the kitchen smell like a holiday morning.
Questions I Get All the Time About These Cups
Q: Why did my cups turn out soggy?
A: Usually it’s one of two things: the bread wasn’t dried out enough, or there was too much custard. Make sure you’re using stale or toasted bread, and don’t overfill the cups with liquid. The bread should absorb it, not float in it.
Q: Can I use regular sandwich bread?
A: You can, but the texture will be softer and less rich. Brioche or challah truly makes a difference here. If using sandwich bread, definitely toast it well and consider adding an extra egg to the custard for structure.
Q: Can I prep these the night before?
A: Yes! Assemble them completely in the muffin tin, cover tightly with plastic wrap, and refrigerate overnight. Bake straight from the fridge, adding 3-5 extra minutes to the time. This is my preferred method for holiday mornings.
Q: What do you serve with these?
A: We love them with a side of crispy bacon and fresh fruit. For brunch parties, I set out a little dish of warm maple syrup, a dusting of powdered sugar, and some fresh berries so everyone can customize their own cup. They’re also great on their own for a quick breakfast grab-and-go.
More Recipes My Family Makes on Repeat
If you liked these, here are a few others that get the same reaction at our table:
- High-Protein Overnight Oats — My go-to for busy mornings when I need something hearty and portable.
- Egg Muffins (High Protein Meal Prep) — The savory counterpart to these sweet cups, perfect for brunch.
- [INTERNAL LINK PLACEHOLDER: Overnight French Toast Casserole] — When you need the big-batch version for a crowd.
These French toast cups have gotten us through school mornings, holiday brunches, and lazy Sunday breakfasts more times than I can count. They’re the kind of recipe that feels like a win for everyone — the cook gets a 15-minute prep, and the eaters get something that tastes like it took much longer. I hope they find a place in your kitchen, too. If you make them, let me know in the comments — I love hearing how it goes for you.
📌 Easy French toast cups recipe with a soft custard center and golden edges — save this for your next lazy Sunday breakfast or holiday brunch!
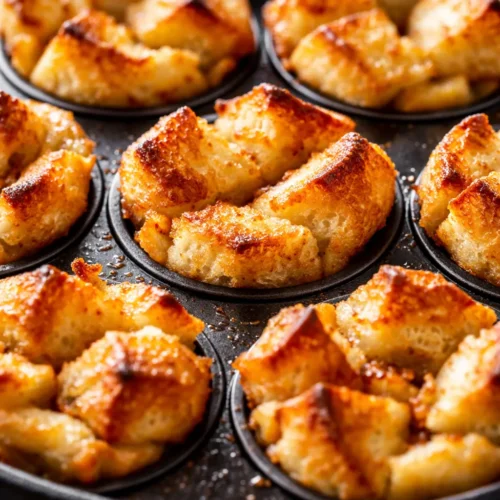
Easy French Toast Cups
Equipment
- 12-cup standard muffin tin
- Baking Sheet
- Large Mixing Bowl
- Whisk
- Ice cream scoop or large spoon
Ingredients
Bread
- 6 cups stale or day-old brioche or challah, cubed (about 8 oz)
Custard
- 4 large eggs
- 1 cup whole milk
- 1/2 cup heavy cream
- 1/4 cup maple syrup
- 2 tbsp brown sugar
- 1 tsp vanilla extract
- 1 tsp cinnamon
For the pan
- butter, for greasing the muffin tin
Instructions
- Preheat the oven to 375°F. Butter a 12-cup standard muffin tin generously.
- Cube the bread into 1-inch pieces. Spread on a baking sheet and toast for 5-7 minutes, until dry but not browned.
- While the bread toasts, whisk together the eggs, milk, cream, maple syrup, brown sugar, vanilla, and cinnamon in a large bowl until smooth and uniform in color.
- Divide the toasted bread cubes evenly among the muffin cups. Pour the custard over the bread, dividing evenly. Press the bread down gently with a spoon so it absorbs the liquid. The bread should look soaked but not swimming.
- Let the cups rest for 10 minutes (or refrigerate overnight if prepping ahead). This allows the bread to fully absorb the custard.
- Bake for 18-22 minutes, until the tops are golden brown and the center is set. A knife inserted in the middle should come out clean, or the cups should spring back when pressed gently.
- Cool in the pan for 5 minutes. Run a knife around the edges to release. Serve warm with maple syrup, powdered sugar, or fresh berries.
Notes
Related posts:
 The Super Simple Chocolate Cake for Dad That Disappears in Minutes
 Breakfast Potatoes That Actually Get Crispy (Not Soggy) — Finally
 The Iced Coffee Float That’s Better Than the Coffee Shop Version — Ready in 5 Minutes
 Blueberry Banana Bread: The Trick That Keeps the Berries Suspended (Not Sunk to the Bottom)
 The Moistest Chocolate Chip Banana Bread (I’ve Made This 80 Times to Prove It)
 Brown Butter Grilling Cake: The Smoky, Tender Dessert You Didn’t Know You Needed