
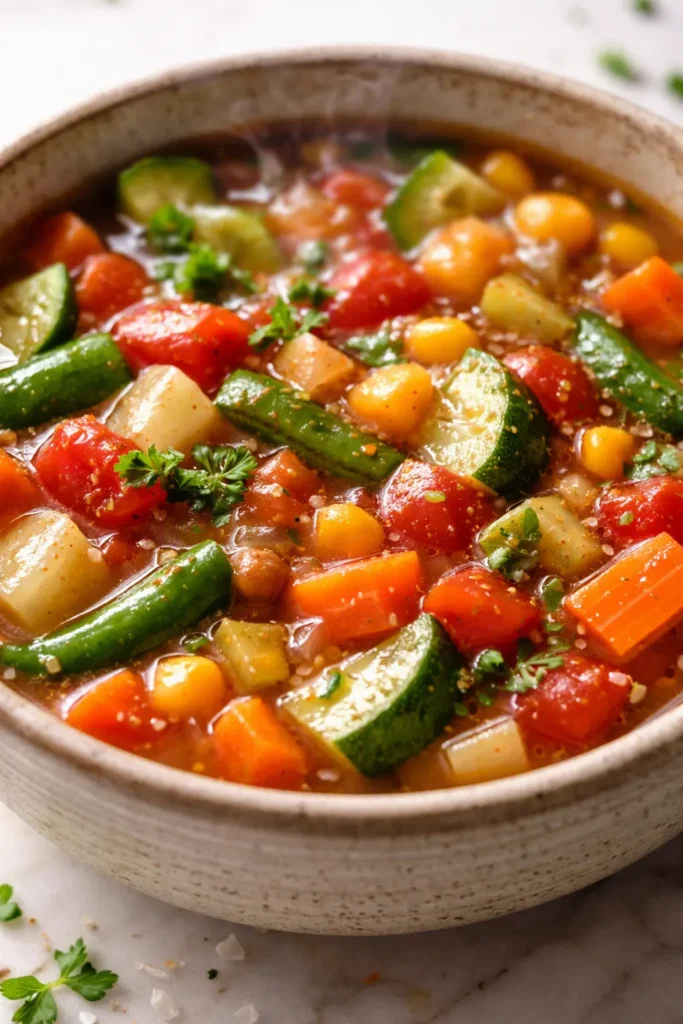
Three bowls in one sitting. That’s what my kids put away of this vegetable soup on a cold school night — and it’s not because I’ve tricked them into eating something healthy. This is the vegetable soup that tastes like it simmered all afternoon when it’s really just 15 minutes of hands-on cooking and 40 minutes from start to bowl. Everything happens in one big pot, so the kitchen’s clean before the school email thread even stops buzzing.
The short version: This comes together in one pot in 40 minutes, and my kids have never once left leftovers.
I’ve made this soup roughly 40 times over the past three winters, so I know exactly which shortcuts are safe and which ones leave the broth tasting thin. The version I’m sharing today is the one I come back to every single time — it’s cozy, it’s generous, and it uses up whatever’s sitting in the crisper drawer.
- Serves: 6 as a main (or 8 as a starter)
- Hands-On Time: 15 min | Total Time: 40 min
- Difficulty: Easy, even on a school night
- Cost per serving: ~$1.50
- Calories: ~220 per serving
- Dietary Notes: Naturally vegetarian, easily vegan and gluten-free
(Photo above: overhead shot of the finished soup in a big white enamel pot, steam rising, with a ladle resting on the rim and a thick slice of crusty bread on a wooden board beside it — golden afternoon light coming in from the left.)
The Trick That Makes It Taste Like It Simmered All Day
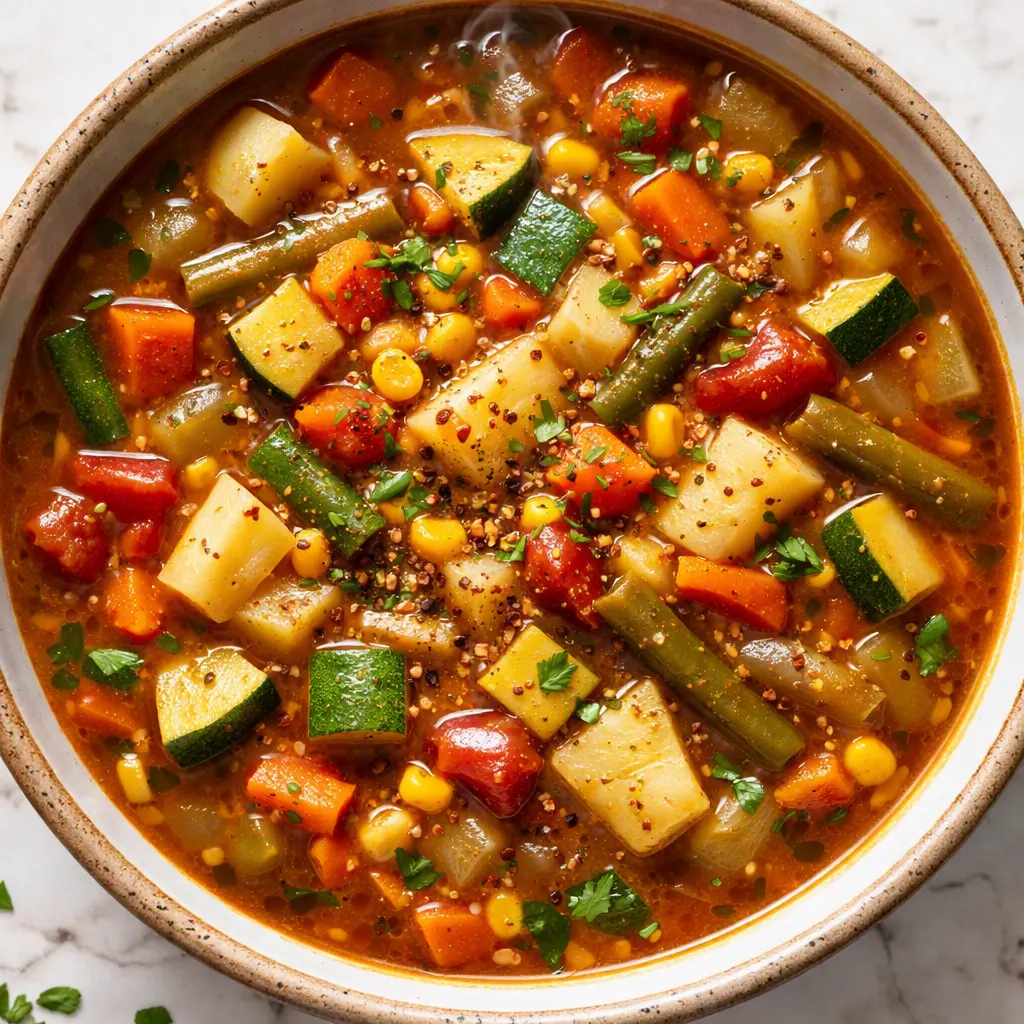
There are two things that set this soup apart from the watery versions that gave vegetable soup a bad reputation. The first is browning the tomato paste. You cook it with the onions and garlic until it turns from bright red to a deep, rusty brick color and begins to stick to the bottom of the pot. That little bit of caramelization gives the whole pot a rich, almost roasted flavor that you just can’t get by dumping tomatoes in and walking away.
The second is a Parmesan rind. I keep the leftover rinds from every wedge of Parmesan in a bag in the freezer and drop one into the pot while it simmers. It melts down and adds a salty, nutty depth that makes the broth taste like it’s been working all day. The first time I made it with the rind, my husband walked into the kitchen and asked what I’d ordered in for dinner. He wasn’t joking.
The result is a vegetable soup that’s silky, savory, and deeply satisfying — the kind where people reach for a second bowl even after they’ve said they’re full.
What Goes In (Plus My Honest Notes)
- 2 tbsp olive oil: Regular olive oil is perfect here — no need for the fancy extra-virgin stuff since we’re heating it up. My grandmother used to say the oil is what makes soup “stick to your ribs,” and she wasn’t wrong.
- 1 large yellow onion, diced: The foundation of everything. Cook it low and slow and it turns sweet instead of sharp.
- 3 medium carrots, peeled and sliced into half-moons: Carrots quietly make the broth taste sweet. Cut them thin so they soften in the 40 minutes. My daughter picks around the carrots but still drinks every drop of the broth — I’ll take that as a win.
- 2 celery stalks, chopped: You won’t taste celery on its own, but the soup feels flat without it. It’s the background singer that makes the whole harmony work.
- 3 cloves garlic, minced: Fresh garlic matters here. The jarred stuff will survive in an emergency, but fresh is a completely different world.
- 2 tbsp tomato paste: The backbone of this whole pot. It gets browned with the aromatics — that’s the step that makes the broth taste deep instead of thin.
- 1 can (14.5 oz) diced tomatoes with their juices: Fire-roasted if you can find them — they add a smoky note that my husband caught in one bite, though the kids never noticed a thing.
- 3 medium Yukon Gold potatoes, diced: These hold their shape beautifully and make the soup feel like an actual meal. I rarely peel them — the skins add texture and nobody has ever minded.
- 1 cup green beans, trimmed and cut into 1-inch pieces: Fresh or frozen both work perfectly. If they’re frozen, toss them right in — no thawing needed.
- 1 cup frozen corn: Little pops of sweetness in every spoonful. I always keep a bag in the freezer just for this soup.
- 1 cup frozen peas: These go in at the very end so they stay bright green and sweet. Overcooked peas turn gray and mushy, and nobody wants that.
- 5 cups vegetable broth: A good broth makes a good soup, so use one you actually like the taste of. I’ve used chicken broth when that’s what was already open — a little richer, still wonderful.
- 1 Parmesan rind (about 2 inches): That end piece you usually toss? Freeze it and drop it in the soup. It works small miracles.
- 1 tsp dried thyme: Or swap in 1 teaspoon Italian seasoning — both are lovely.
- 1 bay leaf: Easy to forget, but it adds a subtle herbaceous note you’ll genuinely miss if it’s gone.
- Salt and black pepper: Season at the end, not the beginning.
- 1 tbsp butter (optional but do it): Stirred in at the end, it makes the broth glossy and silky. I know it sounds strange for vegetable soup. Just try it once and you’ll understand.
What to Pull Out Before You Start
- A large heavy-bottomed pot or Dutch oven — mine is a 6-quart enameled cast iron, and it’s perfect for this
- A wooden spoon or silicone spatula for scraping up the browned bits
- A chef’s knife and cutting board — my trusty 8-inch chef knife does all the work
- A ladle for serving
- Measuring cups and spoons
One quick note: a vegetable peeler is nice for the carrots, but I skip it half the time and just scrub them well.
Here’s How I Do It
This goes fast once the chopping is done, so give everything a rough chop before you turn on the stove. Prep first, then cook — it makes the whole thing feel like a breeze.
- Heat the oil: Warm the olive oil in your pot over medium heat. It’s ready when you tilt the pot and the oil shimmers — about 60 seconds. (📸 Photo tip: Look for faint ripples on the oil’s surface — that’s your signal to move on.)
- Cook the aromatics: Add the onion, carrots, and celery and stir. Cook for 5–7 minutes until the onion is translucent and the carrots are just starting to soften at the edges. You’re not looking for any browning here — just sweet, tender vegetables.
- Add the garlic and tomato paste: Stir in the garlic, then push the vegetables to the sides of the pot and drop the tomato paste into the middle. Let it sizzle for about 60 seconds, then stir it all together and keep cooking for 2–3 minutes until the paste darkens from bright red to brick red and starts to stick just a little to the bottom of the pot. (📸 Photo tip: Watch for the color change — bright red to deep rusty red — that’s when you know it’s ready for the liquid.)
- Deglaze the pot: Pour in the diced tomatoes with their juices and stir, scraping up every browned bit from the bottom — that’s where a huge part of the flavor lives. Then add the potatoes, green beans, corn, broth, Parmesan rind, thyme, and bay leaf. Stir everything together, bring it to a boil, then drop the heat to low, cover, and let it simmer for 20 minutes. (If I’m really tired, this is where I set a timer and actually sit down for the first time all day.)
- Add the peas: After 20 minutes, the potatoes should be fork-tender — spear one with a fork and it should slide right off. Stir in the frozen peas and let everything cook uncovered for 5 more minutes. They just need to warm through and turn bright green.
- Finish with butter and season: Fish out the bay leaf and the Parmesan rind (it softens as it simmers, so don’t worry if part of it has dissolved — that’s pure flavor). Stir in the butter. Taste the broth and add salt and pepper — I usually start with 1 teaspoon of salt and ½ teaspoon of pepper, then adjust from there.
- Rest and serve: Let the soup sit off the heat for 5 minutes before ladling it out. This step matters more than you’d think — it lets all the flavors settle into each other. Serve with crusty bread or a good grilled cheese.
Sunday Prep = Stress-Free School Nights
This soup is basically built for meal prep. I make a double batch on Sundays and we’re set for lunches until Wednesday. It tastes even better on day two, so don’t stress about eating it all fresh — the flavors keep deepening in the fridge.
- Fridge: Store in airtight containers for up to 5 days. Reheat gently on the stove or in the microwave — the potatoes soften a little by day four, but the broth stays incredible.
- Freezer: Yes, this soup freezes beautifully for up to 3 months. Cool it completely, then scoop it into freezer bags or quart containers, leaving an inch of headroom for expansion.
- Reheat: Thaw overnight in the fridge, then warm on the stove over medium-low. The microwave works in a pinch — just cover it so the splatter doesn’t paint your microwave walls (I speak from experience).
Things I Wish I’d Known the First Time
- Don’t skip the tomato paste browning: This tiny step is the difference between a rich, layered broth and a thin, disappointing one. It takes two extra minutes. I learned this the hard way after too many pots that tasted vaguely like watered-down canned tomatoes.
- Salt at the end, always: If you salt the soup at the beginning, it tastes flat and you’ll end up needing more salt than anyone actually wants. Season after the simmer, when the flavors are already bright and clear.
- Keep a bag of Parmesan rinds in the freezer: Every time you finish a wedge of Parmesan, toss the rind in a zip-top bag and freeze it. Then you’re always ready for soups, beans, and marinara. Future you will be genuinely grateful.
- Don’t over-stir: Let the soup bubble gently between stirs — every 5 minutes is plenty. Too much stirring breaks down the potatoes and turns them mushy. If you want that chunkier, heartier texture, give it some space.
- You can’t wreck this: I’ve browned the tomato paste too long, skipped the garlic entirely, and once forgot the potatoes completely. Every single time, my family still ate it happily and nobody said a word. Even if you mess up a step, it will still be good soup.
Swaps That Actually Work
- Vegan: Swap the butter for olive oil or your favorite plant-based butter and skip the Parmesan rind (or use a vegan parm-style rind if you can find one). Everything else stays exactly the same and it’s still wonderful.
- Gluten-Free: This soup is naturally gluten-free. Just double-check your broth and tomato paste labels — some brands sneak in wheat. My sister with celiac eats this every time she visits.
- Add protein: Toss in a drained can of cannellini beans or a couple of cups of shredded rotisserie chicken. My husband stirs a handful of cooked pasta into his bowl at the end — he’s a monster and I love him.
- Raid the crisper drawer: Zucchini and summer squash go in for the last 10 minutes so they don’t turn to mush. Bell peppers can go in with the potatoes. Kale or spinach can be stirred in at the very end until just wilted — this is how I use up whatever my garden gives me in August.
- Spicy, grown-up version: Add a pinch of red pepper flakes with the garlic. My nephew sticks to the mild version, but my husband and I add the flakes to our bowls after serving — best of both worlds.
Questions I Get About This Recipe All the Time
Q: Why did my potatoes turn out mushy?
A: Ugh, I’ve been there. It’s usually one of two things — you simmered too fast, or you cut the potatoes too small. Keep the soup at a gentle bubble, definitely not a rolling boil, and stick to even 1-inch chunks. They should hold their shape beautifully. And even if they don’t, the soup still tastes amazing, so don’t stress over it.
Q: Can I use fresh tomatoes instead of canned?
A: Yes! Use about 4 medium ripe tomatoes, diced, and add them in with the broth. They’ll need the full 20 minutes to break down. Canned diced tomatoes give a more consistent result year-round, but fresh is gorgeous in the summer — I make this with garden tomatoes at least five times every August.
Q: How long does this soup last? Can I freeze it?
A: It keeps in the fridge for up to 5 days in an airtight container, and it freezes beautifully for up to 3 months. One heads-up: potatoes get a little softer after freezing, so if you’re planning to freeze a big batch, you could add the potatoes fresh when you reheat. But honestly, I freeze it as-is every time and nobody has ever complained.
Q: What do you serve with this vegetable soup?
A: In our house, it’s either a grilled cheese on sourdough or a hefty slice of crusty bread slathered with salted butter. My kids also get unreasonably excited about oyster crackers — they pour them in like it’s a sport. And many nights, the soup alone is plenty, so I serve it as the whole dinner and call it a win.
More Recipes My Family Makes on Repeat
If this one landed in your rotation, here are a few more that earn the same spots at our table:
- [INTERNAL LINK PLACEHOLDER: Creamy Tomato Soup] — The one my kids request for every single snow day, no exceptions.
- [INTERNAL LINK PLACEHOLDER: Chicken and Wild Rice Soup] — An easy weeknight version that tastes like it came from a cozy café, and it freezes perfectly.
- [INTERNAL LINK PLACEHOLDER: Slow Cooker Minestrone] — For the days when you want dinner ready the second you walk through the door.
This is the soup I make when the air turns crisp and my kids come in from the bus with red cheeks and hungry smiles. It’s warm, it’s forgiving, and it’s exactly what a busy weeknight needs — a bowl of comfort that doesn’t ask you to do anything fancy.
If you try it, drop a comment below and let me know how it went — I genuinely love hearing which variations your family loved. And tag me on Pinterest or Instagram so I can see your beautiful bowls of soup.
📌 This one-pot vegetable soup recipe tastes like it simmered all day but takes just 40 minutes — save it for your next cold-weather weeknight dinner.

Vegetable Soup That Doesn’t Taste Like Diet Food — Finally
Equipment
- Large heavy-bottomed pot or Dutch oven
- Wooden spoon or silicone spatula
- Chef’s knife and cutting board
- Ladle
- Measuring Cups and Spoons
Ingredients
Aromatics & Base
- 2 tbsp olive oil
- 1 large yellow onion, diced
- 3 medium carrots, peeled and sliced into half-moons
- 2 stalks celery, chopped
- 3 cloves garlic, minced
- 2 tbsp tomato paste
Soup & Vegetables
- 1 can (14.5 oz) diced tomatoes with their juices
- 3 medium Yukon Gold potatoes, diced
- 1 cup green beans, trimmed and cut into 1-inch pieces
- 1 cup frozen corn
- 1 cup frozen peas
- 5 cups vegetable broth
- 1 Parmesan rind (about 2 inches)
- 1 tsp dried thyme
- 1 leaf bay leaf
- Salt and black pepper, to taste
- 1 tbsp butter (optional but recommended)
Instructions
- Heat the oil: Warm the olive oil in your pot over medium heat until it shimmers, about 60 seconds.
- Cook the aromatics: Add the onion, carrots, and celery. Cook for 5–7 minutes until the onion is translucent and the carrots start to soften at the edges.
- Add the garlic and tomato paste: Stir in the garlic, then push the vegetables to the sides and let the tomato paste sizzle for about 60 seconds. Stir and cook for 2–3 minutes until the paste turns brick red and begins to stick slightly to the pot.
- Deglaze the pot: Pour in the diced tomatoes with their juices, scraping up every browned bit from the bottom. Add the potatoes, green beans, corn, broth, Parmesan rind, thyme, and bay leaf. Bring to a boil, then reduce to low, cover, and simmer for 20 minutes.
- Add the peas: After 20 minutes, the potatoes should be fork-tender. Stir in the frozen peas and cook uncovered for 5 minutes until they are bright green and warmed through.
- Finish and season: Fish out the bay leaf and the Parmesan rind. Stir in the butter. Taste the broth and season with salt and pepper, starting with 1 teaspoon salt and ½ teaspoon pepper.
- Rest and serve: Let the soup sit off the heat for 5 minutes before ladling it out. Serve with crusty bread or a good grilled cheese.
Notes
Related posts:
 The Slow Cooker Cowboy Casserole That Saves Tired Weeknights (No Soggy Tots Allowed)
 Quick Lemon Ricotta Pasta for Busy Weeknights: Creamy, Bright, and on the Table in 20 Minutes
 Lemon Garlic Butter Baked Salmon in Foil That’s Ready in 25 Minutes — No Fuss, No Mess
 Lipton Onion Soup Meatloaf for Tuesday Nights: Moist, Savory, and the Only One You’ll Ever Need
 Quinoa Chicken Sausage Bowls That Are Ready in 30 Minutes (And Actually Keep Well)
 Creamy Chicken Penne Pasta That’s Silky Smooth in 30 Minutes (No Heavy Cream Required)