
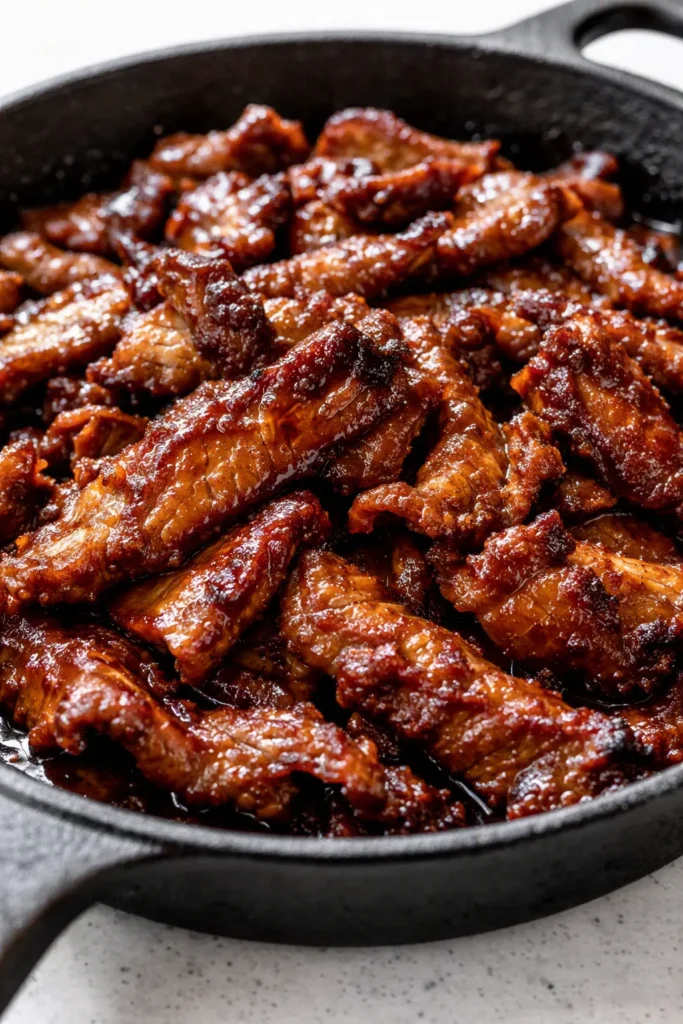
The first time I made bulgogi at home and my six-year-old asked for seconds before even touching her rice, I knew this one was special. It’s that perfect mix of savory, a little sweet, and just enough char from the pan that makes it taste like it’s been on a restaurant grill — except it all happens in a single skillet, in less than half an hour. Any night of the week. Even the ones where I forgot to thaw anything until 5:15.
The short version: Thinly sliced beef in a quick soy-pear marinade, cooked hot and fast until caramelized and juicy. My kids call it “the meat candy one.”
I’ve made this recipe more times than I can count — from busy Tuesday dinners to doubling it for my sister’s birthday barbecue — and it’s never not received the whole table’s full attention.
- Serves: 4 as a main, with rice and sides
- Hands-On Time: 15 min | Total Time: 25 min
- Difficulty: So easy you’ll memorize it by the third time
- Cost per serving: About $4.50
- Calories: ~380 per serving (without rice)
- Dietary Notes: Naturally dairy-free, nut-free; can be made gluten-free with tamari
(Photo above: Overhead shot of bulgogi piled high in a cast iron skillet, sesame seeds and green onion scattered on top, steam rising, natural late-afternoon light catching the caramelized edges of the beef — you can practically hear the sizzle.)
The Thing That Makes This Actually Caramelized (Not Steamed)
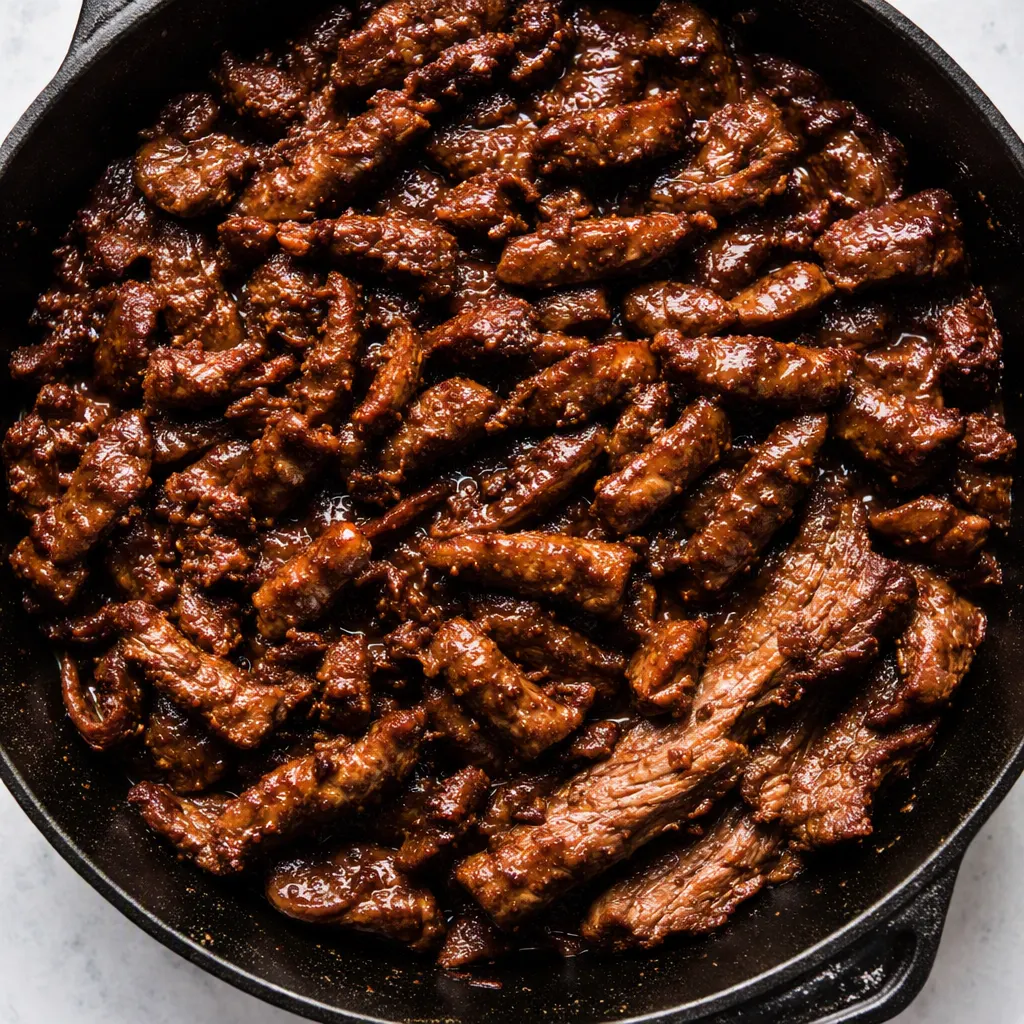
You’ve had bulgogi that looked right but tasted like boiled beef in sweet sauce, right? That happens when the skillet isn’t hot enough or you crowd the pan. The secret here is two quick batches with no moving the meat until it’s got a dark, sticky edge. I learned after a too-many-mushy-dinner incidents that letting the beef sit undisturbed for two minutes is the difference between good and “whoa, this is the real thing.”
The marinade is the other hero. Grated Asian pear does something lovely — it tenderizes the meat without leaving a fruit-forward taste, and it adds a gentle sweetness that browns beautifully. Don’t skip it. If you really can’t find one, a tiny pinch of sugar and maybe a splash of apple juice works in a pinch, but the pear is what gives you that glossy, almost lacquered finish you see at Korean BBQ spots.
This combination — a hot pan, a short marinade with pear, and a don’t-touch-it rule — means you end up with beef that’s caramelized and juicy, never watery. It’s the kind of thing that will have everyone asking what you did differently.
Everything You Need (And a Few Notes From Me)
- 1½ pounds thinly sliced ribeye or sirloin: You want beef with a little marbling so it doesn’t dry out. Ask the butcher for “bulgogi cut” — or freeze the whole piece for 30 minutes and slice it yourself as thin as you can. Makes a huge difference.
- ⅓ cup soy sauce (regular, not dark): The salt backbone. I use full-sodium because my family has no restrictions, but low-sodium works fine — just don’t reduce the amount or the beef will be underseasoned.
- 2 tablespoons brown sugar: For that sweet-savory balance. Dark or light, whatever’s in your pantry.
- 1 tablespoon sesame oil: Toasted sesame oil, not the light one. It’s nutty and irreplaceable — you’ll smell it and immediately think 5 p.m. on a weeknight is a very good time.
- 2 cloves garlic, minced: Fresh, please. Jarred is fine if you’re really pressed, but fresh garlic gives the marinade a brightness that wakes everything up.
- 1 tablespoon grated peeled Asian pear (or regular ripe pear): The tenderizer and the secret to that glossy glaze. I usually grate it right over the bowl so every drop of juice lands in the marinade. My kids have no idea there’s fruit in their beef, and I will take that secret to my grave.
- 2 green onions, sliced, plus more for garnish: White and light green parts go in the marinade; dark green tops for serving. Adds a mild oniony bite without overpowering.
- 1 tablespoon toasted sesame seeds: A subtle crunch and so pretty.
- Vegetable oil, for the pan: Something neutral with a high smoke point — canola or grapeseed.
What to Pull Out Before You Start
- A large mixing bowl for the marinade and beef
- A box grater or microplane for the pear
- A 12-inch skillet (cast iron is my favorite, but any heavy-bottomed pan works — just avoid nonstick if you can, it won’t get the same sear)
- Tongs for flipping and serving
- Small bowl for the garnish
Let’s Make It (Step by Step)
This goes fast, so have your rice cooking or your lettuce wraps ready before you start searing. The beef cooks in under 6 minutes total.
- Slice the beef if needed: If you didn’t buy pre-sliced, pop the steak in the freezer for 30 minutes until firm but not frozen solid, then slice across the grain into ⅛-inch-thick strips. This is the one prep step that’s worth the patience — thin, even slices cook evenly.
(📸 Photo tip: A shot of the raw sliced beef on a cutting board, showing the thin, even cuts, next to the bowl of marinade ingredients.) - Whisk the marinade together: In a large bowl, combine soy sauce, brown sugar, sesame oil, garlic, grated pear, and the white and light green parts of the green onions. Stir until the sugar dissolves, then add the beef. Use your hands or tongs to toss and massage the marinade into every slice. Let it sit for 10 minutes right on the counter — no need to refrigerate unless your kitchen is really warm. This short stint is plenty; longer and the beef can get too soft.
- Heat the pan: Place your skillet over medium-high heat and add about a tablespoon of vegetable oil. You want it shimmering hot but not smoking. If you flick a drop of water and it sizzles and evaporates instantly, you’re there.
- Sear in two batches: Using tongs, lift half the beef from the marinade — let excess drip off but don’t shake it totally dry, because those sugars in the marinade are what creates the caramelized bits. Lay the slices in a single layer in the hot pan. Don’t touch them for 2 minutes. You’ll hear a good sizzle, and the edges will look dark and almost burnt. Flip each piece and cook another 1–2 minutes until just cooked through. Transfer to a plate. Repeat with the remaining half.
(📸 Photo tip: Action shot from the side, tongs flipping beef in the skillet, steam rising, with visible golden-brown edges on the meat.) - Finish and serve: Return all the beef to the pan, toss with any accumulated juices for 30 seconds just to rewarm everything, then pile it onto a platter. Scatter with the reserved green onion tops and toasted sesame seeds. Serve immediately with steamed rice, lettuce leaves for ssam, kimchi, or whatever you love.
Sunday Prep = Stress-Free Weekday Dinner
I make a double batch of the marinade and beef on Sundays, stash it in the fridge, and we pull it out mid-week. The key is not storing the beef in the marinade longer than about 8 hours — it can get mushy. Instead, I combine everything, let it marinate on the counter for the 10 minutes, then cook half for Sunday dinner and leave the other half in an airtight container with the marinade poured off. That way, Wednesday’s dinner is a 10-minute sear away. My husband has actually thanked me for this plan, which never happens.
- Fridge: Cooked bulgogi keeps well in an airtight container for up to 4 days. The flavor somehow deepens overnight, so leftovers are fantastic in rice bowls or tacos.
- Freezer: You can freeze the raw, marinated beef (after the 10-minute counter marinate, drain most of the liquid) in a zip-top bag for up to 3 months. Thaw overnight in the fridge and cook as usual. Cooked bulgogi freezes decently for up to 2 months, but the texture softens a bit — it’s best in fried rice or soups then.
- Reheat: For the best texture, reheat in a hot skillet with a tiny splash of oil for a minute or two. The microwave works in a pinch, but you’ll lose that signature caramelized edge — my kids don’t care, but if my husband’s eating, I pull out the pan.
Things I Wish I’d Known the First Time
- Don’t marinate too long: I once left it overnight thinking deeper flavor would happen. The beef turned a little mealy from the pear’s enzymes. 10 minutes on the counter is truly enough. Trust me on this one — it took three batches of sad, mushy bulgogi to learn that lesson.
- Work in batches, no shortcuts: If you pile all the meat in at once, the pan temperature drops and you steam instead of sear. I know it’s tempting to just dump it all, but two batches take like three extra minutes and make a world of difference. Even if you mess up and it steams a little, it’ll still taste good — just not that restaurant-level char.
- Slice across the grain: Look for the muscle fibers in the beef and cut perpendicular to them. If you slice with the grain, you’ll get chewy strips that feel like you’re eating leather. I learned this the hard way with a flank steak once; now I check every time.
- Don’t skip the pear: I know it sounds like an extra step, but a peeled, grated pear takes one minute and gives you that undeniable Korean BBQ flavor. If you’re in a pinch and don’t have one, substitute 1 tablespoon of grated apple and a pinch of sugar — it won’t be identical, but it gets you 90% there. My kids still demolish it.
Make It Yours: Easy Variations
- Gluten-free version: Swap the soy sauce for tamari. Everything else is naturally gluten-free. Works like a charm.
- Spicy bulgogi: Add 1–2 teaspoons of gochujang (Korean chili paste) to the marinade. My husband loves it like this; I make a kid-friendly batch for the table and add the gochujang to half for the adults.
- Chicken or pork: Thinly sliced chicken thigh or pork shoulder work beautifully with the same marinade and method. For chicken, keep the same cooking time; pork might need an extra minute per side.
- Veggie-heavy version: After cooking the beef, sauté sliced mushrooms, bell peppers, and onions in the same pan with a little more sesame oil. Pile it all together in rice bowls and call it a complete meal — my kids even eat the mushrooms when they’re bathed in that bulgogi sauce.
- Lettuce wrap party: For a fun weekend dinner, set out butter lettuce cups, rice, kimchi, ssamjang (a spicy dipping sauce), and let everyone build their own bundles. It’s messy in the best way.
Questions I Get About This Recipe All the Time
Q: Why did my bulgogi turn out dry and tough?
A: Ugh, I’ve been there. Usually it’s one of two things: either the beef slices were too thick, or they were cooked too long. Ribeye or sirloin are forgiving, but when sliced razor thin, they cook in literal minutes. If you let them go past just-barely-pink, they’ll tighten up. Next time, aim for 1–2 minutes per side max, and pull them at the first sign of doneness. You’ve got this.
Q: Can I make bulgogi without pear?
A: Yes, in a pinch. Grated apple with a tiny bit of extra sugar works, or even a splash of pineapple juice, but don’t go overboard — too much enzyme and the meat gets mushy. I’ve tested both, and they’re decent. But if you can find an Asian pear, even a tiny one, I swear it makes a difference.
Q: How long does bulgogi last? Can I freeze it?
A: Cooked bulgogi stays great in the fridge up to 4 days — honestly, it’s even better the next day in a rice bowl. For freezing, marinate the raw beef, drain off excess liquid, and freeze it flat in a bag for up to 3 months. Thaw in the fridge overnight and cook fresh. Cooked bulgogi freezes okay for 2 months, but the texture gets a little soft; I toss it into fried rice or wrap it in egg for a quick snack. To reheat, a hot skillet is best, but the microwave works if you’re in a Monday-morning-lunchbox hurry.
Q: What do you serve with bulgogi besides rice?
A: Rice is classic, but we also love it tucked into soft flour tortillas with a quick cucumber slaw and sriracha mayo — totally fusion, totally delicious. It’s also amazing over a big pile of steamed greens, in lettuce wraps with kimchi, or even on top of crispy roasted potatoes. My kids will eat it straight from the pan with toothpicks, no judgment.
More Recipes My Family Makes on Repeat
If you liked this one, here are a few others that get the same reaction at our table:
- [INTERNAL LINK PLACEHOLDER: 20-Minute Korean Ground Beef Rice Bowls] — All the bulgogi flavor, no slicing, ready in about the time it takes to cook rice. My go-to when I forgot to buy steak.
- [INTERNAL LINK PLACEHOLDER: Crispy Korean Fried Chicken Wings] — Spicy, sweet, and shatteringly crisp. They disappear in minutes, especially on game day.
- [INTERNAL LINK PLACEHOLDER: Quick Korean-Style Spinach Side Dish] — The easy, garlicky banchan I make whenever we have bulgogi; my kids call it “green noodles.”
I hope this becomes one of those dinners you make so often you stop measuring the soy sauce because you know it by heart. There’s something about a skillet full of sizzling, caramelized beef that just makes the whole kitchen smell like a good decision.
If you try it, tag me on Pinterest or drop a comment — I love seeing your versions, especially when someone’s toddler eats three helpings and then asks for “more meat candy.”
📌 Korean beef bulgogi recipe that’s better than takeout and ready in 25 minutes — save it for those nights when you need dinner to feel like a win, fast.
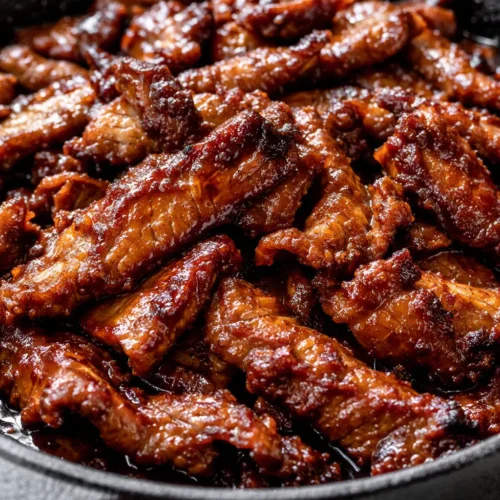
Korean Beef Bulgogi
Equipment
- Large Mixing Bowl
- Box Grater or Microplane
- 12-inch Skillet
- Tongs
- Small bowl
Ingredients
- 1.5 lb ribeye or sirloin, thinly sliced
- 1/3 cup soy sauce
- 2 tablespoon brown sugar
- 1 tablespoon toasted sesame oil
- 2 clove garlic, minced
- 1 tablespoon grated peeled Asian pear (or regular pear)
- 2 whole green onions, sliced (white/light green parts for marinade, dark green for garnish)
- 1 tablespoon toasted sesame seeds
- 1 tablespoon vegetable oil, for the pan
Instructions
- If not pre-sliced, freeze the steak for 30 minutes until firm, then slice across the grain into 1/8-inch-thick strips. This ensures even cooking.
- In a large bowl, whisk together soy sauce, brown sugar, sesame oil, garlic, grated pear, and the white and light green parts of the green onions. Add the beef and toss to coat. Let sit at room temperature for 10 minutes—no longer, or the pear enzymes can make the beef mushy.
- Heat a 12-inch skillet (cast iron preferred) over medium-high heat with the vegetable oil until shimmering hot.
- Add half the beef in a single layer; do not move for 2 minutes until dark, caramelized edges form. Flip and cook 1-2 minutes more until just cooked through. Transfer to a plate. Repeat with the remaining beef.
- Return all the beef to the pan along with any accumulated juices, toss for 30 seconds to rewarm, then transfer to a platter. Garnish with the reserved dark green onion tops and toasted sesame seeds. Serve immediately with rice, lettuce wraps, or kimchi.
Notes
Related posts:
 The Slow Cooker Cowboy Casserole That Saves Tired Weeknights (No Soggy Tots Allowed)
 Quick Lemon Ricotta Pasta for Busy Weeknights: Creamy, Bright, and on the Table in 20 Minutes
 Lemon Garlic Butter Baked Salmon in Foil That’s Ready in 25 Minutes — No Fuss, No Mess
 Lipton Onion Soup Meatloaf for Tuesday Nights: Moist, Savory, and the Only One You’ll Ever Need
 Kielbasa Sausage Cheesy Potato Casserole That Tastes Like Sunday Dinner — In Under an Hour
 Quinoa Chicken Sausage Bowls That Are Ready in 30 Minutes (And Actually Keep Well)