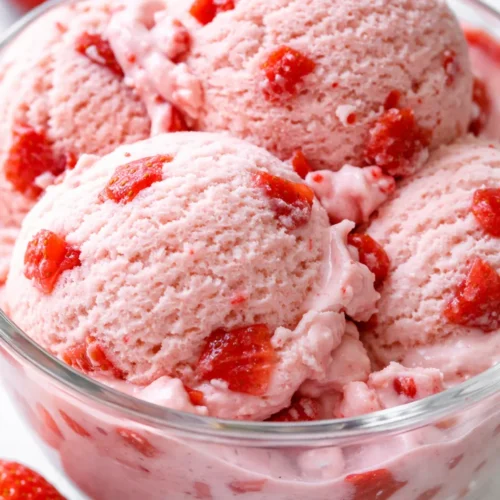
Homemade Strawberry Ice Cream That's Creamier Than Store-Bought — Without an Ice Cream Maker
That first scoop — the way it melts on your tongue, the tiny bits of real strawberry you actually taste, the creamy texture that's nothing like the icy stuff from the store. This is the ice cream my kids beg for every time the temperature hits eighty. And the best part? No machine. No custard. No stress.
Equipment
- Large Mixing Bowl
- Hand Mixer
- Small bowl
- Loaf Pan (8.5x4.5 inches)
- Parchment Paper
- Spatula
Ingredients
- 2 cups heavy cream
- 1 can (14 oz) sweetened condensed milk
- 1½ cups fresh strawberries, hulled and chopped
- 2 tablespoons granulated sugar
- 1 tablespoon fresh lemon juice
- 1 teaspoon vanilla extract
Instructions
- Macerate the berries: In a small bowl, toss the chopped strawberries with the sugar and lemon juice. Let them sit at room temperature for at least 30 minutes — an hour is better. You'll see a syrupy red liquid pool at the bottom. Set aside.
- Whip the cream to stiff peaks: Pour the cold heavy cream into your large bowl. Beat with a hand mixer on medium-high until you see firm peaks that hold their shape when you lift the beaters. Be careful not to go too far — if it starts looking grainy, you've made butter.
- Whisk the condensed milk and vanilla together: In another bowl, stir the sweetened condensed milk and vanilla until smooth.
- Fold the condensed milk into the whipped cream: Add about a third of the condensed milk mixture to the whipped cream and gently fold with a spatula until streaks disappear. Add the rest in two more additions, folding each time until no streaks remain. Don't stir aggressively — you'll deflate the cream.
- Add the macerated strawberries with their syrup: Pour the berries and all their red syrup into the cream mixture. Fold gently just three or four times — you want ribbons of red and chunks of berry throughout, not a fully pink batter.
- Pour into your pan and smooth the top: Line a loaf pan with parchment paper (easier to lift out later) or just use a freezer-safe container. Scrape the mixture in and spread it even. Press a piece of plastic wrap directly onto the surface to prevent ice crystals from forming.
- Freeze for at least 6 hours, overnight is better: Place the pan on a flat shelf in your freezer. Don't open the door for the first 4 hours — let it set. After that, if you want an even creamier texture, you can stir it once with a fork at the 2-hour mark to break up any ice crystals, but I've found it's not strictly necessary with this recipe.
- Scoop and serve: When you're ready, let the ice cream sit at room temperature for 5–10 minutes before scooping. It'll soften just enough to make a perfect ball. Garnish with a fresh strawberry and a mint leaf if you're feeling fancy.
Notes
Important tips: Use full-fat heavy cream and sweetened condensed milk. Macerate berries for at least 30 minutes. Metal loaf pan freezes faster than glass. Press plastic wrap onto surface to prevent ice crystals. For dairy-free, substitute with chilled coconut cream and sweetened condensed coconut milk. Store in freezer for up to 1 month tightly wrapped.