
The first time I made creamy zucchini sauce, I made every mistake the internet warned me about. It was watery. It pooled on the plate. It tasted like boiled squash that had been briefly introduced to some cream. My family ate it politely, which is how I know it was a failure. The trick that changed everything is one I should have known sooner, given how many times Marta salted cucumbers and cabbages before she did anything else with them: you have to draw the water out before the zucchini ever hits the pan. Salting, waiting, and then really aggressively squeezing it dry — that single step transforms a watery vegetable into something that absorbs the cream (or broth, or pasta water) instead of diluting it.
The short version: Salty, silky, savory pasta sauce that comes together in 25 minutes and finally makes zucchini feel like a treat, not a garden tax.
I’ve made this three summers running, sometimes twice a week when the zucchini starts piling up on my porch from neighbors who grow too much. My daughter Nora calls it “green spaghetti” and still requests it when she comes home from college.
- Serves: 4 (as a pasta sauce)
- Hands-On Time: 15 min | Total Time: 25 min
- Difficulty: Easy — the hardest part is waiting for the salt to do its job
- Cost per serving: ~$2.50
- Calories: ~320 per serving (with pasta)
- Dietary Notes: Vegetarian, Gluten-Free (with GF pasta), Adaptable for Dairy-Free
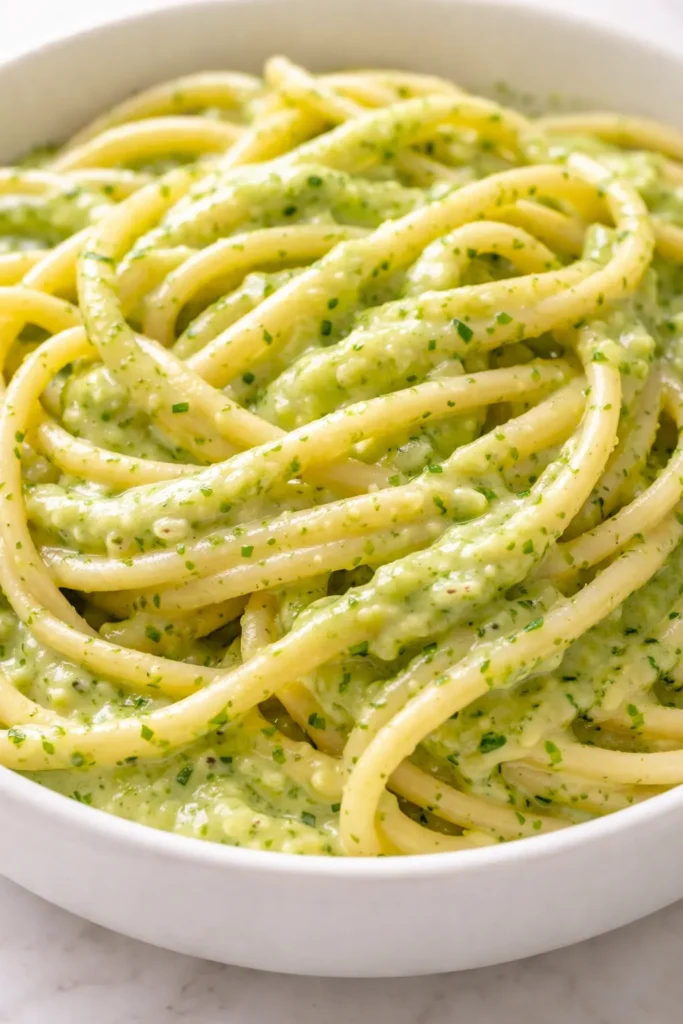
(Photo above: A rustic ceramic bowl filled with spirals of fettuccine coated in a pale green, creamy sauce, scattered with toasted pine nuts and a sprinkle of red pepper flakes. Shot in afternoon light from the side to catch the gloss on the sauce and the texture of the nuts.)
Why Squeezing the Zucchini Dry Changes Everything
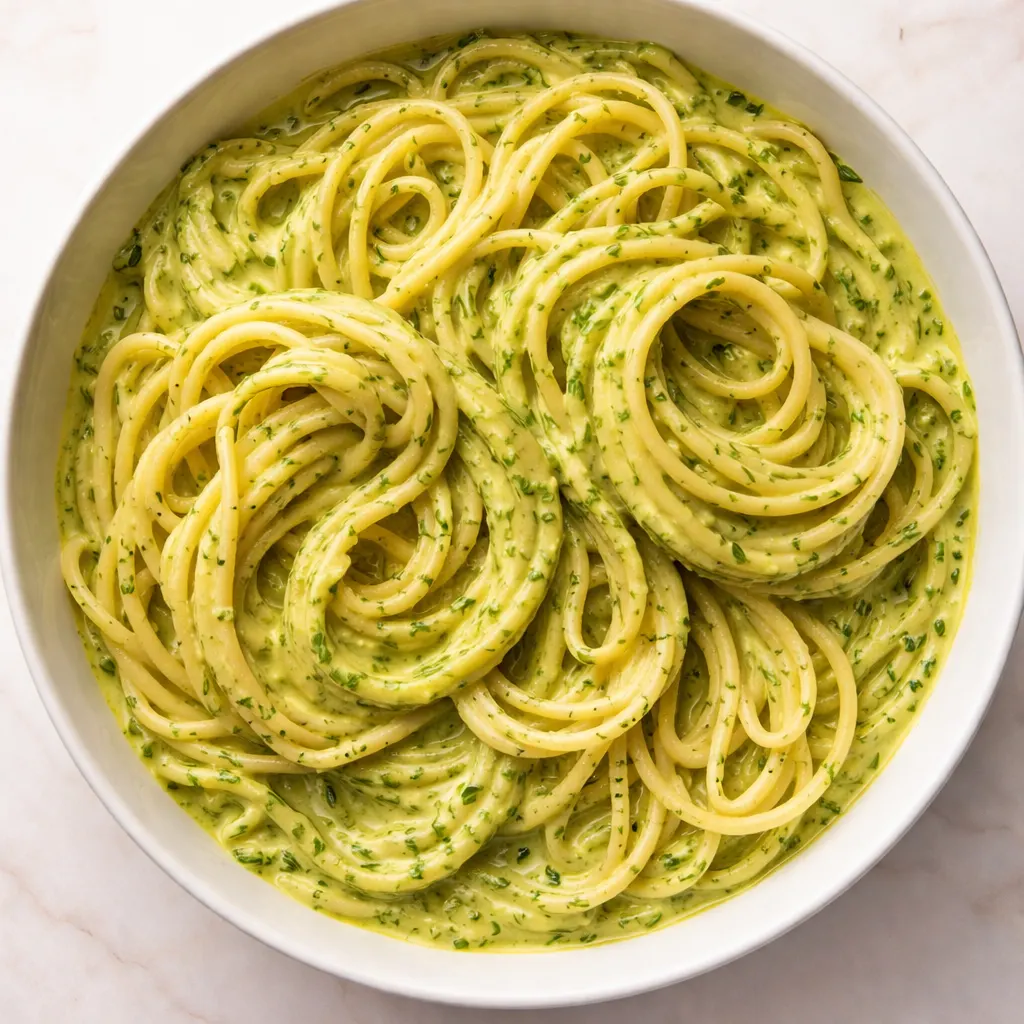
Zucchini is mostly water. That’s its gift and its challenge. If you cook it without drawing that moisture out first, it releases into the pan, diluting everything you add — the cream, the cheese, the olive oil. You end up with something that tastes thin and sad no matter how much parmesan you throw at it.
Salting the grated zucchini pulls the water out through osmosis. Letting it sit in a colander gives that water a place to drain. Then twisting it in a kitchen towel removes the liquid that’s still clinging to the shreds. What remains is concentrated zucchini flavor with none of the watery baggage. It absorbs the cream and fat instead of rejecting them. The result is a sauce that clings to pasta, coats the back of a spoon, and tastes deeply of summer squash without being weighed down by it.
I learned this the hard way after three watery batches. Marta would have known better — she salted everything, even the cucumbers for her salad. She’d shake her head at my impatience.
Everything You Need (And a Few Notes From Me)
- 2 lbs zucchini (about 4 medium), coarse grated: The backbone of the sauce. Don’t grate it too fine — you want some texture left, even if you blend it later. I use a box grater because Marta’s arms were stronger than mine, but a food processor with the grating disc works in half the time.
- 1 tsp salt (plus more for the pasta water): A teaspoon for drawing out the zucchini’s water. Don’t skip it. My kids can smell the difference when I’m tempted to skip this step — the sauce just doesn’t taste as vibrant.
- 2 tbsp olive oil or butter: Olive oil for the dairy-free version, butter for the full-fat version. Both work. I use butter because Nora says it tastes “more like a hug.”
- 3-4 cloves garlic, minced: Three if you’re feeling mild, four if you’re cooking for garlic lovers. A Microplane makes it melt right into the sauce — no biting into a raw chunk.
- 1/2 cup heavy cream (or full-fat coconut milk for dairy-free): The richness that makes it feel indulgent. Coconut milk adds a faint sweetness that works beautifully with the lemon zest.
- 1/2 cup reserved pasta water: This is non-negotiable. Do not pour it all down the drain. It’s liquid gold for the sauce — the starch helps everything emulsify. I dip a coffee mug in right before I drain the pasta.
- 1/2 cup grated Parmesan (or nutritional yeast for dairy-free): The salty, umami finish. If you use nutritional yeast, add an extra squeeze of lemon to make up for the acidity.
- Zest of 1 lemon, red pepper flakes, fresh basil: The bright, spicy, herbal notes that keep the sauce from feeling heavy. The lemon zest wakes everything up. Don’t skip it.
- 1 lb pasta (fettuccine or rigatoni are my favorites): Something with ridges or flat surfaces for the sauce to cling to. Rigatoni holds the sauce inside the tubes — Nora calls them “sauce cups.”
What to Pull Out Before You Start
- A box grater or food processor with grating disc
- A colander (for draining the salted zucchini)
- A clean kitchen towel or double layer of cheesecloth (for the squeeze)
- A large skillet or sauté pan (12-inch is ideal)
- A pot for boiling pasta
- A Microplane or fine grater (for the garlic and lemon zest)
- A blender or immersion blender (optional — only if you want a completely smooth sauce)
Let’s Make It (Step by Step)
This moves fast once you start, so I like to have everything prepped before I turn on the stove. Read through once, then jump in.
First, the pasta water: Bring a large pot of generously salted water to a boil. Drop your pasta in and cook it two minutes shy of the package directions — it’ll finish cooking in the sauce.
- Grate and salt: Grate the zucchini using the large holes of a box grater or the grating disc of a food processor. Toss the shreds with 1 teaspoon of salt directly in the colander. Let it sit over the sink or a bowl for 10 minutes. You’ll start to see green-tinted water pooling at the bottom — that’s exactly what you want.
- Squeeze: Transfer the zucchini to a clean kitchen towel. Gather the corners and twist tightly over the sink. Really twist. You’ll be shocked at how much water comes out — sometimes up to a cup. (📸 Photo tip: The twisted towel with green-tinted water streaming out is the “aha!” moment. Snap it before you wring it out completely — that’s the visual that makes people understand why this step matters.)
- Sauté: Heat the olive oil or butter in a large skillet over medium heat. Add the squeezed zucchini and minced garlic. Cook, stirring frequently, for 4-5 minutes. Sensory cue: It should smell sweet and vegetal, not wet or steamed. If it sounds like it’s frying rather than boiling, you’re in the right place.
- Blend (if you want a silky sauce): Transfer the cooked zucchini mixture to a blender or use an immersion blender. Pulse until smooth. For a chunkier, more rustic sauce, leave it as is. I prefer it blended — it feels more like a traditional pasta sauce that way.
- Make it creamy: Return the zucchini to the skillet (or keep it there if you skipped the blender). Reduce the heat to low. Stir in the heavy cream or coconut milk, the Parmesan or nutritional yeast, and the lemon zest. Stir until everything is combined and warm — about 1 minute.
- Add the pasta water: Ladle in the reserved pasta water, a splash at a time, stirring constantly. Watch the texture: The sauce should loosen and become glossy, not thin and watery. You want it to coat the back of a spoon — a line drawn through it should hold for a second before slowly filling back in.
- Toss the pasta: Add the drained pasta (remember, two minutes undercooked) directly to the sauce. Toss vigorously for 1-2 minutes over low heat. Sensory cue: The sound should shift from a liquid splash to a soft, slick coat — that’s the pasta absorbing the sauce. If it looks dry, add another splash of pasta water. (📸 Photo tip: Tongs lifting a nest of pasta from the pan — the sauce should cling, not drip.)
- Finish and serve: Taste. Add salt if needed (the Parmesan and pasta water are usually enough). Top with fresh basil, a sprinkle of red pepper flakes, and extra Parmesan. Serve immediately.
How I Meal Prep This for the Week
This sauce was made for Sunday prep. I make a double batch, freeze half, and we’re set for two separate dinners. The key is storing the sauce without the pasta — otherwise the noodles soak up all the liquid and turn mushy overnight.
- Fridge: Store the sauce (without pasta) in an airtight container for up to 4 days. Reheat in a skillet with a splash of pasta water or broth to bring back the gloss.
- Freezer: Yes! Let the sauce cool completely, then transfer to a zip-top bag or freezer container. It keeps for 3 months. Thaw overnight in the fridge before reheating.
- Reheat: A skillet on medium-low is best. The microwave works in a pinch but can make the sauce separate — if you do microwave it, do it in 30-second bursts and stir well between each one.
Things I Wish I’d Known the First Time
- Don’t skip the squeeze: I know it feels like an extra step when you’re hungry. It’s the only step that actually matters. I’ve tested this side by side — squeezed vs. unsqueezed — and the difference is dramatic. The unsqueezed version is watery and thin. The squeezed version is thick and creamy. Every single time.
- Toast some nuts: Pine nuts or walnuts add a crunch that the soft sauce desperately needs. Toast them in a dry pan over medium heat for 2-3 minutes until they’re fragrant and just starting to brown. Watch them carefully — they go from golden to burnt in seconds.
- Use the right pasta: Something with ridges or a flat surface helps the sauce cling. Rigatoni, fettuccine, or campanelle are my favorites. Spaghetti works but the sauce slides off a little more. Nora still eats it with spaghetti and doesn’t mind the pool at the bottom of her bowl.
- Taste as you go: The salt from the initial brine, the Parmesan, and the pasta water all add up. I’ve oversalted this before when I wasn’t paying attention. Add salt at the end, not the beginning, unless it’s for the zucchini’s initial sweat.
Swaps That Actually Work
- Dairy-Free: Use full-fat coconut milk instead of heavy cream and nutritional yeast instead of Parmesan. The coconut milk adds a faint sweetness that pairs beautifully with the lemon zest. My nephew can’t do dairy and this is the version I make for him — he loves it.
- Vegan: Follow the dairy-free version above, and use a generous squeeze of lemon to brighten the nutritional yeast’s flavor. Toss with fresh herbs — basil and mint both work.
- Protein add-in: Sautéed shrimp, shredded rotisserie chicken, or crispy white beans on top turn this into a full meal. My husband adds grilled Italian sausage to his bowl and claims it’s the best thing I’ve ever made.
- Spicy: Double the red pepper flakes and add a pinch of cayenne with the garlic. Nora and I do a mild version but my husband adds hot honey at the table — it’s surprisingly good.
- Yellow squash instead of zucchini: Works perfectly. Same process. Same result. You’ll barely notice the difference.
Questions I Get About This Recipe All the Time
Q: Why did my sauce turn out watery? I followed the instructions but it still pooled on the plate.
A: I’ve been there, and it’s almost always because the zucchini wasn’t squeezed dry enough. Next time, twist the kitchen towel like you’re trying to wring the last drop out of it. You should get at least 1/2 cup of green-tinted water from 2 pounds of zucchini. Also, make sure your pan is hot enough before you add the zucchini — if it goes in cold, it’ll steam instead of sautéing.
Q: Can I make this without a blender?
A: Absolutely. Skip the blending step and keep it rustic. The texture will be more like a chunky vegetable sauce, but it’s just as delicious. Nora actually prefers it unblended because she likes “finding the green bits.”
Q: How long does the sauce last? Can I freeze it?
A: The sauce keeps in the fridge for 4 days in an airtight container. It also freezes beautifully for up to 3 months — I freeze it flat in a zip-top bag so it thaws quickly. Reheat it in a skillet with a splash of pasta water or broth to bring back the glossy texture. Do NOT freeze the sauce with the pasta already mixed in — the noodles will turn to mush.
Q: What do you serve with this? Any sides that go well?
A: We keep it simple: a green salad with lemon vinaigrette and crusty bread for soaking up the extra sauce. Sometimes I roast cherry tomatoes on the side — their sweetness is a perfect contrast to the rich, savory sauce. My kids love it with garlic bread, which I fully support because any extra starch to catch the sauce is a win.
More Recipes My Family Makes on Repeat
If you liked this one, here are a few others that get the same reaction at our table:
- [INTERNAL LINK PLACEHOLDER: My Grandmother’s Simple Tomato Sauce] — Slow-simmered, no-fuss, and the only tomato sauce I’ve made every single year for a decade.
- [INTERNAL LINK PLACEHOLDER: Brown Butter Sage Gnocchi] — Ready in 20 minutes and tastes like a restaurant dish you’d pay $18 for.
- [INTERNAL LINK PLACEHOLDER: One-Pan Lemon Chicken Orzo] — The weeknight hero that leaves you with exactly one pan to wash.
This is the sauce that finally made my family love zucchini season instead of dreading the endless squash deliveries from neighbors. It’s silky, savory, and comes together in the time it takes to boil water — once you’ve made the squeeze step a habit, you’ll never skip it again. I hope it becomes a staple in your kitchen the way it has in mine.
If you try it, drop a comment below — I love hearing how it goes for you, especially if you try the dairy-free version. Tag me on Pinterest so I can see yours!
📌 Creamy zucchini sauce recipe that stays thick and silky without getting watery — save it for your next summer weeknight dinner when the garden is overflowing.
Creamy Zucchini Sauce
Equipment
- Box grater or food processor with grating disc
- Colander
- Clean kitchen towel or cheesecloth
- Large Skillet (12-inch)
- Pot for boiling pasta
- Microplane or Fine Grater
- Blender or immersion blender (optional)
Ingredients
For the Zucchini
- 2 lbs zucchini (about 4 medium), coarse grated
- 1 tsp salt (plus more for pasta water)
For the Sauce
- 2 tbsp olive oil or butter
- 3-4 cloves garlic, minced
- 1/2 cup heavy cream (or full-fat coconut milk for dairy-free)
- 1/2 cup reserved pasta water
- 1/2 cup grated Parmesan (or nutritional yeast for dairy-free)
- 1 zest of 1 lemon
- Red pepper flakes, to taste
- Fresh basil, for serving
For the Pasta
- 1 lb pasta (fettuccine or rigatoni recommended)
Instructions
- Bring a large pot of generously salted water to a boil. Cook the pasta two minutes shy of the package directions — it will finish cooking in the sauce.
- Grate and salt: Grate the zucchini using the large holes of a box grater or the grating disc of a food processor. Toss the shreds with 1 teaspoon of salt directly in a colander. Let it sit over the sink or a bowl for 10 minutes. You’ll see green-tinted water pooling — that’s exactly what you want.
- Squeeze: Transfer the zucchini to a clean kitchen towel. Gather the corners and twist tightly over the sink. Really twist. You’ll be shocked at how much water comes out — sometimes up to a cup.
- Sauté: Heat the olive oil or butter in a large skillet over medium heat. Add the squeezed zucchini and minced garlic. Cook, stirring frequently, for 4-5 minutes. It should smell sweet and vegetal, not wet or steamed.
- Blend (optional): Transfer the cooked zucchini mixture to a blender or use an immersion blender. Pulse until smooth. For a chunkier sauce, leave as is.
- Make it creamy: Return the zucchini to the skillet (or keep it there if you skipped blending). Reduce heat to low. Stir in the heavy cream or coconut milk, the Parmesan or nutritional yeast, and the lemon zest. Stir for about 1 minute until combined and warm.
- Add the pasta water: Ladle in the reserved pasta water, a splash at a time, stirring constantly. The sauce should loosen and become glossy — it should coat the back of a spoon.
- Toss the pasta: Add the drained pasta (undercooked by two minutes) directly to the sauce. Toss vigorously for 1-2 minutes over low heat. The sound should shift from a liquid splash to a soft, slick coat. Add another splash of pasta water if it looks dry.
- Finish and serve: Taste and adjust salt if needed. Top with fresh basil, red pepper flakes, and extra Parmesan. Serve immediately.
Notes
Related posts:
 The Slow Cooker Cowboy Casserole That Saves Tired Weeknights (No Soggy Tots Allowed)
 Quick Lemon Ricotta Pasta for Busy Weeknights: Creamy, Bright, and on the Table in 20 Minutes
 Lemon Garlic Butter Baked Salmon in Foil That’s Ready in 25 Minutes — No Fuss, No Mess
 Lipton Onion Soup Meatloaf for Tuesday Nights: Moist, Savory, and the Only One You’ll Ever Need
 Kielbasa Sausage Cheesy Potato Casserole That Tastes Like Sunday Dinner — In Under an Hour
 Quinoa Chicken Sausage Bowls That Are Ready in 30 Minutes (And Actually Keep Well)