
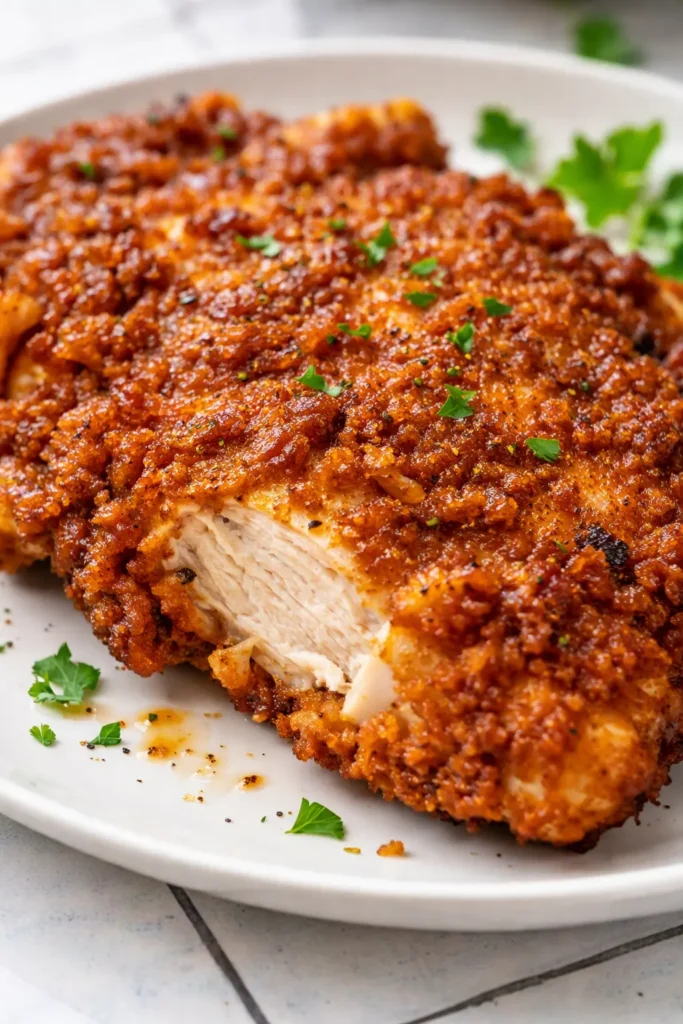
That first crack of the fork through the crust — the sharp crunch you hear before the fork even reaches the meat — is the entire reason I make country fried chicken the long way. The gravy pools into the gaps, and the crust doesn’t give an inch. It stays shattering, even underneath all that peppery goodness, and my family has stopped asking what’s for Sunday supper. They just ask when I’m starting the chicken.
The short version: Crispy, peppery, milk-gravy country fried chicken in about an hour, with forty minutes of hands-on work and a crust that holds up to everything you pour over it.
I’ve been making this version for the better part of a decade. Marta — my grandmother, who came to North Carolina from Germany with a rolling pin and a stubborn streak — taught me to pound the chicken thin like she did for schnitzel, and that habit is the secret nobody talks about. The neighbors taught her about buttermilk and gravy; she taught them how a kitchen knife sounds on a cutting board when it’s being used with confidence. I got both lessons, and this recipe is what they look like together.
- Serves: 4 as a main dish
- Hands-On Time: 40 min | Total Time: 60 min
- Difficulty: Easier than it looks — one pan, one good rest, and you’re there
- Cost per serving: ~$2.75
- Calories: ~640 per serving (with gravy)
- Dietary Notes: Naturally nut-free. Adaptable for gluten-free and dairy-free (see swaps below).
(Photo above: overhead shot of a white stoneware plate of country fried chicken, one piece cut open to show the juicy interior, a small enamel pitcher of peppery milk gravy beside it. Morning light from the left, a faded red-and-white cotton dishtowel folded under the plate on the wooden kitchen table.)
The Trick That Keeps the Crust Crispy Under All That Gravy
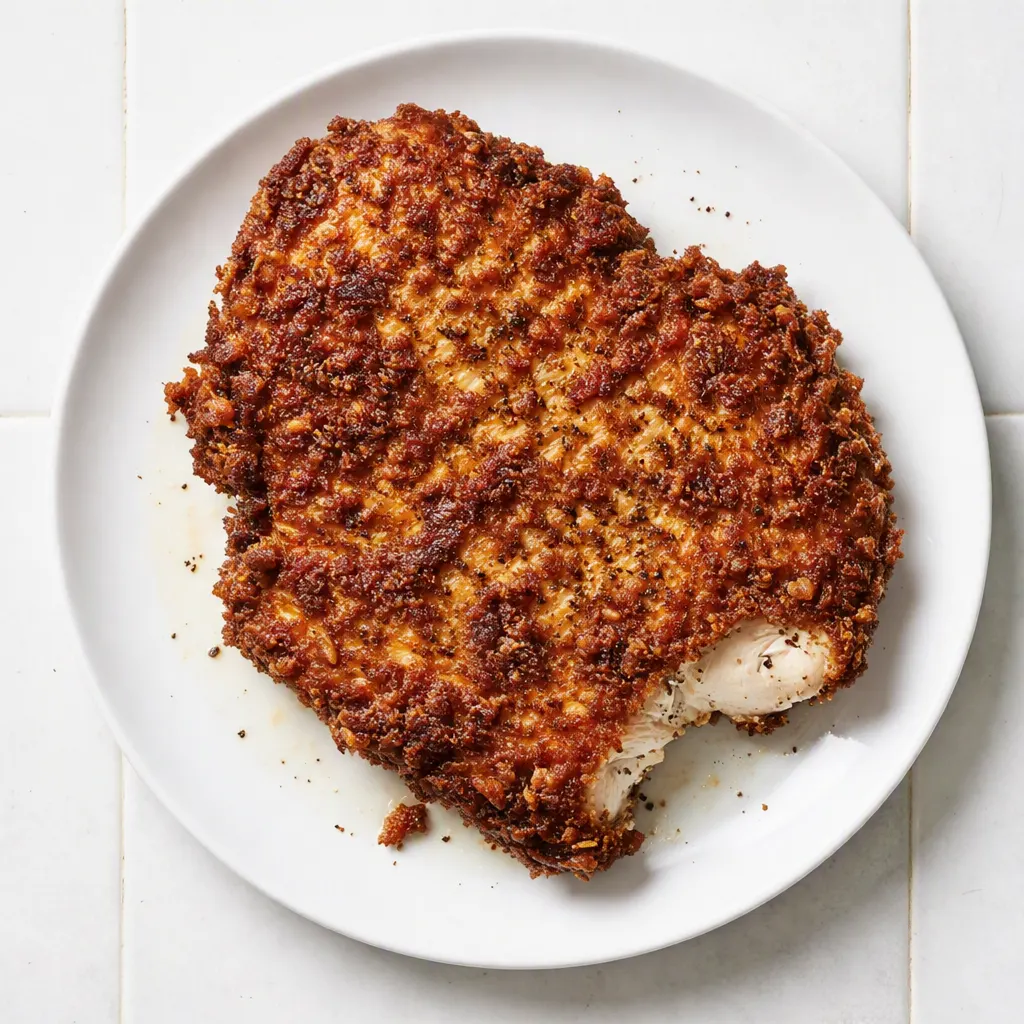
The first time I made country fried chicken as an adult, the crust slid off in one sad sheet when I flipped it. The chicken was fine. The coating was a tragedy. I’ve redone it enough times to know exactly where that goes wrong, and it’s almost never the oil.
The rest is the magic. After the second dredge, the breaded chicken sits on a wire rack for fifteen minutes. That gives the flour time to hydrate and cling to the buttermilk-soaked surface, so when the first side hits the oil, it’s already a crust — not a dusty coat waiting to separate. Skipping this step is how you end up with crispy chicken that’s bald by the time it hits the plate.
Cornstarch does the rest. A quarter cup in the flour mixture changes the texture from muffled and mealy to light and shattering, the way the best versions crackle in your teeth before the juice even reaches your tongue. And the wire rack at the end — not paper towels — keeps the bottom crust crisp while you finish the other batches. My daughter Nora calls from Savannah when she’s homesick and asks what’s on the stove. On the nights this is in the skillet, she can hear it in my voice before I even describe it.
The Ingredient List, With My Honest Notes Attached
- 4 boneless, skinless chicken breasts (about 6 ounces each): Pound them thin — an even ½ inch — so they cook through in the same time the crust takes to brown. Thighs work too; they’re juicier and nearly impossible to overcook.
- 1½ cups buttermilk: This is the tang under all that crust. If you only have regular milk, see the swap section below — it works in a pinch.
- 1 tablespoon hot sauce (I use Frank’s): It doesn’t make the chicken spicy. It makes the buttermilk sharp in the way that gets your attention without shouting.
- 2 cups all-purpose flour: Nothing fancy. Regular flour is exactly right — bread flour makes the crust tough, and self-rising flour throws off the salt balance.
- ¼ cup cornstarch: The shatter factor. This is the one ingredient I’d argue about at the dinner table.
- 2 teaspoons smoked paprika: The color and the warmth. My kids detect when I skip it, and I have no idea how they know.
- 1 teaspoon garlic powder, 1 teaspoon onion powder: The flavor foundation that makes the crust taste like more than just fried flour.
- 1 teaspoon kosher salt, plus more for finishing: Season the flour like you mean it — the crust is the only chance the outside gets.
- ½ teaspoon cayenne (use ¼ if you’re feeding kids): A warm hum at the back of the throat, not a burn.
- 1 cup neutral oil (peanut or canola): Enough for about half an inch in the skillet. Don’t use olive oil; it’s heavy and it smokes.
- For the gravy: 3 tablespoons reserved fry oil, 3 tablespoons all-purpose flour, 2 cups whole milk, salt, and a very generous amount of black pepper: The pepper is the flavor. Do not be shy with it.
What to Pull Out Before You Start
- A 12-inch cast iron skillet — it holds heat like a stubborn mule and gives you that deep, even browning. A heavy stainless steel pan works too.
- A wire rack set over a baking sheet — this is where the chicken rests before frying and drains after. Non-negotiable for a crisp bottom.
- A meat mallet or rolling pin — for pounding the breasts thin. Wax paper or plastic wrap underneath keeps the kitchen from looking like a crime scene.
- Two shallow dishes — one for buttermilk, one for flour. A pie plate is perfect.
- Tongs and a whisk — and a kitchen thermometer if you have one, though I’ll give you the cues that don’t need it.
Let’s Make It, Step by Step
This moves faster than it looks, so read it through once before you heat the oil. The hands-on parts are short; the resting parts are where the crust earns its keep.
- Pound the chicken: Lay each breast between two sheets of wax paper and pound to about ½ inch thick. You’re looking for even thickness — the whole piece should feel the same when you press it. If you skip this, the thick end will still be raw when the thin end is done — the pound is not optional.
- Soak: Whisk the buttermilk and hot sauce together in a shallow dish. Submerge the chicken, cover, and let it sit at room temperature while you set everything else up — or up to overnight in the fridge if you’re planning ahead. The soak tenderizes and gives the crust something to grip.
- Mix the dredge: In a second shallow dish, whisk the flour, cornstarch, smoked paprika, garlic powder, onion powder, salt, and cayenne. Taste a pinch of the flour mixture — it should taste seasoned, not bland. If it’s flat, add more salt.
- Dredge: Working one piece at a time, lift the chicken from the buttermilk, let the excess drip off, then press it into the flour mixture. Coat one side, flip, coat the other, and press firmly so the flour adheres. Dip it back into the buttermilk for a quick pass, then back into the flour for the second coat. This double dredge is what builds a crust with real depth, not just a thin crackly skin.
- Rest: Place the breaded pieces on the wire rack and let them sit for fifteen minutes. This is the step that prevents the crust from sliding off. You’ll notice the coating change from pale and dusty to slightly translucent and tacky — that’s the flour absorbing the buttermilk and setting into a crust that will cling through the fry.
- Heat the oil: Add the oil to the cast iron skillet over medium-high heat. You want it shimmering — about 350°F if you’re using a thermometer. No thermometer? Drop a pinch of flour into the oil. It should sizzle immediately with a steady, quiet hiss. A violent spatter means the oil’s too hot; no bubbles means it’s not ready.
- Fry in batches: Lay the chicken in the oil without crowding — leave an inch between pieces. Cook for 4 to 5 minutes per side, until the crust is the color of dark honey and the internal temperature reads 165°F. The sound matters here: you want a steady, low sizzle the whole way through. If it goes loud and aggressive, turn the heat down; the crust is browning faster than the chicken is cooking. (📸 Photo tip: this deep, lacquered golden-brown crust — not pale, not scorched — is your doneness signal. The edges should look almost polished.)
- Drain on the rack: Transfer the fried chicken to the wire rack, not paper towels. Paper towels trap steam and soften the bottom crust in minutes. The rack keeps every side crisp while you fry the rest.
- Make the gravy: After the last batch, pour off all but 3 tablespoons of oil from the skillet, leaving the browned bits in the pan. Whisk in the flour and cook over medium heat, stirring constantly, until the roux turns the color of a penny — about 2 minutes. You’ll smell it toast before you see it darken; that nutty smell is the gravy’s foundation. Slowly pour in the milk while whisking, then let it come to a gentle simmer. It will thicken as it bubbles. Season with a generous amount of salt and a very generous amount of black pepper — the gravy should be peppery enough to be the reason you ask for more bread. (📸 Photo tip: the gravy should coat the back of a spoon — a slow, even ribbon when you lift it up.)
- Serve: Pour the gravy over the chicken at the table — or serve it alongside in a pitcher and let everyone do it themselves. The crust stays crispiest if the gravy goes on right before you eat, so we do it per plate in this house.
Meal Prep Notes (Yes, You Can Make This Ahead)
I’ve made this on Sunday mornings when we knew the week would be chaos. The buttermilk soak can sit overnight, and the breaded chicken can rest in the fridge, uncovered, for up to 4 hours before it meets the oil. That’s the kind of head start that makes a Tuesday feel like Sunday.
- Fridge: Cooked country fried chicken keeps in an airtight container for up to 3 days. Reheat on a wire rack over a baking sheet at 400°F for 8–10 minutes until the crust crackles when you press it. The microwave works in a pinch but it will soften the crust — I’d rather eat it cold than microwave it.
- Freezer: Not this one. I’ve tried, and the crust turns soggy in the thaw while the gravy splits. If you’re batch-cooking, freeze the gravy separately and make fresh chicken when you want it — that’s the honest answer.
- Reheat: Oven, 400°F, wire rack, 8–10 minutes. Warm the gravy gently on the stovetop with a splash of milk to loosen it back up.
Things I Learned the Hard Way So You Don’t Have To
- The rest is non-negotiable: I know fifteen minutes feels like forever when the oil is hot and you’re hungry. But the crust needs that time to set, or it will slide off in the pan. I’ve tested both ways; there’s no comparison.
- Don’t crowd the pan: Overcrowding drops the oil temperature, and the chicken ends up greasy instead of crisp. Fry in batches — it takes an extra five minutes and it’s the difference between a crust and a wet coat.
- Let the oil heat back up between batches: The oil gets hotter as it cycles. Give it a minute to recover before you add the next round. If the crust is browning too fast, the oil’s too hot — that’s the signal to back off.
- Paper towels are a lie: I said it in the steps and I’ll say it again because it’s the most common mistake I see in the comment section. A wire rack keeps the crust alive. Paper towels turn it into a steamed version of what it should be.
- Even if it’s not perfect, it’s still good: The first time you make this, the crust might be a little uneven or the gravy a little thin. That’s fine. It’s still going to be a better dinner than anything from a drive-through, and the next time you’ll know exactly what to look for.
Swaps That Actually Work
- Gluten-free: Use a 1:1 gluten-free flour blend instead of the all-purpose flour. The cornstarch already helps with structure, so the blend holds up well. I’ve tested it for my nephew who has celiac, and he asked for seconds before he remembered to ask if it was safe.
- Dairy-free buttermilk: Stir a tablespoon of lemon juice or white vinegar into a cup of regular milk, let it sit 5 minutes, and you’ve got a passable buttermilk. For a fully dairy-free version, use the same trick with unsweetened oat milk, and use olive oil or a plant butter for the gravy roux. The tang won’t be quite as sharp, but the structure holds.
- Spicy version: Add a teaspoon of cayenne to the flour mixture and a splash of hot sauce to the gravy. It wakes the whole dish up. My kids need the mild version, so I just shake extra cayenne onto the adult plates at the table.
- Chicken thighs: Use 6 boneless, skinless thighs instead of breasts — they’re juicier and nearly impossible to overcook. The breading method is identical; just pound them to the same ½ inch thickness.
- Company version: This one’s for the nights when you want it to feel special — add a teaspoon of dried thyme to the flour and finish the gravy with a splash of cream instead of all milk. It reads like a restaurant dish that took all day, and it still takes the same hour.
Questions I Get About This All the Time
Q: Why did my crust fall off?
A: Ugh, I’ve been there. It’s almost always one of three things: the rest was skipped, the oil wasn’t hot enough, or the chicken was flipped too early. Give the crust fifteen minutes on the rack, get the oil to that shimmering stage, and let the first side get deep golden before you even think about touching it. If it’s not releasing from the pan, it’s not ready — the crust will let go when it’s done.
Q: Can I make this without buttermilk?
A: Yes — and I say that with a caveat. Stir a tablespoon of lemon juice or white vinegar into a cup of regular milk and let it sit for five minutes. It won’t have the exact same tang or thickness as real buttermilk, but it’ll get you through. I’ve also had readers report good results with thinned plain yogurt, though I haven’t tested that myself with this exact recipe.
Q: How long does it last? Can I freeze it?
A: Cooked chicken keeps in the fridge for up to 3 days in an airtight container. Reheat it in the oven at 400°F on a wire rack — that’s the key to getting some of the crunch back. I don’t recommend freezing the breaded or fried chicken; the crust loses its soul in the thaw. The gravy does freeze well for up to a month, so if you’re batch-cooking, freeze the gravy and make fresh chicken when you want it.
Q: What do you serve with this?
A: Mashed potatoes to catch the gravy, green beans with bacon to cut the richness, and something vinegary — a quick pickle or a sharp slaw — to balance it all out. My kids would live on just the chicken and gravy if I let them, but we always do at least one green thing and a pile of biscuits. The biscuits are non-negotiable at our house; we just don’t talk about it.
More Recipes My Family Makes on Repeat
If you liked this one, here are a few others that get the same reaction at our table:
- [INTERNAL LINK PLACEHOLDER: Buttermilk Biscuits] — Flaky on top, soft in the middle, and they’ve never once lasted past breakfast.
- [INTERNAL LINK PLACEHOLDER: Skillet Green Beans with Bacon] — The one vegetable side my kids ask for by name, and they don’t ask for vegetables.
- [INTERNAL LINK PLACEHOLDER: Brown Butter Mashed Potatoes] — The gravy’s best friend; these catch every drop and ask for more.
The first time you cut into this chicken, that crackle will tell you everything. It’s the same sound Marta heard in her kitchen when she’d finally gotten the method to match the memory — the one she brought with her from Germany and the one she found in the South, both of them living in the same pan. Once you hear it, you’ll know exactly what I mean.
If you make it, drop a comment below and tell me how the crust held up for you — I love hearing how this one goes in other kitchens! And tag me on Pinterest when you share a photo; I like seeing them.
📌 Country fried chicken recipe that stays shatteringly crisp even under the peppery gravy — save it for your next Sunday supper.
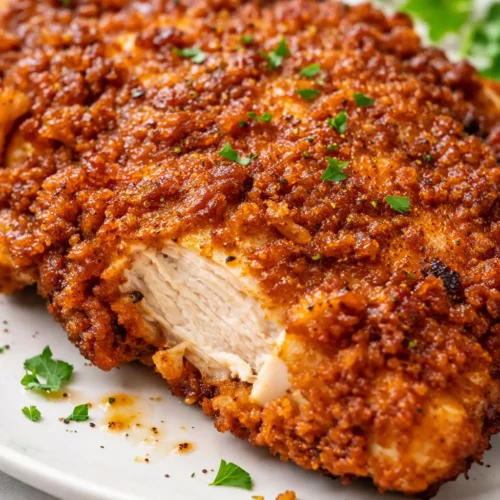
Country Fried Chicken That Stays Crispy Even Under the Gravy
Equipment
- 12-inch cast iron skillet
- Wire Rack
- Baking Sheet
- Meat Mallet or Rolling Pin
- Two Shallow Dishes
- Tongs
- Whisk
- Kitchen Thermometer
Ingredients
For the Chicken
- 4 boneless, skinless chicken breasts (about 6 ounces each)
- 1½ cup buttermilk
- 1 tablespoon hot sauce (Frank’s)
- 2 cups all-purpose flour
- ¼ cup cornstarch
- 2 teaspoons smoked paprika
- 1 teaspoon garlic powder
- 1 teaspoon onion powder
- 1 teaspoon kosher salt, plus more for finishing
- ½ teaspoon cayenne (use ¼ for kids)
- 1 cup neutral oil (peanut or canola)
For the Gravy
- 3 tablespoons reserved fry oil
- 3 tablespoons all-purpose flour
- 2 cups whole milk
- salt to taste
- generous amount black pepper
Instructions
- Pound the chicken: Lay each breast between two sheets of wax paper and pound to about ½ inch thick. Aim for an even thickness — if you skip this, the thick end will still be raw when the thin end is done.
- Soak: Whisk the buttermilk and hot sauce together in a shallow dish. Submerge the chicken, cover, and let it sit at room temperature while you set up, or up to overnight in the fridge.
- Mix the dredge: In a second shallow dish, whisk the flour, cornstarch, smoked paprika, garlic powder, onion powder, salt, and cayenne. Taste a pinch — if it tastes flat, add more salt.
- Dredge: Working one piece at a time, lift chicken from buttermilk, let excess drip, press into flour, flip, coat, then dip back into buttermilk and into flour again. This double dredge builds a crust with real depth.
- Rest: Place breaded chicken on a wire rack for 15 minutes. The coating will change from dusty to tacky — that is the flour hydrating and setting into a crust that clings.
- Heat the oil: Add oil to a cast iron skillet over medium-high heat until shimmering, about 350°F. Drop a pinch of flour in — it should sizzle steadily. A violent spatter means too hot; no bubbles means not ready.
- Fry in batches: Lay chicken in hot oil without crowding. Cook 4 to 5 minutes per side until the crust is dark honey colored and internal temperature reaches 165°F. Keep a steady, low sizzle.
- Drain on the rack: Transfer fried chicken to a wire rack, not paper towels. Paper towels trap steam and soften the bottom crust.
- Make the gravy: Pour off all but 3 tablespoons oil, leave browned bits. Whisk in flour and cook until roux turns penny colored, about 2 minutes. Slowly pour in milk while whisking, bring to a simmer, season generously with salt and plenty of black pepper.
- Serve: Pour gravy over chicken at the table or serve alongside in a pitcher. For the crispiest crust, gravy goes on right before eating.
Notes
Related posts:
 The Slow Cooker Cowboy Casserole That Saves Tired Weeknights (No Soggy Tots Allowed)
 Quick Lemon Ricotta Pasta for Busy Weeknights: Creamy, Bright, and on the Table in 20 Minutes
 Lemon Garlic Butter Baked Salmon in Foil That’s Ready in 25 Minutes — No Fuss, No Mess
 Lipton Onion Soup Meatloaf for Tuesday Nights: Moist, Savory, and the Only One You’ll Ever Need
 Kielbasa Sausage Cheesy Potato Casserole That Tastes Like Sunday Dinner — In Under an Hour
 Quinoa Chicken Sausage Bowls That Are Ready in 30 Minutes (And Actually Keep Well)