
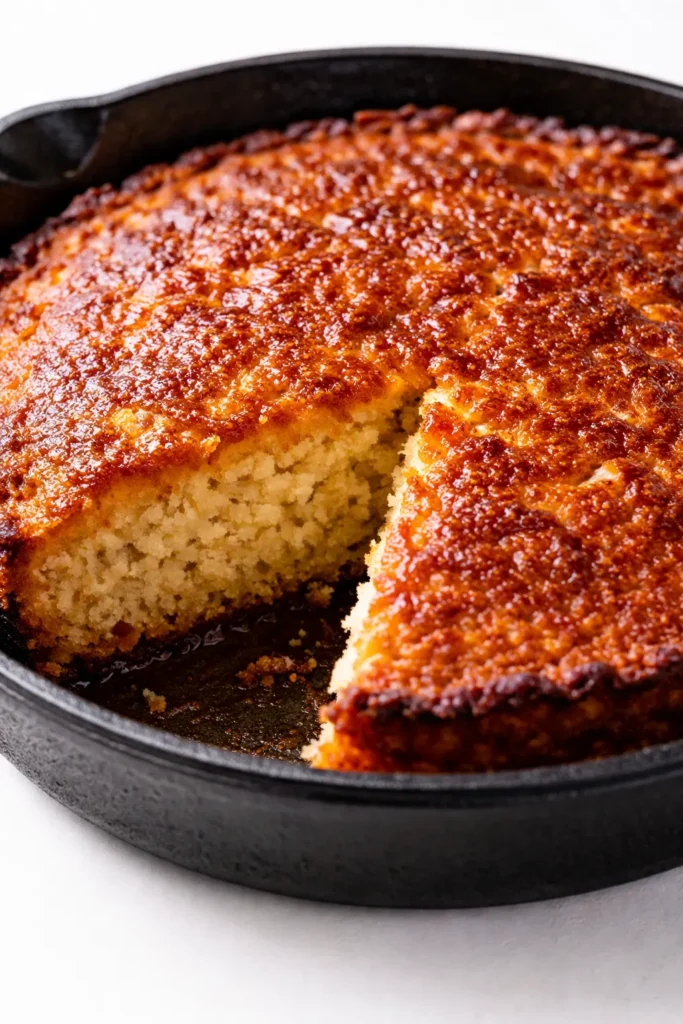
The first time Marta pulled a cake off the grill, I thought she’d lost her mind. The batter went into a cold cast iron skillet, and the lid came down over the coals. Twenty minutes later, the smell that came off that cake — sweet butter meeting hickory smoke — was something I had never smelled before and have been chasing ever since. This is that cake. It’s tender in the middle, with a shatteringly crisp top from the turbinado sugar, and the smoke works its way into every bite without overwhelming the brown butter. You will not believe it came off a grill.
The short version: A buttery, tender cake with a crisp turbinado crust, kissed by smoke, baked entirely on the grill in a cast iron skillet.
I’ve tested this eleven times to get the crust right — the balance of smoke and sweet that makes your neighbors wander over. My pickiest eater, Nora, asked for a second slice before I’d even finished taking the photo.
- Serves: 8–10 as dessert
- Hands-On Time: 20 min | Total Time: 1 hr 20 min
- Difficulty: Easy, but requires a watchful eye on the grill
- Cost per serving: ~$2.50
- Calories: ~380 per serving (with glaze)
- Dietary Notes: Vegetarian. Gluten-free and dairy-free adaptable (see variations).
(Photo above: An overhead shot of the golden-brown cake cooling on a wire rack set inside the cast iron skillet, a drizzle of honey-brown butter glaze pooling on the surface, with a grill spatula resting against the side. Background is a weathered wooden table with a few fresh peaches and a sprig of mint.)
Why This Cake Belongs on Your Grill (Not Just in Your Oven)
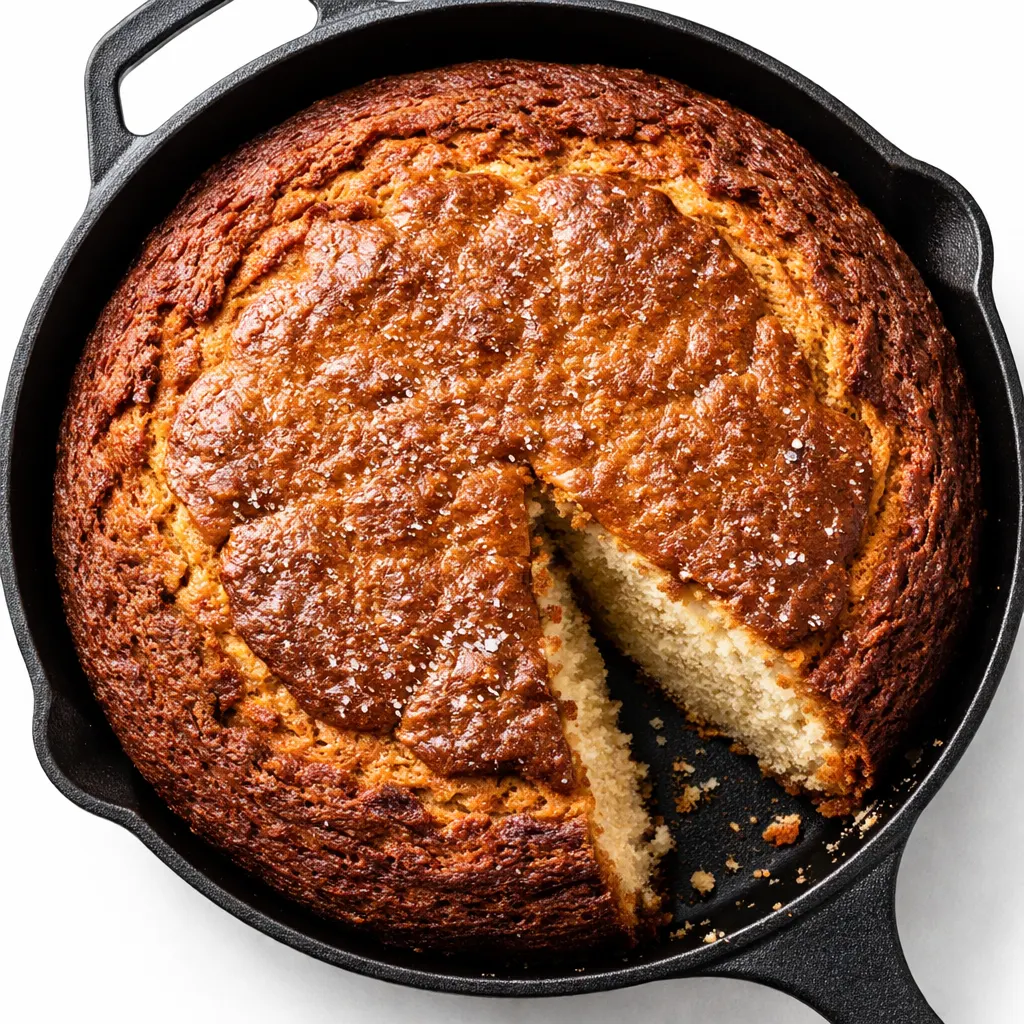
The grill does two things an oven can’t: it wraps the cake in a gentle, indirect heat that cooks it evenly, and it breathes a whisper of smoke into the batter as it bakes. You don’t need a smoker or wood chips — just a clean grill with a lid will do it. The smoke from the sear zone drifts under the skillet and up around the cake, and that subtle hit of campfire is what makes it unforgettable.
The brown butter is the other piece of the puzzle. It adds a nutty depth that stands up to the smoke. It’s not subtle — it’s a flavor that announces itself. When you brown butter on the stove and then let it cool just enough, the toasty notes get amplified by the grill’s heat. Together, they create a cake that tastes like summer nights.
Plus, on a hot July evening, keeping the oven off is reason enough. The grill does the work while you sit on the porch with a glass of something cold.
The Ingredients That Make This Cake (Plus My Notes)
- Unsalted butter (1 cup, 2 sticks): We’re browning it first, then letting it cool slightly. This is the single most important step for flavor. Don’t rush it — the color should be deep amber with a nutty smell. European-style butter gives a richer flavor, but standard unsalted works fine. My kids can smell the difference when I use margarine — don’t do it.
- Light brown sugar (1 cup, packed): Brown sugar adds moisture and a molasses note that pairs perfectly with the smoke. Dark brown sugar works too, but it makes the cake denser. I tested both and the light version wins for tenderness.
- Eggs (2 large, room temperature): Room temperature eggs emulsify into the browned butter without seizing it. If you forget to take them out, put them in a bowl of warm water for 5 minutes — I do this all the time.
- Cake flour (1.5 cups): Cake flour gives this the tender crumb it needs. All-purpose works in a pinch, but you’ll miss some of the softness. To make your own: remove 2 tbsp of flour from 1.5 cups all-purpose and replace with 2 tbsp cornstarch. Sift it three times.
- Baking powder (1.5 tsp) and salt (½ tsp): Make sure your baking powder is fresh. I test mine by adding a teaspoon to hot water — if it fizzes, it’s good.
- Buttermilk (½ cup, room temperature): The acid in buttermilk tenderizes the gluten and keeps the cake moist. Cold buttermilk will seize the browned butter and give you a thick, lumpy batter. Leave it on the counter for 30 minutes.
- Vanilla extract (2 tsp): Pure vanilla, not imitation. Marta would have thrown imitation out the window. It matters here because the flavor is front and center.
- Turbinado sugar (2 tbsp for topping): This creates the crisp, caramelized crust. Don’t skip it or substitute with granulated — it won’t give you the same crunch. I learned that the hard way on test batch number three.
- Honey (for the glaze, optional): A light drizzle of honey mixed with a little melted butter makes a beautiful glaze. We do this when company’s coming. On a Tuesday, we eat it plain.
What You’ll Need
- 10-inch cast iron skillet: Well-seasoned is key. If yours is new, give it a few rounds of cornbread first.
- Grill (gas or charcoal): Must have a lid and a way to maintain medium-low indirect heat (325–350°F).
- Small saucepan: For browning the butter. Light-colored bottom helps you see the color change.
- Mixing bowls: One large, one medium. Glass or stainless steel — plastic can hold onto odors.
- Whisk and rubber spatula: The spatula is for folding the batter. Use a gentle hand.
- Instant-read thermometer: Optional, but helpful for checking the grill temperature and the cake’s internal temp (205°F is done).
Let’s Make This Cake (Step by Step)
This moves quickly once you start mixing, so have everything measured and ready to go. I like to set the grill up first so it’s preheating while I mix.
Set up the grill: Clean the grates and set up for indirect heat. For gas, turn one burner to medium-low and leave the others off. For charcoal, bank the lit coals to one side. Aim for 325–350°F inside the grill with the lid closed.
- Brown the butter: Place the butter in a small saucepan over medium heat. Swirl occasionally. It will melt, then foam, then the foam will subside. Watch closely — when the milk solids at the bottom turn deep amber and the butter smells nutty, pull it off the heat. Pour it into a heatproof bowl to stop the cooking.
(📸 Photo tip: You’re looking for milk solids the color of a well-toasted hazelnut — not black, not pale. Golden amber with a few darker specks.) - Mix the dry ingredients: In a large bowl, whisk together the cake flour, baking powder, and salt. Set aside.
- Mix the wet ingredients: In a medium bowl, whisk the brown sugar, buttermilk, eggs, and vanilla until smooth. Slowly stream in the cooled browned butter (it should be warm, not hot) while whisking constantly.
- Combine the batter: Pour the wet ingredients into the dry ingredients. Fold gently with a rubber spatula just until no streaks of flour remain. Do not overmix — a few small lumps are fine.
(📸 Photo tip: The batter should be thick and glossy, almost like a thick pancake batter. It should drop off the spatula in a soft ribbon.) - Prepare the skillet: Grease the cast iron skillet generously with butter or vegetable oil. Pour the batter into the skillet and spread it evenly. Sprinkle the turbinado sugar over the top in an even layer.
- Grill the cake: Place the skillet on the indirect-heat side of the grill. Close the lid. Bake for 45–55 minutes. Rotate the skillet halfway through to ensure even browning.
Sensory doneness cue: The cake will pull away from the edges of the skillet when it’s done. The top should be golden brown and cracked slightly. A toothpick inserted in the center should come out with moist crumbs — not wet batter. If you tap the bottom of the skillet (carefully!), it should sound hollow. If it doesn’t, give it five more minutes. - Rest and serve: Remove the skillet from the grill and place it on a wire rack. Let the cake cool in the pan for 15 minutes. Then turn it out onto the rack to cool completely. Drizzle with the honey-butter glaze if you’re using it.
How I Meal Prep These for the Week
This cake actually gets better on day two — the flavors settle and the smoke softens into something rounder. I make a double batch on Saturday mornings when I’m already firing up the grill for lunch, and we snack on it all week.
- Fridge: Store tightly wrapped at room temperature for up to 4 days. The glaze will soften the top crust, so if you want it crunchy, reheat slices on the grill or in a toaster oven for a few minutes.
- Freezer: Yes! Wrap the unglazed cake tightly in plastic wrap, then foil. Freeze for up to 3 months. Thaw at room temperature, then glaze before serving.
- Reheat: The microwave works for softening it, but the grill or a cast iron pan is better — it re-crisps the outside while warming the inside. I do mine on the grill for about 3 minutes per side.
A Few Things I Wish Someone Had Told Me
- Trust the indirect heat: I’ve had readers tell me they put the skillet directly over the flames because they were impatient. The bottom burned and the center stayed raw. Indirect heat is not a suggestion — it’s the only way this works. Keep the temperature between 325–350°F.
- Don’t skip the turbinado sugar: It creates a shatteringly crisp crust that contrasts with the tender crumb. I tested it with granulated sugar and it just dissolved into the batter. The coarse crystals are non-negotiable in my kitchen.
- Tent it if it’s browning too fast: Every grill runs a little different. If the top is darkening before the center is set, lay a piece of foil loosely over the skillet. It’ll slow down the top while the middle catches up.
- Let it rest before cutting: I know the smell is torture. But cutting into it warm will give you a gummy, sunken center. Fifteen minutes in the pan, then at least 30 minutes on the rack. It finishes setting during that time. Even if you mess this part up a little, it’ll still taste good — I’ve done it.
Make It Yours: Variations That Actually Work
- Dairy-Free: Use vegan butter (brown it just like regular butter) and full-fat oat milk + 1 tbsp lemon juice for the buttermilk. I tested this for a friend and it was shockingly close to the original.
- Gluten-Free: Replace the cake flour with 1.5 cups gluten-free all-purpose flour blend (with xanthan gum) + 2 tbsp cornstarch. Sift it well. The texture is slightly more crumbly, but the flavor is all there.
- Fruity: Fold 1 cup of fresh blueberries or raspberries into the batter before pouring it into the skillet. The berries burst and create little jammy pockets. My kids love this version.
- Spiced: Add 1 tsp cinnamon, 1/2 tsp nutmeg, and a pinch of cardamom to the dry ingredients. This is perfect for fall grilling — it makes the house smell like thanksgiving, but you’re standing outside.
Questions People Always Ask Me About This Cake
Q: Why did my cake stick to the skillet?
A: Oh, I’ve cried over a stuck cake before. It almost always means the skillet wasn’t well-seasoned or buttered enough. Use a generous amount of butter, and make sure your cast iron is in good shape. A well-seasoned skillet is like nonstick — if yours is patchy, give it a quick stovetop seasoning before you start.
Q: Can I use a regular loaf pan instead of a cast iron skillet?
A: You can! A 9×5 loaf pan works well. Adjust the time to 50-60 minutes. You won’t get the same smoky flavor from the grill, but the cake will still be delicious. I’ve done it in the oven at 350°F and it’s a fine cake — it’s just not the same experience.
Q: How long does this cake last?
A: Wrapped tightly at room temperature, it’s beautiful for 4 days. The crust softens after day one, but toasting a slice on the grill brings it right back to life. We keep it on the counter wrapped in parchment inside a reusable bag.
Q: What do you serve with this?
A: My favorite is grilled peaches or nectarines with a dollop of creme fraiche. A scoop of vanilla ice cream is never a bad idea. My kids actually love it for breakfast with a glass of cold milk — I don’t blame them. It’s also incredible with a cup of coffee the morning after.
More Recipes My Family Makes on Repeat
If this cake has you looking at your grill differently, here are a few other recipes that took me by surprise:
- [INTERNAL LINK PLACEHOLDER: Cast Iron Skillet Chocolate Chip Cookie] — One giant cookie, baked in the same skillet, served warm with ice cream. Ready in 25 minutes.
- [INTERNAL LINK PLACEHOLDER: Grilled Stone Fruit with Honey Mascarpone] — The perfect 10-minute topping for this cake, or on its own with a little mint.
- [INTERNAL LINK PLACEHOLDER: Marta’s Buttermilk Biscuits] — Not grilled, but they use the same brown butter trick, and they’re the best biscuits I’ve ever made.
Every time I pull this cake off the grill, the smoke curls up around the skillet, and for a second I’m back on Marta’s porch, watching her work. It’s the kind of recipe that makes you rethink what a grill can do. I hope it becomes that for you, too.
If you make it, I’d love to hear about it — drop a comment below or tag me on Pinterest. There’s nothing like seeing your version of it.
📌 Smoky brown butter grilling cake recipe that’s tender on the inside and crisp on the outside — save it for your next summer cookout or backyard dinner party!
Brown Butter Grilling Cake
Equipment
- 10-inch cast iron skillet
- Grill (gas or charcoal) with lid
- Small saucepan (light-colored bottom)
- Mixing bowls (1 large, 1 medium)
- Whisk
- Rubber spatula
- Instant-read thermometer (optional)
Ingredients
For the Cake
- 1 cup unsalted butter (2 sticks)
- 1 cup (packed) light brown sugar
- 2 large eggs, room temperature
- 1½ cups cake flour
- 1½ tsp baking powder
- ½ tsp salt
- ½ cup buttermilk, room temperature
- 2 tsp vanilla extract
- 2 tbsp turbinado sugar (for topping)
For the Glaze (optional)
- 2 tbsp honey
- 1 tbsp unsalted butter, melted
Instructions
- Set up the grill: Clean grates and set up for indirect heat. For gas, turn one burner to medium-low and leave others off. For charcoal, bank lit coals to one side. Aim for 325-350°F inside the grill with lid closed.
- Brown the butter: Place butter in a small saucepan over medium heat. Swirl occasionally. It will melt, then foam, then the foam will subside. Watch closely — when milk solids at bottom turn deep amber and the butter smells nutty, pull it off heat. Pour into a heatproof bowl to stop cooking. The color should be like a well-toasted hazelnut.
- Mix dry ingredients: In a large bowl, whisk together cake flour, baking powder, and salt. Set aside.
- Mix wet ingredients: In a medium bowl, whisk brown sugar, buttermilk, eggs, and vanilla until smooth. Slowly stream in cooled browned butter (warm, not hot) while whisking constantly.
- Combine batter: Pour wet ingredients into dry. Fold gently with a rubber spatula just until no streaks of flour remain. Do not overmix — a few small lumps are fine. Batter should be thick and glossy, like thick pancake batter.
- Prepare skillet: Grease cast iron skillet generously with butter or oil. Pour batter into skillet and spread evenly. Sprinkle turbinado sugar over the top in an even layer.
- Grill the cake: Place skillet on the indirect-heat side of the grill. Close lid. Bake for 45–55 minutes, rotating skillet halfway through. Doneness cues: cake pulls away from edges, top is golden brown and cracked slightly, toothpick inserted in center comes out with moist crumbs (not wet batter). Tap bottom of skillet — should sound hollow.
- Rest and serve: Remove skillet from grill and place on wire rack. Cool in pan 15 minutes, then turn out onto rack to cool completely. Drizzle with honey-butter glaze if using. Serve warm or at room temperature.
Notes
• Dairy-free: Use vegan butter and full-fat oat milk + 1 tbsp lemon juice for buttermilk.
• Gluten-free: Use 1.5 cups GF all-purpose flour blend (with xanthan gum) + 2 tbsp cornstarch; sift well.
• Fruity: Fold 1 cup fresh blueberries or raspberries into batter.
• Spiced: Add 1 tsp cinnamon, 1/2 tsp nutmeg, pinch cardamom to dry ingredients. Pro tips (learned the hard way):
1. Trust indirect heat — direct flame burns the bottom and leaves the center raw.
2. Don’t substitute turbinado sugar; granulated just dissolves.
3. Tent with foil if top browns too fast before center is set.
4. Let cake rest at least 30 minutes on rack before cutting — cutting warm gives a gummy center.
Related posts:
 Breakfast Potatoes That Actually Get Crispy (Not Soggy) — Finally
 The Iced Coffee Float That’s Better Than the Coffee Shop Version — Ready in 5 Minutes
 No-Blender Nutella Milkshake That’s Creamier Than Any Blender Version — in 5 Minutes
 Crispy Breakfast Burritos That Actually Stay Golden (Not Soggy) — Ready in 35 Minutes
 Blueberry Banana Bread: The Trick That Keeps the Berries Suspended (Not Sunk to the Bottom)
 The Moistest Chocolate Chip Banana Bread (I’ve Made This 80 Times to Prove It)