
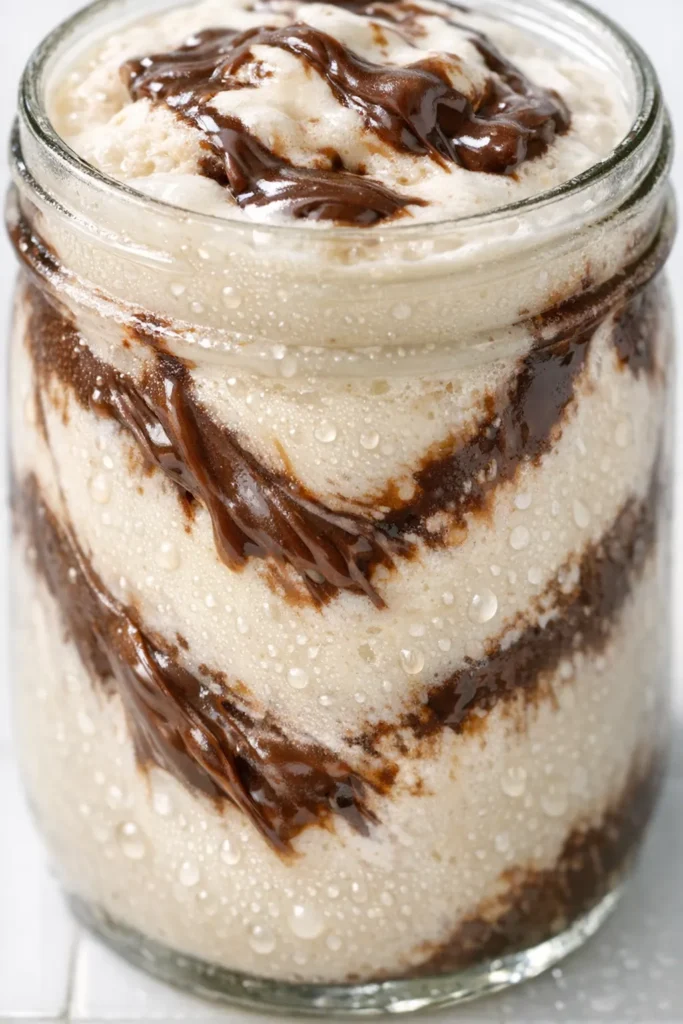
The first time I made this, I didn’t believe it would work. A milkshake without a blender feels like a trick, doesn’t it? But here’s the thing — the sound of ice cream sloshing against the glass of a mason jar, the rhythm of shaking until your arms feel it, that’s where the creaminess comes from. Not from a noisy machine, but from your own two hands. My kids make this after school on the days when they just need something special, and the whole house smells like chocolate and vanilla by the time they’re done.
The short version: Thick, cold, and intensely chocolate-hazelnut — no blender required, just a jar and five minutes.
I’ve tested this at least thirty times — different milks, different ice creams, different shaking rhythms. This particular ratio, this exact method, produces the silkiest milkshake I’ve ever had from a home kitchen. Marta would have called it “a proper treat” — simple ingredients, handled with care, no machine required.
- Serves: 1 as a generous treat
- Hands-On Time: 5 min | Total Time: 5 min
- Difficulty: Easy enough for a kid to make after school
- Cost per serving: ~$2.50
- Calories: ~580 per serving
- Dietary Notes: Vegetarian. Easily adaptable for dairy-free.
(Photo above: overhead shot of a tall glass of Nutella milkshake on a faded blue farmhouse table, a mason jar off to the side, natural afternoon light streaming in from the right, a spoon resting on the rim.)
Why Shaking Beats Blending Every Time
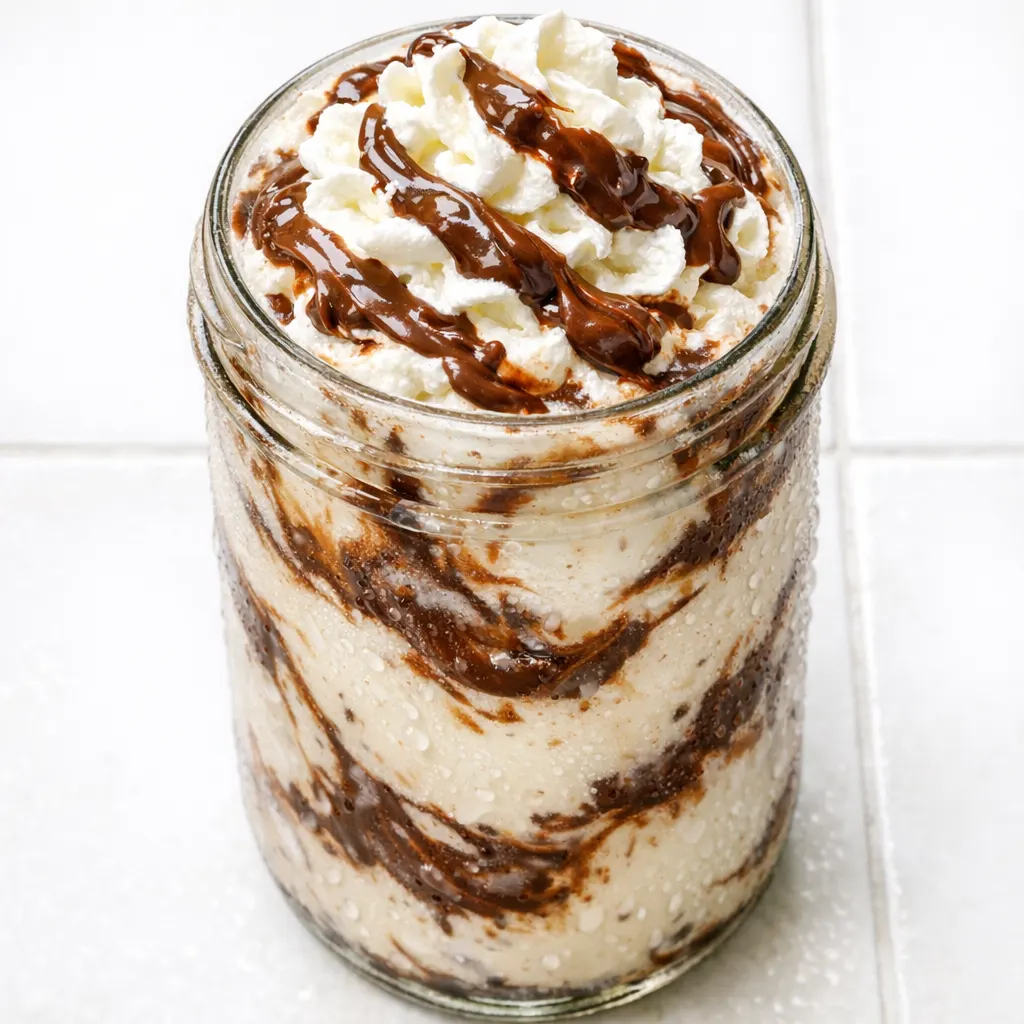
A blender blade is aggressive. It introduces heat and air, which sounds fine until your milkshake turns into a thin, foamy version of itself. Shaking, on the other hand, is a slow dance. The Nutella dissolves into the milk first, creating a smooth base. Then the ice cream breaks down in controlled increments — you are working with it, not forcing it. You end up with something thick, spoonable, and intensely cold. Plus, you get to involve your kids in the process. My daughter Nora used to love shaking the jar until her arms got tired — that’s how you know it’s ready.
What Goes In (And Why It Matters)
- ½ cup whole milk: The fat carries the Nutella flavor and gives the shake its luxurious body. Skim milk works, but it won’t be as thick or satisfying. Oat milk is my go-to dairy-free swap — it has enough heft to mimic whole milk.
My kids can taste the difference if I use anything less than whole milk, so I don’t bother trying anymore. - 1 tablespoon Nutella: Quality matters here. This is the star of the show. A full tablespoon delivers that distinct chocolate-hazelnut flavor without overwhelming the vanilla.
I’ve tried homemade versions, and honestly, the original does something magical when it emulsifies with the cold milk. - 2 cups vanilla ice cream: Use a good quality one — the kind that lists cream, sugar, and vanilla as the first three ingredients. The vanilla acts as a canvas for the hazelnut chocolate.
My husband once used chocolate ice cream in a pinch. It was delicious, but it overwhelmed the Nutella. Vanilla lets the Nutella shine.
The Only Tool You Need
- A mason jar (or any jar with a tight-fitting lid): A pint-sized jar is perfect. Wide mouth makes it easier to scoop in the ice cream.
- A long-handled spoon: For that crucial 30-second stir. A metal spoon stays cold and breaks up the ice cream efficiently.
That’s it. No blender, no food processor, no fancy gadgets. Just your hands, a jar, and five minutes.
Making Your Milkshake, Step by Simple Step
This goes fast, so read through once before you start. The whole thing takes less time than finding your blender and washing it afterward.
- Prepare: Take your ice cream out of the freezer for about 5 minutes so it softens slightly. Run your jar under cold water so it starts cold — this keeps the shake thick.
- Combine milk and Nutella: Pour the milk into the jar first, then add the Nutella. Watch it sink and swirl. That’s the beginning of the emulsion.
(📸 Photo tip: Hold the jar up to the light — the milk should be an even, light chocolate brown with no streaks after shaking.) - Shake: Screw the lid on tight. Shake vigorously for about 30 seconds. Listen for the sound to change from a watery slosh to a thicker, creamier susurrus. That’s the Nutella fully incorporating into the milk. Your arm will start to feel it.
- Add the ice cream: Open the jar, scoop in the 2 cups of ice cream. Don’t worry if it piles above the rim.
(📸 Photo tip: Get a shot of the scoop going in — the contrast of the creamy white ice cream against the chocolate milk is beautiful.) - Stir: Use your spoon to stir the ice cream into the milk mixture. Press against the sides of the jar to break up the ice cream. You’re looking for a thick, cohesive consistency — not completely liquid, but easily pourable. This takes about 30 seconds.
- Shake again: Return the lid and give it one final 10-second shake. This creates a velvety, frothy top — the finishing touch.
- Pour and serve: Pour into your favorite glass. Serve immediately with a straw and a spoon. You’ll need both.
Can You Make This Ahead? (Honestly?)
This is a “make and serve immediately” kind of recipe. Ice cream melts. But I’ve tested a few workarounds for busy days.
- Fridge: Not recommended. It will separate and become watery. Make it fresh.
- Freezer: You can freeze the finished milkshake in a freezer-safe container for up to an hour. Let it sit at room temperature for 10 minutes and stir vigorously before serving.
- Reheat: N/A. This is a cold treat! If it melts, just drink it with a straw and call it a chocolate milk — no shame in that.
Things I Learned the Hard Way
- A warm jar is the enemy. If your jar is warm from the dishwasher, the ice cream will melt instantly. Run it under cold water first. That simple step buys you enough time to get a perfectly thick shake.
- Don’t over-shake the final step. The second shake is just to combine. Over-shaking will incorporate too much air and make it foamy. Ten seconds is the sweet spot.
- Use a towel to hold the jar. The jar gets shockingly cold. Wrap a dish towel around it for a better grip. My kids learned this when they dropped their first one on the kitchen floor.
- Even if you mess this up a little, it is still good. I have made this thin, and I have made it so thick it barely poured. Both times, my family finished every drop. You cannot truly ruin a Nutella milkshake.
Make It Your Own
- Dairy-Free: Use oat milk and a good quality dairy-free vanilla ice cream (like Oatly or So Delicious). I make this version for my nephew, and he loves it — doesn’t miss the dairy at all.
- Chocolate-Hazelnut + Banana: Add half a frozen banana in step 4. Mash it into the milk before adding the ice cream. It adds a natural sweetness and makes it even thicker. My kids ask for this version on weekends.
- Extra Decadent: Swap the milk for heavy cream and use chocolate ice cream instead of vanilla. This is the version I make when I really need a treat.
- Kid-Friendly Activity: Set up a “milkshake bar” with toppings — sprinkles, crushed cookies, whipped cream — and let the kids shake their own. It’s a perfect after-school activity that keeps them busy for a solid ten minutes.
Questions My Readers Ask
Q: Why did my milkshake turn out watery?
A: Ugh, I’ve been there. The culprit is usually ice cream that was too soft or a jar that wasn’t cold enough. Next time, let the ice cream soften at room temp for only 5 minutes — don’t let it melt. And make sure your jar is cold to the touch. You’ve got this next time.
Q: Can I use skim milk or almond milk?
A: You can, but it won’t be as thick. The fat in whole milk or oat milk (for dairy-free) gives it that milkshake body. Skim milk will make it more of an iced chocolate milk — which is still delicious, just different. My husband accidentally used almond milk once, and he said it tasted fine but didn’t have the same luxurious mouthfeel.
Q: How long does this last? Can I freeze it?
A: Fresh is best. It can sit in the freezer for about an hour, but after that it freezes solid. If it does, let it thaw on the counter for 15 minutes and give it a good stir. The texture won’t be quite the same, but the flavor is still there.
Q: What do you serve with this?
A: Honestly, it is the serving. But if I’m feeling extra, I’ll bake a batch of chocolate chip cookies to go alongside. My kids love it with a handful of pretzels for the salty crunch — that sweet-and-salty combination is hard to beat. For a grown-up twist, I’ve been known to serve it with a shortbread cookie dipped in dark chocolate.
More Recipes My Family Makes on Repeat
If you liked this one, here are a few others that get the same reaction at our table:
- [INTERNAL LINK PLACEHOLDER: No-Churn Nutella Ice Cream] — Creamier than store-bought and you don’t need an ice cream maker.
- [INTERNAL LINK PLACEHOLDER: Classic Chocolate Malt] — The old-school version my grandmother taught me, made with malted milk powder and a real blender.
- [INTERNAL LINK PLACEHOLDER: 3-Ingredient Brownies] — The perfect partner for this shake. Fudgy, rich, and done in 25 minutes.
There is a particular kind of satisfaction in making something this indulgent with so little effort — no blender to wash, no complicated steps. It’s just you, a jar, and a few minutes of shaking. I hope you make one for yourself and one for someone you love.
If you try this no-blender Nutella milkshake, I’d love to hear about it! Drop a comment below or tag me on Pinterest.
📌 No-blender Nutella milkshake recipe that’s thick, creamy, and ready in 5 minutes — save this for your next chocolate craving.
No-Blender Nutella Milkshake
Equipment
- Mason jar (pint-sized)
- Long-handled spoon
- Dish towel
Ingredients
Milkshake Base
- 1/2 cup whole milk (or oat milk for dairy-free)
- 1 tablespoon Nutella
- 2 cups vanilla ice cream (good quality)
Optional Add-Ins
- 1/2 frozen banana (for banana version)
Instructions
- Prepare: Let the ice cream sit at room temperature for 5 minutes to soften slightly. Run your mason jar under cold water so it starts cold — this keeps the shake thick.
- Combine milk and Nutella: Pour the milk into the jar first, then add the Nutella. Screw the lid on tight and shake vigorously for about 30 seconds. Listen for the sound to change from a watery slosh to a thicker, creamier susurrus — that is the Nutella fully incorporating into the milk.
- Add the ice cream: Open the jar and scoop in the 2 cups of ice cream. It is okay if it piles above the rim.
- Stir: Use a long-handled spoon to stir the ice cream into the milk mixture, pressing against the sides of the jar to break up the ice cream. Stir until you have a thick, cohesive consistency — about 30 seconds.
- Shake again: Return the lid and give it one final 10-second shake. This creates a velvety, frothy top.
- Pour and serve: Pour into a glass and serve immediately with a straw and a spoon. You will need both.
Notes
Tips: Use a cold jar to prevent melting. Do not over-shake the final step — 10 seconds is enough. Use a towel to hold the jar. Even if it gets thin or too thick, it is still delicious.
Related posts:
 Breakfast Potatoes That Actually Get Crispy (Not Soggy) — Finally
 The Iced Coffee Float That’s Better Than the Coffee Shop Version — Ready in 5 Minutes
 Crispy Breakfast Burritos That Actually Stay Golden (Not Soggy) — Ready in 35 Minutes
 Egg Muffins That Don’t Turn Out Soggy or Spongey (High-Protein & Make-Ahead)
 Cottage Cheese Chips That Are Actually Crispy – in Under an Hour
 Lasagna Roll-Ups That Taste Like Sunday Dinner (In 45 Minutes Flat)