
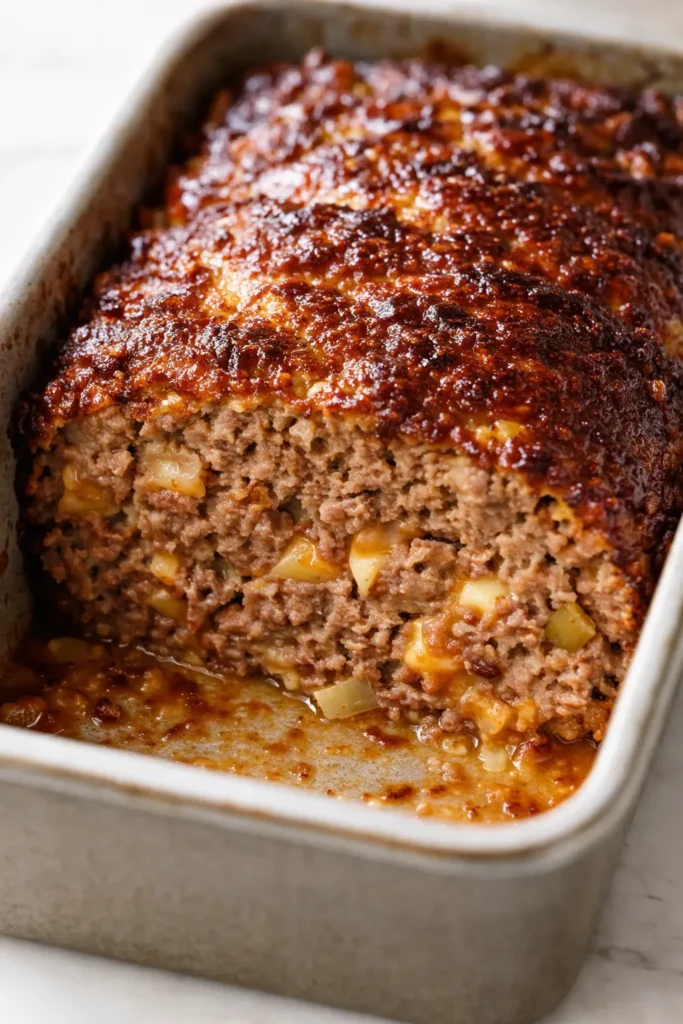
I’ve made a lot of meatloaves in my day. This one — the one my kids actually fight over the leftovers of — solves the two biggest problems with cheeseburger meatloaf: it comes out dry, or it falls apart the second you slice it. This one stays tender, holds its shape, and has pockets of melted cheddar that stretch with every single bite. The smell of it baking — caramelizing ketchup and mustard, mingling with the garlic and rendered beef — is the kind that brings people wandering into the kitchen asking, “What’s for dinner?” before they’ve even taken off their coat.
The short version: 45 minutes, one loaf pan, and it tastes like your favorite diner cheeseburger in sliceable form.
My 19-year-old, Nora, who is a self-proclaimed meatloaf skeptic, asked me to pack her the last slice for the drive back to Savannah. That’s when I knew I had it right.
- Serves: 6-8 as a main dish
- Hands-On Time: 15 min | Total Time: 55 min
- Difficulty: Easy enough for a Tuesday
- Cost per serving: ~$3.50
- Calories: ~420 per serving
- Dietary Notes: Easily adaptable for gluten-free
(Photo above: A slice of meatloaf on a simple white plate, showing the pocket of melted cheddar in the center, the tangy ketchup-mustard glaze glistening on top, and a side of mashed potatoes catching the juices. Warm afternoon light from the kitchen window.)
The Secret to a Meatloaf That Doesn’t Crumble
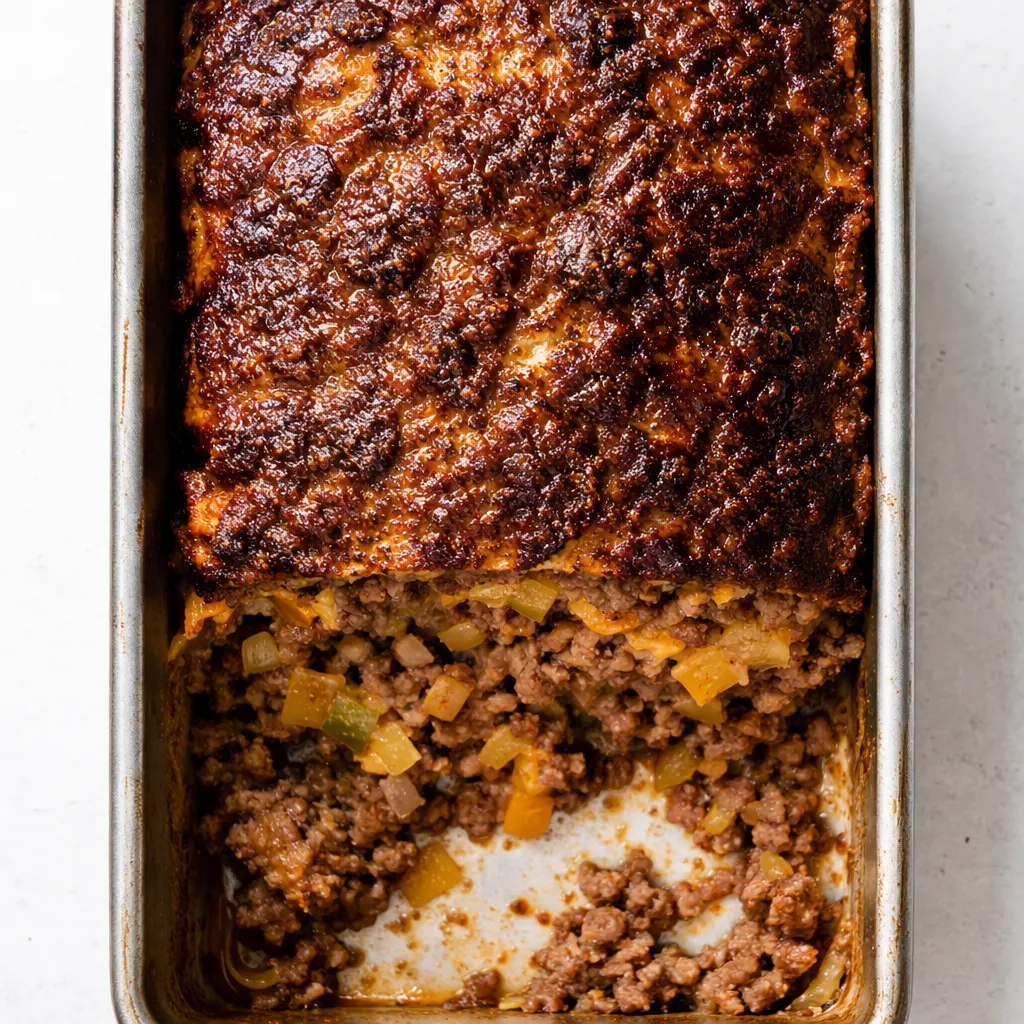
The problem with most cheeseburger meatloaf recipes is they treat it like a regular meatloaf and just throw cheese on top. I wanted cheese inside — gooey, melty pockets that keep the meat tender and add that unmistakable cheeseburger flavor. The real trick though is the panade. That’s just a fancy word for breadcrumbs soaked in milk, and it’s the best thing you can do for ground meat. It keeps everything moist without making it heavy. Skip it, and you’ll be eating crumbly burgers off a fork. Use it, and you’ll get clean slices every time.
I learned this the hard way after too many dry meatloaves that fell apart the minute I looked at them. My grandmother Marta never used a recipe for her meatloaf, but she always added a little milk to the breadcrumbs. She couldn’t tell you why it worked — she just knew it did.
Everything You Need for the Juiciest Loaf
- 2 lbs ground beef (80/20 is ideal): Hey, I know we all want to reach for the lean stuff, but a little fat is flavor here. I’ve tested it with 93/7 and it’s just not the same. Trust me on this one. My kids don’t notice the difference nutritionally, but they definitely notice when it’s dry.
- 1 cup finely diced yellow onion: The finer you dice it, the more it melts into the meat. My kids can’t even find it, they just taste the sweetness. If you have a kid who hates onions, grate it on a box grater — it disappears completely.
- 3 cloves garlic, minced
- 1 cup shredded cheddar cheese (sharp is best), plus extra for stuffing: Don’t skip the center pocket — that’s the moment everyone oohs and aahs over.
- 1/2 cup panko breadcrumbs: They keep the texture light. Regular breadcrumbs work too, but panko gives it a better structure.
- 1/2 cup whole milk: For the panade.
- 2 large eggs, lightly beaten: The binder that holds it all together.
- 2 tbsp ketchup: In the meat, for tang.
- 1 tbsp Worcestershire sauce: The umami bomb. I’ve used soy sauce in a pinch and it works just as well.
- 1 tsp salt
- 1/2 tsp black pepper
For the glaze:
- 1/4 cup ketchup
- 1 tbsp yellow mustard
- 1 tbsp brown sugar
What You’ll Need to Pull This Together
- 9×5 inch loaf pan: Metal or glass works fine. I line mine with parchment for easy lifting.
- Large mixing bowl: For getting your hands in there and mixing gently.
- Small bowl: For the glaze.
- Chef’s knife and cutting board: For dicing the onion.
- Instant-read thermometer: Not strictly required, but it takes the guesswork out. I’ll walk you through the visual cues too.
Let’s Make the Best Cheeseburger Meatloaf of Your Life
Preheat the oven to 375°F. This gives the meatloaf a nice hot environment to set quickly without drying out.
- Make the panade: In your large bowl, combine the panko and milk. Let it sit for 5 minutes until it forms a thick paste. This is the sponge that holds all the moisture. If you’re in a rush, you can skip this soak, but don’t — the texture is noticeably better with it.
- Combine the meat: Add the ground beef, onion, garlic, cheddar, eggs, ketchup, Worcestershire, salt, and pepper to the panade. Use your hands — I promise, it’s the best way — to gently mix everything until it’s just combined. Overmixing makes it tough. Think of it like a burger patty, not a pasta dough. (📸 Photo tip: You’re looking for a uniform mixture with no streaks of raw egg or flour pockets. Stop the second it comes together.)
- Form the loaf: Press half the meat mixture into your parchment-lined loaf pan. Make a shallow well down the center. (📸 Photo tip: This is what becomes the cheesy surprise center. Make it deep enough to hold a good handful of cheese.)
- Add the cheese center: Fill the well with a generous handful of shredded cheddar. Pack the remaining meat mixture on top, sealing the edges so the cheese doesn’t bubble out.
- Make the glaze: Whisk together the ketchup, mustard, and brown sugar. Spread it evenly over the top of the loaf. This caramelizes into a sticky, tangy crust that tastes just like a diner burger sauce.
- Bake: Place the loaf pan on a baking sheet (just in case it bubbles over) and bake for 45-50 minutes. You’re looking for an internal temperature of 160°F and the edges to be bubbling and caramelized. The glaze will look dark and glossy.
- Rest: Let it rest in the pan for 10 full minutes. This is the hardest part, I know, but it’s non-negotiable. The meatloaf needs this time to reabsorb its juices and set so it slices cleanly. Lift it out using the parchment, slice, and watch everyone’s faces light up.
How I Make This for a Stress-Free Week
This meatloaf is a meal prepper’s dream. I almost always make two — one for dinner, one to stash away for the busy week ahead. My secret is slicing it before storing so the kids can just grab a piece for lunch or reheat it in a pan for a crispy-edged sandwich the next day.
- Fridge: Wrap tightly in foil or store in an airtight container for up to 4 days. I like it even better on day two — the flavors settle and get deeper.
- Freezer: Yes! Bake it, let it cool completely, then wrap tightly in plastic wrap and foil. It keeps for up to 3 months. Thaw overnight in the fridge before reheating.
- Reheat: The best way is in a 350°F oven for 15-20 minutes. The microwave works too, but it’ll soften that beautiful glaze. If I’m in a hurry, I’ll pan-fry a slice in a little butter to crisp up the edges — it’s like a whole new meal.
A Few Things I’ve Learned the Hard Way So You Don’t Have To
- Don’t overmix the meat. I know I said it, but it bears repeating. Treat this like a delicate operation. Mix until you don’t see any more streaks of raw egg, then stop. A tough meatloaf is a sad meatloaf, and it usually happens right there in the bowl.
- Don’t skip the rest. That 10-minute rest isn’t just a suggestion from fancy chefs. It’s the difference between a slice that holds together and a slice that crumbles into a glorious, cheesy mess on your cutting board. Both taste good, but one is much easier to eat.
- Use a thermometer if you have one. I’m usually a “poke it and see” kind of cook, but for meatloaf, a thermometer is your best friend. 160°F in the center and you’re golden. Overcook it to 180°F and you’re getting into drier territory. If you don’t have one, look for the glaze to be bubbling and the edges pulling away from the pan slightly.
- Line your pan. Parchment paper with a little overhang on the sides makes it so easy to lift the whole loaf out. No crumbling, no sticking, no scrubbing the pan. Just perfect, clean slices.
Make It Yours — Swaps and Twists That Actually Work
- Gluten-Free: Use gluten-free panko or rolled oats (pulsed in a food processor) instead of regular breadcrumbs. The texture holds up beautifully. I’ve made it this way for my sister’s family and they didn’t even notice the swap.
- Turkey Meatloaf: Swap the beef for ground turkey (93/7). Add a tablespoon of olive oil to the mix to keep it from drying out. It’s a little lighter but still full of flavor from the glaze and cheese.
- Bacon Cheeseburger: Oh, this is a good one. Chop 4 slices of cooked bacon and mix it into the meat. Then lay a couple of bacon strips on top before baking. This is what I make when I want to feel like a proper Southern cook.
- Spicy Jalapeño: Dice up a jalapeño (seeds removed if you want less heat) and mix it in with the onion. Add a few dashes of hot sauce to the glaze. This one’s for the adults — my husband’s favorite version.
The Questions I Get About This Meatloaf All the Time
Q: Why did my meatloaf fall apart when I sliced it?
A: Ugh, I’ve been there. It’s usually because it didn’t rest long enough, or it was a little too lean. Let it rest the full 10 minutes, and make sure you’re using at least 80/20 beef. The fat and the panade work together to hold the structure. You’ve got this next time — it happens to all of us.
Q: Can I make this in a muffin tin for individual servings?
A: Yes! This is a game-changer for kids and portion control. Divide the mixture into a greased muffin tin and bake for 18-22 minutes at 375°F. They cook much faster, so keep an eye on them. My kids love having their own “meatloaf muffin” with a side of fries.
Q: How long does this last in the fridge, and can I freeze it?
A: It keeps beautifully in the fridge for up to 4 days in an airtight container. For the freezer, bake it first, let it cool completely, and wrap it tightly in plastic wrap and foil. It’ll keep for 3 months. The best way to reheat from frozen is in a 350°F oven — cover it with foil so the glaze doesn’t burn.
Q: What do you serve with this?
A: My family loves it with creamy mashed potatoes and a simple side salad or roasted broccoli. But honestly, my kids are just as happy eating a thick slice with extra ketchup for dipping and a handful of potato chips on the side. It’s a cheeseburger in loaf form, after all!
More Recipes My Family Makes on Repeat
If you liked this one, here are a few others that get the same reaction at our table:
- Garlic Rosemary Beef Tips — Even faster than the meatloaf, same comforting vibes, and the gravy is incredible.
- Slow Cooker Cowboy Casserole — Set it and forget it for a Sunday supper. The house smells amazing all day.
- Crispy Breakfast Potatoes — The perfect crunchy side for that tender slice of meatloaf. We make these at least once a week.
This meatloaf has been a staple in my kitchen for years, and it’s one of those rare recipes that pleases everyone — the kids, the adults, the “I don’t really like meatloaf” crowd. I hope it becomes a favorite in yours, too.
If you make it, would you do me a favor? Leave a comment below and let me know how it went. Or tag me over on Pinterest — I love seeing your photos pop up in my feed.
📌 Save this cheeseburger meatloaf recipe for your next busy weeknight dinner — it’s the kind of meal that makes everyone show up to the table happy.
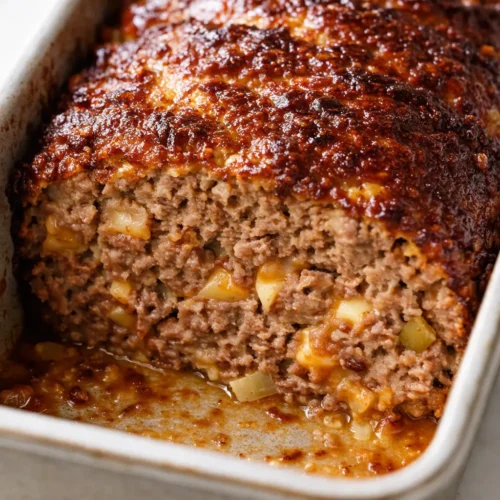
The Cheeseburger Meatloaf That Stays Juicy Through and Through (No Crumbly Slices Here)
Equipment
- 9×5-inch loaf pan
- Large Mixing Bowl
- Small bowl
- Chef’s Knife
- Cutting Board
- Instant-read thermometer (optional)
Ingredients
- 2 lbs ground beef (80/20 is ideal)
- 1 cup finely diced yellow onion
- 3 cloves garlic, minced
- 1 cup shredded sharp cheddar cheese, plus extra for stuffing
- 1/2 cup panko breadcrumbs
- 1/2 cup whole milk
- 2 large eggs, lightly beaten
- 2 tbsp ketchup
- 1 tbsp Worcestershire sauce
- 1 tsp salt
- 1/2 tsp black pepper
For the glaze:
- 1/4 cup ketchup
- 1 tbsp yellow mustard
- 1 tbsp brown sugar
Instructions
- Preheat the oven to 375°F (190°C).
- Make the panade: In your large bowl, combine the panko and milk. Let it sit for 5 minutes until it forms a thick paste.
- Combine the meat: Add the ground beef, onion, garlic, 1 cup cheddar, eggs, 2 tbsp ketchup, Worcestershire sauce, salt, and pepper to the panade. Use your hands to gently mix everything until just combined. Do not overmix.
- Form the loaf: Press half the meat mixture into a parchment-lined 9×5 inch loaf pan. Make a shallow well down the center.
- Add the cheese center: Fill the well with a generous handful of shredded cheddar (about 1/2 cup). Pack the remaining meat mixture on top, sealing the edges.
- Make the glaze: In a small bowl, whisk together 1/4 cup ketchup, yellow mustard, and brown sugar. Spread evenly over the top of the loaf.
- Bake: Place the loaf pan on a baking sheet and bake for 45-50 minutes, until the internal temperature reaches 160°F (71°C) and the glaze is bubbling and caramelized.
- Rest: Let the meatloaf rest in the pan for 10 full minutes. Lift out using parchment, slice, and serve.
Notes
Don’t skip the rest. That 10-minute rest is essential for clean slices.
Use a thermometer if you have one. 160°F in the center is perfect.
Line your pan. Parchment paper with overhang makes lifting out easy. Storage: Refrigerate in an airtight container for up to 4 days. Freeze baked and cooled meatloaf wrapped in plastic wrap and foil for up to 3 months. Reheat in a 350°F oven for 15-20 minutes, or pan-fry slices in butter for crispy edges.
Related posts:
 Mini Quiche Recipe: The Store-Bought Crust Version That Tastes Like You Made It From Scratch
 The Slow Cooker Cowboy Casserole That Saves Tired Weeknights (No Soggy Tots Allowed)
 Quick Lemon Ricotta Pasta for Busy Weeknights: Creamy, Bright, and on the Table in 20 Minutes
 Juicy Oven Baked Chicken Thighs That Stay Golden and Tender — in 40 Minutes
 Lemon Garlic Butter Baked Salmon in Foil That’s Ready in 25 Minutes — No Fuss, No Mess
 Lipton Onion Soup Meatloaf for Tuesday Nights: Moist, Savory, and the Only One You’ll Ever Need