
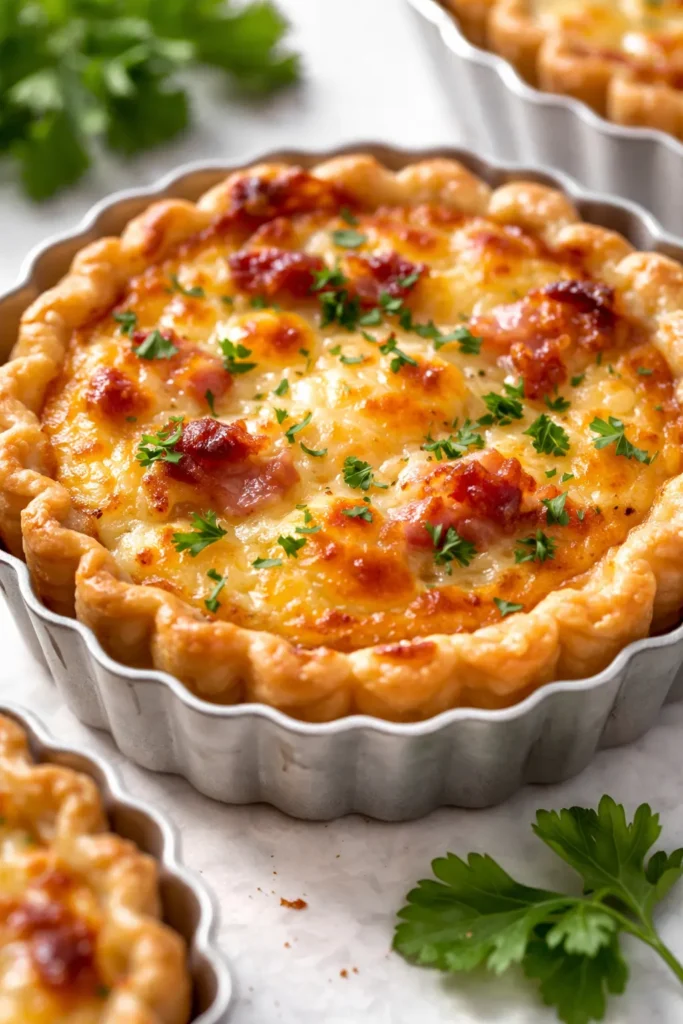
That first bite — the way the custard barely holds its shape, the way the crust shatters instead of bends — that’s the moment my daughter Nora texts me from college saying she can smell them through the phone. I don’t make my own crust for these mini quiches. And I don’t feel bad about it. The trick isn’t the crust. It’s what you do to it before the filling goes in.
The short version: Fifteen minutes of hands-on work, store-bought shells, and a custard that comes out creamy every single time.
I’ve tested these for three different brunch crowds and my picky nine-year-old nephew asks for the leftovers before he’s finished his first one. That’s the kind of win I’ll take any day.
- Serves: 12 mini quiches (as an appetizer or brunch main)
- Hands-On Time: 15 min | Total Time: 35 min
- Difficulty: Easy enough for a Tuesday, fancy enough for guests
- Cost per serving: ~$1.50 per quiche
- Calories: ~180 per quiche
- Dietary Notes: Vegetarian adaptable. Easily made gluten-free or dairy-free.
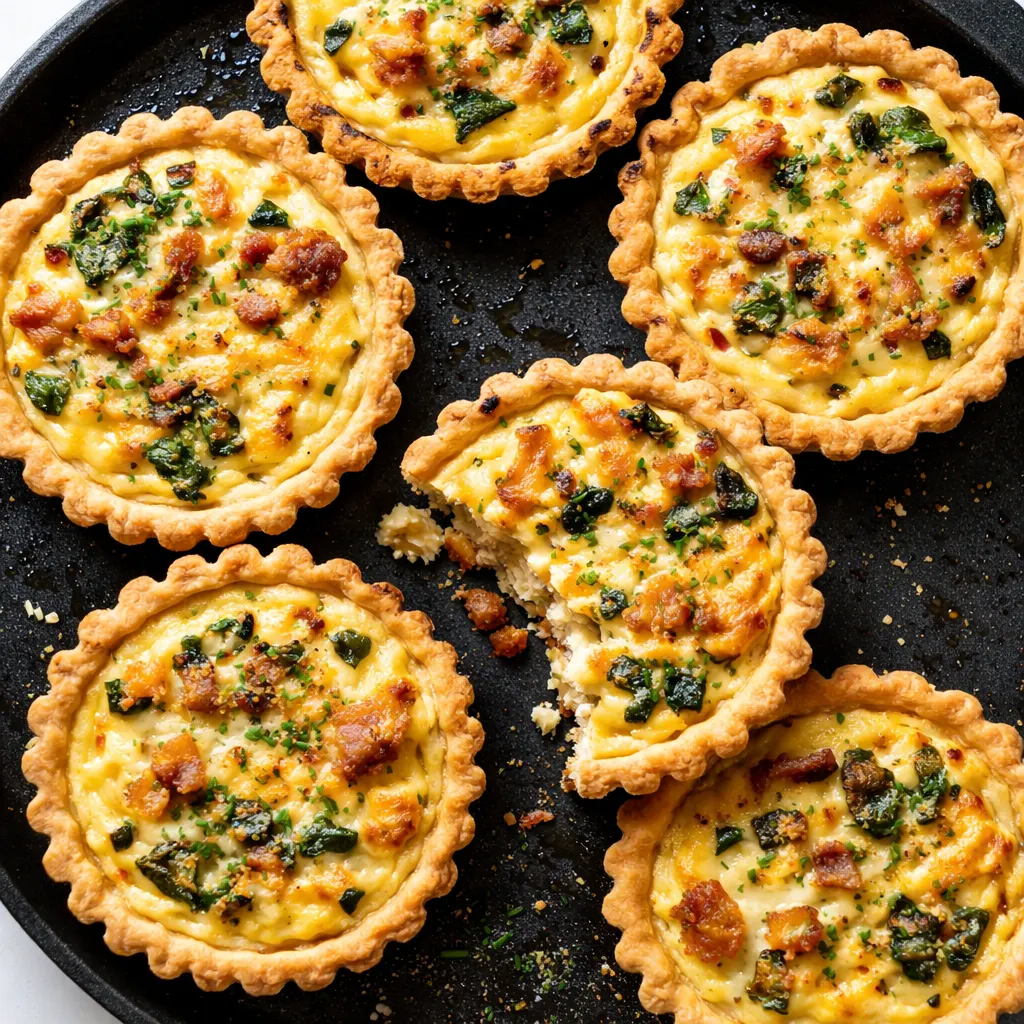
(Photo above: overhead shot of 12 golden mini quiches on a weathered wooden board, some cut in half to reveal the creamy egg custard and bits of spinach and bacon, natural morning light streaming in from the left.)
The Trick That Makes Store-Bought Crust Taste Homemade
The biggest mistake people make with frozen tart shells? They fill them raw and bake them all at once. That’s how you get a soggy bottom that collapses when you try to pick it up. I learned this the hard way after way too many sad, limp mini quiches.
Here’s the fix: blind bake the shells first. Just 8 minutes in a hot oven with a fork prick in the bottom. It sets the pastry so it stays shatteringly crisp even under a heavy custard. The second trick is the dairy ratio. I use half-and-half instead of milk or heavy cream. Milk is too watery — your quiche weeps. Heavy cream is too rich — it feels like eating a custard tart. Half-and-half gives you that silky texture that holds its shape when you cut into it.
Once you do these two things, you have a mini quiche that tastes like you spent the whole morning rolling pastry dough. But you didn’t. You used the frozen section. And that’s perfectly fine.
What Goes In (And Why It Works Every Time)
- 1 package (15 count) frozen mini tart shells: These are my go-to. Find them in the frozen aisle near the pie crusts. My grocery store runs out of these before Thanksgiving every year. I buy three boxes in October.
- 4 large eggs: The backbone of the custard. Take them out of the fridge 20 minutes before you start so they blend smoothly. Cold eggs make a lumpy custard — I learned this from Marta’s handwritten notes.
- 1 cup half-and-half: This is the non-negotiable. It’s what makes the texture silky without being heavy. I tried milk once and the filling didn’t set right. Half-and-half every time now.
- 1 cup shredded Gruyère or sharp cheddar: Gruyère gives a nutty, slightly sweet flavor. Cheddar gives that familiar stretch. My kids prefer cheddar. Nora asks for Gruyère. I do a mix when no one’s looking.
- 1/2 cup cooked fillings (your choice): Sautéed mushrooms and thyme, crisp bacon and spinach, or caramelized onions. Don’t use raw veggies — they release water into the custard and make it weepy.
- 1/4 teaspoon freshly grated nutmeg: Marta’s secret. It’s not optional in my house. Pre-ground nutmeg smells like cardboard. Grate it fresh — the difference is night and day.
- Salt and pepper to taste.
What to Pull Out Before You Start
- Baking sheet (to hold the tart shells steady)
- Fork (for pricking the shells)
- Medium mixing bowl
- Whisk
- Liquid measuring cup with a spout (for easy pouring into the tiny shells)
- Cookie scoop or tablespoon (for filling the shells cleanly)
Here’s How I Do It (No Fancy Skills Required)
This goes fast. Read through the steps once so you know where you’re headed. I promise it’s easier than it sounds.
Preheat. Blind bake. Cool.
- Preheat: Set your oven to 375°F. Arrange the frozen tart shells on a baking sheet. Prick the bottoms of each shell 3-4 times with a fork. This keeps them from puffing up during the blind bake.
- Blind Bake: Bake the shells for 8 minutes. They should look dry and just barely golden at the edges. You’re not trying to brown them here. You’re just setting the crust so it doesn’t get soggy later. (📸 Photo tip: The shells should look dry and matte, not shiny or raw. If they’re still pale, give them 2 more minutes.)
- Make the Custard: While the shells cool, whisk the eggs and half-and-half together in a medium bowl. Whisk until the mixture is completely uniform — no streaks of white. Stir in the nutmeg, 1/2 teaspoon salt, and a few cracks of black pepper. (📸 Photo tip: You should see a pale yellow, completely smooth liquid. No streaks of egg white.)
- Assemble: Divide your fillings evenly among the pre-baked shells. Use about 2 teaspoons per shell. Top with the shredded cheese. Pour the custard over the fillings until each shell is about 3/4 full. Don’t overfill — they puff up in the oven and overflow if you push it.
- Bake: Bake for 14-16 minutes, until the edges are set and the centers jiggle just slightly when you shake the pan. That slight jiggle is what keeps them creamy. If the center is completely firm, they’re overbaked.
- Rest: Let them rest on the baking sheet for 5 minutes. This is the hardest step. But it sets the custard so it holds together when you pick it up.
- Serve: Transfer to a platter and serve warm. Or let them cool completely and reheat later — they’re just as good the second day.
Make-Ahead Notes (Because Mornings Are Chaos)
I make these for every family brunch, baby shower, and holiday gathering. Half the magic is that you can do most of the work the night before. I prep the custard and fillings on Friday, bake on Saturday morning, and I’m sipping coffee while everyone else is still scrambling.
- Fridge: Make the custard and fillings the night before. Store separately in airtight containers. Assemble and bake in the morning. The custard keeps for up to 2 days in the fridge.
- Freezer: Bake fully, cool completely, and freeze in a single layer on a baking sheet. Once frozen, transfer them to a zip-top bag. They keep for up to 3 months.
- Reheat: The microwave works in a pinch, but the oven keeps the crust shatteringly crispy. Reheat at 350°F for 5-7 minutes if thawed, 12-15 minutes if frozen.
Things I Wish I’d Known the First Time
- Don’t skip the blind bake. Even if you skip this, it’s still good. But if you want the crust to stay crispy under the custard, don’t skip it. I did my first three times before I learned.
- Room temperature ingredients matter. Cold eggs and cold half-and-half make for a lumpy custard that doesn’t bake evenly. Let them sit on the counter for 20 minutes. I know it sounds fussy, but it takes zero effort and makes a real difference.
- Season the custard well. The filling needs salt to bring out the eggs. Don’t skimp. I use rounded 1/2 teaspoon for the full batch. My husband thought I was overthinking it until he tried a batch with less salt — he agreed immediately.
- Use a cookie scoop. A tablespoon works, but a small cookie scoop (the 2-teaspoon size) fills the shells cleanly and evenly without spilling. It’s one of those tools that costs $5 and changes your life.
Swaps That Actually Work (For Every Situation)
- Gluten-Free: Use gluten-free pie crust or small shredded potato cups (like mini latkes). If using gluten-free pastry, blind bake it for 10 minutes instead of 8.
- Dairy-Free: Use full-fat oat milk or unsweetened cashew milk. Add 2 tablespoons of nutritional yeast for the cheesy flavor. The texture will be slightly less silky but still delicious.
- Kid-Friendly (The Nora Test): My daughter grew up on cheddar and ham versions. Just cheese and diced ham. No veggies. No nutmeg. They go fast.
- Fancy Guest Version: Caramelized onion, goat cheese, and fresh thyme. The sweetness of the onions balances the tangy goat cheese perfectly. I serve these at holiday parties and they disappear immediately.
- Lighter Version: Swap half the eggs for egg whites and use whole milk instead of half-and-half. Not quite as creamy, but still good when you’re watching the calories.
Questions I Get About These Mini Quiches All the Time
Q: Why did my crust get soggy?
A: Ugh, I’ve been there. The culprit is almost always skipping the blind bake. The other possibility is using wet fillings — make sure you cook down mushrooms or spinach until the water is gone before adding them to the shells. You’ve got this next time.
Q: Can I use egg whites only?
A: You can, but the texture will be a little more rubbery. I’d do 3 whole eggs + 2 whites for a compromise if you’re trying to cut cholesterol. I’ve tested this and it works — just don’t overbake them or they get tough.
Q: How long do they last in the fridge?
A: In an airtight container, about 4 days. Reheat in a 350°F oven for 5 minutes to bring the crust back to life. The microwave works but you’ll lose the crisp shell.
Q: What do you serve with these?
A: A simple arugula salad with lemon vinaigrette is my standard move. The peppery greens cut through the richness of the quiche. My kids love them with fresh fruit on the side. For brunch, I add a mimosa and call it a party.
More Recipes My Family Makes on Repeat
If you liked this one, here are a few others that get the same reaction at our table:
- [INTERNAL LINK PLACEHOLDER: Easy Sourdough Discard Crackers] — Perfect for using up leftover custard and egg wash. They’re crispy and salty and disappear in minutes.
- [INTERNAL LINK PLACEHOLDER: Grandmother Marta’s Apple Cake] — The cake I make every Sunday. It’s the one Nora asks for every time she comes home.
- [INTERNAL LINK PLACEHOLDER: Creamy Stovetop Mac and Cheese] — The dinner that gets my picky nephew to the table without complaint. It’s the cheese sauce that does it.
These mini quiches are my go-to for baby showers, brunches, and quiet Sunday mornings when I want something that feels special without much effort. They’re the recipe that made Nora start requesting brunch at home instead of going out.
If you try them, drop a comment below — I love hearing how they turned out for you!
📌 Don’t lose this mini quiche recipe! Save it for your next brunch gathering or meal prep Sunday — your future self will thank you.
Mini Quiche Recipe: The Store-Bought Crust Version That Tastes Like You Made It From Scratch
Equipment
- Baking Sheet
- Fork
- Medium Mixing Bowl
- Whisk
- Liquid measuring cup
- Cookie scoop
Ingredients
- 1 package (15 count) frozen mini tart shells
- 4 large eggs
- 1 cup half-and-half
- 1 cup shredded Gruyère or sharp cheddar cheese
- 1/2 cup cooked fillings (sautéed mushrooms, spinach, bacon, etc.)
- 1/4 teaspoon freshly grated nutmeg
- 1/2 teaspoon salt
- 1/4 teaspoon black pepper
Instructions
- Preheat your oven to 375°F. Arrange the frozen tart shells on a baking sheet. Prick the bottoms of each shell 3-4 times with a fork to prevent puffing.
- Blind bake the shells for 8 minutes until they look dry and just barely golden at the edges. Do not brown them fully; you are simply setting the crust so it doesn’t get soggy later.
- While the shells cool, whisk the eggs and half-and-half together in a medium bowl until completely uniform with no streaks of white. Stir in the nutmeg, salt, and pepper.
- Divide your fillings evenly among the pre-baked shells using about 2 teaspoons per shell. Top with the shredded cheese. Pour the custard over the fillings until each shell is about 3/4 full.
- Bake for 14-16 minutes until the edges are set and the centers jiggle slightly when you shake the pan. That slight jiggle ensures a creamy texture; if the center is completely firm, they are overbaked.
- Let them rest on the baking sheet for 5 minutes. This sets the custard so it holds together when you pick it up.
- Serve warm or let cool completely and reheat later. They are just as good the second day.
Notes
Related posts:
 Lasagna Roll-Ups That Taste Like Sunday Dinner (In 45 Minutes Flat)
 Creamy Smothered Chicken and Rice for the Weeknights You Need Real Comfort: Rich, Velvety, One Pot
 Easy Beef and Broccoli That’s Better Than Takeout in 30 Minutes
 Crunchy Cucumber Carrot Salad That Stays Crisp for Days — in 15 Minutes
 Egg Roll in a Bowl That’s Faster Than Takeout (Ready in 20 Minutes)
 Blueberry Banana Bread: The Trick That Keeps the Berries Suspended (Not Sunk to the Bottom)