
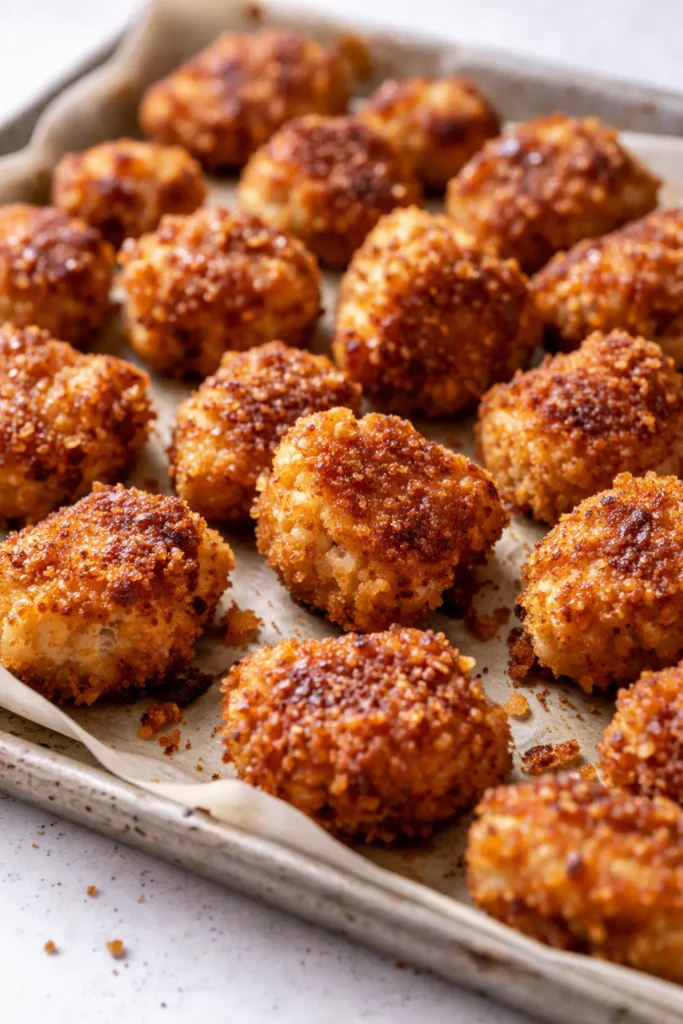
Every version of chickpea nuggets I tried for two years came out fine. Not great, not the kind you’d text your sister about — just fine. They crumbled halfway through the pan, or they came out so soft that calling them “nuggets” felt generous. This batch was different. I sent the recipe to my sister before I’d even finished eating, and my daughter Nora — home from art school in Savannah for the weekend — ate six of them standing at the counter. That’s the endorsement that counts in this house.
The short version: These are crispy, deeply golden, and hold together in your hand exactly the way a good nugget should — in about 40 minutes, with stuff you probably already have in your pantry.
I’ve made chickpea nuggets maybe thirty times by now, trying every binder I could think of — chickpea flour, rice flour, panko, crushed cornflakes, an extra egg, no egg at all. This is the combination that finally stuck. My kids have asked for them two Fridays in a row, and around here, that’s basically a standing order.
- Serves: 4 as a main (makes about 18–20 nuggets)
- Hands-On Time: 15 min | Total Time: 40 min
- Difficulty: Easy — even on a school night
- Cost per serving: About $1.50
- Calories: ~220 per serving
- Dietary Notes: Naturally vegetarian and dairy-free; easily gluten-free
(Photo above: overhead shot of golden chickpea nuggets piled on a parchment-lined baking sheet, a few scattered on a small wooden cutting board beside a white bowl of ranch dip, late afternoon light from the left catching the crispy edges.)
The Trick That Keeps These From Crumbling Into a Mess
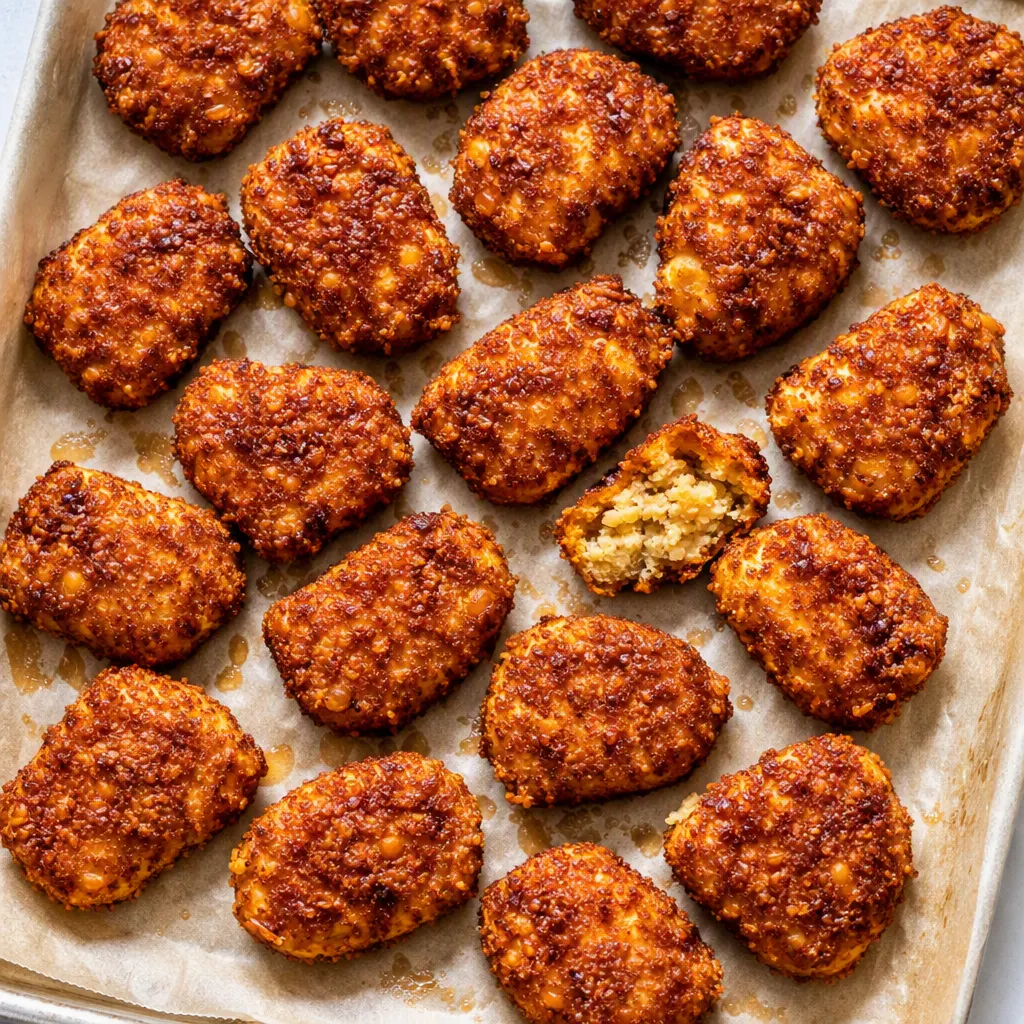
The problem with most chickpea nugget recipes is that they treat chickpeas like paste. Mash them into a smooth puree and you get a dense, heavy disc that falls apart the minute you pick it up — because there’s nothing holding the pieces together except pureed bean. This recipe does two things differently, and both of them matter.
First, I mash most of the chickpeas but leave a good handful roughly chopped. Those visible pieces of whole chickpea are what give the nugget its structure — they grip onto each other instead of sliding apart. Second, the flax egg. Ground flaxseed mixed with warm water turns thick and gel-like in about five minutes, and it works better than a real egg here because it actually grips the chickpea pieces. It’s the difference between glue and paste — you want glue.
You also need to let the mixture rest for a few minutes before you shape it. That rest is when the flax really gets to work and when the breadcrumbs soak up just enough moisture to bind everything together. Skip it and you’ll be fighting a loose, wet mixture the whole time. I learned that the hard way after way too many trays of crumble.
Everything You Need (Plus My Honest Notes)
- 1 can (15 oz) chickpeas, drained and rinsed: Pat them dry with a kitchen towel after rinsing — extra water on the surface is the number one reason nuggets turn mushy. I keep the can liquid for a minute, just in case the mixture needs a spoonful of moisture back before shaping.
- 1 tbsp ground flaxseed + 3 tbsp warm water: This is the binder, and it’s the whole reason these hold together. My kids can’t taste it at all, I promise — it just disappears into the chickpeas.
- 1/2 cup panko breadcrumbs: Panko gives you the crispy, craggy coating that regular breadcrumbs can’t. If you only have fine breadcrumbs, they’ll work, but the crunch won’t be the same.
- 1/4 cup nutritional yeast: This is the secret to the savory, almost cheesy flavor that makes kids think they’re eating something slightly naughty. My nephew asked if these had cheese in them — he didn’t believe me when I said no.
- 1 tsp garlic powder, 1 tsp onion powder, 1/2 tsp smoked paprika, 1/2 tsp fine salt: The smoked paprika is the one I’d fight for. It adds a warmth that makes the nuggets taste deeper than they are — like they’ve been simmering in something, even though they haven’t.
- 2 tbsp olive oil: Half goes in the mixture, half gets drizzled on top before baking. That drizzle on top is what turns the coating golden instead of pale — don’t skip it.
- 1 tbsp chickpea flour (optional): If your mixture feels sticky or loose, this firms it right up. You may not need it at all — it depends on how dry your chickpeas were.
What to Pull Out Before You Start
- A potato masher — or a fork, if you’re me on a lazy Tuesday. A food processor works, but it’s easier to over-mash in one.
- A colander for draining the chickpeas.
- A clean kitchen towel for patting them dry.
- A baking sheet lined with parchment paper.
- A small bowl for the flax egg.
- A cookie scoop — if you have one, it makes perfectly even nuggets. If not, two spoons work just fine.
Let’s Make Them (Step by Step)
This goes fast once you get going, so read through the steps once before you start. The whole thing is maybe 15 minutes of active work — the oven does the rest.
Preheat and prep: Set the oven to 425°F and line a baking sheet with parchment paper.
- Make the flax egg: In a small bowl, stir the ground flaxseed with the warm water. Set it aside for at least 5 minutes — it needs that time to thicken into a gel. It should look like a thick, glossy paste when it’s ready.
- Dry the chickpeas: Drain and rinse the chickpeas, then tip them onto a clean kitchen towel and pat them dry gently. This is the step everyone skips, and it’s the difference between crisp and soggy.
- Mash most, leave some chunky: Put the chickpeas in a big bowl and mash until about two-thirds of them are broken down. Leave the rest in visible pieces — those chunks are what keep the nuggets from falling apart. (📸 Photo tip: You’re looking for a coarse, uneven texture with visible chickpea halves scattered through the mash — not baby food.)
- Add everything else: Stir in the flax egg, nutritional yeast, garlic powder, onion powder, smoked paprika, salt, and olive oil. Mix with a fork until it’s evenly combined. If it feels sticky or too loose, add the chickpea flour a little at a time.
- Let it rest: Leave the bowl alone for 5 minutes. This is when the flax and breadcrumbs soak up moisture and the mixture firms up. It should hold its shape if you pinch a little between your fingers.
- Shape the nuggets: Scoop about 2 tablespoons of the mixture and press it into an oval nugget shape, about 1/2 inch thick. Repeat until the mixture is gone. You should get 18 to 20.
- Coat and arrange: Roll each nugget in the panko breadcrumbs, pressing gently so they stick. Place them on the prepared baking sheet with a little space between each one. Drizzle the tops lightly with the remaining olive oil.
- Bake, flip, finish: Bake for 20 to 25 minutes, flipping halfway through, until the nuggets are deeply golden at the edges and firm when you press them. By the 15-minute mark, your kitchen will smell like toasted chickpeas and warm paprika — that smell means the crisp is happening. (📸 Photo tip: At the halfway flip, you should see browned spotty patches forming on the bottom — that’s the crispness developing.) Let them sit on the baking sheet for 2 minutes before serving — they firm up even more as they cool.
How I Meal Prep These for the Week
These have saved more than one school-night dinner in our house. I make a double batch on Sunday afternoon and we’re set until Wednesday — the nuggets reheat beautifully, and my kids grab a handful with baby carrots and call it a meal. That’s a win in my book.
- Fridge: Store baked nuggets in an airtight container for up to 4 days. Reheat in a 400°F oven for 6-8 minutes or in the air fryer for 4-5 minutes to bring back the crunch. The microwave works in a pinch, but they’ll go soft.
- Freezer: Yes — freeze them, baked or unbaked. For unbaked, arrange the shaped nuggets on a parchment-lined tray, freeze solid, then transfer to a zip-top bag. Bake from frozen at 425°F for 25-28 minutes. For baked, freeze in a single layer, then bag them; reheat from frozen at 400°F for 10-12 minutes.
- Reheat: Oven or air fryer, always oven or air fryer. The microwave leaves them sad and soft, and these deserve better than that.
Things I Wish I’d Known the First Time
- Pat the chickpeas dry — actually dry: I know it feels like an annoying extra step, but damp chickpeas make a loose mixture that won’t hold its shape. Take the 30 seconds and really dry them. It’s the difference between nuggets and crumble.
- Don’t over-mash: If you’re using a food processor, stop the second the chickpeas come together — or better yet, mash by hand. A smooth puree turns into dense, heavy discs that fall apart when you pick them up. Coarse is what you want.
- Let the mixture rest before shaping: I know the urge to just get them on the pan, but that 5-minute rest is when the flax and the breadcrumbs absorb the moisture and bind everything together. Skip it and you’ll be standing at the sink with a loose, wet mixture stuck between your fingers. Trust me on this one.
- Flip them gently: At the halfway mark, use a thin spatula and take your time. They’re most fragile right around the 12-minute mark. Once the second side sets, they hold together completely — my husband flips them now without breaking a single one, and he used to leave a trail of crumbs across the kitchen.
- Even if you mess one up, it’ll still taste good: My first batch came out of the oven in three pieces and I served them anyway with a little barbecue sauce on the side. My kids didn’t care, and honestly neither did I. These are forgiving. Don’t stress about perfect.
Swaps and Additions That Actually Work
- Gluten-free: Use crushed cornflakes or gluten-free panko in place of regular panko. I’ve tested this with my nephew who can’t do gluten, and he ate the whole tray. Adding the chickpea flour helps too — it gives a little extra structure.
- Spicy version: Add 1/2 tsp cayenne or a spoonful of sriracha to the mixture. My kids need the mild version at the table, but I make a few spicy ones for the adults after they’ve gone to bed — just a couple of extra nuggets on the same sheet, no extra work.
- No nutritional yeast? Use 2 tbsp grated parmesan instead, or just add an extra 1/2 tsp garlic powder and a pinch of turmeric for color. It won’t taste identical, but it’ll still be delicious. If you’re dairy-free, stick with the nutritional yeast — it really is the magic that makes these taste richer than they are.
- Air fryer version: Cook them at 375°F for 12-15 minutes, shaking the basket at the halfway point. They get even crispier in the air fryer — this is my favorite way to make a quick lunch on the weekends.
- Nugget sliders: Shape the mixture into small patties instead of nugget shapes, and serve them on little buns with lettuce and tomato. My sister calls these “chickpea sliders” and makes them for her book club every month.
Questions I Get About These All the Time
Q: Why did my nuggets fall apart?
A: Ugh, I’ve been there. The most common reason is too much moisture — usually the chickpeas weren’t dried well enough, or the mixture didn’t get its 5-minute rest. Make sure you pat the chickpeas dry, and give the mixture time to firm up before shaping. If it still feels loose, add a tablespoon of chickpea flour or another handful of panko and stir it in. You’ve got this next time — after one more batch, you’ll know exactly how it should feel in your hands.
Q: Can I make these without nutritional yeast?
A: Yes! Use 2 tbsp grated parmesan in its place, or just bump up the garlic and onion powder and add a pinch of turmeric for color. The nutritional yeast adds that savory, slightly cheesy depth, but these still taste great without it. I’ve made them both ways and my kids clean the plate either way.
Q: How long do these last? Can I freeze them?
A: Baked nuggets keep in an airtight container in the fridge for up to 4 days. And yes, you can absolutely freeze them — both baked and unbaked versions work great. For unbaked, shape the nuggets, arrange them on a parchment-lined tray, freeze solid, then transfer to a zip-top bag and bake from frozen at 425°F for 25-28 minutes. For baked, freeze in a single layer and reheat at 400°F for 10-12 minutes. Just don’t use the microwave for reheating — it makes the coating soft, and you worked too hard for that crisp.
Q: What do you serve with chickpea nuggets?
A: In our house, ranch dip for the kids and a spicy mayo for the adults — just mayo, sriracha, and a squeeze of lime. We do sweet potato fries or a quick coleslaw on the side most nights. If it’s going into a school lunch, I pack them on a toothpick with grapes and cheese cubes. And apparently they’re just as good cold, straight from the fridge the next day — my kids have told me that multiple times.
More Recipes My Family Makes on Repeat
If you like how these turn out, here are a few others that get the same reaction at our table:
- [INTERNAL LINK PLACEHOLDER: Crispy Baked Sweet Potato Fries] — These come out shatteringly crisp in the oven, no deep fryer needed, and they’re the perfect side for nugget night.
- [INTERNAL LINK PLACEHOLDER: My Go-To Black Bean Burger Patties] — The same “holds together without falling apart” energy, but in burger form. My husband requests them every single week.
- [INTERNAL LINK PLACEHOLDER: Easy Buffalo Cauliflower Bites] — For the nights when you want the same crispy, snacky energy but with a little heat. Nora’s favorite.
These nuggets have saved more busy weeknights in this house than I can count, and I love knowing they’re heading into your kitchen now too. If you make them, drop a comment below and tell me how they went — especially if your kids were skeptical and then asked for seconds. That’s my favorite kind of update.
📌 Crispy baked chickpea nuggets that don’t fall apart — save this easy vegetarian recipe for your next busy school-night dinner.
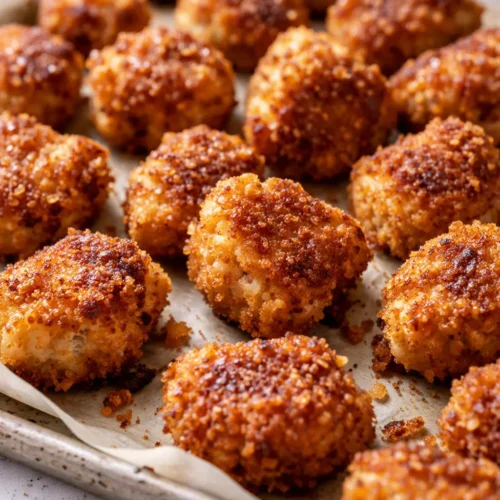
Crispy Chickpea Nuggets That Don’t Fall Apart
Equipment
- Potato Masher or Fork
- Colander
- Clean Kitchen Towel
- Baking sheet lined with parchment paper
- Small bowl
- Cookie scoop
Ingredients
Flax Egg
- 1 tbsp ground flaxseed
- 3 tbsp warm water
Chickpea Mixture
- 1 can (15 oz) chickpeas, drained and rinsed
- 1/4 cup nutritional yeast
- 1 tsp garlic powder
- 1 tsp onion powder
- 1/2 tsp smoked paprika
- 1/2 tsp fine salt
- 2 tbsp olive oil, divided
- 1 tbsp chickpea flour, optional
For the Crispy Coating
- 1/2 cup panko breadcrumbs
Instructions
- Preheat the oven to 425°F and line a baking sheet with parchment paper. In a small bowl, stir the ground flaxseed with the warm water and set it aside for at least 5 minutes. It should turn into a thick, glossy paste — that is the glue that holds these nuggets together.
- Drain and rinse the chickpeas, then tip them onto a clean kitchen towel and pat them dry gently. Extra water on the surface is the fastest way to end up with mushy nuggets, so take the 30 seconds.
- Put the chickpeas in a large bowl and mash until about two-thirds are broken down. Leave visible chickpea pieces scattered through the mash — those chunks grab each other and keep the nuggets from crumbling.
- Stir in the flax egg, nutritional yeast, garlic powder, onion powder, smoked paprika, salt, and 1 tablespoon of the olive oil. Mix with a fork until evenly combined. If it feels sticky or loose, add the chickpea flour 1 tablespoon at a time.
- Let the mixture sit for 5 minutes. The breadcrumbs and flax need that time to soak up moisture and bind. Pinch a little between your fingers — it should hold its shape.
- Scoop about 2 tablespoons of the mixture and press it into an oval about 1/2 inch thick. Repeat until you have 18 to 20 nuggets.
- Roll each nugget in the panko, pressing gently so the crumbs stick. Arrange them on the parchment-lined baking sheet with space between each, then drizzle the tops with the remaining olive oil.
- Bake at 425°F for 20 to 25 minutes, flipping gently halfway, until deeply golden at the edges and firm when pressed. Let them rest on the baking sheet for 2 minutes before serving — they firm up even more as they cool.
Notes
Related posts:
 The Slow Cooker Cowboy Casserole That Saves Tired Weeknights (No Soggy Tots Allowed)
 Quick Lemon Ricotta Pasta for Busy Weeknights: Creamy, Bright, and on the Table in 20 Minutes
 Lemon Garlic Butter Baked Salmon in Foil That’s Ready in 25 Minutes — No Fuss, No Mess
 Lipton Onion Soup Meatloaf for Tuesday Nights: Moist, Savory, and the Only One You’ll Ever Need
 Kielbasa Sausage Cheesy Potato Casserole That Tastes Like Sunday Dinner — In Under an Hour
 Quinoa Chicken Sausage Bowls That Are Ready in 30 Minutes (And Actually Keep Well)