
Every batch of dilly beans I made for years came out soft. Not terrible, but not the snappy, crackly kind you get from the fancy jar at the farmer’s market. My husband would still eat them, but I’d watch him chew and think, “that should be crunchier.” This recipe finally changed that — and the fix was one tiny step I’d been skipping.
The short version: These pickled green beans take 20 minutes of hands-on work, stay crisp for weeks, and require zero canning gear.
I’ve made these dozens of times now, and my six-year-old eats them straight from the jar like they’re sour candy. No joke.
- Serves: about 1 quart jar (4–6 as a snack)
- Hands-On Time: 20 min | Total Time: 20 min + at least 24 hours chilling
- Difficulty: Easy, even on a school night
- Cost per serving: ~$0.50
- Calories: ~10 per serving
- Dietary Notes: Naturally vegan, gluten-free, and nut-free
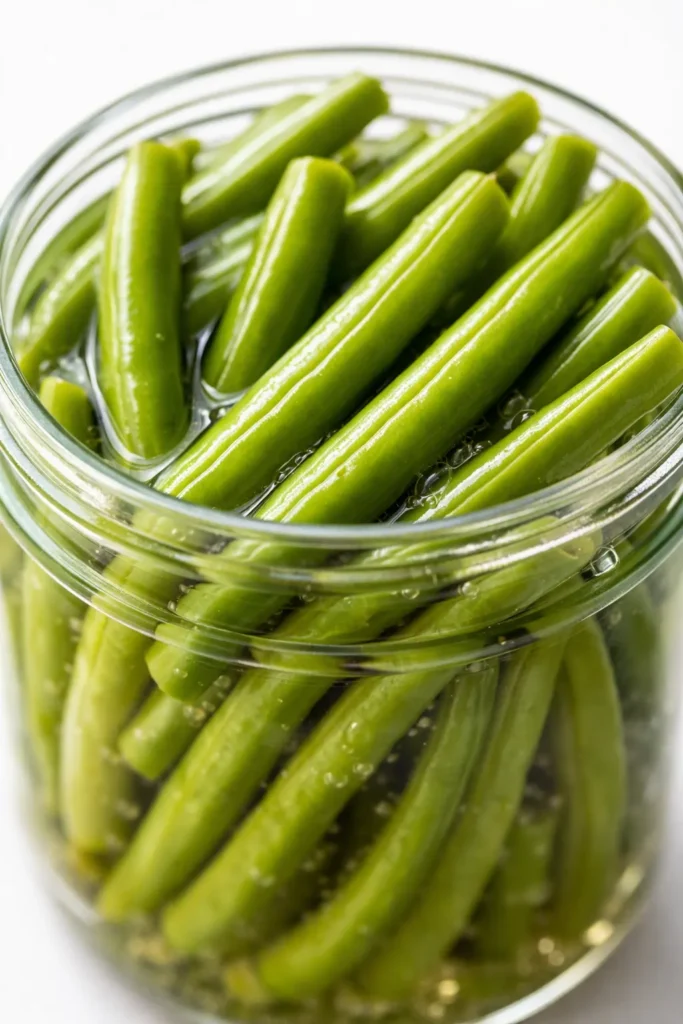
(Photo above: a wide-mouth quart jar filled to the top with bright green pickled beans, sprigs of fresh dill, and whole garlic cloves — shot from slightly above on a rustic wooden table, with morning light catching the peppers and mustard seeds.)
The One Step That Keeps These Beans Snappy (Not Soggy)
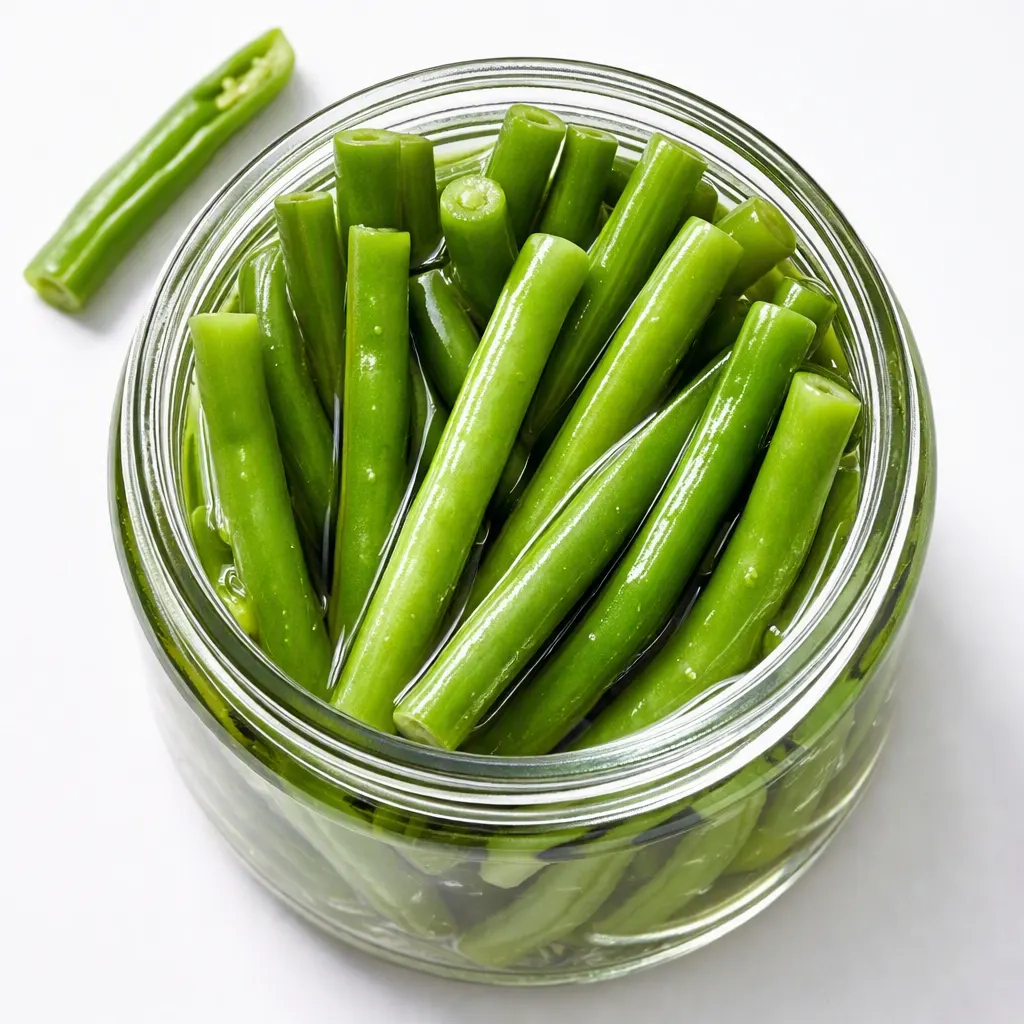
The enemy of a good pickled green bean is heat that hangs around. You pour boiling brine over raw beans, and they start to cook in that hot liquid, even after you put the jar in the fridge. That gentle cooking turns them from crisp to bendy in about two days. I found the fix by accident: a super-quick blanch followed by an ice bath.
Here’s what happens. You drop the beans into boiling water for 60 seconds — just long enough to set their bright green color and take the raw edge off — then plunge them straight into a bowl of ice water. That jolt stops any carryover cooking cold. When you pack them in the jar, they’re already at their peak crunch, and the hot brine won’t soften them one bit. I learned this after a sad batch that came out exactly like canned green beans from my childhood. Never again.
If you skip nothing else in this recipe, don’t skip the ice bath. It’s the difference between a bean that snaps and one that sort of folds when you bite it.
Everything You Need (And a Few Notes From Me)
- 1 pound fresh green beans, trimmed to fit your jar: Pick beans that feel firm and make a good snap when you break one. Wrinkly or bendy beans won’t get crisp no matter what you do. I once used thin haricots verts from the farmer’s market and they became these elegant, skinny little pickles — my kids called them “fancy fries.”
- 4 large sprigs fresh dill (or 1 teaspoon dried dill weed): Fresh dill brings that classic dilly bean flavor. If you only have dried, it works — just know the flavor is a bit milder. My kids can smell the difference when I use dried, and they complain. Fresh is worth the $1.
- 4 cloves garlic, peeled and lightly smashed: Smashing releases garlicky goodness into the brine. Don’t chop it — the big pieces are easier to fish out and they infuse more slowly.
- 1 teaspoon whole black peppercorns: Adds a gentle heat that doesn’t overpower. Leave them whole so they don’t make the brine cloudy.
- 1 teaspoon yellow mustard seeds: These give a little pop of warm spice. If you don’t have them, a pinch of dry mustard powder works in a pinch.
- 1/2 teaspoon crushed red pepper flakes (optional): This is the kick. I leave it out when I’m making a jar for the kids, and double it for the adults-only batch.
- 1 cup white distilled vinegar (5% acidity): Keeps the brine sharp and clear. You can swap in apple cider vinegar for a milder, slightly sweet tang — my sister swears by that.
- 1 cup water: Just plain tap water is fine.
- 1 tablespoon kosher salt (not iodized table salt): Table salt has anti-caking agents that can cloud the brine. Kosher salt dissolves cleanly.
- 1 teaspoon granulated sugar: A tiny bit balances the vinegar’s acidity. You can leave it out, but the beans taste rounder with it. Even my sugar-conscious friends don’t mind this little bit.
What to Pull Out Before You Start
- A large pot for blanching — any 4-quart pot works.
- A big bowl filled with ice water (lots of ice, it needs to be cold fast).
- A 1-quart wide-mouth glass jar with a tight lid — the wide mouth is key, trust me on this.
- A small saucepan for the brine.
- Tongs or a spider to lift the beans out of the boiling water.
Here’s How I Do It
This goes fast, so read through once before you start. Most of the steps take less than a minute.
Prep the beans and jar first: Wash your jar in hot soapy water, rinse well, and let it air dry while you work. Trim the stem ends off the green beans, and if they’re too tall for the jar, cut them to about 1/2 inch below the rim — they’ll shrink a little but not much. No need to trim the skinny tip ends.
- Blanch the beans for exactly 1 minute: Bring a large pot of water to a rolling boil. Drop in the trimmed beans and set a timer for 60 seconds — no guessing, because one extra minute can start the softening process. The beans will turn a vivid, almost neon green. (📸 Photo tip: The beans should look bright and slightly translucent at the edges — that’s your cue they’re ready.)
- Ice bath shock: Use tongs to immediately transfer the beans to the bowl of ice water. Swish them around so they all chill quickly. Let them sit for at least 2 minutes until they’re completely cold to the touch. This stops any cooking and locks in the crunch. (📸 Photo tip: A close-up of the beans in the ice bath, steam dissipating, is a beautiful shot that shows the crispness.)
- Drain and dry: Take the beans out and pat them dry with a clean kitchen towel or paper towels. You want them as dry as possible so they don’t dilute the brine.
- Make the brine: In a small saucepan, combine the vinegar, water, salt, and sugar. Bring it to a boil over medium-high heat, stirring to dissolve the salt and sugar. Once it’s boiling, turn off the heat.
- Pack the jar: Put the garlic cloves, dill sprigs, peppercorns, mustard seeds, and red pepper flakes (if using) into the bottom of the clean jar. Then pack the beans vertically, really wedging them in — it’s okay if they’re snug. You want the jar full but not so tight that brine can’t circulate. (📸 Photo tip: A shot of the jar from the side, showing the colorful spices at the bottom and the beans standing like soldiers, is Pinterest gold.)
- Pour the hot brine over: Slowly pour the boiling brine into the jar, covering the beans completely and leaving about 1/2 inch of headspace at the top. You might hear a little pop from the garlic — that’s fine. Tap the jar gently on the counter to release any air bubbles.
- Seal and cool: Wipe the rim if you dribbled (I always do), then screw the lid on tightly. Let the jar cool on the counter until it’s just warm, about an hour, then pop it in the fridge.
- Wait (the hardest step): You can eat them after 24 hours, but they really hit their stride after 3 days. The garlic and dill need time to mellow into the beans. I usually make a jar on Sunday and we start snacking by Wednesday.
Sunday Prep = Stress-Free Snacks All Week
I make a double batch on Sundays and we’re set for two weeks of crunchy, tangy snacks. My secret: I use two 1-quart jars so I can keep one mild for the kids and one spicy for the grown-ups. Then it’s just grab-and-go — I pack a handful in my daughter’s lunchbox next to a sandwich, and she feels fancy.
- Fridge: Keep the jar sealed tight. They’ll stay crisp for at least 2 months, though honestly they never last that long at our house. The beans at the bottom might soften a tiny bit over time, but they still taste great.
- Freezer: Please don’t. Frozen pickled beans turn into a limp, icy mess. Just stick to the fridge.
- Reheat: None needed — eat them cold or at room temp. If you want to use them in a warm dish, just toss them in at the very last second so they keep their snap.
Things I Wish I’d Known the First Time
- Get the right jar, or you’ll fight with it: A wide-mouth quart jar is a game-changer. My first batch I used a regular-mouth jar and I could barely fit two beans in without breaking them. Wide mouth lets you pack them neatly and still get the brine around everything. If you don’t have one, a deep glass container works okay, but the beans might float.
- Don’t overstuff — I mean it: You want the jar packed, but not so tight that the beans are crushed. If you have to force them in, they won’t pickle evenly, and you’ll get soft spots. I overdid it once and the center beans were pale and bland while the outer ones were perfect. Now I leave just enough room for the brine to flow.
- Taste your brine before you pour (and adjust): The recipe is a starting point. Some people like more tang, some like less. Dip a spoon into the hot brine and give it a taste — it should be sharp and salty with a hint of sweetness. I sometimes add an extra splash of vinegar because I like it bright. My husband says it’s “too zingy” but he still eats them.
- Even if you mess up the ice bath, it’s not ruined: Forgot to set the timer? Beans sat in the hot water an extra minute? It happens. They might not be shatteringly crisp, but they’ll still be delicious and pickled — just a bit more tender, like a classic dilly bean from a jar. My first few batches were that way and nobody complained.
Swaps That Actually Work
- Spicy version (my favorite): Add 1 sliced jalapeño to the jar along with the garlic and dill. The heat infuses slowly and gives you a bean that bites back. I make a separate jar just for me after the kids go to bed.
- Mild kid-friendly version: Skip the red pepper flakes entirely and use only 2 cloves of garlic. My six-year-old calls these “green pickle sticks” and eats them by the handful.
- Garlic lover’s dream: Double the garlic and smash the cloves a bit more. The brine turns almost creamy with garlic flavor after a week — incredible in a Bloody Mary.
- No fresh dill? Use 1 teaspoon dried dill weed. The color won’t be as bright green, but the flavor is still there. I’ve done this in winter when fresh dill is sad and expensive.
- Different vinegar twist: Swap white vinegar for apple cider vinegar for a rounder, slightly sweet pickle. My sister-in-law uses rice vinegar and adds a star anise; it’s weirdly good with Asian-inspired snacks.
- Fancy charcuterie version: Add a strip of lemon zest and a few sprigs of tarragon instead of dill. These are elegant and taste like something from a restaurant.
- Use what you’ve got: If you have a pickling spice blend, toss 1 teaspoon into the jar and skip the individual spices. I’ve done this when camping and it turned out great.
Questions I Get About This Recipe All the Time
Q: Why did my pickled green beans turn out mushy?
A: Ugh, I’ve been there. The number one culprit is the beans cooking too long in the hot brine or during blanching. If you skip the ice bath or blanch for more than a minute, they start breaking down. Next time, set a timer for exactly 60 seconds and have that ice water ice-cold and waiting. Also, don’t let the beans sit in the hot brine on the counter for hours — cool the jar to room temp within an hour, then refrigerate.
Q: Can I make these without sugar?
A: Absolutely. The sugar just rounds out the acid so it doesn’t feel like you’re drinking vinegar. I’ve made it with no sugar and it’s fine — just a bit sharper. You can also use a pinch of honey or maple syrup if you prefer a more natural sweetness. My neighbor uses a date paste, but I haven’t tried that myself.
Q: How long do pickled green beans last in the fridge? Can I freeze them?
A: In the fridge, they stay crisp for 2 months easily — sometimes longer if the jar is well sealed and you always use clean utensils to fish them out. I’ve found a jar at the back of the fridge after 3 months and they were still good, just a little softer. Freezing is a hard no: the texture goes mushy and weird. If you want long-term storage, look up proper canning methods; this recipe is for refrigerator pickles only.
Q: What do you serve with pickled green beans?
A: Oh, so many things! We snack on them straight from the jar. They’re perfect on a cheese platter next to sharp cheddar and salami. I chop them into tuna salad or potato salad for a tangy crunch. My kids love them alongside lunchbox sandwiches — they act like it’s a treat. And don’t even get me started on a Bloody Mary: skewer a few beans with an olive and a lemon wedge, and it’s basically a meal.
More Recipes My Family Makes on Repeat
If you liked this one, here are a few others that get the same reaction at our table:
- [INTERNAL LINK PLACEHOLDER: Quick Pickled Red Onions] — These adds color and zing to tacos, salads, and sandwiches, and they’re ready in 30 minutes.
- [INTERNAL LINK PLACEHOLDER: Garlic Dill Pickle Spears] — My ultimate crunchy dill pickle recipe, with the same stay-crisp secret.
- [INTERNAL LINK PLACEHOLDER: Spicy Pickled Carrots] — These are a staple for banh mi and noodle bowls, and my husband eats them by the forkful.
I hope these pickled green beans become your new fridge staple just like they have ours — there’s something so satisfying about pulling out a homemade jar of tangy, crunchy beans when you need a quick snack or want to dress up a lunch. If you make them, drop a comment below or tag me on Instagram so I can see your pretty jars — I love that moment when people realize how easy crisp dilly beans can be.
📌 Pickled green beans recipe that stay crunchy for weeks — save it for your next snack board, lunchbox, or weekend Bloody Mary bar.
Pickled Green Beans That Don’t Turn Mushy
Equipment
- Large pot (4-quart)
- Large bowl for ice water
- 1-quart wide-mouth glass jar with tight lid
- Small saucepan
- Tongs or spider
Ingredients
- 1 pound fresh green beans (firm, not bendy), trimmed to fit jar
- 4 large sprigs fresh dill (or 1 teaspoon dried dill weed)
- 4 cloves garlic, peeled and lightly smashed
- 1 teaspoon whole black peppercorns
- 1 teaspoon yellow mustard seeds
- 1/2 teaspoon crushed red pepper flakes (optional)
- 1 cup white distilled vinegar (5% acidity)
- 1 cup water
- 1 tablespoon kosher salt (not iodized table salt)
- 1 teaspoon granulated sugar
Instructions
- Blanch the beans: Bring a large pot of water to a rolling boil. Add trimmed green beans and set a timer for exactly 60 seconds. The beans will turn vivid green.
- Ice bath shock: Immediately transfer beans to a bowl of ice water. Swish to chill quickly and let sit at least 2 minutes until completely cold. This stops cooking and locks in crunch.
- Drain and dry: Remove beans from ice water and pat very dry with a clean towel.
- Make the brine: In a small saucepan, combine vinegar, water, salt, and sugar. Bring to a boil over medium-high heat, stirring to dissolve. Remove from heat.
- Pack the jar: Place garlic, dill, peppercorns, mustard seeds, and red pepper flakes (if using) in the bottom of a clean 1-quart wide-mouth jar. Pack beans vertically as snug as possible without crushing.
- Pour hot brine over beans, covering them completely and leaving about 1/2 inch headspace. Tap jar gently to release air bubbles.
- Seal and cool: Wipe the rim, screw the lid on tightly, and let cool on the counter until just warm (about 1 hour). Then refrigerate.
- Wait: For best flavor, chill at least 24 hours before eating. Flavor deepens over 3 days.
Notes
Related posts:
 The Slow Cooker Cowboy Casserole That Saves Tired Weeknights (No Soggy Tots Allowed)
 Lemon Garlic Butter Baked Salmon in Foil That’s Ready in 25 Minutes — No Fuss, No Mess
 Moist Chocolate Zucchini Bread That Doesn’t Turn Out Rubbery — Finally
 Creamy Homemade Strawberry Dole Whip (That Tastes Just Like the Real Thing)
 Blueberry Peach Bread That Doesn’t Sink or Turn Mushy — Finally
 Quinoa Chicken Sausage Bowls That Are Ready in 30 Minutes (And Actually Keep Well)