
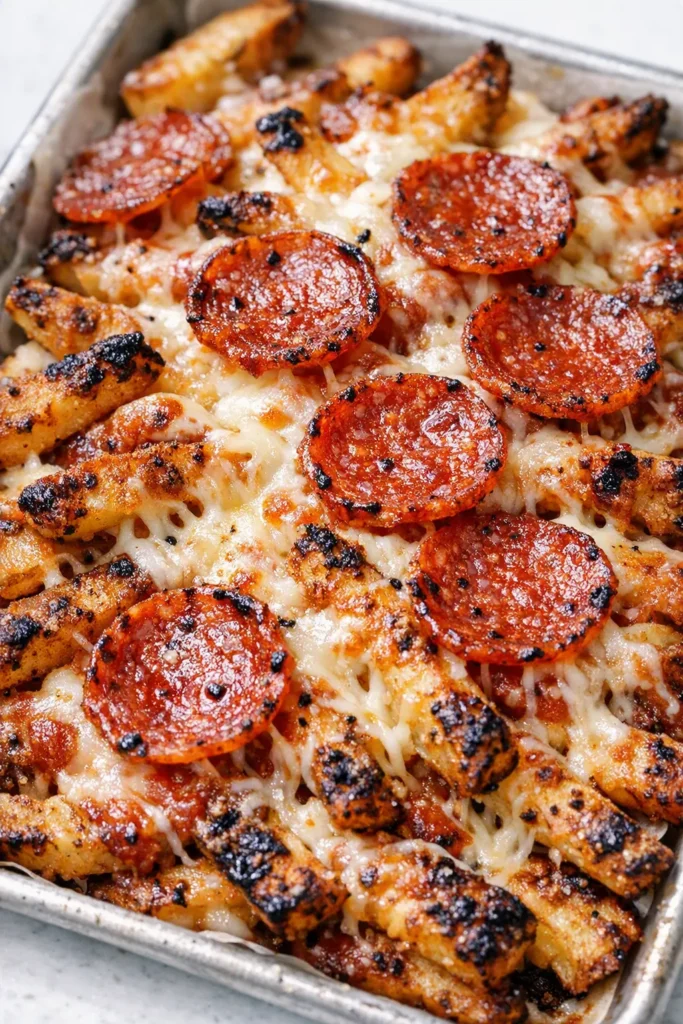
That first pull-apart moment — when the mozzarella stretches between two fries and the pepperoni cups are practically glistening — that’s the exact reason my kids ask for these every single Friday after school. Every. Single. Week. I used to just throw toppings onto raw fries and call it dinner, and somewhere around the seventh soggy batch I finally figured out what was going wrong. Now I’ve made this recipe so many times that I’ve lost count, and my nine-year-old — who normally picks around anything with visible herbs — cleaned the whole sheet pan last time without a single complaint.
The short version: Frozen fries, a smart layered topping order, and a low-broiler trick that gives you cheese-stretchy, crispy-edged pizza fries without a soggy fry in sight.
I’ve tested this with the cheapest frozen fries from the grocery store and with homemade ones on a day when the farmer’s market had a good potato deal. Both work as long as you follow the same order: par-bake the fries first, go light on the sauce, let the oven do the rest. My sister calls these “cheat-night pizza” and I’ve never been offended, because they come together in the same amount of time it takes to order a pizza and actually get it delivered.
- Serves: 4 as a snack or side
- Hands-On Time: 15 min | Total Time: 25 min
- Difficulty: Easy enough for a school-day afternoon
- Cost per serving: About $2 (using frozen fries and store-bought sauce)
- Calories: ~450 per serving
- Dietary Notes: Vegetarian as written; easy to make dairy-free with swaps
(Photo above: Overhead shot of the finished pizza fries on a rimmed baking sheet, melty mozzarella pulled between two fries, pepperoni cups with crispy edges, a small bowl of marinara sauce on the side for dipping, warm early afternoon light from the left.)
The Secret That Keeps These Actually Crispy (Not Soggy)
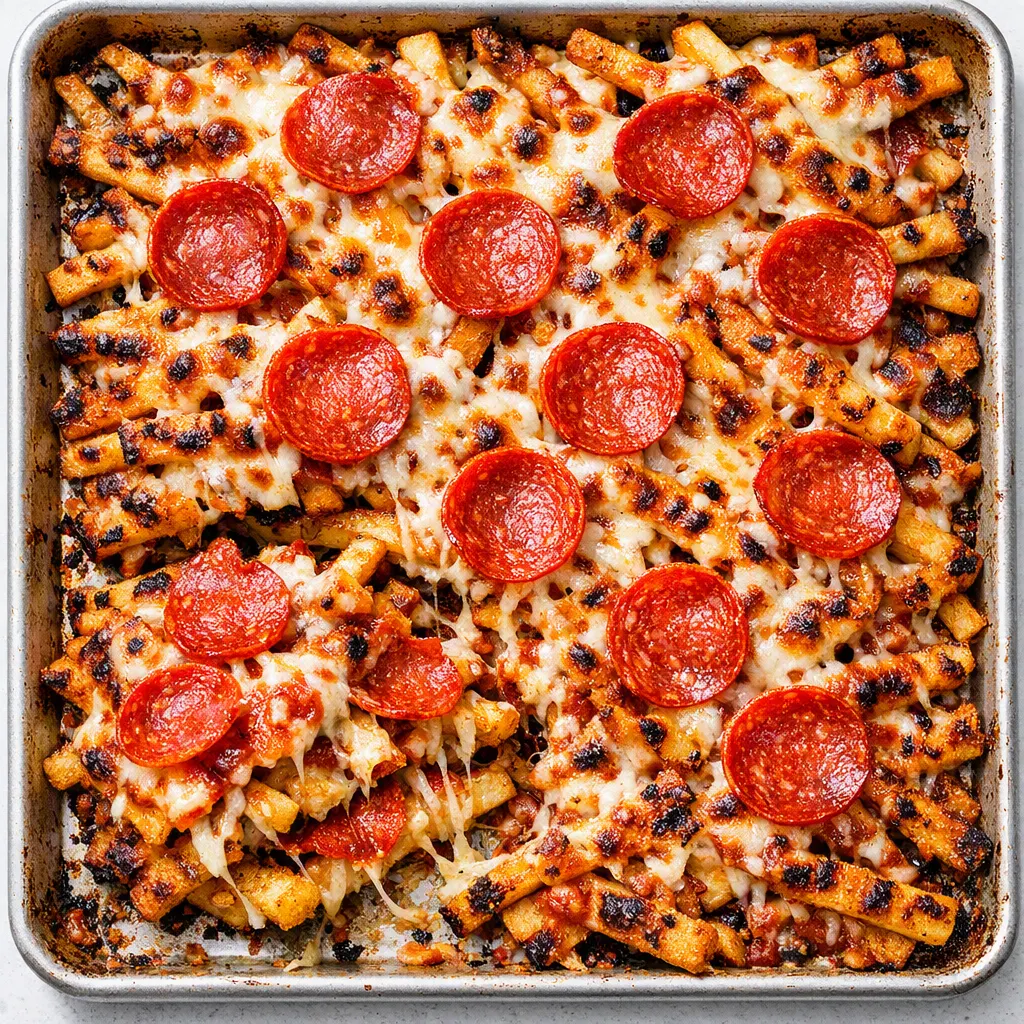
First, don’t dump your toppings on raw fries. Yes, it saves six minutes, but it also turns the fries into a sad, pale blanket. I know because I did it that way for a full year. Instead, I par-bake the fries until they’re just starting to turn golden at the edges, then I go in with the sauce and cheese. That first bake gives the fries a head start on developing a crisp crust before anything heavy lands on top.
Second, the sauce has to be thick. If you’re using a jarred marinara, drain off the watery top layer first or give it a quick simmer to let extra moisture bubble away. You only need a few spoonfuls total — this is a fry dish, not a soup. I put a small layer of sauce directly on the fries, but I don’t toss them in it. Tossing breaks the crisp and turns the whole thing into mush. The goal is a light, barely-there coating of tomato flavor that melts into the cheese, not a puddle.
The final piece is the broiler. After the fries are baked and topped, a couple of minutes under the broiler melts the cheese into little golden spots of blister while the pepperoni cups get crispy at the edges. The contrast between the still-crispy fry, the molten cheese, and that tiny bit of charred pepperoni is what makes these disappear faster than any plate of regular fries I’ve ever put on the table.
Everything You Need (And a Few Notes From Me)
- 1 (28-ounce) bag frozen french fries — Go with a thinner cut, like shoestring or wavy, if you want maximum crisp. Steak fries work too but take a couple extra minutes in the oven. I’ve used the store brand and the nice organic kind, and both come out fine here. My kids honestly can’t tell the difference once the cheese is on top.
- 1 cup pizza sauce or marinara — Pick one that’s thick and not overly watery. I usually use a good jarred marinara and just drain off the liquid at the top. If all you have is crushed tomatoes, add a pinch of sugar and a little dried oregano and simmer for five minutes. My husband thinks I’m crazy for draining the jar, but it really does keep the fries from getting limp.
- 1 ½ cups shredded whole-milk mozzarella — Low-moisture mozzarella melts without making everything watery. Fresh mozzarella in the water pack is fine too, but pat it dry with paper towels first or it’ll turn the pan soggy. I prefer the bagged kind for this dish for exactly that reason.
- 1 (3.5-ounce) package pepperoni — Regular slices are perfect. I leave them whole because my kids like the crispy little cups that form when the edges curl up. If you prefer more even coverage, cut them into quarters. Turkey pepperoni works too, but it doesn’t crisp up quite as much.
- 1 tablespoon olive oil — Just to drizzle over the fries before they hit the oven. It’s a little thing, but it helps them crisp up evenly.
- 1 teaspoon Italian seasoning — Oregano and basil work fine, but this blend is what makes it taste like pizza instead of fries with cheese. I use it even when I’m using a sauce that’s already seasoned.
- Fresh basil or parsley for serving (optional) — If I’m being fancy, I’ll sprinkle it on right before serving. My family doesn’t really care, but it makes the baking sheet look prettier for photos.
What to Pull Out Before You Start
- A rimmed baking sheet — The rim is important, because the pepperoni releases a little oil and you don’t want it running all over your oven.
- Parchment paper or aluminum foil — This saves you a lot of scrubbing afterward. I always line the sheet, even when I’m feeling lazy.
- A wire cooling rack — This is optional, but if you have one that fits your baking sheet, set the fries on it for the first half of baking. The hot air circulates underneath and makes the fries twice as crispy. I got this one from my mom years ago and I use it for everything now.
Let’s Make It (Step by Step)
This goes fast, so read through once before you start. The oven does most of the work, but the minute under the broiler is the moment you don’t want to walk away from.
- Preheat the oven to 425°F. Pop the fries out of the freezer while it heats up. (📸 Photo tip: You should see the fries still icy from the freezer, ready to go onto the baking sheet.)
- Toss the frozen fries with olive oil and half the Italian seasoning. Spread them in a single layer on the prepared baking sheet. If you’re using the wire rack, place it over the sheet and arrange the fries on top. Bake for 12-15 minutes, until the fries are just starting to brown at the edges. They won’t be fully crisp yet — that’s okay, they’ll finish under the broiler.
- While the fries bake, prep the toppings. Drain any watery liquid off your pizza sauce. Shred the mozzarella if you bought a block. Pull the pepperoni slices out of the package so they’re ready to go. (This is also the step where I get my kids to help — they like “staging” the toppings on a plate like we’re in the middle of assembling a pizza.)
- Pull the fries out and reduce the oven temperature to 400°F. Use a spatula to flip the fries over if they’ve stuck at all. Then, spoon about half of the pizza sauce in a drizzle pattern across the fries. You’re not looking for an even coating — just a nice tomato presence here and there. Reserve the rest of the sauce for dipping at the table.
- Sprinkle the shredded mozzarella over the top. Don’t go overboard. A cup and a half spread loosely over the whole pan is enough. Too much cheese creates a blanket that traps all the steam and makes the fries underneath soft. I know it’s tempting to dump the whole bag on, but trust me — this amount is the sweet spot.
- Lay the pepperoni on top of the cheese in a single layer. You can nestle them into the cheese a little so they don’t slide off when you’re moving the pan. Sprinkle with the remaining Italian seasoning. (📸 Photo tip: At this point, the steak fries are just golden, the cheese is still shredded and separate, and the pepperoni looks slightly wet from the sauce — that’s the perfect before-broil shot.)
- Return the pan to the oven and bake for 5-6 minutes, just until the cheese is melted and the fries are fully hot. You’re not trying to brown the cheese in this step — that happens in the next one.
- Turn your oven to broil and put the baking sheet on the top rack 6 inches from the heat source. Broil for 1-3 minutes, watching it constantly. You’re looking for the cheese to start bubbling and turning lightly golden in spots, and the edges of the pepperoni to curl up and crisp. This is the “don’t walk away” moment. Once you see those dark spots, pull the pan out immediately.
- Let the pan rest for 2 minutes before serving. I know it’s hard when the kitchen smells like pepperoni and melted cheese, but this gives the fries a chance to set so they don’t steam themselves when you cut them. Sprinkle with fresh basil if you’re using it, and serve directly from the baking sheet or transfer to a big serving plate. Put the remaining pizza sauce in a small bowl for dipping.
Make-Ahead Notes (Because We’re All Busy)
These are best straight out of the oven, but I’m not going to pretend you won’t want leftovers. When I meal prep this for the week, I actually keep the components separate instead of making a full sheet pan ahead. I make a double batch of the pizza sauce and store it in a jar. I shred extra mozzarella and keep it in a ziptop bag. On a busy afternoon, I just pull out the fries and assemble a small pan for just us — it takes the same 25 minutes but tastes like it was made from scratch.
- Fridge: Leftover pizza fries keep in an airtight container for up to 2 days, but they will lose their crispness. Reheat in a 375°F oven on a parchment-lined sheet for 5-7 minutes to revive the texture.
- Freezer: I don’t recommend freezing the assembled pizza fries — the whole texture goes downhill when you thaw and reheat. You can freeze the pizza sauce in an ice cube tray for up to 3 months, which is great, because you can pop out exactly how much you need for this recipe.
- Reheat: The microwave works in a pinch but makes the fries soft. If you have an air fryer, that’s actually the secret to getting them crispy again. Heat at 375°F for 3-4 minutes and they come out almost as good as day one.
The Mistakes I Made So You Don’t Have To
- Don’t skip the wire rack. I know it’s one more thing to wash, but it makes a huge difference. Air gets underneath the fries, so they crisp up on all sides instead of steaming against the pan. If you don’t have a wire rack, flip the fries halfway through the initial bake. That helps a little, but honestly, the rack is worth it.
- Watch the broiler like it’s the last thing you’ll ever see. I’ve burned at least two batches of these by looking down at my phone for what felt like 10 seconds. The cheese goes from perfectly melted to blackened in about 90 seconds. Set a timer for 1 minute and check, then add more time if you need it. Even if you mess this part up a little, it’ll still taste good — I’ve done it.
- Go easy on the sauce. I know it seems like more sauce would be more pizza-like, but it actually makes the whole thing harder to eat and, worse, makes the fries soggy. You’re looking for a thin layer of flavor, not a soup bowl. If you want more sauce, serve extra on the side for dipping — that way everyone gets as much or as little as they want.
- Use whole-milk mozzarella. I’ve tried the part-skim kind to save calories, and the texture just isn’t the same. Whole-milk mozzarella melts more slowly and evenly, and it doesn’t release watery liquid the way the lower-fat version sometimes does. Plus, let’s be real — these are pizza fries. The extra 20 calories per serving is worth it.
Make It Yours: Easy Variations
- Dairy-Free / Vegan: Use a store-bought or homemade dairy-free mozzarella (the kind in a block melts better than the kind in a bag). I’ve tested it with the Daiya shreds and they work, but they take an extra few minutes under the broiler to get that same golden look. My neighbor can’t do dairy and she loves these more than any of my other recipes.
- Spicy Version: Add a drizzle of hot honey or sprinkle of chili flakes right before broiling. I like to put a few pickled jalapeños on half the sheet for me and leave the other half plain for the kids. My nine-year-old calls the spicy ones “mommy’s fries” and pretends to be scared, but I’ve caught him stealing them.
- Veggie-Loaded: Sauté sliced mushrooms, bell peppers, or mushrooms in a little olive oil for 5 minutes before adding them to the top. This is my go-to on days I want to feel slightly more responsible about lunch. Just make sure you pat the mushrooms dry before sautéing so they don’t release extra moisture onto the fries.
- Breakfast Version: Now that I’ve discovered this, I can’t go back. Use frozen hash browns instead of fries, top with cheese, crispy bacon pieces, and a runny egg or two, and call it breakfast pizza fries. My kids think it’s the best thing that’s ever happened to a weekend morning.
Questions I Get About This Recipe All the Time
Q: Why did my fries turn out soggy?
A: Ugh, I’ve been there. The most likely culprit is too much sauce or too much watery mozzarella. Next time, drain the sauce before using it and pat the shredded cheese dry with a paper towel if it looks wet. Also, don’t skip the initial par-bake — that’s the step that gives the fries a head start on crispiness. You’ve got this next time.
Q: Can I make this dairy-free?
A: Yes! Use a dairy-free mozzarella that melts well — I like the ones that come in a block and you shred yourself. There is a slight texture difference, but the whole-family version still gets eaten. My nephew can’t do dairy and he asks for these every time he comes over.
Q: How long do pizza fries last in the fridge? Can I freeze them?
A: You can keep leftovers in an airtight container in the fridge for up to 2 days. Reheat in the oven or air fryer to get some crisp back — the microwave will soften them. I wouldn’t freeze the fully assembled pizza fries, but you can make a batch of the pizza sauce and freeze that in small portions for months.
Q: What do you serve with pizza fries?
A: Honestly, these are usually the whole meal for us on a Friday night. But if you’re looking to round things out, I serve them next to a simple green salad with a lemony vinaigrette — the acid cuts through all that cheese perfectly. We also have them with crisp veggies like carrots and cucumber sticks on the side when my kids need a little more produce in their day. And obviously, a little bowl of ranch dressing for dipping on the side is never a bad idea.
More Recipes My Family Makes on Repeat
If you liked this one, here are a few others that get the same reaction at our table:
- [INTERNAL LINK PLACEHOLDER: Sheet Pan Chicken Parmesan]} — All the comfort of the classic, but on one pan and ready in 40 minutes.
- [INTERNAL LINK PLACEHOLDER: Garlic Parmesan Wedges]} — The side dish that my kids request even when I’ve already made the pizza fries.
- [INTERNAL LINK PLACEHOLDER: 15-Minute Stovetop Mac and Cheese]} — For the nights when cheese is the entire point and you need it fast.
These pizza fries have become our official Friday afternoon tradition, the kind of dish that makes everyone wander into the kitchen while they’re still in the oven. I don’t think I’ll ever get tired of watching my family hover around the baking sheet, waiting for the cheese to set just a little longer so they can pull that first perfect fry.
If you try this, drop a comment below — I love hearing how it goes for you! Or tag me on Pinterest/Instagram so I can see yours!
📌 This sheet pan pizza fries recipe stays golden and crispy — save it for your next Friday pizza night or after-school snack.
Crispy Pizza Fries
Equipment
- Rimmed Baking Sheet
- Parchment Paper
- Wire cooling rack
- Mixing Bowl
Ingredients
Pizza Fries
- 1 bag frozen french fries (28 ounces)
- 1 cup pizza sauce or thick marinara, drained
- 1 1/2 cups shredded whole-milk mozzarella
- 1 package pepperoni (3.5 ounces)
- 1 tablespoon olive oil
- 1 teaspoon Italian seasoning
For Serving
- 1 tablespoon fresh basil or parsley, chopped (optional)
- 1/2 cup extra pizza sauce, warmed for dipping
Instructions
- Preheat oven to 425°F. Toss the frozen fries with olive oil and half the Italian seasoning, then spread them in a single layer on a parchment-lined rimmed baking sheet. Bake for 12-15 minutes until the edges just start to brown.
- While the fries bake, drain any watery liquid from the pizza sauce, shred the mozzarella if needed, and set out the pepperoni slices.
- Reduce the oven to 400°F. Spoon about half the pizza sauce in a light drizzle over the fries. They should not be coated evenly — just enough tomato flavor to melt into the cheese later.
- Sprinkle 1 1/2 cups shredded mozzarella over the sauce, then lay the pepperoni slices in a single layer. Sprinkle with the remaining Italian seasoning.
- Bake for 5-6 minutes until the cheese is melted and the fries are fully hot.
- Switch the oven to broil and place the sheet on the top rack about 6 inches from the heat. Broil for 1-3 minutes, watching constantly, until the cheese bubbles in golden spots and the pepperoni edges crisp.
- Let the pan rest for 2 minutes. Sprinkle with fresh basil if using, and serve with the reserved pizza sauce for dipping.
Notes
Related posts:
 The Slow Cooker Cowboy Casserole That Saves Tired Weeknights (No Soggy Tots Allowed)
 Quick Lemon Ricotta Pasta for Busy Weeknights: Creamy, Bright, and on the Table in 20 Minutes
 Lemon Garlic Butter Baked Salmon in Foil That’s Ready in 25 Minutes — No Fuss, No Mess
 Lipton Onion Soup Meatloaf for Tuesday Nights: Moist, Savory, and the Only One You’ll Ever Need
 Kielbasa Sausage Cheesy Potato Casserole That Tastes Like Sunday Dinner — In Under an Hour
 Quinoa Chicken Sausage Bowls That Are Ready in 30 Minutes (And Actually Keep Well)