
There’s that moment at every cookout — someone takes a bite, chews, goes quiet, and then looks at their plate like they’ve just discovered a secret. The secret isn’t the meat. It’s the sauce. This homemade BBQ sauce is smoky, tangy, and exactly sweet enough, and the whole batch comes together in 15 minutes flat. I used to grab whatever bottle was on sale at the grocery store. Then I whipped up this batch one Sunday, brushed it on some chicken thighs, and watched my family’s eyes go wide. I’ve never bought a jar of BBQ sauce since.
The short version: Ketchup, brown sugar, vinegar, and a handful of pantry spices simmered for 15 minutes — and you’ll never look at that bottle in your fridge the same way again.
I’ve made this batch at least twenty times over the years, and my pickiest eater — the one who once announced at age seven that she “didn’t like sauce” — now asks for it on everything from ribs to Saturday-morning scrambled eggs.
- Serves: Makes about 2 cups — 16 servings as a sauce, glaze, or marinade
- Hands-On Time: 5 min | Total Time: 15 min
- Difficulty: Easy enough for a Tuesday night
- Cost per serving: About $0.25
- Calories: ~40 per 2-tablespoon serving
- Dietary Notes: Naturally dairy-free and gluten-free — vegan if you swap the Worcestershire
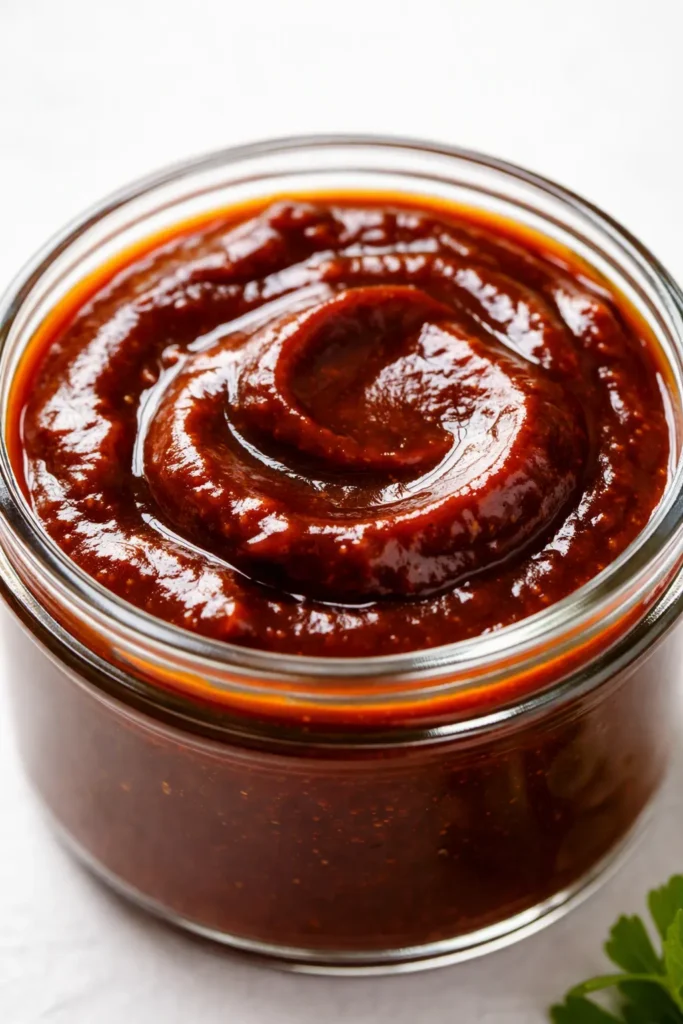
(Photo above: overhead shot of a mason jar filled with glossy, deep-rust-colored BBQ sauce, a basting brush leaning against the rim, and a plate of grilled chicken thighs blurred in the warm late-afternoon background. It looks like the cookout you wish you’d been invited to.)
Why This Sauce Tastes Like It Smoked All Day (It Really Just Simmered for 15 Minutes)
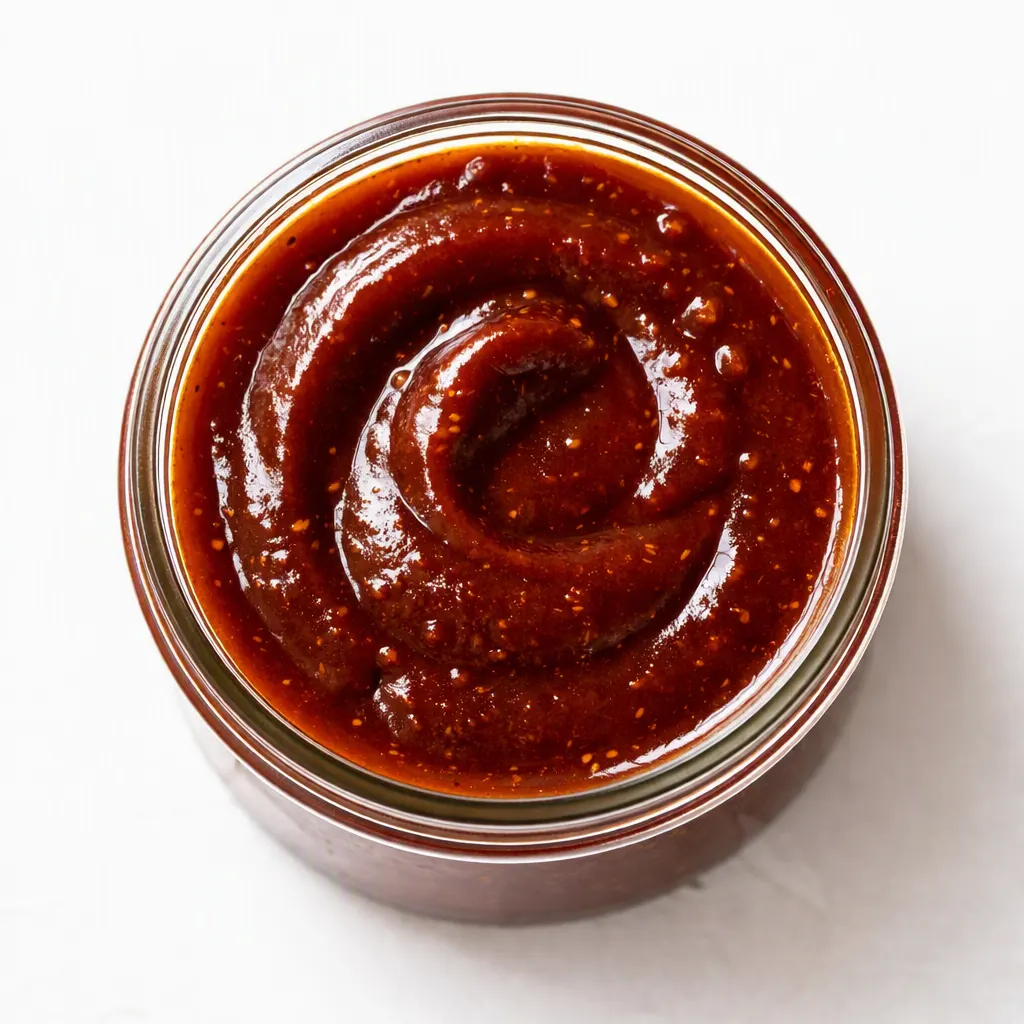
The first time I made this, I honestly thought I’d missed a step. How could something this simple taste so… finished? The answer is one tiny move that makes all the difference: let the sauce actually simmer — a gentle, lazy bubble — instead of just warming it through. Those quiet minutes are when the vinegar calms down, the brown sugar stops tasting separate, and everything melts into that deep, round flavor you’d expect from a sauce that cooked low and slow for hours.
The other trick is balance. Most homemade BBQ sauces go wrong by leaning too hard on the sugar or too hard on the vinegar. This one sits right in the middle — the apple cider vinegar cuts the sweetness, the brown sugar softens the vinegar’s sharp edge, and the smoked paprika gives it that unmistakable backyard backbone. The texture lands somewhere perfect, too: thick enough to cling to a rack of ribs, but loose enough to brush onto chicken without sliding right off.
What you end up with is a sauce that tastes like you fussed over it all afternoon — when you really just stood at the stove stirring for five minutes and let it bubble while you chopped whatever’s going on the grill.
The Grocery List (With Real Talk About Each Ingredient)
- 1 cup ketchup: The base of the whole operation. Don’t overthink it, but don’t grab the watery generic stuff either. Use a brand you’d actually want on your fries. My kids have literally asked me to “make the sauce that tastes like summer” — this is it.
- 1/2 cup packed dark brown sugar: Dark brown sugar gives you more molasses flavor, which makes the sauce taste deeper and slower-cooked than it really was. Light brown works in a pinch, but dark is better. If you only have light brown on hand, stir in a teaspoon of molasses if you’ve got it — worth the extra step.
- 1/3 cup apple cider vinegar: This is the tang that balances all that sweetness. Don’t substitute white vinegar — it’s sharper and less friendly. Apple cider vinegar has a rounder, fruitier bite that belongs in BBQ sauce.
- 2 tablespoons Worcestershire sauce: The savory, slightly funky depth that makes people ask “what IS that in there?” For a vegan version, swap it for soy sauce or tamari — I’ve tested it and nobody at the table noticed a difference.
- 1 tablespoon yellow mustard: The secret my Kansas City friends would probably kill me for sharing. It doesn’t make the sauce taste like mustard at all — it just makes everything else taste brighter and more alive.
- 1 teaspoon smoked paprika: The smoky backbone of the whole sauce. This is what tricks everyone into thinking it was made over a wood fire.
- 1 teaspoon garlic powder: Or two fresh cloves, minced. Powder keeps the sauce silky smooth, but fresh garlic gives a brighter punch in the first few minutes. Both work.
- 1 teaspoon onion powder: Same deal as the garlic powder — it adds that savory under-note without any gritty texture.
- 1/2 teaspoon chili powder: Mild warmth, not heat. My kids eat this sauce without a single complaint, and they’re the ones who run from anything spicy.
- 1/4 teaspoon cayenne (optional): For when you’re making an adult batch after the kids have gone to bed.
- 1/2 teaspoon black pepper and 1/2 teaspoon salt: Don’t skip these. They pull every other flavor together and keep the sauce from tasting one-dimensional.
What to Pull Out of the Drawer
- A medium saucepan — 2 quarts is perfect. If you don’t have one, any pot with a thick bottom will do.
- A whisk (or a fork, if you’re like me and the whisk is still in the dishwasher from this morning).
- Measuring cups and spoons.
- A mason jar or airtight container for storing the finished sauce.
- Optional: a fine-mesh strainer if you want it perfectly smooth. I never bother, honestly.
Making the Sauce, Start to Finish
This goes fast, so read through the steps once before you start. And don’t let the number of steps fool you — most of these are 30 seconds each.
The whole method: Combine everything, let it bubble gently, taste it warm, and you’re done.
- Combine everything: Add all the ingredients to your saucepan. Don’t stress about stirring as you go — just get everything in the pot and whisk it together until the sugar dissolves and the color turns even. When I’m really tired, I dump it all in and give it a good whisk — this recipe is forgiving enough that order doesn’t matter one bit. (📸 Photo tip: you should see a glossy, brick-red sauce with no visible streaks of sugar or spice at this point.)
- Warm it over medium heat: Whisk occasionally as it warms up. You’ll see tiny bubbles start to form around the edge of the pot — that’s your cue that things are moving.
- Bring it to a gentle simmer: You want small, lazy bubbles across the surface — not a rolling boil. A hard boil will make the sauce taste slightly scorched and bitter, and nobody wants bitter BBQ sauce.
- Turn the heat down to low: Let it sit there and bubble softly for 10 to 12 minutes. This is the “smoke all day” step — it’s when everything stops tasting like separate ingredients and starts tasting like actual BBQ sauce. The kitchen will smell like vinegar and brown sugar and something dangerously close to a county fair. (📸 Photo tip: you’ll see the surface covered in small, even bubbles and the sauce starting to thicken around the edges of the pan.)
- Test the thickness: Dip the back of a spoon in and run your finger through the sauce. If the line stays clean instead of filling right back in, it’s ready. If it’s still running like water, give it another 3 to 4 minutes and check again.
- Taste it warm — this is important: Warm sauce tastes completely different from cold sauce. Add a pinch more salt, a splash more vinegar if you want more tang, or a pinch of cayenne if you want heat. This is your moment to fix it, so trust your mouth.
- Cool and store it: Let the sauce cool for a few minutes, then pour it into a mason jar. It’ll thicken noticeably as it cools, so don’t panic if it looks looser in the pot than you expected.
Double It on Sunday and Glaze All Week
This is the recipe that made me a meal-prepper, at least for sauce. When I’m planning a cookout, I make a double batch — one jar for the grill, one for the pulled chicken nachos we’ll be eating by Wednesday. It keeps beautifully in the fridge, which is a serious relief when you’re juggling school pickup and soccer practice and somehow still trying to get dinner on the table.
- Fridge: Store in a sealed jar or airtight container for up to 2 weeks. The flavor actually deepens after a day or two — my husband calls it “day-two magic” and I’ve stopped arguing.
- Freezer: Yes, it freezes beautifully. Pour it into a freezer-safe jar or zip-top bag and freeze for up to 6 months. If you’re using a glass jar, leave an inch of headroom at the top so it doesn’t crack as it expands.
- Reheat: Warm it gently on the stove or in the microwave in 30-second bursts. If it thickened up in the fridge, stir in a tiny splash of water or vinegar to loosen it back up.
Things I Wish I’d Known Before My First Batch
- Don’t skip the simmer: This is the step I see people skip when they’re in a hurry, and it’s a mistake. The simmer isn’t just heating the sauce — it’s letting the vinegar mellow and the sugar melt into everything. Even five extra minutes makes a noticeable difference in how deep and round the flavor gets.
- Keep it at a lazy bubble, not a boil: A hard, aggressive boil can make the sauce taste slightly bitter and scorched. If you look down and see big, angry bubbles, turn the heat down immediately. Low and lazy is the goal.
- Taste it warm, not cold: Cold sauce always tastes flatter and less sweet than it really is. I almost added extra sugar once because the chilled sauce tasted too tangy — then I warmed it up and it was perfect. Trust your taste buds when the sauce is warm.
- Use a ketchup you actually like: I know it sounds silly, but the ketchup is the base of literally everything in this sauce. A decent brand gives you a deeper, richer result. I’ve made this with the watery store brand once, and it came out thinner and oddly sweeter. Never again.
- Mess it up anyway: Even if you boil it too hard or add a little too much vinegar, it’s still going to taste good on chicken. I’ve done it — probably more than once — and the entire batch still vanished by the end of dinner. This is a forgiving recipe, and that’s exactly why it earned a permanent spot in my rotation.
Four Easy Variations That All Taste Like a Different City
- Spicy (Texas-style): Add 1 teaspoon of chipotle powder or an extra 1/2 teaspoon of cayenne for a smoky, slow-building heat. My husband prefers this version, so I make a small “adult jar” after the kids go to bed on grilling nights.
- Sweet and honey (Memphis-style): Swap the brown sugar for 1/2 cup of honey. The flavor is softer and a little more floral, and it’s my daughter’s favorite on chicken fingers. Just stir it in well so it dissolves completely.
- Mustard-based (South Carolina-style): Swap the ketchup for 1 cup of yellow mustard and reduce the brown sugar to 1/4 cup. You’ll get that bright, tangy Carolina gold sauce that’s absolutely incredible on pulled pork. I haven’t converted my kids yet, but I keep trying every summer.
- Dark and sticky (for ribs): Add 1 tablespoon of molasses and a teaspoon of liquid smoke for a deeply dark, glossy sauce that clings to ribs like it means it. Liquid smoke is a little controversial in my house — my husband thinks it’s cheating — but it makes a fantastic rib night either way.
The BBQ Sauce Questions My Readers Always Ask
Q: Why did my sauce turn out too sweet?
A: Ugh, I’ve been there — it usually means the vinegar didn’t have enough time to mellow out, or your ketchup brand leans sweeter than you realized. Fix it by stirring in an extra splash of apple cider vinegar, a teaspoon at a time, until the tang comes back. For next time, reduce the brown sugar to 1/3 cup and see how that hits. You’ve got this on the next batch.
Q: Can I make this with less sugar?
A: You can, but it changes the texture more than the taste. I’d reduce the brown sugar to 1/4 cup, and if it tastes too sharp, add a small drizzle of honey or maple syrup to smooth it out. I haven’t personally tested a fully sugar-free version, but readers have made it with brown sugar substitutes and reported good results. Just know it’ll be a little thinner, since the sugar helps the sauce thicken as it simmers.
Q: How long does homemade BBQ sauce last in the fridge? Can I freeze it?
A: In a sealed jar or airtight container, it’ll last up to 2 weeks in the fridge — but in my house, it never sees day five. You can absolutely freeze it for up to 6 months. Just leave some headroom in whatever container you use so it doesn’t crack as it freezes. To thaw, let it sit overnight in the fridge or warm it gently on the stove, then stir in a splash of water or vinegar to bring back the texture.
Q: What do you serve with this sauce?
A: Everything, honestly. It’s my go-to for grilled chicken thighs, baby back ribs, and pulled pork sandwiches. But it’s also incredible brushed over meatloaf during the last 20 minutes of baking, drizzled into leftover chicken tacos, and — my kids’ favorite — as a dipping sauce for crispy air-fryer chicken tenders. On weekends we do “BBQ nachos” with whatever meat we have leftover, this sauce, and a mountain of shredded cheese.
More Recipes My Family Makes on Repeat
If you liked this one, here are a few others that get the same kind of reaction at our table:
- [INTERNAL LINK PLACEHOLDER: Easy Grilled Chicken Thighs] — The chicken that turns this sauce into the best dinner of the summer, ready in under 30 minutes.
- [INTERNAL LINK PLACEHOLDER: Sticky Oven-Baked Ribs] — Fall-off-the-bone tender ribs that don’t need a smoker or even a grill.
- [INTERNAL LINK PLACEHOLDER: Weeknight Pulled Pork Sandwiches] — Set it in the slow cooker before work, and dinner’s basically done by the time everyone’s home.
This sauce has carried us through every summer cookout, every birthday, and more “I forgot to plan dinner” Tuesdays than I can count. Whether you’re feeding a whole backyard or just trying to win over a picky family, a batch belongs in your fridge.
If you make it, drop a comment below — I genuinely love hearing about that first cookout moment when someone figures out you made the sauce yourself. And if you’re a Pinterest person, save it for your next backyard get-together.
📌 This homemade BBQ sauce recipe comes together in 15 minutes and tastes like it smoked all day — save it for your next summer cookout or backyard BBQ.
Homemade BBQ Sauce
Equipment
- Medium Saucepan
- Whisk
- Measuring Cups and Spoons
- Mason jar or airtight container
Ingredients
For the BBQ Sauce
- 1 cup ketchup
- 1/2 cup packed dark brown sugar
- 1/3 cup apple cider vinegar
- 2 tablespoons Worcestershire sauce
- 1 tablespoon yellow mustard
- 1 teaspoon smoked paprika
- 1 teaspoon garlic powder
- 1 teaspoon onion powder
- 1/2 teaspoon chili powder
- 1/4 teaspoon cayenne pepper, optional
- 1/2 teaspoon black pepper
- 1/2 teaspoon salt
Instructions
- Combine all ingredients in a medium saucepan and whisk until the sugar dissolves and the color is even.
- Warm over medium heat, whisking occasionally, until tiny bubbles form around the edge of the pot.
- Bring to a gentle simmer with small, lazy bubbles across the surface. Avoid a rolling boil.
- Reduce the heat to low and let the sauce bubble softly for 10 to 12 minutes, until it thickens and tastes like real BBQ sauce.
- Test the thickness by dipping the back of a spoon in and running a finger through the sauce. If the line stays clean, it is ready.
- Taste the sauce warm and adjust with extra salt, vinegar, or cayenne as needed.
- Cool for a few minutes, then pour into a mason jar. The sauce will thicken more as it cools.
Notes
Related posts:
 The Slow Cooker Cowboy Casserole That Saves Tired Weeknights (No Soggy Tots Allowed)
 Lemon Garlic Butter Baked Salmon in Foil That’s Ready in 25 Minutes — No Fuss, No Mess
 Moist Chocolate Zucchini Bread That Doesn’t Turn Out Rubbery — Finally
 Creamy Homemade Strawberry Dole Whip (That Tastes Just Like the Real Thing)
 Blueberry Peach Bread That Doesn’t Sink or Turn Mushy — Finally
 Quinoa Chicken Sausage Bowls That Are Ready in 30 Minutes (And Actually Keep Well)