
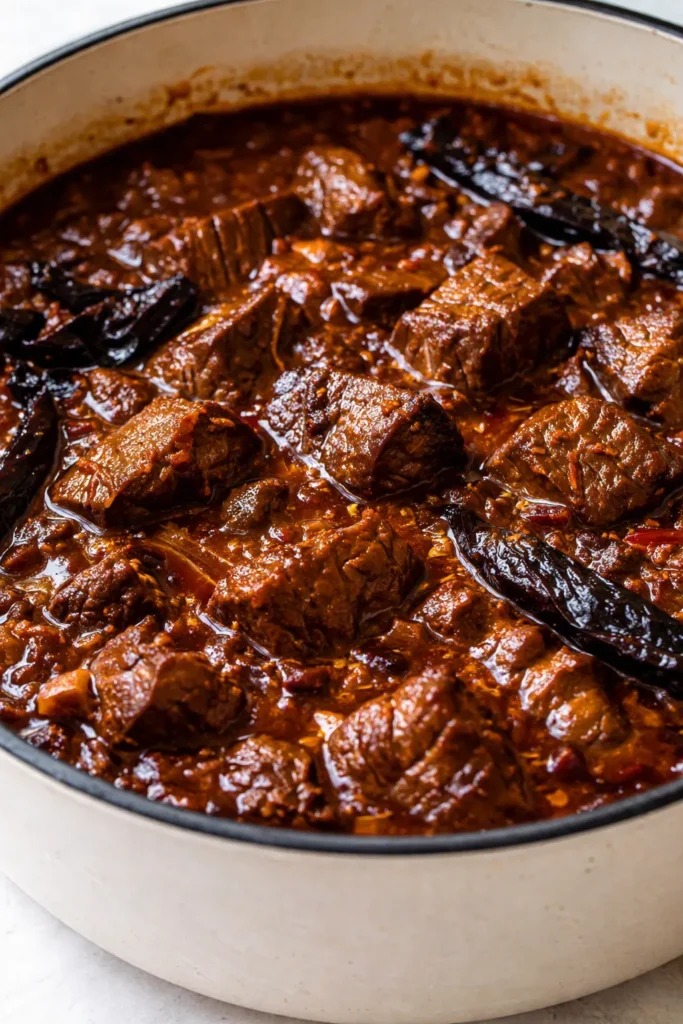
The moment that first spoonful hits the bowl, the steam carries this deep, smoky scent that instantly makes everyone wander into the kitchen. It’s the chili I’ve been making every football Sunday for years, the one my husband actually texts me about from work on Friday mornings — “We’re doing your chili this weekend, right?” Not a question. A statement. And I never argue, because honestly? It takes about fifteen minutes of real work and tastes like you simmered it all day. This Mexican chili con carne is the real deal: chunks of tender beef swimming in a dark, velvety sauce that’s smoky from dried chiles, warm with cumin, and just spicy enough to make you reach for a cold beer.
The short version: A rich, beefy chili con carne packed with authentic Mexican flavor that comes together in 45 minutes flat and tastes even better the next day.
I’ve made this over fifty times — for tailgates, for snow days, for the random Tuesday when the kids begged for “the beef stuff with the chips.” Every single time, the pot gets scraped clean. Even my picky seven-year-old asks for seconds, which is basically a culinary miracle.
- Serves: 6 as a main, or 8–10 as a party dish with toppings
- Hands-On Time: 15 min | Total Time: 45 min
- Difficulty: Easy — you’re just toasting, blending, and simmering
- Cost per serving: ~$3.50
- Calories: ~380 per serving
- Dietary Notes: Naturally gluten‑free, easily dairy‑free; can be made low‑carb by skipping beans
(Photo above: overhead shot of a heavy Dutch oven filled with dark red chili, steam rising, a wooden spoon resting on the rim. A small bowl of crumbled queso fresco, diced white onion, and fresh cilantro sits beside it. Natural morning light from a kitchen window, warm and inviting.)
The Thing That Makes This Chili So Rich (Not Just Spicy)
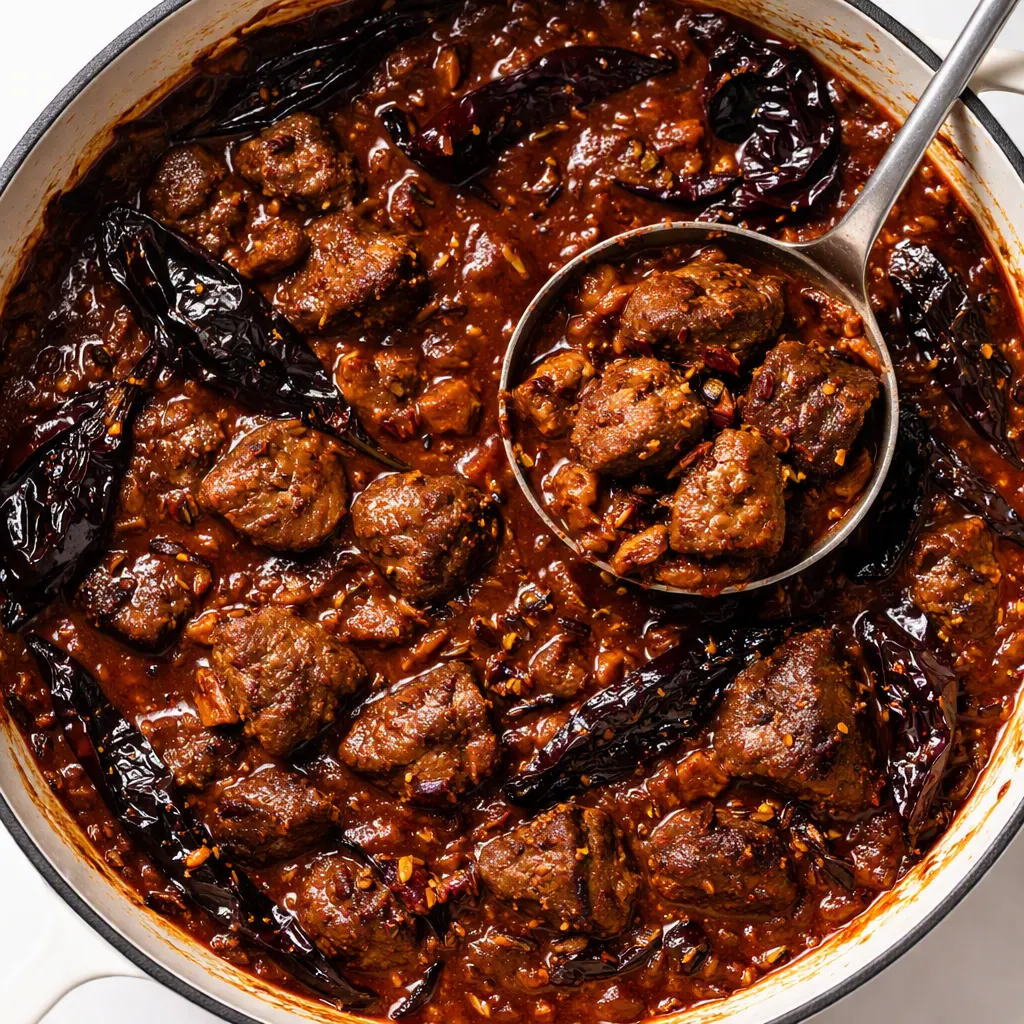
Most chili con carne recipes rely on a heap of commercial chili powder and call it a day. That’s fine in a time crunch, but you miss the deep, almost chocolaty backbone that dried Mexican chiles bring. I use a quick blend of ancho and guajillo chiles — not because I’m fancy, but because they’re about a dollar a bag at any grocery store with a Latin aisle, and the flavor they give is wild. Toast them in a dry pan for about thirty seconds, soak in hot water, then blend into a smooth paste. That paste is the secret. It tastes earthy, a little sweet, and it makes your whole kitchen smell like a mercado.
The second non‑negotiable: browning the beef in batches. Don’t crowd the pot, or the meat steams instead of searing. Those browned bits on the bottom of the pan? That’s pure flavor, and we scrape every last bit into the sauce later. Skip this and your chili will still be good, but it won’t have that slow‑cooked depth that makes people ask for the recipe.
These two things together — the chile paste and the properly browned beef — turn a simple pot of ground meat and beans into something that feels like it’s been on the stove since noon. And I promise, you can pull it off before the game even kicks off.
Everything You Need (And a Few Notes From Me)
- 2 lbs beef chuck, cut into ½‑inch cubes: You want chuck — it’s marbled enough to stay juicy during simmering and won’t dry out like lean stew meat. I’ve used round steak in a pinch, but the texture gets a little grainy. My husband can tell when I cheat on this, so now I just buy chuck.
- 3 dried ancho chiles, stemmed and seeded: These are mild and fruity. They add that dark red color and a gentle sweetness. If you can only find one kind, go all‑ancho — it’ll still be delicious.
- 2 dried guajillo chiles, stemmed and seeded: A touch more heat and a hint of berry flavor. Together with the anchos, they’re the dream team. My kids tolerate these, but if your crew is spice‑averse, you can reduce to 1 guajillo and it’ll be noticeably milder.
- 1 large white onion, diced: This melts into the sauce and gives body. Yellow onion works too.
- 4 garlic cloves, minced: Because what’s chili without a load of garlic?
- 2 tsp ground cumin, preferably whole seeds toasted and ground: Fresh cumin makes a difference you can actually taste — warm and earthy, not musty. I keep whole seeds in the freezer and grind them with a mortar and pestle when I have 30 extra seconds.
- 1 tsp Mexican oregano: It’s more floral than regular oregano and pairs perfectly with the chiles. If you only have Italian oregano, use half the amount.
- 1 tbsp tomato paste: Concentrated umami that deepens the sauce without making it taste like spaghetti.
- 1 (14.5‑oz) can fire‑roasted diced tomatoes: The fire‑roasting adds a little smokiness. Regular diced tomatoes work too — just add a pinch of smoked paprika.
- 2 cups beef broth, plus more as needed: Use a good, low‑sodium one so you control the salt.
- 1 (15‑oz) can pinto beans, drained and rinsed (optional): Traditional Texas chili says no beans, but my family loves them. I add beans on weeknights for extra bulk; leave them out for a more classic bowl or if you’re serving it over rice.
- 1 tbsp vegetable oil: For searing the beef.
- Salt and black pepper
- For serving: Cilantro, diced white onion, lime wedges, crumbled queso fresco or sour cream, and warm tortillas or tortilla chips.
What to Pull Out Before You Start
- A large Dutch oven or heavy‑bottomed pot (you need something that holds heat well)
- A blender or food processor for the chile paste (an immersion blender works if you strain the chiles first)
- Tongs or a slotted spoon for moving the beef
- Measuring spoons and a liquid measuring cup
- A small dry skillet for toasting the chiles
If you don’t have a Dutch oven, a deep sauté pan with a lid will get you there — just keep the simmer low so it doesn’t scorch.
Let’s Make It (Step by Step)
This goes fast, so read through once before you start. Most of the hands‑on time is in the first ten minutes, then you let the pot do the work.
Toast and soak the chiles: Heat a small dry skillet over medium heat. Toast the dried chiles for 20–30 seconds per side, just until fragrant and a little puffed. (If they burn, they’ll taste bitter — so don’t walk away.) Transfer to a bowl, cover with hot water, and let soak for 15 minutes.
- Brown the beef: Pat the beef cubes dry with paper towels and season generously with salt and pepper. Heat the oil in your Dutch oven over medium‑high. Working in two batches, sear the beef on all sides until deeply browned, about 3–4 minutes per batch. Don’t move the pieces too much — let them develop a crust. Transfer to a plate. (📸 Photo tip: The beef should look dark golden, almost like a steak crust, not gray. That color is where the flavor lives.)
- Soften the aromatics: Turn the heat down to medium. There should be some oil left in the pot; if not, add a tiny splash. Toss in the diced onion and cook until soft and translucent, about 4 minutes. Scrape up any browned bits from the bottom with your spoon. Add the garlic, cumin, and oregano, and stir for 30 seconds until your kitchen smells amazing.
- Bloom the tomato paste: Push the onion mixture to the side and plop the tomato paste directly onto the hot bottom of the pot. Let it sit for a minute, then stir it into everything. This caramelizes the paste and adds a subtle sweetness.
- Make the chile paste: Drain the soaked chiles (reserve about ¼ cup of the soaking liquid) and transfer them to a blender with the fire‑roasted tomatoes and a splash of the soaking liquid. Blend until completely smooth, scraping down as needed. The paste should be thick but pourable — add a little more soaking liquid if it’s struggling. (📸 Photo tip: The blended paste will look like a glossy, brick‑red sauce. Pour it into the pot and watch the color deepen instantly.)
- Build the chili: Pour the chile‑tomato paste into the pot. Stir in the beef broth and add back the browned beef along with any accumulated juices. If you’re using beans, add them now. Bring to a gentle boil, then lower the heat to a simmer. Partially cover and let it bubble away for 20–25 minutes, stirring occasionally, until the beef is tender and the sauce has thickened to your liking. If it gets too thick, splash in a little more broth.
- Finish and season: Taste the chili and adjust salt — it usually needs a good pinch. I often stir in a tiny piece of dark chocolate here (about ½ ounce) which mellows the acidity and rounds out the flavors without making it sweet. That’s totally optional but I never skip it.
- Serve it up: Ladle into bowls and let everyone build their own with the fresh toppings. Cilantro, white onion, a squeeze of lime, and a handful of crumbled queso fresco are my table’s non‑negotiables. Oh, and tortilla chips for scooping.
Sunday Prep = Stress‑Free Weeknight Dinners
I make a double batch of this on a lazy Sunday and we eat like royalty all week. It’s one of those magical dishes that actually improves after a day in the fridge — the flavors meld and the sauce gets silkier. My secret: I stash individual portions in Mason jars so all I have to do is reheat while I help with homework.
- Fridge: In an airtight container, it’ll keep up to 5 days. The flavors get even better after day one.
- Freezer: Yes! Cool completely, then freeze in portions for up to 3 months. Thaw overnight in the fridge.
- Reheat: The microwave works in a pinch, but the stovetop over low heat with a splash of broth keeps it from drying out. The microwave won’t ruin it, but the texture’s a little less lush.
Things I Wish I’d Known the First Time
- Don’t rush the browning. I know it’s tempting to throw all the beef in at once, but the pot loses heat and you end up with gray, steamed meat. Take the extra five minutes to do it in batches. Trust me — the difference is so obvious my husband can spot it from across the room.
- Watch the chiles while toasting. They go from perfectly fragrant to acrid and burnt in the blink of an eye. I set a timer for 20 seconds and just stand there. If they do burn, toss them and start over — bitter chiles will ruin the whole pot. I’ve done it. Twice.
- Simmer with the lid slightly ajar. You want steam to escape so the sauce concentrates. If you cover it tightly, it stays thin. Even if you mess this part up and it’s too thin, just simmer with the lid off for an extra five minutes — it’ll thicken right up.
- Don’t forget the salt at the end. Store‑bought broth varies wildly, so always taste before serving. Under‑salted chili is sad chili. A squeeze of lime at the table also brightens everything.
Make It Yours: Easy Variations
- Spicy version: Add 1–2 chipotle chiles in adobo to the blender along with the tomatoes. Smoky heat that builds slowly. I do this for adults‑only get‑togethers — my kids can’t hang.
- Ground beef shortcut: You can use 2 lbs ground chuck instead of cubed beef. Brown it the same way, breaking it into big crumbles. The cooking time drops to about 30 minutes total, and the texture is more like a classic American chili con carne. Still delicious, just different.
- Turkey or pork: Ground turkey or cubed pork shoulder both work beautifully. Pork shoulder wants an extra 10 minutes of simmering, but it shreds a little and makes the chili extra rich.
- Vegetarian: Skip the meat, double the beans (pinto and black beans are great), and use vegetable broth. Add a cup of diced zucchini or mushrooms with the onion for heartiness. It’s not the same, obviously, but my sister who doesn’t eat meat makes it this way and her kids demolish it with tortilla chips.
- No dried chiles? Substitute 3 tablespoons chili powder for the chile paste. Use a mix of ancho chili powder and regular chili powder if you can. The flavor won’t be as complex, but it’ll still be a solid bowl of chili. I always keep a bag of ancho chili powder in the pantry for exactly this emergency.
Questions I Get About This Recipe All the Time
Q: Why did my chili turn out bitter?
A: Ugh, I’ve been there. Bitter chili almost always means the chiles got scorched during toasting or your chile paste had seeds that didn’t get fully strained out. Next time, toast for no more than 30 seconds per side, and make sure you remove all the seeds and stems before blending. If it’s already bitter, a pinch of brown sugar or a little more tomato can help balance it out — not perfect, but salvageable.
Q: Can I make this without dried chiles?
A: Yes. Swap in 3 tablespoons chili powder (preferably half ancho chili powder and half regular). Omit the toasting and blending steps, and just add the chili powder when you add the cumin. You’ll miss some of that rich, fruity depth, but the chili will still be warm and comforting — and way better than anything from a packet. I’ve tested it both ways, and the chili powder version is still a crowd‑pleaser.
Q: How long does this chili last in the fridge? Can I freeze it?
A: In the fridge, it stays great for 5 days. Honestly, day‑two chili is the best chili — the flavors meld and mellow. Freeze it in airtight containers for up to 3 months. Let it thaw overnight in the fridge, then reheat slowly on the stovetop with a splash of broth. The microwave works, but the stovetop keeps that thick, almost creamy texture intact. I often make a triple batch and freeze flat in zip‑top bags so I can stack them.
Q: What do you serve with Mexican chili con carne?
A: On game day, I set out bowls of tortilla chips, warm corn tortillas, and a big pile of cilantro‑lime rice. A simple cabbage slaw with lime and salt cuts the richness nicely. My kids’ favorite combo is chili ladled over rice with a mountain of shredded cheese. For a lighter weeknight meal, I scoop it over roasted sweet potato cubes and call it dinner. And don’t sleep on a fried egg on top — runny yolk in chili is a whole new level of cozy.
More Recipes My Family Makes on Repeat
If you liked this one, here are a few others that get the same “make it again!” reaction at our table:
- [INTERNAL LINK PLACEHOLDER: My Go-To Skillet Cornbread] — Golden, buttery, and ready in half an hour. This is the cornbread my kids fight over the corner pieces.
- [INTERNAL LINK PLACEHOLDER: Weeknight Chicken Enchiladas with Red Sauce] — Faster than you’d think, and the homemade sauce uses some of the same dried chiles. Perfect for Tuesday nights.
- [INTERNAL LINK PLACEHOLDER: The Ultimate Slow Cooker Carnitas] — Crispy, juicy pork that cooks while you’re at work. We use it for tacos, bowls, and late‑night quesadillas.
I really hope this chili becomes a regular in your kitchen the way it is in ours — the kind of recipe you know by heart and that makes everyone at the table happy. It’s the pot of food that turns a regular Sunday into something that feels like a little celebration, even if you’re just wearing sweatpants. If you try it, drop a comment below or tag me on Instagram — I love seeing your bowls with all the toppings piled high.
📌 Save this Mexican chili con carne recipe that’s smoky, rich, and ready in 45 minutes for your next game day spread or a cozy Sunday dinner — it’s the one my family asks for every single week.
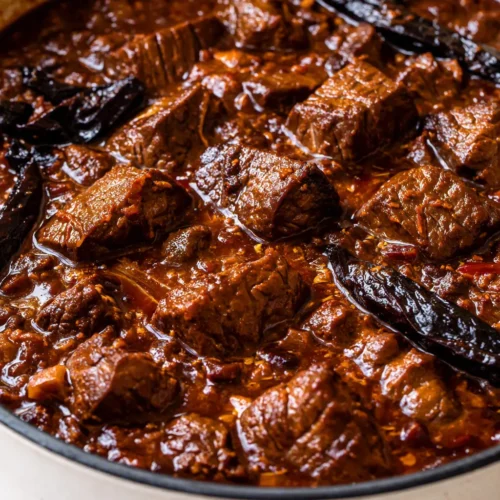
Mexican Chili Con Carne (Ready in 45 Minutes)
Equipment
- Large Dutch Oven or Heavy-Bottomed Pot
- Blender or food processor
- Small Dry Skillet
- Tongs or Slotted Spoon
- Measuring spoons
- Liquid measuring cup
Ingredients
- 2 lbs beef chuck, cut into half-inch cubes
- 3 dried ancho chiles, stemmed and seeded
- 2 dried guajillo chiles, stemmed and seeded
- 1 large white onion, diced
- 4 garlic cloves, minced
- 2 tsp ground cumin
- 1 tsp Mexican oregano
- 1 tbsp tomato paste
- 1 14.5-oz can fire-roasted diced tomatoes
- 2 cups beef broth, plus more as needed
- 1 15-oz can pinto beans, drained and rinsed (optional)
- 1 tbsp vegetable oil
- salt and black pepper to taste
- fresh cilantro, for serving
- diced white onion, for serving
- lime wedges, for serving
- crumbled queso fresco or sour cream, for serving
- warm tortillas or tortilla chips, for serving
Instructions
- Toast and soak the chiles: Heat a small dry skillet over medium heat. Toast the dried chiles for 20-30 seconds per side, just until fragrant and a little puffed. Transfer to a bowl, cover with hot water, and let soak for 15 minutes.
- Brown the beef: Pat the beef cubes dry with paper towels and season generously with salt and pepper. Heat the oil in your Dutch oven over medium-high. Working in two batches, sear the beef on all sides until deeply browned, about 3-4 minutes per batch. Transfer to a plate.
- Soften the aromatics: Turn the heat down to medium. Add a tiny splash of oil if needed. Toss in the diced onion and cook until soft and translucent, about 4 minutes, scraping up any browned bits. Add the garlic, cumin, and oregano, and stir for 30 seconds.
- Bloom the tomato paste: Push the onion mixture to the side, plop the tomato paste directly onto the hot bottom of the pot, let sit for a minute, then stir into everything.
- Make the chile paste: Drain the soaked chiles, reserving some soaking liquid. Transfer to a blender with the fire-roasted tomatoes and a splash of the soaking liquid. Blend until completely smooth.
- Build the chili: Pour the chile-tomato paste into the pot. Stir in the beef broth and add back the browned beef along with any juices. Add the beans if using. Bring to a gentle boil, then lower the heat to a simmer. Partially cover and cook for 20-25 minutes, stirring occasionally, until beef is tender and sauce thickened.
- Finish and season: Taste and adjust salt. Stir in a tiny piece of dark chocolate (about 1/2 ounce) if desired to mellow the acidity. Serve with toppings.
Notes
Related posts:
 The Slow Cooker Cowboy Casserole That Saves Tired Weeknights (No Soggy Tots Allowed)
 Quick Lemon Ricotta Pasta for Busy Weeknights: Creamy, Bright, and on the Table in 20 Minutes
 Lemon Garlic Butter Baked Salmon in Foil That’s Ready in 25 Minutes — No Fuss, No Mess
 Lipton Onion Soup Meatloaf for Tuesday Nights: Moist, Savory, and the Only One You’ll Ever Need
 Kielbasa Sausage Cheesy Potato Casserole That Tastes Like Sunday Dinner — In Under an Hour
 Quinoa Chicken Sausage Bowls That Are Ready in 30 Minutes (And Actually Keep Well)