
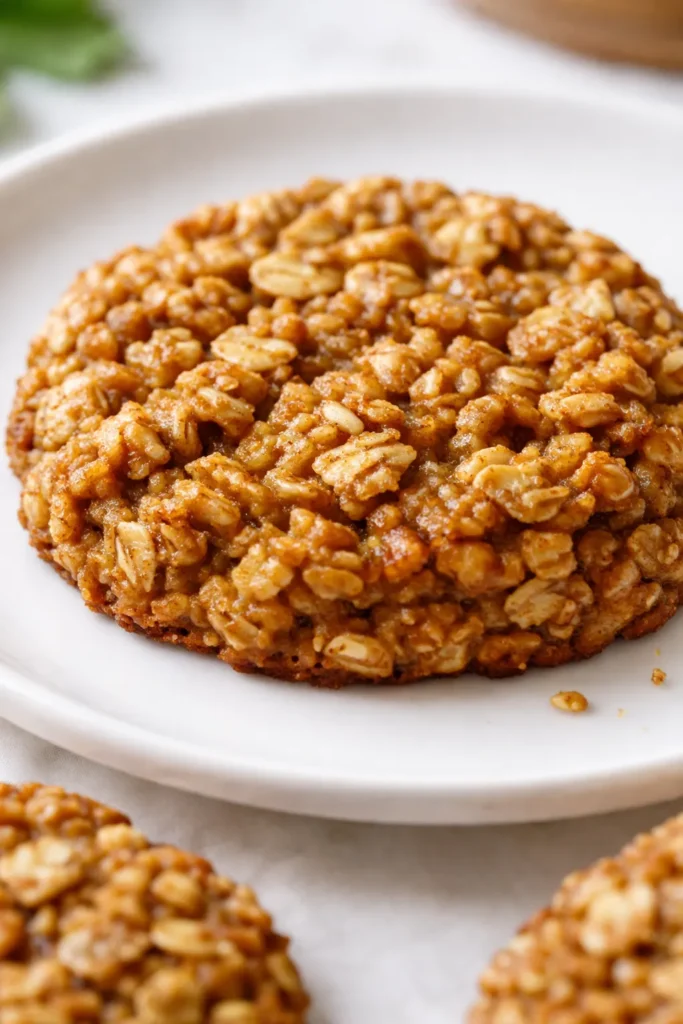
I love my slow mornings — the ones where I actually sit down with a book and let my coffee cool to the perfect lukewarm. But those mornings aren’t every morning. Most mornings are a sprint out the door with a coffee in one hand and a granola bar wrapper in the other. These oatmeal breakfast cookies were born out of that sprint. One bite and you’ll know exactly why they’ve become my family’s go-to.
The short version: Soft, chewy, naturally sweetened, and done before you’ve even found your keys. My kids have never once asked to trade these for the sugary cereal aisle.
I’ve made about thirty batches of these over the last year. The first few were a little too close to cardboard for my liking. But the version you’re getting here? This is the one that finally made Nora — my college freshman who lives on espresso and independence — ask me to mail her a batch. That’s the real win.
- Serves: 12–14 cookies (or one hungry teenager in two sittings)
- Hands-On Time: 10 min | Total Time: 25 min
- Difficulty: Easy enough for a school morning — no stand mixer required
- Cost per serving: ~$0.40
- Calories: ~180 per cookie
- Dietary Notes: Naturally gluten-free (use certified GF oats), dairy-free, and refined sugar-free
(Photo above: An overhead shot of the cookies cooling on a wire rack, a few pulled apart to show the soft, chunky interior studded with chocolate chips. Early morning light streaming in from the left. A mug of black coffee in the background.)
What Makes These Different From Every Dry “Healthy” Cookie I’ve Tried
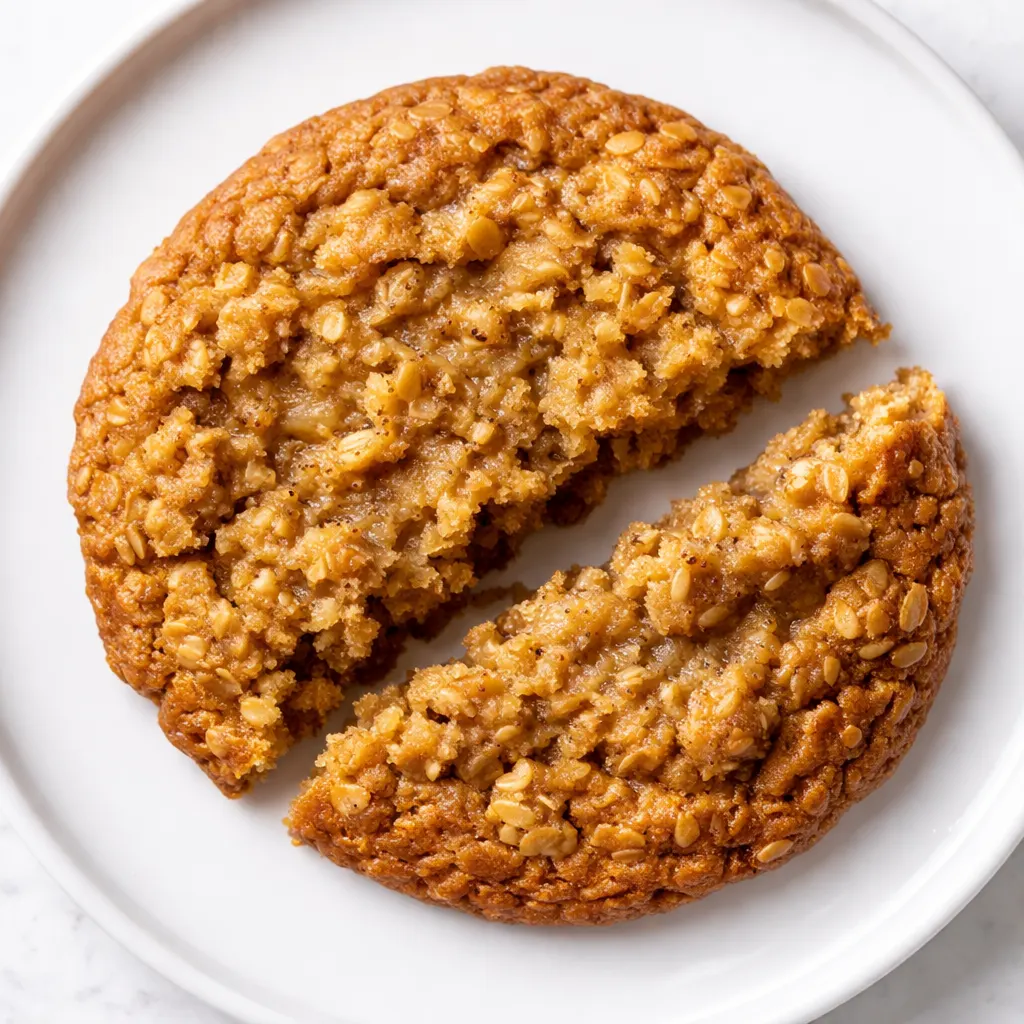
The biggest problem with breakfast cookies is the texture. Most are dense, dry, and taste like you’re eating a bowl of oatmeal that took a wrong turn. These aren’t that. They’re soft in the center, chewy at the edges, and sweet enough to satisfy a 7 AM sweet tooth without a grain of refined sugar.
The secret is the banana. It has to be the kind of banana that’s practically brown — the ones you usually toss in the freezer for smoothies. That’s what gives these cookies their moisture and natural sweetness. The peanut butter pulls double duty: it holds everything together and adds a richness that tricks your brain into thinking they’re more indulgent than they are.
My neighbor tried one and asked if I was hiding butter in them. I told her the truth: nope, just a very ripe banana and a little bit of patience.
Everything You Need (And a Few Notes From Me)
- 2 spotty bananas, mashed: The spottier, the better. Green bananas won’t give you the sweetness or moisture you need. I’ve learned this the hard way — twice.
- 1/3 cup creamy peanut butter: Or almond butter, or sunflower seed butter for the nut-free crew. Just make sure it’s the kind that’s just nuts and salt — no sugar or hydrogenated oils. My kids can tell the difference when I use the natural stuff that separates. Stir it well first.
- 1/4 cup maple syrup: The real deal. Not pancake syrup. It adds a depth of flavor that honey doesn’t quite match here.
- 1 large egg: For structure. A flax egg works beautifully if you’re egg-free (1 tablespoon flax meal + 3 tablespoons water, let it sit for 5 minutes).
- 1 teaspoon vanilla extract: Pure, not imitation. You deserve the good stuff.
- 1 1/2 cups rolled oats: Not quick oats, not steel-cut. Rolled oats give you that chewy texture that makes these feel like a real cookie. Gluten-free if that matters to you.
- 1/2 cup oat flour: You can buy it, or just blitz some rolled oats in your blender until they look like flour. The store-bought version is finer, but the homemade version works great.
- 1 teaspoon cinnamon: I grate mine fresh from a stick when I’m feeling fancy. Mostly I just shake it from the jar.
- 1/2 teaspoon baking soda: Fresh baking soda matters here. If yours has been sitting in the cabinet for two years, replace it.
- 1/4 teaspoon salt: Flaky or fine. Salt makes the sweetness pop.
- 1/2 cup mix-ins: Chocolate chips are our family’s default, but dried cherries, chopped walnuts, or shredded coconut are all fair game. We do a mix of dark chocolate chips and dried cranberries when I’m feeling like I need to balance out the chocolate.
What to Pull Out Before You Start
- A large mixing bowl (I use the same blue ceramic one Marta used for everything)
- A fork or potato masher for the bananas
- Measuring cups and spoons
- A baking sheet (half-sheet size is perfect)
- Parchment paper (or a silicone baking mat)
- A 1.5-tablespoon cookie scoop if you have one — it makes the cookies uniform, which helps them bake evenly
That’s it. No stand mixer, no complicated equipment. Just your hands and a bowl.
Let’s Make ‘Em: My Exact Process
Preheat everything, preheat yourself — this goes fast once you start mixing.
Preheat & Prep: Set your oven to 350°F. Line your baking sheet with parchment paper.
- Mash the bananas: Put them in your mixing bowl and mash until mostly smooth with a few tiny lumps left. Over-mashing makes them gummy, so stop while there’s still a little texture.
- Add the wet ingredients: Toss in the peanut butter, maple syrup, egg, and vanilla. Stir until everything comes together into a thick, glossy batter. The peanut butter should be fully incorporated — no streaks left. (📸 Photo tip: The batter should look like a thick, pourable pancake batter at this stage — dark blonde with a glossy sheen.)
- Mix the dry ingredients: In a separate bowl (or just eyeball it if you’re brave), whisk together the rolled oats, oat flour, cinnamon, baking soda, and salt. I usually just do this in a small bowl to make sure the baking soda is evenly distributed.
- Combine them: Pour the dry into the wet. Fold with a spatula until no dry streaks remain. The batter will be thick — thicker than your average cookie dough. That’s good. (📸 Photo tip: The finished batter should be scoopable, not runny. It should hold its shape on the spoon.)
- Add your mix-ins: Fold in the chocolate chips (or whatever you’re using). Don’t overmix — just a few turns until they’re distributed.
- Scoop and shape: Use your cookie scoop to portion the dough onto the prepared baking sheet, leaving about 2 inches between each. Press each scoop down slightly with the back of a spoon or your fingers. They don’t spread much in the oven, so what you see is pretty much what you get.
- Bake: Slide them into the oven for 10–12 minutes. At 10 minutes, they’ll look slightly underdone in the center — that’s exactly what you want. The bottoms should be golden brown when you lift one with a spatula.
- Cool completely on the pan: This is the hardest step. Let them rest on the baking sheet for a full 5 minutes before moving them to a wire rack. They’re fragile when hot. They firm up as they cool. Trust the process.
How I Make a Double Batch for the Week
I almost never make just one batch. Sunday afternoon I’ll put on a podcast and make a double batch — they disappear so fast it’s almost silly. My secret? I scoop all the dough onto a parchment-lined baking sheet and freeze it solid. Once frozen, I pop the dough balls into a zip-top bag and pull out 2 or 3 whenever I need them.
- Fridge: Baked cookies keep in an airtight container for up to 5 days. They actually get a little softer and more tender by day 2.
- Freezer: Yes, both baked and unbaked. Baked cookies freeze beautifully for up to 3 months. Unbaked dough balls can go straight from freezer to oven — just add 2–3 minutes to the bake time.
- Reheat: The microwave works in a pinch (15 seconds), but the toaster oven brings back that slight crispiness around the edges. Do it while your coffee finishes brewing.
Things I Wish I’d Known the First Time
- Very ripe bananas aren’t optional: I cannot stress this enough. If your bananas are still yellow with green tips, your cookies will be dry and not sweet enough. Wait until they look like they’re on their last leg. That’s when they’re perfect.
- Don’t overbake: I know it’s tempting to leave them in until they look fully set. Don’t. Pull them out when the edges are golden and the centers look just slightly underdone. They finish setting on the hot baking sheet. Overbaking is the number one reason people tell me these come out dry.
- Let them cool on the pan: This is where the magic happens. If you try to move them right out of the oven, they’ll fall apart. Be patient. Set a timer for 5 minutes if you have to.
- Press them down: These cookies don’t spread much on their own. If you like a flatter, wider cookie, press the dough balls down to about 1/2-inch thickness before baking. My husband prefers them thick and puffy, so I leave some as is. It’s your kitchen — do it your way.
Make Them Yours: Easy Variations
- Nut-Free: Swap the peanut butter for sunflower seed butter. The color turns slightly green from the natural reaction with the baking soda (it’s completely safe, just a little surprising the first time). My nephew has a severe nut allergy, and this is the version I always make for him.
- Egg-Free: Use a flax egg. Mix 1 tablespoon of flax meal with 3 tablespoons of water and let it sit for 5 minutes until it gels. It works perfectly — the cookies might be slightly more tender, but nobody will know the difference.
- Blueberry Lemon: Swap the chocolate chips for 1/2 cup fresh or frozen blueberries (don’t thaw them) and add the zest of one lemon. The lemon cuts through the sweetness in the most beautiful way.
- Apple Cinnamon: Fold in 1/2 cup finely diced apple and an extra 1/4 teaspoon of cinnamon. It’s like eating a warm bowl of apple oatmeal in cookie form.
- Extra Protein: Add 1 scoop (about 30g) of your favorite vanilla or unflavored protein powder. You might need to add a tablespoon or two of milk to loosen the batter if it gets too stiff.
The Questions I Get About These All the Time
Q: Why did my cookies turn out dry and crumbly?
A: Two likely culprits. First, your bananas weren’t ripe enough — they need to be spotty and soft. Second, you might have overbaked them. Pull them out when they still look slightly underdone in the center. They continue cooking on the hot pan. I’ve made both mistakes myself, and it’s frustrating, but it’s an easy fix next time.
Q: Can I use quick oats or steel-cut oats instead of rolled oats?
A: Quick oats will work, but your cookies will be less chewy — more like a soft, cakey texture. Steel-cut oats won’t work at all; they won’t soften enough during the short bake time. Stick with rolled oats for the best texture. If that’s all you have, you’re golden.
Q: How long do these stay fresh? Can I freeze them?
A: They keep beautifully in an airtight container at room temperature for up to 5 days — if they last that long. For the freezer, I lay them flat on a baking sheet until frozen solid, then transfer to a freezer bag. They’ll keep for 3 months. To reheat, I do 15 seconds in the microwave or pop them in the toaster oven until the edges crisp slightly.
Q: What do you serve with these for a complete breakfast?
A: Two cookies and a hard-boiled egg or a Greek yogurt cup is my go-to. My kids love them with a glass of cold milk and some apple slices on the side. If I’m having a lazy Saturday, I’ll crumble one over a bowl of yogurt with fresh berries. It’s not fancy, but it’s filling, and it gets us out the door.
More Recipes My Family Makes on Repeat
If these cookies have earned a spot in your kitchen, you’ll probably love these other recipes that have gotten the same reaction at my table:
- Banana Oat Muffins — The muffin version of these cookies, perfect for when you want something a little more handheld.
- No-Bake Peanut Butter Granola Bars — No oven required, and they come together in about 10 minutes flat.
- Overnight Oats with Chia — The set-it-and-forget-it breakfast that my teenagers can actually make themselves.
These are the cookies that finally made my kids stop asking for sugary cereal on school mornings. They’re not a compromise — they’re a genuine treat that happens to be good for you. If you make them, drop a comment below and let me know how they turned out. I love hearing about the mix-ins your family comes up with.
📌 Healthy Oatmeal Breakfast Cookies that taste like a soft-baked treat — save this recipe for busy school mornings when you need a grab-and-go breakfast everyone will actually eat.
Healthy Oatmeal Breakfast Cookies
Equipment
- Large Mixing Bowl
- Fork or potato masher
- Measuring Cups and Spoons
- Baking sheet (half-sheet size)
- Parchment paper or silicone baking mat
- Cookie scoop (optional)
Ingredients
- 2 spotty bananas, mashed
- 1/3 cup creamy peanut butter (or almond/sunflower butter)
- 1/4 cup maple syrup
- 1 large egg (or flax egg)
- 1 teaspoon vanilla extract
- 1 1/2 cups rolled oats
- 1/2 cup oat flour
- 1 teaspoon cinnamon
- 1/2 teaspoon baking soda
- 1/4 teaspoon salt
- 1/2 cup chocolate chips (or other mix-ins like dried fruit, nuts, coconut)
Instructions
- Preheat oven to 350°F (175°C). Line a baking sheet with parchment paper.
- In a large mixing bowl, mash the bananas with a fork or potato masher until mostly smooth with a few tiny lumps remaining. Over-mashing makes them gummy, so stop while there’s still a little texture.
- Add the peanut butter, maple syrup, egg, and vanilla to the mashed bananas. Stir until the mixture is thick, glossy, and no streaks of peanut butter remain. It should look like a thick, pourable pancake batter.
- In a separate small bowl, whisk together the rolled oats, oat flour, cinnamon, baking soda, and salt until evenly combined.
- Pour the dry ingredients into the wet and fold with a spatula until no dry streaks remain. The batter will be thick — scoopable, not runny.
- Fold in the chocolate chips (or your chosen mix-ins) until just distributed. Do not overmix.
- Using a cookie scoop (about 1.5 tablespoons), scoop dough onto the prepared baking sheet, leaving about 2 inches between each. Press each scoop down slightly with the back of a spoon or your fingers to flatten to about 1/2-inch thickness.
- Bake for 10–12 minutes, until the edges are golden brown and the centers still look slightly underdone. The bottoms should be golden when lifted with a spatula.
- Let the cookies cool on the baking sheet for 5 minutes — they are fragile when hot and firm up as they rest. Then transfer to a wire rack to cool completely. Store in an airtight container at room temperature for up to 5 days, or freeze.
Notes
Related posts:
 High-Protein Overnight Oats That Actually Taste Like Breakfast (Not a Chalky Disaster)
 The Slow Cooker Cowboy Casserole That Saves Tired Weeknights (No Soggy Tots Allowed)
 Quick Lemon Ricotta Pasta for Busy Weeknights: Creamy, Bright, and on the Table in 20 Minutes
 Lemon Garlic Butter Baked Salmon in Foil That’s Ready in 25 Minutes — No Fuss, No Mess
 Lipton Onion Soup Meatloaf for Tuesday Nights: Moist, Savory, and the Only One You’ll Ever Need
 Moist Chocolate Zucchini Bread That Doesn’t Turn Out Rubbery — Finally