
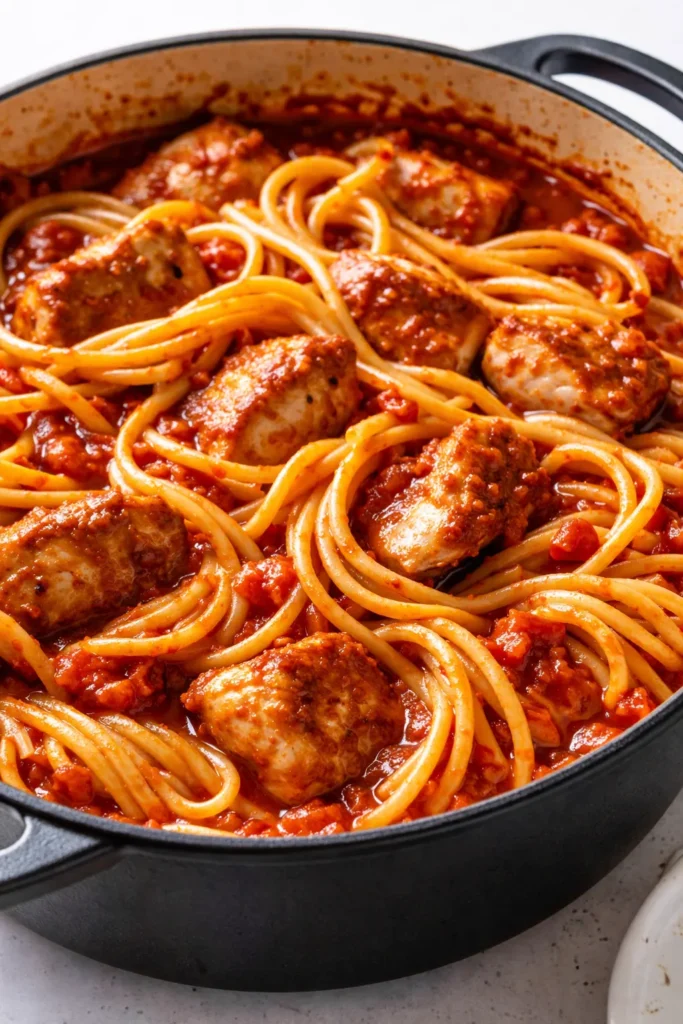
There is a moment about thirty minutes into cooking this, when the tomatoes have fully broken down and the chicken has given its flavor to the broth, where the kitchen smells like a Sunday that never actually happened. It could be a busy Tuesday. The smell insists otherwise. That kind of transformation requires very little work from you honestly — it comes from trusting a single pot to do the heavy lifting.
The short version: Protein-rich one pot chicken tomato pasta where the pasta finishes cooking in the sauce for deep flavor. Ready in 45 minutes. My kids actually ask for seconds.
I tested this with boneless breasts, ground turkey, and even Italian sausage on a whim. The chicken thigh version is the one my daughter Nora requests from Savannah when she is homesick and needs something that tastes like the kitchen. It reheats without complaint. It also freezes in individual containers, which is the only way I survive soccer practice season with my sanity intact.
- Serves: 6 generous portions
- Hands-On Time: 20 min | Total Time: 45 min
- Difficulty: Easy, even on a school night
- Cost per serving: ~$4.50
- Calories: ~620 per serving
- Dietary Notes: Naturally nut-free. Adaptable for gluten-free (use GF pasta and adjust liquid).
(Photo above: An enameled cast iron pot sits on a worn wooden cutting board. The lid is off, revealing a thick, chunky tomato sauce clinging to rotini noodles and shredded chicken. A generous scattering of fresh basil and a dusting of Parmesan finishes the top. Steam rises in the warm afternoon light.)
The Step That Keeps This From Being Just Another Soggy Noodle Dish
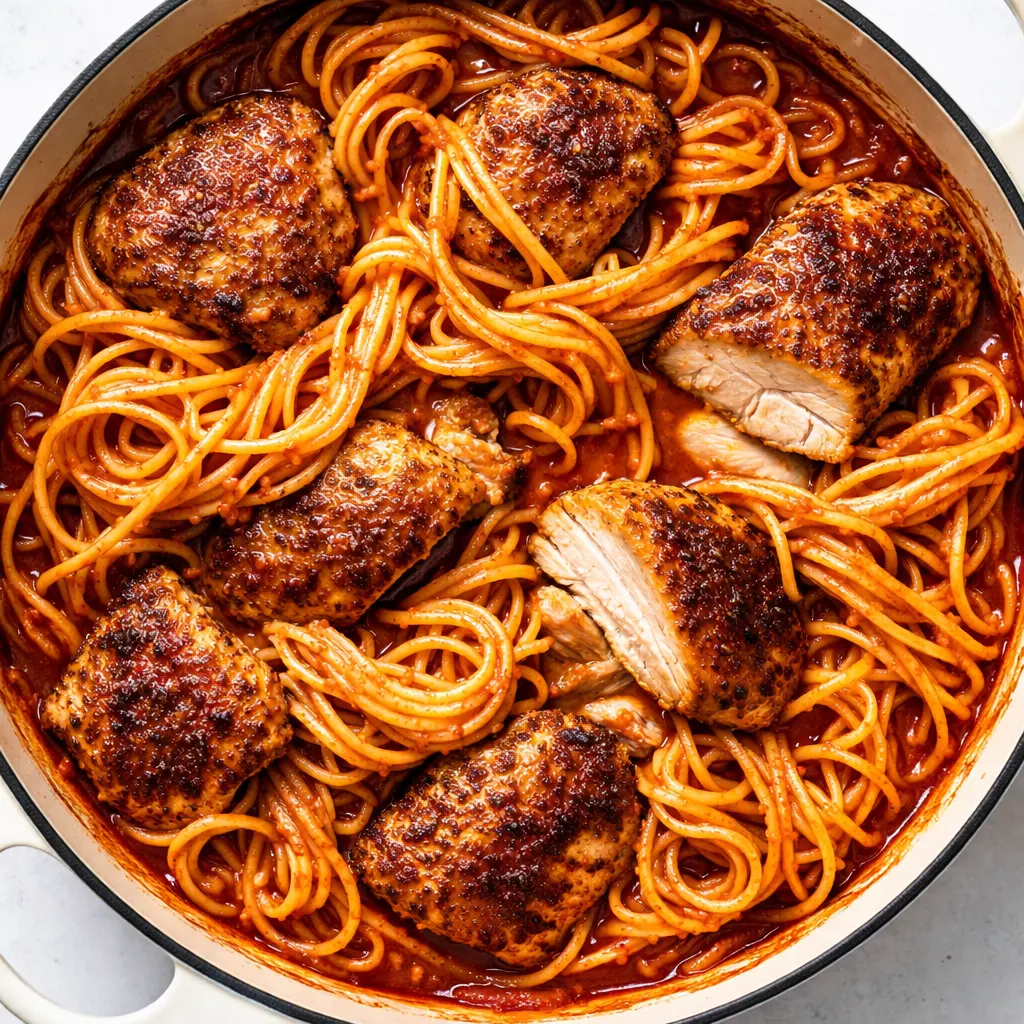
Most one pot pasta recipes I have tried end up letting the noodles over-absorb, the chicken dries out, and the sauce gets starchy in a way that is gluey instead of silky. I fixed that by taking one extra step that takes exactly six minutes: searing the chicken first, then building the sauce in the same pot.
Those browned bits stuck to the bottom of the pot — the fond — are where the deep flavor lives. They dissolve into the tomatoes and make the entire dish taste like it slow-simmered for hours. You do not need wine to deglaze unless you want it. The chicken juices and crushed tomatoes do the job beautifully on their own.
The other thing I do differently is undercook the pasta by two minutes in the boiling water and let it finish in the sauce. That means the noodles absorb the spiced tomato broth instead of just plain salted water. The result is a cohesive dish where every piece of pasta tastes like the whole pot. My youngest noticed the difference the first time I made it this way. He said “this is better” and kept eating. That is the kind of feedback that keeps a recipe in permanent rotation.
What Goes In (And What Not to Skip)
- 1.5 lbs boneless, skinless chicken thighs: Thighs stay juicy through the simmer. Breasts work in a pinch but check them earlier — they dry out quickly. My kids do not notice the difference between thighs and breasts when the sauce is this flavorful, so I choose whatever is on sale that week. Chicken thighs are perfect for this dish.
- 1 tbsp tomato paste: This is not optional. It adds a concentrated umami punch that canned tomatoes alone cannot deliver. I keep a tube of tomato paste in my fridge door at all times. No more wasted half-cans that turn into science experiments.
- 1 can (28 oz) crushed San Marzano tomatoes: Fire-roasted or plain both work. Do not use crushed tomatoes with added puree — they are too thick and will make the sauce pasty. If you only have diced tomatoes, pulse them in the food processor three times until they resemble crushed.
- 1 cup chicken broth: Low-sodium is important here. You need the liquid to cook the pasta, and salt control prevents an overly salty finish. Homemade broth is ideal, but boxed is fine — just taste it first to make sure it does not taste like tin.
- 12 oz short pasta (rotini, penne, or shells): Short pasta catches the sauce in its ridges better than long strands ever could. My youngest refuses long noodles because they “fall off the fork.” Rotini is our compromise and everyone is happy.
- 1 medium onion, finely diced: Sweat it low and slow. Rushing the onions produces a harsh-tasting sauce. Ten minutes on medium-low until they are translucent and sweet — this is the patience step Marta always insisted on. She was correct.
- 4 cloves garlic, minced: Add it after the onions soften, not before. Burnt garlic ruins a tomato sauce faster than almost anything else. I use a microplane for garlic because I hate biting into a chunk of raw garlic in an otherwise smooth sauce.
- 1 tsp dried oregano, 1/2 tsp red pepper flakes (optional), salt and black pepper: Dried herbs work better than fresh in sauces that simmer — they release their oils slowly over time. I include the red pepper flakes because my husband likes the warmth, but I keep the amount subtle so the kids do not complain about “spicy.”
- Fresh basil and Parmesan for serving: The fresh basil at the end is not garnish — it lifts the entire dish. Marta would scatter basil over everything and say “it makes the stomach happy.” I do the same thing now without thinking about it.
The Tools You Will Need
- A heavy-bottomed Dutch oven or deep 12-inch skillet with a tight-fitting lid
- Wooden spoon or silicone spatula
- Cutting board and chef’s knife
- Measuring cups and spoons
- Tongs for shredding the chicken
If you do not own a Dutch oven, any heavy pot that holds heat evenly will work. Avoid thin nonstick skillets — they will not develop the fond that builds the flavor base, and you will wonder why your sauce tastes flat.
Let Us Cook: My Exact Process
This moves quickly once you start. Read through the steps once before you turn on the heat so you know what is coming.
Prep and Sear: Pat the chicken thighs dry with paper towels. Season generously on both sides with salt and pepper. Heat 1 tbsp olive oil in your Dutch oven over medium-high heat until it shimmers. Add the chicken in a single layer — do not crowd the pan. Sear 4 to 5 minutes per side until deeply golden brown. Transfer to a plate. They will not be cooked through yet. (📸 Photo tip: You are looking for a deep golden brown crust — not pale yellow. If the chicken sticks to the pan, let it cook another minute and it will release naturally.)
- Sweat the aromatics: Reduce the heat to medium-low. Add a splash more oil if the pan looks dry. Add the diced onion and a pinch of salt — this helps it release moisture. Cook, stirring occasionally, for 7 to 8 minutes until completely soft and translucent. Add the garlic, oregano, and red pepper flakes and cook for 1 minute until fragrant. (📸 Photo tip: The onion should look almost jammy, not crunchy. This is the sweet base of the entire sauce.)
- Build the tomato base: Stir in the tomato paste and cook for 2 minutes, stirring constantly. It will darken from bright red to a rusty brick color — that is exactly what you want. It means the raw tomato edge is cooking off. Pour in the crushed tomatoes and chicken broth, scraping the bottom of the pot with your spoon to lift the browned bits. Bring to a gentle simmer.
- Simmer the chicken: Nestle the seared chicken thighs back into the sauce, including any juices that have collected on the plate. Cover the pot, reduce the heat to low, and simmer for 15 minutes. The chicken should be cooked through and tender enough to shred easily with a fork.
- Shred and return: Remove the chicken to a cutting board. Use two forks to shred it into bite-sized pieces. Return the shredded chicken to the sauce. Stir in 1/2 cup of water or broth — the sauce needs to be slightly loose at this stage because the pasta will absorb a significant amount of liquid.
- Cook the pasta in the sauce: Meanwhile, bring a separate pot of salted water to a boil. Add the pasta and cook for 2 minutes LESS than the package directions indicate. Drain the pasta (reserve 1 cup of the starchy pasta water) and add it directly to the sauce. Stir well to coat every piece. Let it simmer together for 2 to 3 minutes, stirring occasionally. If the sauce gets too thick, splash in some reserved pasta water until it looks silky instead of dry.
- Finish and serve: Taste the sauce and adjust salt and pepper. Remove from heat. Stir in a generous handful of fresh basil leaves until they wilt just slightly. Serve hot with a generous shower of grated Parmesan. I sometimes add a pat of butter at the very end — Marta’s trick for “when the tomatoes are too sharp.” It rounds out the acidity beautifully.
How I Make This Stretch Through the Week
This chicken tomato pasta is my favorite Sunday prep meal because it does double duty. We eat it fresh for Sunday dinner, and the leftovers become Monday lunch without any extra effort. I make a double batch on quiet weekends and we are set for two meals that week.
- Fridge: Store in an airtight container for up to 4 days. The pasta continues to absorb liquid as it sits, so when you reheat, add a splash of broth or water to loosen it back up to the right consistency.
- Freezer: Yes, it freezes beautifully. I portion it into individual deli containers so we can grab one for lunch or a quick dinner. Freeze for up to 3 months. Thaw overnight in the fridge before reheating.
- Reheat: The microwave works in a pinch but the stovetop is better. Reheat gently in a covered skillet over medium-low heat with a splash of water or broth. Stir occasionally. It will taste as close to the first night as leftovers possibly can.
Things I Learned the Hard Way (So You Do Not Have To)
- Do not skip the sear: I know it is tempting to dump everything in the pot and walk away. I have done it. The result is a pale, flat-tasting sauce that tastes like boiled chicken. That deep golden crust on the chicken is pure concentrated flavor. It takes 8 minutes. It is worth every second.
- Under-boil the pasta aggressively: If you cook the pasta to al dente in the water, it will be overcooked and mushy by the time it finishes in the sauce. I set a timer for 2 minutes less than the box says and taste one piece to make sure it is still firm in the center. The sauce finishes the job perfectly.
- Taste the sauce before the pasta goes in: Canned tomatoes vary wildly in acidity and sweetness. Sometimes they need a pinch of sugar to balance the acid. Sometimes they need an extra hit of salt. Fix the sauce before the pasta goes in — you cannot fix it after.
- Reserve the pasta water: That starchy, salted water is liquid gold. It emulsifies the sauce and helps it cling to the noodles better than plain broth ever could. I always reserve extra, even when I think I will not need it. I have never regretted having it on hand.
- Let it rest before serving: Five minutes off the heat makes a noticeable difference. The pasta absorbs a bit more liquid, the flavors settle and combine, and the sauce stops being watery. My family always wants to dig in immediately, but I make them wait. They are always glad I did.
How to Make It Your Own
- Dairy-Free: Skip the Parmesan or use a high-quality nutritional yeast-based substitute. The sauce itself is naturally dairy-free without the cheese. I sometimes serve it with a sprinkle of toasted pine nuts for richness instead.
- Gluten-Free: Use a sturdy gluten-free short pasta — brown rice pastas hold up best. Adjust the liquid as needed because GF pasta absorbs differently. I have tested this with Tinkyada brown rice rotini and it worked beautifully.
- Kid-Friendly Version: Omit the red pepper flakes completely and add a small carrot, grated directly into the sauce. It adds natural sweetness and a dose of hidden vegetables. My kids have never noticed the carrot, and I consider that a small victory.
- Fancy Guest Version: Use bone-in, skin-on chicken thighs instead. Sear them skin-side down until the skin is shatteringly crispy. Finish the dish with a drizzle of good balsamic vinegar and a dollop of pesto on top. It feels like a completely different meal but requires almost the same effort.
Questions I Get About This Recipe All the Time
Q: Why did my pasta turn out mushy?
A: Ugh, I have been there. The most common reason is cooking the pasta to full doneness in the water before adding it to the sauce. Remember to undercook it by 2 minutes in the salted water. The residual heat and liquid in the sauce finish the job. Also check your simmer — if it is boiling too hard, the pasta can overcook quickly.
Q: Can I make this with ground chicken or turkey instead of thighs?
A: Yes, I do this when I need an even quicker version. Brown the ground meat in the pot, breaking it up with a spoon, then remove it and proceed with the onions and garlic. Return the cooked meat when you add the tomatoes. The flavor will not be quite as deep as with seared thighs, but it is still an excellent weeknight option.
Q: How long does this last in the fridge? Can I freeze it?
A: It lasts up to 4 days in the fridge in an airtight container. Yes, it freezes beautifully for up to 3 months. The only thing to be aware of is that the pasta absorbs more liquid as it sits, so when you reheat, always add a splash of broth or water to bring the sauce back to life. I freeze it in individual portions for easy lunches.
Q: What do you serve with this?
A: A simple green salad with a lemony vinaigrette is my standard pairing — the acid balances the deep tomato flavor without competing with it. My kids prefer garlic bread for dipping into the sauce. When I want to keep things light, I serve it with roasted broccoli or steamed green beans tossed in butter and salt.
More Recipes My Family Makes on Repeat
If you loved this one pot chicken tomato pasta, here are a few other recipes that get the same reaction at our table:
- Hearty Sausage and White Bean Skillet — Smoky sausage, creamy beans, and a tomato broth that begs to be sopped up with crusty bread.
- Slow Simmered Sunday Ragu — The all-day version of this, with a deep, layered flavor that fills the house with the smell of a day off.
- Creamy Lemon Chicken Orzo — A lighter, brighter one pot chicken dinner that comes together in under 30 minutes when you need something quick.
That first bite of this chicken tomato pasta, when the sauce clings to every curve of the rotini and the chicken is so tender it pulls apart at the nudge of a fork — that is the moment I remember why I love cooking from a pot instead of a packet. It is simple. It is honest. It tastes like someone took the time, even if that someone is you on a Tuesday night with a glass of wine in one hand and a wooden spoon in the other.
If you try it, drop a comment below and tell me how it went for your family. I love hearing about the variations everyone comes up with — the carrot version for picky kids, the extra garlic version for garlic lovers, the double batch version for freezer stocking. And if you are pinning this for later, I have you covered.
📌 This one pot chicken tomato pasta recipe saves busy weeknights — pin it for those evenings when you need a cozy, protein-packed dinner that the whole family will actually eat.
One Pot Chicken Tomato Pasta
Equipment
- Dutch oven or deep 12-inch skillet with lid
- Wooden spoon or silicone spatula
- Cutting board and chef’s knife
- Measuring Cups and Spoons
- Tongs for shredding chicken
Ingredients
- 1.5 lbs boneless skinless chicken thighs
- 1 tbsp olive oil
Aromatics
- 1 medium onion, finely diced
- 4 cloves garlic, minced
- 1 tbsp tomato paste
Liquids & Pasta
- 1 can (28 oz) crushed San Marzano tomatoes
- 1 cup low-sodium chicken broth
- 12 oz short pasta (rotini, penne, or shells)
Seasonings
- 1 tsp dried oregano
- 1/2 tsp red pepper flakes (optional)
- salt and black pepper to taste
For Serving
- fresh basil leaves
- grated Parmesan cheese
Instructions
- Pat the chicken thighs dry with paper towels. Season generously on both sides with salt and pepper. Heat 1 tbsp olive oil in your Dutch oven over medium-high heat until it shimmers. Add the chicken in a single layer and sear 4 to 5 minutes per side until deeply golden brown. Transfer to a plate (they will not be cooked through yet).
- Reduce the heat to medium-low. Add a splash more oil if the pan looks dry. Add the diced onion and a pinch of salt; cook, stirring occasionally, for 7 to 8 minutes until completely soft and translucent. Add the garlic, oregano, and red pepper flakes and cook for 1 minute until fragrant.
- Stir in the tomato paste and cook for 2 minutes, stirring constantly, until it darkens from bright red to a rusty brick color. Pour in the crushed tomatoes and chicken broth, scraping the bottom of the pot to lift the browned bits. Bring to a gentle simmer.
- Nestle the seared chicken thighs back into the sauce, including any accumulated juices. Cover the pot, reduce the heat to low, and simmer for 15 minutes until the chicken is cooked through and tender enough to shred easily with a fork.
- Remove the chicken to a cutting board. Use two forks to shred it into bite-sized pieces. Return the shredded chicken to the sauce. Stir in 1/2 cup of water or broth — the sauce needs to be slightly loose at this stage because the pasta will absorb liquid.
- Meanwhile, bring a separate pot of salted water to a boil. Add the pasta and cook for 2 minutes less than the package directions indicate. Drain the pasta (reserve 1 cup of the starchy pasta water) and add it directly to the sauce. Stir well and let it simmer together for 2 to 3 minutes, stirring occasionally. If the sauce gets too thick, splash in reserved pasta water until silky.
- Taste the sauce and adjust salt and pepper. Remove from heat. Stir in a generous handful of fresh basil leaves until they wilt slightly. Serve hot with a shower of grated Parmesan.
Notes
- Do not skip the sear — that golden crust is pure concentrated flavor. It takes 8 minutes and is worth every second.
- Under-boil the pasta aggressively: cook it 2 minutes less than the box says in the water so it finishes perfectly in the sauce.
- Taste the sauce before the pasta goes in — canned tomatoes vary in acidity and sweetness. Adjust with a pinch of sugar or extra salt as needed.
- Always reserve the pasta water; it emulsifies the sauce and helps it cling to the noodles.
- Let the dish rest 5 minutes off the heat before serving — the flavors settle and the sauce thickens perfectly.
Related posts:
 The Slow Cooker Cowboy Casserole That Saves Tired Weeknights (No Soggy Tots Allowed)
 Quick Lemon Ricotta Pasta for Busy Weeknights: Creamy, Bright, and on the Table in 20 Minutes
 Lemon Garlic Butter Baked Salmon in Foil That’s Ready in 25 Minutes — No Fuss, No Mess
 Lipton Onion Soup Meatloaf for Tuesday Nights: Moist, Savory, and the Only One You’ll Ever Need
 Kielbasa Sausage Cheesy Potato Casserole That Tastes Like Sunday Dinner — In Under an Hour
 Quinoa Chicken Sausage Bowls That Are Ready in 30 Minutes (And Actually Keep Well)