
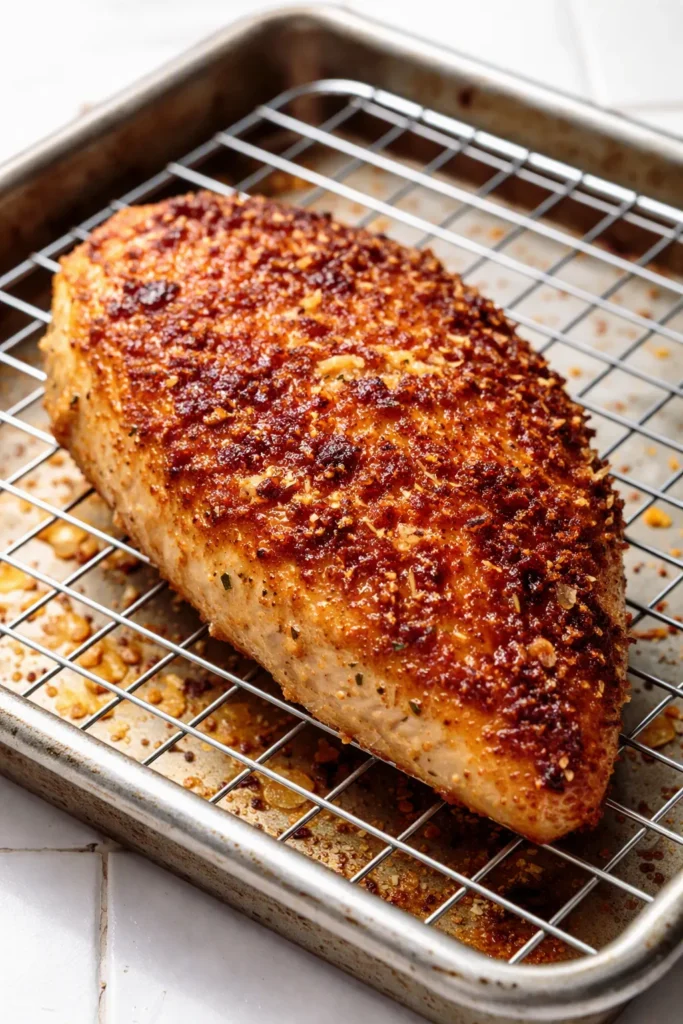
That first bite — when the crust shatters instead of bending — is the whole reason I stopped ordering chicken parmesan at restaurants. Every version I made at home before this one had the same two problems: the crust slid off in one sad piece, or it went soft before I got the plates on the table. This parmesan crusted chicken fixes both, and it’s on the table in 30 minutes. The first time I made it, Nora asked for it again the next night, and that has never once happened in nineteen years of feeding her.
The short version: Chicken breasts pounded thin, a creamy mustard binder, and a panko-parmesan crust that actually stays attached. Fifteen minutes of hands-on work, thirty total.
I’ve made this at least forty times since that first night — weekly for a stretch, because it was the one dinner everyone in this house agreed on. I’ve burned it, I’ve had the crust come off in chunks, and I’ve learned exactly where the line is between golden and gone. This is the version I’d hand you if you were standing in my kitchen.
- Serves: 4 as a main
- Hands-On Time: 15 min | Total Time: 30 min
- Difficulty: Easy enough for a Tuesday, even when you’re tired
- Cost per serving: ~$2.50
- Calories: ~430 per serving
- Dietary Notes: Not gluten-free as written (uses panko), but the swap is in the variations section
(Photo above: a cast-iron skillet on a wooden trivet holding three golden chicken breasts, the crust puffed and deeply browned at the edges, one piece lifted with a fork to show the juicy interior, late-afternoon light coming from the side window.)
The Two Things That Keep the Crust From Sliding Off
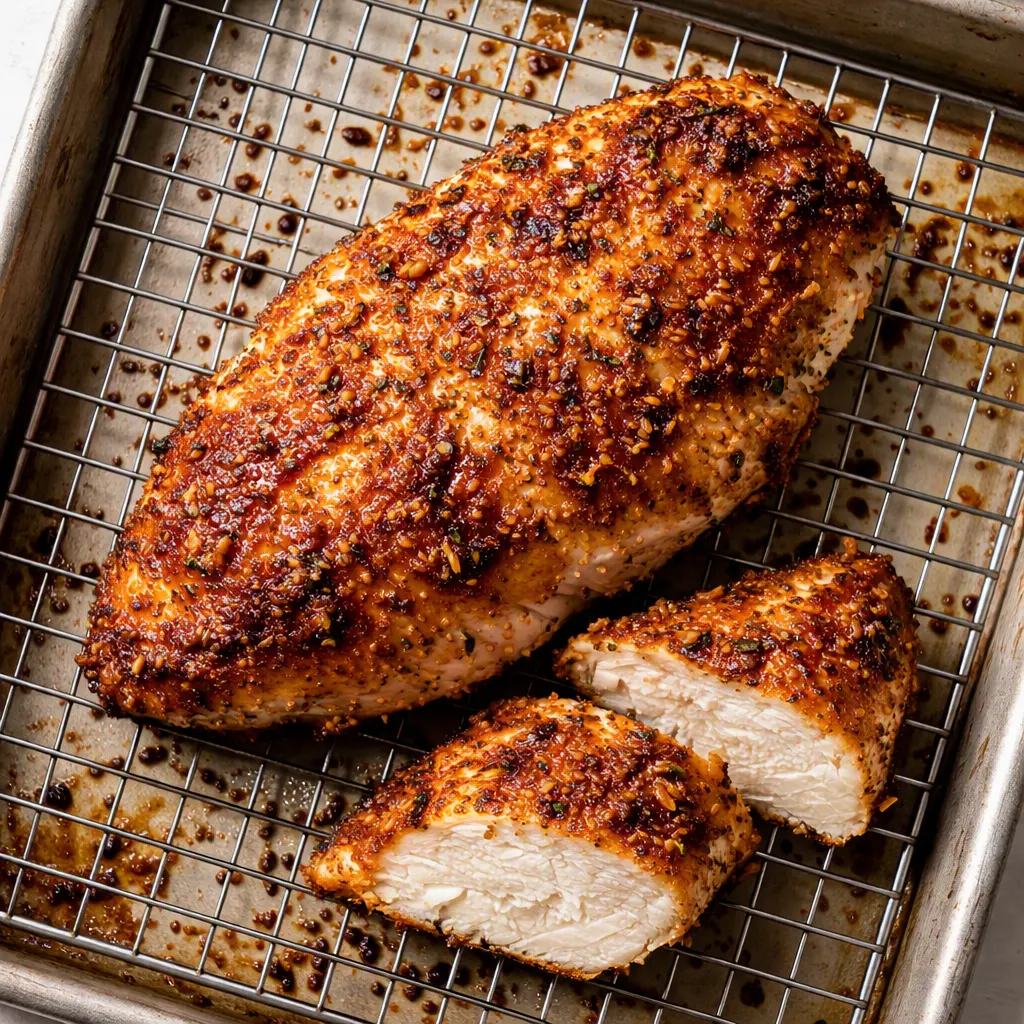
I’ve made more parmesan crusted chicken than I can count, and the two problems are always the same: a dry breast and a crust that abandons ship somewhere between the pan and the plate. The first time I made this — before I knew better — I dragged the chicken through flour, then egg, then crumbs, the way Marta would have. It was fine. It was also dry, and the crust left the building entirely. What I do now looks a little strange, but it works every single time, and I’ll never go back.
The binder is a mix of mayonnaise and Dijon mustard, spread on the chicken the way you’d butter bread. It sounds like something you’d only do when you were out of eggs, but it’s better than an egg wash. It’s sticky enough to hold the panko in place, it keeps the chicken moist while it bakes, and it gives the whole crust a richness you’d swear came from butter. We do not taste the mayo. Nick has eaten this at least twenty times and he still doesn’t believe it’s in there.
The second thing is the step everyone skips: pounding the chicken to an even half-inch thickness. I skipped it for years because it felt like extra work. It’s the difference between a breast that cooks through in the same time the crust needs to turn golden, and a breast that’s dry on the outside and somehow still pink in the middle. Pounding takes about three minutes. It’s worth every one of them.
Everything You Need (Plus My Honest Notes)
- 4 boneless, skinless chicken breasts (about 1½ pounds): You want ones that aren’t gigantic — thick cutlets are a full generation of cooking away from this recipe’s timing. If they’re big, just pound them thinner. That’s the fix.
- 1 cup panko breadcrumbs: Not fine breadcrumbs, not crushed crackers. Panko is the difference between a crust that shatters and a crust that mushes. The fine stuff in the canister gives you a sandcastle situation. Go panko.
- ½ cup freshly grated Parmesan: I’m not a snob about much, but I am about this one thing. The pre-grated stuff in the green cylinder melts into nothing and leaves the crust flat. A wedge of real Parmesan, grated fine, makes the crust nutty and sharp and a little bronzed. It’s a different dish entirely.
- ½ cup mayonnaise: It does not make it taste like mayo. It makes it taste like dinner your kids actually eat. It’s also the thing that keeps the chicken from drying out in the oven, so this is not the place to use the fat-free kind.
- 1 tablespoon Dijon mustard: Nora can tell when I skip it, I’m not kidding. She’ll eat the whole thing and say “this tastes different” without being able to name what changed. The mustard brightens everything without announcing itself.
- 1 teaspoon garlic powder: Not garlic salt. You’re adding salt separately, and garlic salt brings a bitterness you don’t want with the cheese.
- ½ teaspoon smoked paprika: Regular is fine, but smoked gives the crust a warmth that reads like it took two hours instead of thirty minutes.
- Salt and freshly ground black pepper: The pepper goes in the crust too, not just on the chicken. It’s the thing that keeps the whole dish from tasting flat.
- 2 tablespoons butter or olive oil: For the sear. Butter tastes better; oil is more forgiving if you’re nervous about it browning too fast. I use butter when I’m paying attention and oil when I’m not.
What to Pull Out Before You Start
- Plastic wrap or a big zip-top bag: The chicken goes inside before you pound it, so you’re not scraping breast meat off your counters. Ask me how I know.
- A heavy skillet or a rolling pin: For pounding. A cast-iron skillet wrapped in a towel does the job. My grandmother used the side of her hand and clucked at anyone who needed a tool, but I’m telling you to use the tool.
- A 12-inch cast-iron or heavy stainless skillet: For the sear, and then it goes straight into the oven if it’s oven-safe. If your pans have plastic handles, no judgment — transfer to a baking sheet instead.
- Two shallow dishes: One for the binder, one for the crust. A pasta bowl works fine for the panko.
- A wire rack on a baking sheet: This does two jobs, and neither should be skipped.
Here’s How I Do It, Step by Step
Read this through once before you start, because it moves quickly and the sear waits for no one. If you have a small person hovering — or a tired one — the first three steps are the ones you can do ahead and not tell anyone.
- Preheat: Turn the oven to 425°F. Put a wire rack on a baking sheet and set it aside. That rack is for the rest later — it’s not a fussy chef thing, it’s a “keep the bottom crust from steaming” thing.
- Pound: Put each breast between two sheets of plastic wrap. Pound with the flat side of the mallet until it’s an even half-inch thick. Focus on the thick end — that’s the part that always lags behind. (📸 Photo tip: You should be able to see that the chicken is the same thickness all the way across, like a thin cutlet from the butcher.)
- Mix the binder: In a small bowl, stir together the mayonnaise, Dijon, garlic powder, smoked paprika, and a pinch of salt and pepper. It should look like pale golden dressing. If it looks like anything else, you grabbed the wrong jar.
- Mix the crust: In a shallow dish, toss the panko with the grated Parmesan and a generous grind of black pepper. Press the mixture between your fingers a little to roughen the panko — those craggy bits are what get extra crispy. (📸 Photo tip: The crust should look like coarse golden sand with visible darker flecks of cheese.)
- Coat: Pat each chicken breast dry with a paper towel. This matters more than you’d think — a wet breast gives the binder nothing to grip, and the crust slides right off later. Spread the binder on both sides, then press the chicken into the crust mixture. And I mean press — use the heel of your hand, firm enough that the crumbs stay put when you turn it over. Do both sides, pat down any bare spots.
- Rest: Put the coated chicken on the wire rack and pop it in the fridge for 10 minutes while the oven finishes preheating. This is the trick nobody writes in their recipe, and it’s half the reason the crust doesn’t fall off. It gives the crumbs time to sort of glue themselves to the binder.
- Sear: Melt the butter (or heat the oil) in your skillet over medium-high heat. When it’s shimmering and a test crumb sizzles on contact — not spits, just sizzles steadily — lay in the chicken. Sear 2 to 3 minutes per side, until the crust is a deep golden. Do not move the chicken around. Let it sit and brown and release on its own. If it resists the spatula, it’s not ready. You’ll know it’s working by the sound — a steady, low sizzle, the kind that means the crust is setting rather than scorching.
- Bake: If your skillet is oven-safe, leave the chicken in it. If not, transfer to the prepared baking sheet. Bake for 12 to 14 minutes. The doneness cue is color: you’re looking for the deep bronze of toast that just crossed into golden — check the edges first, they’ll always be darker. The smell in the kitchen will shift from raw and floury to nutty and sharp, and that’s the Parmesan browning, not burning. It’s the signal.
- Rest: Pull them out and let them sit on the rack for five minutes. The chicken is still cooking in there, the juices are settling back into the meat, and cutting it early means losing all of that. When you cut into it, the juices should run clear and the thickest part should read 165°F.
How I Make This Work on a Busy Week
I do the coating step on Sunday nights after dinner while I’m still in the kitchen, and then the actual cooking on a Tuesday is nothing. It’s genuinely quicker than ordering out. I’ll make a double batch: four for Monday, four for Wednesday, and no one complains about repeats.
- Fridge: Breaded raw chicken keeps 24 hours, covered, on its wire rack or a plate. Cook straight from the fridge — just add 2 minutes to the oven time.
- Freezer: Yes. This is my favorite make-ahead trick. Flash-freeze the breaded raw chicken on a parchment-lined sheet pan for an hour, then transfer to a zip-top bag. It’ll keep about 3 months. Cook from frozen — do not thaw — and add about 6 minutes to the oven time.
- Reheat: The microwave works in a pinch, but it will make the crust sad. Do the oven or an air fryer at 375°F for about 6 minutes and it comes back almost as crisp as the first night. Cooked leftovers keep 3 to 4 days in the fridge.
What I Wish I’d Known the First Three Times I Made This
- The mayonnaise binder is not a trick — it’s the whole story. I know it looks weird when you’re mixing it. Nick watched me spread mayonnaise on raw chicken and asked if I’d lost my mind. Then he ate dinner and asked what I did differently. It holds the crust on, it keeps the meat moist, and there is no trace of it in the finished taste.
- Dry chicken is the enemy of a stuck-on crust. Pat the breasts dry before the binder goes on. A wet surface creates a slippery layer, and the crust will slide off in the pan, in the oven, and ultimately in your mouth — as a sad pile of crumbs next to a piece of bare chicken. I’ve eaten that version. It’s why I bother with the paper towels.
- Don’t crowd the pan. If the chicken touches sides in the skillet, it steams instead of searing, and you lose the crisp before you even get to the oven. Cook in batches of two if you need to. The first batch isn’t getting cold — it’s going back in the oven anyway.
- The crust might crack when you flip it, and that’s okay. Really. The first time it happened I was ready to start over. The cracks brown up in the oven and the chicken is still excellent. Even if you lose half the crust, you spoon it over rice and nobody says a word.
Even if you mess this up a little — and I want you to hear this — the chicken is still good. I’ve served it with the crust in pieces and I’ve had a pan full of bare chicken and I’ve never once had leftovers. This is a forgiving recipe.
Swaps That Actually Work
- Gluten-free: Use gluten-free panko. I’ve tested this and it works beautifully. The brand matters less than the pressing-into-the-chicken part. Check your Dijon too — most are gluten-free, but it’s worth the two-second label check.
- Dairy-free: Skip the Parmesan and use a dairy-free version — my readers have reported that the Follow Your Heart brand grates the closest to real. Add an extra pinch of salt to the crust, because Parmesan brings salt with it that you’ll need to make up for.
- Spicy version (for after bedtime): Add a teaspoon of hot sauce to the binder and a pinch of cayenne to the crust. It’s the same recipe, but it reads like a completely different dinner. I do this when it’s just for Nick and me.
- Chicken thighs: Boneless thighs work and are honestly more forgiving — they don’t dry out as fast. Use the same method, cook to 165°F, and expect a couple of extra minutes in the oven.
- Make it a sandwich: This is Nora’s favorite lunch the next day — cold sliced chicken on a crusty roll with a smear of the same Dijon and a handful of arugula. Zero reheating complaints.
The Questions I Get in My Inbox About This One
Q: Why did my crust fall off?
Ugh, I’ve been there — it’s so frustrating. Two causes, usually: the chicken wasn’t patted dry before the binder went on (a wet surface gives the crust nothing to grip), or the crust wasn’t pressed in hard enough. Also, don’t move the chicken around in the pan during the sear — let it sit until it releases on its own. You’ve got this next time!
Q: Can I use chicken thighs instead of breasts?
Yes! Boneless thighs are great here. They’re a little more forgiving, too. Same method, a couple extra minutes in the oven, and cook to 165°F like anything else. Nick actually prefers this version.
Q: How long does it last, and can I freeze it?
Cooked leftovers keep 3 to 4 days in a sealed container. The best way to freeze is breaded and raw — flash-freeze on a parchment-lined sheet pan for an hour, then transfer to a zip-top bag for up to 3 months. Cook from frozen, add about 6 minutes to the oven time, and it’ll still be crisp. The microwave will soften the crust — the oven or air fryer keeps it crunchy.
Q: What do you serve with this?
I do a simple green salad with a lemony vinaigrette and whatever starch I have — rice, or a crusty loaf. Nora likes it with roasted broccoli. On Sundays I make the whole batch on top of a Caesar salad for the grownups and it’s the best thing we eat all week.
More Recipes My Family Makes on Repeat
If this one lands in your rotation the way it did in mine, these are the others that get the same reaction at our table:
- Oven-Fried Chicken That Tastes Like Sunday Dinner — the one that beats the drive-through and doesn’t involve a deep fryer.
- Lemon Butter Pasta That’s on the Table in 20 Minutes — the side dish that makes every weeknight feel a little more deliberate.
- Sheet Pan Roasted Broccoli That’s Actually Crispy — the vegetable my 19-year-old requests without being asked.
The first time Nora asked for this two nights in a row, I wrote the recipe down on an index card and taped it inside the cabinet door so I’d never have to think about it again. That card is still there, stained at the corner where the butter jumped. This is the kind of dinner you’ll make without thinking by the third time — and the kind your people will start asking for when they’re deciding what’s for dinner. That’s the whole point.
If you try it, come back and tell me how it went — I read every comment, and it genuinely makes my day to hear about a good dinner landing in someone else’s kitchen. Tag me on Pinterest too, so I can see yours!
📌 Parmesan crusted chicken recipe that keeps its crispy crust even reheated — save it for your next busy weeknight when dinner needs to be on the table in 30 minutes.
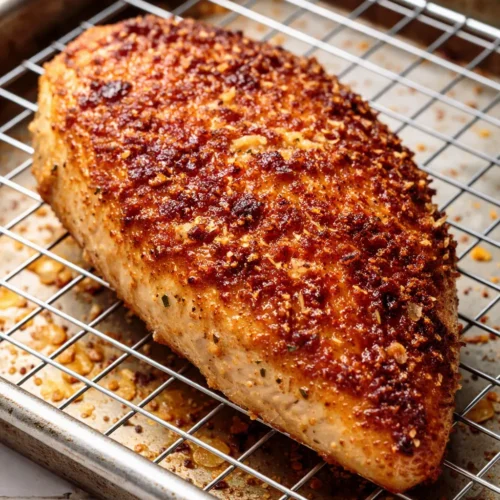
Parmesan Crusted Chicken That Stays Crispy in 30 Minutes
Equipment
- Meat mallet or heavy skillet
- Plastic wrap or zip-top bag
- 12-inch oven-safe skillet (cast iron or stainless)
- Wire rack on a baking sheet
- Two Shallow Dishes
Ingredients
Chicken
- 4 boneless, skinless chicken breasts (about 1 1/2 pounds)
- 1/2 cup mayonnaise
- 1 tablespoon Dijon mustard
- 1 teaspoon garlic powder
- 1/2 teaspoon smoked paprika
- salt and freshly ground black pepper, to taste
Crust
- 1 cup panko breadcrumbs
- 1/2 cup freshly grated Parmesan cheese
- 2 tablespoons butter or olive oil, for searing
Instructions
- Preheat the oven to 425°F. Set a wire rack on a baking sheet and set aside. That rack is for the rest later — it keeps the bottom crust from steaming.
- Pound each chicken breast between two sheets of plastic wrap to an even 1/2-inch thickness, focusing on the thick end.
- In a small bowl, stir together the mayonnaise, Dijon, garlic powder, smoked paprika, and a pinch of salt and pepper until it looks like pale golden dressing.
- In a shallow dish, toss the panko with the grated Parmesan and a generous grind of black pepper. Press the mixture between your fingers to roughen the panko — those craggy bits get extra crispy.
- Pat each chicken breast dry with a paper towel. Spread the binder on both sides, then press the chicken into the crust mixture firmly with the heel of your hand. Do both sides and pat down any bare spots.
- Place the coated chicken on the wire rack and refrigerate for 10 minutes while the oven finishes preheating. This helps the crumbs glue themselves to the binder.
- Melt the butter or heat the oil in a 12-inch oven-safe skillet over medium-high heat. When it is shimmering and a test crumb sizzles steadily, lay in the chicken and sear 2 to 3 minutes per side until deep golden. Do not move the chicken around; let it release on its own.
- If your skillet is oven-safe, leave the chicken in it; otherwise transfer to the prepared baking sheet. Bake for 12 to 14 minutes, until the crust is deep bronze at the edges and the kitchen smells nutty and sharp. The thickest part should reach 165°F.
- Let the chicken rest on the rack for 5 minutes before cutting. The juices will settle back into the meat and the crust will stay crisp.
Notes
Related posts:
 The Slow Cooker Cowboy Casserole That Saves Tired Weeknights (No Soggy Tots Allowed)
 Quick Lemon Ricotta Pasta for Busy Weeknights: Creamy, Bright, and on the Table in 20 Minutes
 Lemon Garlic Butter Baked Salmon in Foil That’s Ready in 25 Minutes — No Fuss, No Mess
 Lipton Onion Soup Meatloaf for Tuesday Nights: Moist, Savory, and the Only One You’ll Ever Need
 Kielbasa Sausage Cheesy Potato Casserole That Tastes Like Sunday Dinner — In Under an Hour
 Quinoa Chicken Sausage Bowls That Are Ready in 30 Minutes (And Actually Keep Well)