
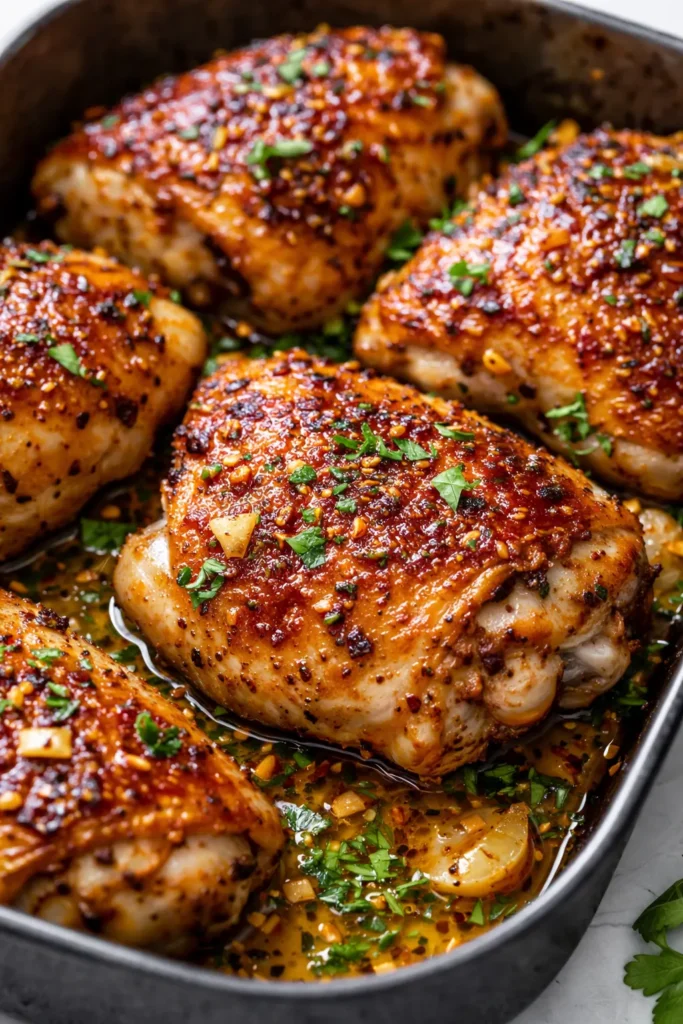
There’s a specific sadness to pulling a baking sheet out of the oven and finding dry, rubbery chicken thighs. I’ve been there more times than I want to admit — the kind of dry where the meat shrinks away from the skin and the flavor just… disappears into the pan. This version is the opposite of that. These thighs come out juicy all the way through, with edges that are genuinely golden and crisp, and a garlic butter sauce that makes its way into every bite.
The short version: High heat, a quick salt-and-baking-powder rest for crispy skin, and a garlic butter baste that keeps the meat tender.
I’ve made this recipe about thirty times now, tweaking the oven rack position and the resting time, and it’s the only baked thigh recipe my fifteen-year-old actually asks for by name.
- Serves: 4 (2 thighs per person)
- Hands-On Time: 20 min | Total Time: 45 min
- Difficulty: Easy enough for a Tuesday, impressive enough for company
- Cost per serving: ~$2.50
- Calories: ~380 per serving
- Dietary Notes: Low-Carb-friendly; adaptable for dairy-free (swap butter for avocado oil)
(Photo above: A close-up overhead shot of four golden-brown chicken thighs in a cast-iron skillet, garlic cloves scattered between them, a spoonful of butter sauce pooling at the edges, warm late-afternoon light coming from the left.)
The Thing That Makes These Actually Crispy (Not Dry)
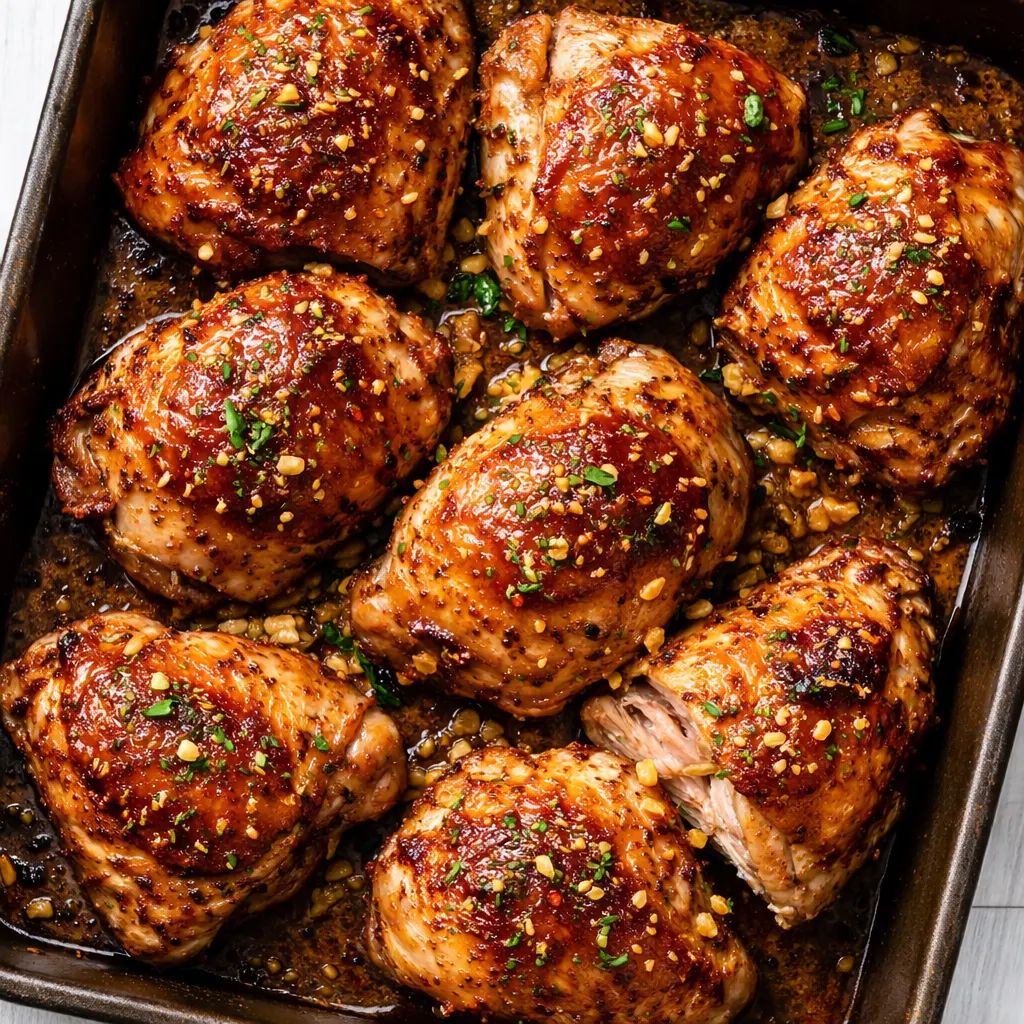
Most recipes skip the most important step: a quick dry-brine. Patting the thighs dry, seasoning them with salt and a pinch of baking powder, then leaving them uncovered in the fridge for even just 15 minutes does something magical to the skin. It dries it out on the surface, which means it crisps up in the oven instead of steaming.
The second trick is starting them skin-side down in a cold cast-iron skillet. As the pan heats up, the fat renders slowly, giving you a head start on that golden crust before the oven even finishes preheating. I learned this from a restaurant cook who told me it’s the “only way” — and after trying it both ways, I have to agree.
What you get is chicken that’s juicy on the inside, shatteringly crisp on the outside, and coated in a buttery garlic sauce that you’ll want to spoon over rice, potatoes, or just straight into your mouth.
Everything You Need (Plus a Few Notes From My Kitchen)
- 4 boneless, skin-on chicken thighs (about 1.5 lbs): Skin-on is non-negotiable here — the fat keeps the meat moist and crisps up beautifully. If you only have boneless, skinless, the cooking time will be shorter and you won’t get the crunchy top, but the dry-brine and butter baste will still save it from dryness. My grocery store sometimes only has skinless — on those weeks, I add an extra pat of butter on top of each thigh before baking.
- 1 tsp kosher salt + 1/4 tsp baking powder: The dry-brine duo. The salt seasons all the way through, the baking powder helps the skin brown faster. Don’t worry — you won’t taste it. I promise.
- 2 tbsp butter (salted or unsalted): The baste. I use salted butter and skip extra salt in the sauce. My daughter Nora once asked if I could “bottle this butter” — that’s how good it is.
- 5-6 cloves of garlic (smashed, not minced): Smashed cloves release their flavor slowly into the butter without burning. Minced garlic can go bitter under the high heat of the oven. Trust me on this one — I’ve ruined a batch with burnt minced garlic and it’s not worth it.
What I Pull Out Before I Start
- A 10-inch cast-iron skillet (or any oven-safe heavy pan — stainless works too, just make sure it’s not non-stick if you want the crispy bits to stick for the sauce)
- A cooling rack and a baking sheet (for the dry-brine rest in the fridge)
- Tongs (for flipping without tearing the skin)
- An instant-read thermometer (optional, but it takes the guesswork out of dinner)
Making the Best Baked Chicken Thighs: My Exact Process
This goes fast once the chicken is in the oven, so read through once before you start. I promise the extra step of the dry-brine makes everything worth it.
First, the dry-brine (do this before anything else): Pat the chicken thighs dry with paper towels. Mix the salt and baking powder together and sprinkle evenly over both sides of the thighs. Place them skin-side up on a wire rack set over a baking sheet and pop them in the fridge, uncovered, for at least 15 minutes (up to 24 hours — the longer the better).
- Preheat the oven: Set your oven to 425°F with the rack in the upper third. You want high heat to crisp the skin quickly.
- Start in a cold skillet: Place your cast-iron skillet on the stovetop over medium heat. Add a drizzle of avocado oil or any high-smoke-point oil. Place the thighs skin-side down in the cold pan. (📸 Photo tip: You should hear a gentle sizzle, not a loud spatter — if it’s screaming at you, the pan is too hot.)
- Sear the skin: Cook for 4-5 minutes without moving them. The skin should release easily from the pan when it’s ready. If it sticks, give it another minute. Flip and cook for 1 minute on the bone side.
- Add the butter and garlic: Toss in the butter and smashed garlic cloves. Transfer the skillet to the oven. (📸 Photo tip: The butter should melt and foam around the thighs immediately — that’s the sizzle you want to see.)
- Bake and baste: Bake for 15-20 minutes, depending on the thickness of your thighs. At the 10-minute mark, use a spoon to baste each thigh with the melted garlic butter from the pan. This keeps the meat moist and adds layers of flavor.
- Check for doneness: The most reliable way is an instant-read thermometer — the thickest part of a thigh should read 175-185°F. The higher temperature for thighs (compared to breasts) is what makes them tender and rich. The sensory cue: The skin should be deep golden-brown and crisp, and the juices should run clear when you pierce the thickest part.
- Rest before serving: Let the thighs rest in the skillet for 5 minutes. The carryover cooking finishes the job and the butter sauce settles into something spoonable. This is the hard part — your kitchen will smell like garlic butter and roasted chicken and you’ll want to dive right in. Let it rest anyway.
How I Make These Work for a Busy Week
I do the dry-brine on Sunday mornings while I’m making coffee. Then I just wrap the baking sheet tightly in plastic wrap and leave it in the fridge until I’m ready to cook on Tuesday or Wednesday. It makes the actual dinner rush so much smoother.
- Fridge: Store leftover thighs in an airtight container for up to 4 days. The garlic butter will solidify — that’s a good thing. Spread it on bread or melt it over vegetables.
- Freezer: Yes! Freeze the cooked, cooled thighs in a single layer on a baking sheet, then transfer to a freezer bag for up to 3 months.
- Reheat: The oven is your friend here. Reheat at 375°F for 10-12 minutes to bring the skin back to life. The microwave works in a pinch but the skin won’t be crispy — my kids don’t care, but I always reheat mine in the toaster oven.
Things I Learned the Hard Way (So You Don’t Have To)
- Don’t skip the dry-brine, even for 15 minutes: I know it seems like an extra step. I used to skip it all the time. The difference is genuinely night and day — the skin goes from chewy to crispy, and the meat from dry to juicy. Even 15 minutes makes a big difference.
- Cold pan, not hot pan: If you add the chicken to a screaming hot pan, the butter burns and the skin shrinks. Starting in a cold pan lets the fat render slowly and evenly. I messed up a full tray of thighs before I learned this trick.
- Use smashed garlic, not minced: Mince burns at 425°F. Smashed cloves give you that sweet, roasted garlic flavor without the bitterness. Plus, you can eat the soft cloves right out of the pan — my family fights over them.
- The thermometer is your best friend for food safety and quality: Thighs can handle a higher internal temp than breasts, which makes them incredibly forgiving. 175-185°F is the sweet spot. Below that, the connective tissue hasn’t broken down enough. Above that, you’re getting close to dry territory.
How to Make This Recipe Your Own
- Dairy-Free: Swap the butter for 2 tablespoons of avocado oil or olive oil. Add an extra splash of lemon juice at the end for brightness.
- Spicy Garlic Version: Add 2-3 whole dried chilies or a teaspoon of red pepper flakes to the butter with the garlic. The heat infuses into the oil and gives the chicken a slow, warm kick.
- Herby Butter: Throw in a few sprigs of thyme, rosemary, or sage when you add the butter to the pan. The herbs crisp up in the oven and make a beautiful garnish.
- Chicken Thighs for Tacos: Skip the butter baste and use cumin, smoked paprika, and lime juice. Bake as directed, then shred or chop for the most incredible chicken taco filling.
- Boneless, Skinless Thighs: If that’s all you have, reduce the baking time to 12-15 minutes. The dry-brine still helps with texture, but without the skin, you’ll miss out on the crispy factor. The butter sauce becomes even more important here.
Questions People Always Ask Me About This Recipe
Q: Why did my chicken skin come out rubbery instead of crispy?
A: The number one reason is moisture. The skin wasn’t dry enough before it went into the pan. Make sure you’re patting it very dry with paper towels and giving it that uncovered rest in the fridge. A second reason: the oven wasn’t hot enough. Stick to 425°F and don’t crowd the pan — the thighs need space for the heat to circulate.
Q: Can I use chicken breasts instead of thighs?
A: You can, but you’ll need to adjust the timing significantly. Chicken breasts cook faster and dry out more easily. I’d recommend butterfly the breasts, reduce the baking time to 12-15 minutes, and start checking for doneness at 160°F. The butter baste will help, but it won’t work miracles on a lean breast.
Q: Can I make this ahead and reheat it for a crowd?
A: Absolutely. I’ve done this for family dinners and it works beautifully. Cook the thighs completely, let them cool, and store them in a baking dish with the garlic butter. When you’re ready to serve, reheat at 350°F for 15 minutes, covered, then uncover for the last 5 minutes to crisp the skin back up. Your guests will think you spent all afternoon on it.
Q: What do you serve with these baked chicken thighs?
A: In my house, it’s usually a big pile of mashed potatoes to catch all that garlic butter sauce, and a simple green vegetable — roasted broccoli or a crisp green salad. On Sundays, I’ll do a pan of roasted fennel and carrots alongside. My daughter loves them with buttered egg noodles and a squeeze of lemon.
More Weeknight Dinner Recipes From My Kitchen
If these baked chicken thighs end up on your regular rotation, here are a few other dinners that get the same treatment at my house:
- [INTERNAL LINK PLACEHOLDER: Garlic Butter Roasted Salmon with Lemon] — Twenty minutes, one pan, and a sauce that works on everything.
- [INTERNAL LINK PLACEHOLDER: The Only Sheet Pan Meatballs I Make] — Juicy, tender, and they freeze like a dream for busy nights.
- [INTERNAL LINK PLACEHOLDER: Simple Braised Chicken Thighs with White Wine and Herbs] — For the nights when you want something that feels a little more special but still takes almost no work.
I hope these baked boneless chicken thighs become as much of a staple in your kitchen as they are in mine. They’re the kind of recipe that teaches you something about how heat and timing work together — and the payoff is a dinner that genuinely feels good to put on the table. If you try them, come back and let me know how it went. Your notes and questions are what keep me testing and writing in this little kitchen of mine.
Tag me on Pinterest when you make them — I love seeing your versions show up in my feed. It’s the next best thing to having you over for dinner.
📌 Save this recipe for your next easy weeknight dinner: juicy, golden-brown baked boneless chicken thighs with a garlic butter finish that the whole family will love.
Baked Boneless Chicken Thighs with Garlic Butter
Equipment
- 10-inch cast iron skillet
- Cooling rack and baking sheet
- Tongs
- Instant-read thermometer
Ingredients
For the Chicken
- 4 boneless skin-on chicken thighs (about 1.5 lbs)
- 1 tsp kosher salt
- 1/4 tsp baking powder
- 1 tbsp avocado oil (or other high-smoke-point oil)
For the Garlic Butter Baste
- 2 tbsp butter (salted or unsalted)
- 5-6 cloves garlic, smashed
Instructions
- Pat the chicken thighs dry with paper towels. Mix the salt and baking powder together and sprinkle evenly over both sides of the thighs. Place them skin-side up on a wire rack set over a baking sheet and pop them in the fridge, uncovered, for at least 15 minutes (up to 24 hours).
- Preheat the oven to 425°F with the rack in the upper third.
- Place your cast-iron skillet on the stovetop over medium heat. Add a drizzle of avocado oil. Place the thighs skin-side down in the cold pan. You should hear a gentle sizzle, not a loud spatter.
- Cook for 4-5 minutes without moving them. The skin should release easily from the pan when it’s ready. Flip and cook for 1 minute on the bone side.
- Toss in the butter and smashed garlic cloves. Transfer the skillet to the oven. The butter should melt and foam around the thighs immediately.
- Bake for 15-20 minutes. At the 10-minute mark, baste each thigh with the melted garlic butter from the pan. The thighs are done when an instant-read thermometer reads 175-185°F in the thickest part. The skin should be deep golden-brown and the juices should run clear.
- Let the thighs rest in the skillet for 5 minutes before serving. This allows the carryover cooking to finish and the butter sauce to settle.
Notes
Related posts:
 Mini Quiche Recipe: The Store-Bought Crust Version That Tastes Like You Made It From Scratch
 Easy Shrimp Lo Mein That’s Faster Than Delivery (Ready in 30 Minutes)
 The Slow Cooker Cowboy Casserole That Saves Tired Weeknights (No Soggy Tots Allowed)
 Creamy Beef and Shells for Tuesday Nights: The One-Pot Dinner My Kids Actually Ask For
 Quick Lemon Ricotta Pasta for Busy Weeknights: Creamy, Bright, and on the Table in 20 Minutes
 Juicy Oven Baked Chicken Thighs That Stay Golden and Tender — in 40 Minutes