
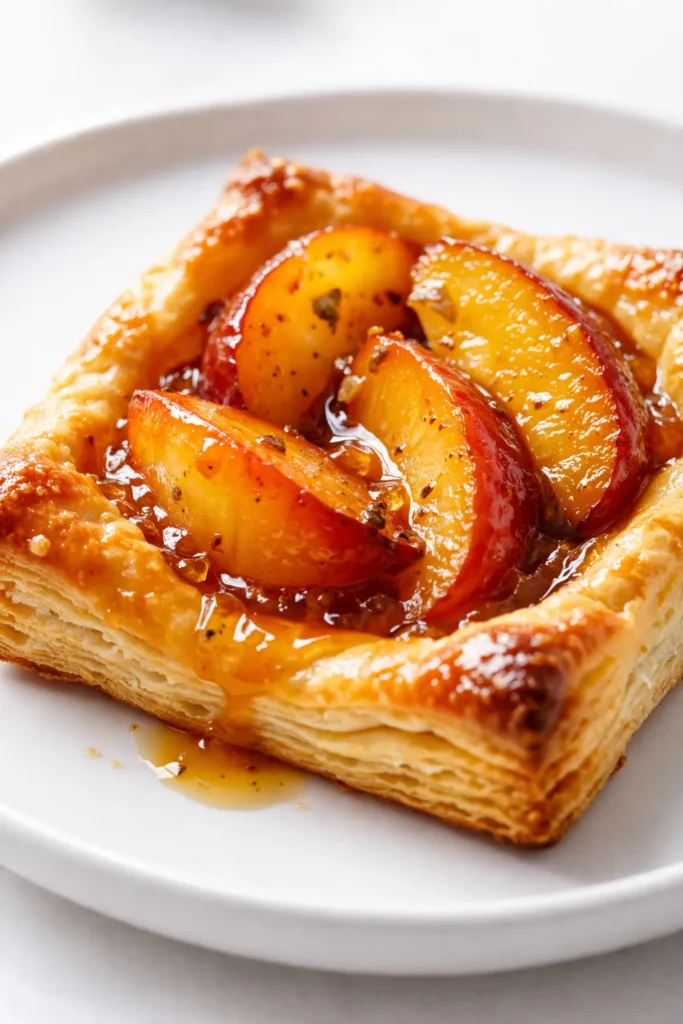
The first time I made these, I pulled the tray out of the oven, saw the peaches bubbling over the edge of the pastry, and thought finally. Finally, a fruit tart that didn’t turn into a wet, limp situation by the time it cooled. The bottom was golden. The layers were shatteringly crisp. The peaches were soft but not swimming. That was the summer I stopped overthinking fruit desserts.
The short version: 20 minutes of hands-on work, 4 ingredients in the filling, and the one trick that keeps the pastry crunchy instead of soggy.
I’ve made these for book club, for Sunday brunch, and for the random Tuesday night when I wanted something warm and sweet without pulling out the stand mixer. My daughter Nora, who’s away at school now, texts me a picture every time she makes them in her tiny apartment kitchen. She uses a pizza cutter to cut the pastry and says it makes her feel like she knows what she’s doing. She’s right.
- Serves: 6 individual tarts
- Hands-On Time: 20 min | Total Time: 40 min
- Difficulty: Easy — looks impressive but the pastry does all the heavy lifting
- Cost per serving: ~$2.50
- Calories: ~310 per tart
- Dietary Notes: Vegetarian. Easily adaptable for dairy-free (see swaps).
(Photo above: overhead shot of three tarts on a rustic wooden board. Golden, flaky edges rising around dark caramel bubbles. A small scoop of vanilla ice cream melts into the center of one tart. Natural side light from a window catches the glossy glaze on the peaches.)
The Thing That Keeps the Pastry Crispy (It’s One Simple Step)
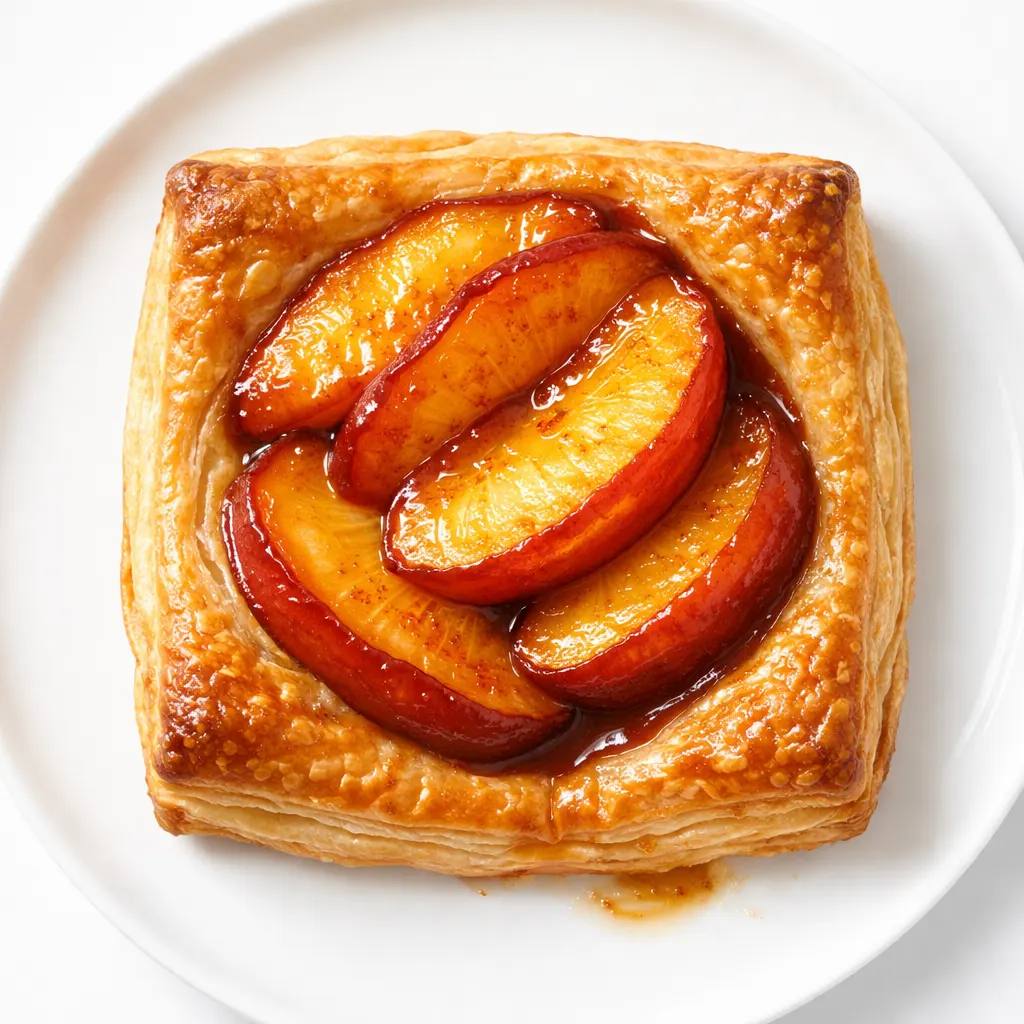
Peaches release water when they hit the heat. It’s what they do. If you toss them with sugar and put them directly on the pastry, that water has nowhere to go except into the dough. It steams the layers before they have a chance to puff, and you end up with a soggy bottom that no amount of good intentions can fix.
Here’s what works instead: you toss the sliced peaches with the brown sugar, cornstarch, and lemon juice, and then you let them sit for 15 minutes. The sugar draws the moisture out of the fruit, and you drain that liquid off before arranging the peaches on the pastry. That’s it. That’s the trick. And it makes all the difference.
The brown sugar isn’t just for sweetness. It brings a deep, almost caramel note to the peaches that white sugar just can’t match. And the high oven heat (400°F) makes sure the pastry puffs up tall before the fruit has a chance to weigh it down. The result is a tart with layers that shatter when you bite into them and fruit that tastes intensely, concentratedly peachy.
What Goes In — With Some Notes I’ve Learned the Hard Way
- 3 ripe but firm peaches: Firm peaches hold their shape during baking. If yours are very soft, dice them smaller so they cook through quickly. My kids will eat these with nectarines too, and those need even less time—if you swap them in, check the tart at 16 minutes instead of 20.
- 3 tablespoons light brown sugar: Not dark—dark can be a little bitter when it concentrates in the oven. Light brown sugar gives you that molasses warmth without going too far.
- 1 teaspoon cornstarch: Just enough to tighten the juices so they don’t run all over the baking sheet. Too much makes the filling gloppy. Trust me on the teaspoon.
- ½ lemon, juiced: Brightens the fruit and balances the sweetness. You won’t taste the lemon directly—it just makes the peaches taste more like themselves.
- ½ teaspoon vanilla extract: I use the good stuff here because I always do, but imitation vanilla works fine. The oven heat takes care of the rest.
- 1 sheet puff pastry (thawed): I use Dufour or Pepperidge Farm. Keep it cold until it hits the pan. My grandmother used frozen puff pastry for her fruit tarts in the 80s, and if it was good enough for her, it’s good enough for me.
- Egg wash (1 egg + splash of water): This gives the pastry that deep golden color. Don’t skip it.
- 1 tablespoon turbinado sugar: The coarse sugar adds crunch and a subtle caramel flavor to the edges. Regular granulated sugar doesn’t give the same texture.
What to Pull Out Before You Start
- Rimmed baking sheet (half-sheet pan is perfect)
- Parchment paper (non-negotiable for clean release)
- Sharp knife or pizza cutter
- Mixing bowls (one medium, one small)
- Pastry brush
- Small saucepan for the glaze
- Cooling rack
Let’s Make These — Easier Than It Looks
This goes fast, so read through once before you start. The hardest part is waiting for the peaches to ripen.
Preheat and prep: Set your oven to 400°F. Line a rimmed baking sheet with parchment paper.
- Macerate the peaches: Slice the peaches into wedges, about 8 slices per peach. In a medium bowl, toss them with the brown sugar, cornstarch, lemon juice, and vanilla. Let them sit for 15 minutes. (📸 Photo tip: You should see a syrupy liquid pooling at the bottom of the bowl. That’s the water we’re keeping out of the pastry.)
- Drain the liquid: Pour the liquid from the peaches into a small saucepan. Set the peaches aside. Bring the liquid to a boil over medium heat, then reduce to a simmer and cook until it thickens into a syrup, about 3 minutes. This becomes your glaze. Don’t skip this step—it’s pure concentrated peach flavor.
- Cut the pastry: Unfold the thawed puff pastry sheet on a lightly floured surface. Cut it into 6 equal rectangles (I use a pizza cutter, just like Nora). Transfer them to the parchment-lined baking sheet. Using a sharp knife, score a ½-inch border around each rectangle—cut about halfway through the dough. Don’t cut all the way through. This border will puff up into walls that hold the fruit.
- Assemble the tarts: Arrange the peach slices inside the scored border, overlapping them slightly. Don’t pile them too high—one layer is enough. Brush the exposed edges of the pastry with the egg wash. Sprinkle the edges with turbinado sugar.
- Bake: Place the baking sheet on the bottom rack of the oven (this helps the bottom brown). Bake for 18–22 minutes, until the pastry is deep golden brown and the peaches are caramelized at the edges. (📸 Photo tip: The pastry should be puffed and dark golden at the corners. If the bottoms look pale, give them 2 more minutes.)
- Glaze and cool: Brush the reduced syrup over the warm peaches. Immediately transfer the tarts to a cooling rack. Do not leave them on the hot baking sheet—the residual heat will continue to cook the bottom and create steam. The airflow from the rack keeps the bottoms crunchy.
How I Prep These Ahead for a Party
These are best the day they’re made, but I’m a realist. If I’m serving them for a gathering, I slice the peaches and mix the sugar mixture the night before and store them separately in the fridge. In the morning, I drain, assemble, and bake. It takes 10 extra minutes of planning and saves me a lot of stress when guests are on their way.
- Fridge: Store leftover tarts in an airtight container at room temperature for up to 1 day. Reheat in a 350°F oven for 5 minutes to re-crisp the pastry.
- Freezer: Yes! Freeze the unbaked tarts on a sheet pan until solid, then wrap individually in plastic wrap. Bake from frozen, adding 5–7 minutes to the total time.
- Reheat: The oven is your friend here. The microwave makes the pastry chewy and sad. If you absolutely must use the microwave, do 10-second bursts and immediately toast in a dry skillet to crisp the bottom.
Things I Wish I’d Known the First 3 Times I Made These
- Cold pastry is non-negotiable: If the dough warms up, the butter melts into the flour instead of creating steam pockets in the oven. That means less puff. Pop the assembled tarts in the fridge for 10 minutes while the oven preheats. Your patience will be rewarded.
- Don’t skip the scoring: That ½-inch border you score creates the walls of the tart. If you forget, the pastry will puff unevenly and the peaches will slide off onto the baking sheet. I’ve done it. It still tastes good, but it doesn’t look nearly as pretty.
- Bake on the bottom rack: This ensures the bottom gets direct heat and browns properly. Nothing frustrates me more than a pale, soggy bottom on an otherwise beautiful tart. The bottom rack fixes that.
- Underripe peaches work better than overripe ones: Overripe peaches turn into jam in the oven. That’s nice for some things, but for a tart where you want distinct slices of fruit, firm peaches are better. If all you have are very soft peaches, dice them small and reduce the cornstarch by half.
Make It Yours — Easy Swaps I’ve Tested
- Dairy-Free: Many store-bought puff pastries are accidentally vegan (check the label). Brush with plant-based milk instead of egg wash. The turbinado sugar still gives you that beautiful crunch on the edges. I make this version for my neighbor who can’t do dairy, and she says it’s the only fruit tart she trusts.
- Gluten-Free: I’ve had good luck with the ‘Gee Free’ brand of gluten-free puff pastry. Handle it gently—it’s more delicate than the wheat version—and bake it on parchment paper for easy removal.
- Spicy Twist: Add a pinch of cardamom or cinnamon to the brown sugar mixture. My sister adds a tiny pinch of cayenne to hers. I think she’s crazy, but her tarts are always the first to disappear at family dinners.
- Other Fruits: Nectarines work beautifully and don’t need peeling. Plums and apricots are also fantastic in this recipe. If you’re using apples, sauté them for 5 minutes in a little butter first to soften them up.
- Kid-Friendly Version: Skip the glaze and let the kids arrange the fruit themselves. Use fun cookie cutters to cut the pastry into shapes instead of rectangles. Stars, hearts, circles—they all work. Just remember to score a border on each one.
The Questions I Get Every Time I Post These
Q: Why did my pastry turn out soggy?
A: Ugh, I’ve been there. Chances are the peaches released too much water. Did you let them sit (macerate) and did you drain them? That’s the number one culprit. Next time, try the extra 10-minute drain step and make sure your oven is fully preheated to 400°F before the tarts go in. You’ve got this next time.
Q: Can I use frozen peaches?
A: I don’t recommend it for this recipe, honestly. Frozen peaches release significantly more water when they thaw. If that’s all you have, thaw them completely in a colander, press them dry in a clean kitchen towel, and then proceed. The texture won’t be quite the same, but it’ll still be good.
Q: My tarts didn’t puff up very well. What happened?
A: Two things usually cause this: the pastry was too warm when it hit the oven, or the oven wasn’t hot enough. Make sure your oven is fully preheated to 400°F. I usually pop my assembled tarts in the fridge for 10 minutes while the oven finishes heating. The cold pastry hitting the hot air creates the steam that makes the layers separate and puff.
Q: What do you serve with these?
A: We love them with a dollop of creme fraiche—the tang cuts the sweetness perfectly. A scoop of vanilla bean ice cream is always a hit. But honestly, on a Tuesday night, I just pour myself a cold glass of milk and stand at the counter eating one warm. My kids like theirs with a drizzle of honey on top, which makes me wince a little because they’re already sweet enough, but they’re happy.
More Recipes My Family Makes on Repeat
If you liked these, here are a few others that get the same reaction at our table:
- Apple Galette with Brown Butter — Same flaky energy, less structured, and perfect for fall when the apples come in.
- Mixed Berry Crumble — My daughter’s favorite. Uses fresh or frozen berries, so we make it year-round.
- Peach Caprese Salad — Not a dessert, but the perfect way to use the other peaches sitting on your counter.
These peach tarts are the dessert I turn to when I want something that feels special but doesn’t require a pastry degree. They’re forgiving, they’re fast, and they taste like the exact middle of summer. If you make them, let me know—tag me on Instagram or leave a comment below. I love seeing them show up in your kitchens.
📌 Save this easy peach puff pastry tart recipe for your next summer brunch or weeknight dessert craving. Flaky, buttery pastry meets caramelized brown sugar peaches in under 40 minutes.
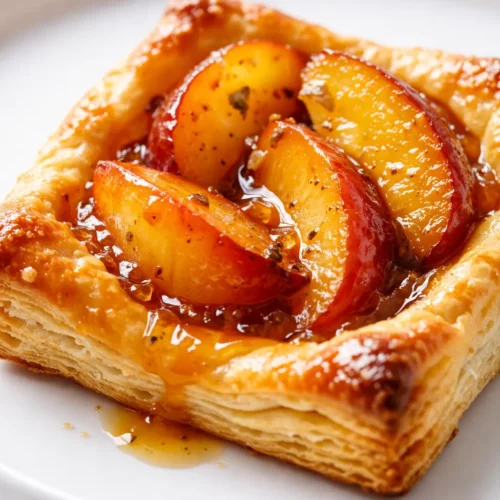
Peach and Brown Sugar Puff Pastry Tarts
Equipment
- Baking Sheet
- Parchment Paper
- Pizza Cutter
- Mixing Bowls
- Pastry Brush
- Small saucepan
- Cooling Rack
Ingredients
Peach Filling
- 3 ripe but firm peaches, sliced
- 3 tablespoons light brown sugar
- 1 teaspoon cornstarch
- 1/2 lemon, juiced
- 1/2 teaspoon vanilla extract
Pastry & Assembly
- 1 sheet puff pastry (thawed)
- 1 large egg
- 1 tablespoon water
- 1 tablespoon turbinado sugar
Instructions
- Slice the peaches into wedges, about 8 slices per peach. In a medium bowl, toss them with the brown sugar, cornstarch, lemon juice, and vanilla. Let them sit for 15 minutes. You should see syrupy liquid pooling at the bottom of the bowl.
- Pour the liquid from the peaches into a small saucepan. Set the peaches aside. Bring the liquid to a boil over medium heat, then reduce to a simmer and cook until it thickens into a syrup, about 3 minutes. This becomes your glaze.
- Unfold the thawed puff pastry sheet on a lightly floured surface. Cut it into 6 equal rectangles. Transfer them to a parchment-lined baking sheet. Using a sharp knife, score a 1/2-inch border around each rectangle, cutting about halfway through the dough.
- Arrange the peach slices inside the scored border, overlapping them slightly. Do not pile them too high; one layer is enough. Brush the exposed edges of the pastry with the egg wash (egg beaten with water). Sprinkle the edges with turbinado sugar.
- Place the baking sheet on the bottom rack of the oven. Bake for 18–22 minutes, until the pastry is deep golden brown and the peaches are caramelized at the edges.
- Brush the reduced syrup over the warm peaches. Immediately transfer the tarts to a cooling rack. Do not leave them on the hot baking sheet to keep the bottoms crunchy.
Notes
- Cold pastry is non-negotiable – chill assembled tarts for 10 minutes before baking.
- Don’t skip scoring the border – it creates walls to hold the fruit.
- Bake on the bottom rack for a crispy bottom.
- Underripe peaches work better than overripe ones.
Related posts:
 Tater Tot Breakfast Bowl with Sausage Gravy: The 40-Minute Weekend Breakfast Worth Waking Up For
 High-Protein Overnight Oats That Actually Taste Like Breakfast (Not a Chalky Disaster)
 Homemade McGriddle Bites That Are Faster Than the Drive-Through — Ready in 30 Minutes
 Mini Quiche Recipe: The Store-Bought Crust Version That Tastes Like You Made It From Scratch
 The Slow Cooker Cowboy Casserole That Saves Tired Weeknights (No Soggy Tots Allowed)
 Creamy Beef and Shells for Tuesday Nights: The One-Pot Dinner My Kids Actually Ask For