
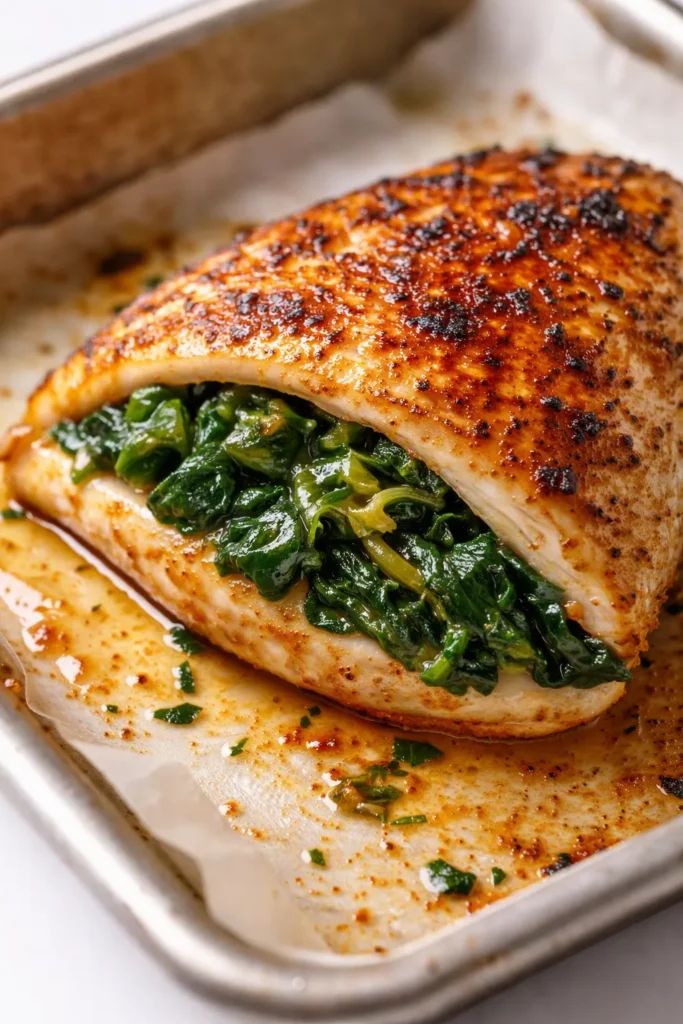
Every version of this I made for two years came out dry. Or the filling leaked out into the pan. Or both. That’s the chicken stuffed with spinach‘s cruel trick — it looks simple on paper, but one wrong move and you’re eating sad, dry meat with a puddle of cream cheese in the bottom of the baking dish.
This batch changed everything. The trick? It’s not about what you stuff in — it’s about how you seal it and how you cook it. The first time I made this version, my husband asked what I’d done differently before he finished his first bite. My 14-year-old, who usually pushes chicken around her plate, actually asked for seconds. That’s the kind of recipe shift worth writing down.
The short version: Juicy chicken, creamy spinach filling, golden on the outside — 40 minutes, one pan, no dry meat regrets.
I’ve made this about fifteen times now, tweaking the sealing method, the oven temp, the resting time. This is the version where everything finally clicked.
- Serves: 4 as a main
- Hands-On Time: 20 min | Total Time: 40 min
- Difficulty: Straightforward — one tricky step I’ll walk you through
- Cost per serving: ~$3.50
- Calories: ~390 per serving
- Dietary Notes: Low-carb, gluten-free naturally. Easily adaptable for dairy-free.
(Photo above: overhead shot of four stuffed chicken breasts on a rimmed baking sheet, golden-brown edges visible, a small ramekin of extra creamed spinach filling on the side for dipping, warm afternoon light from the kitchen window hitting the pan.)
The Thing That Keeps This Chicken Juicy (It’s Not What You Think)
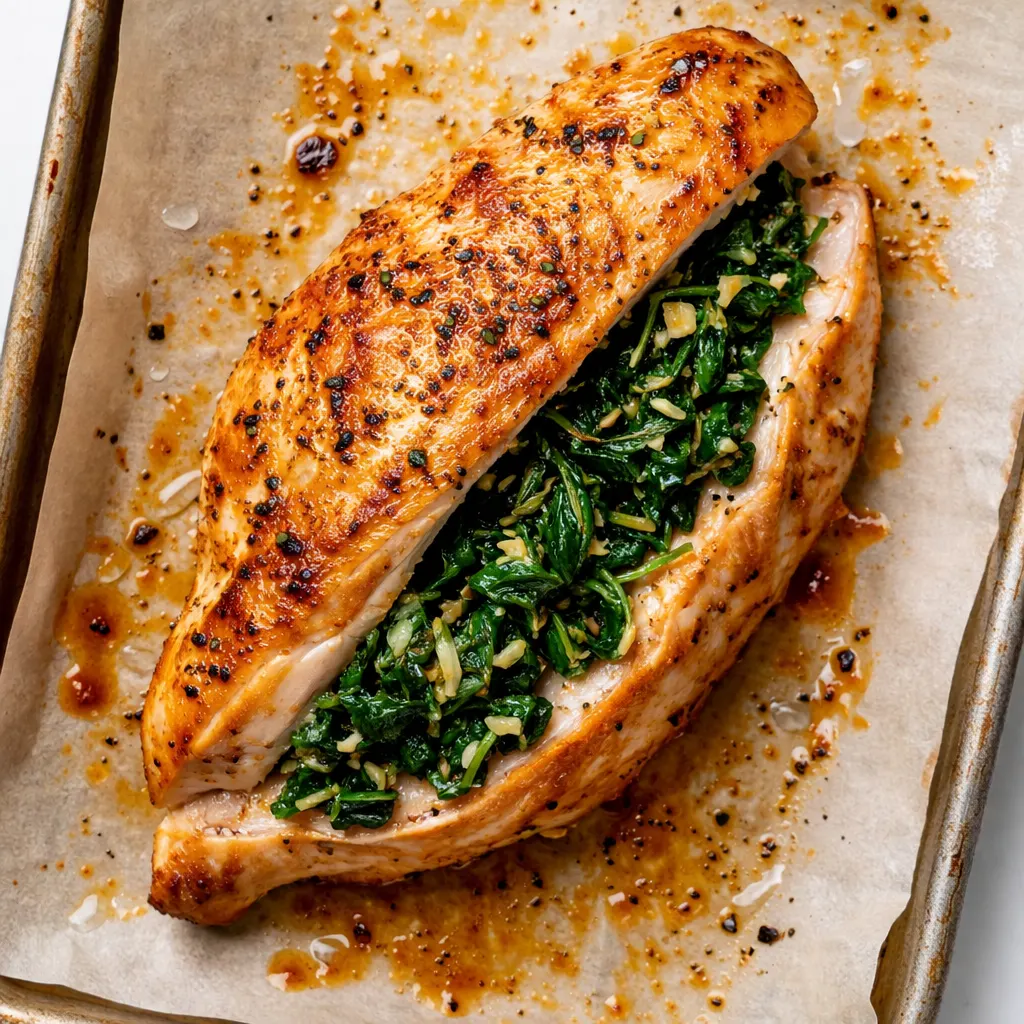
The biggest mistake I made for years was over-stuffing the chicken. I’d cram in as much spinach filling as physically possible, thinking more filling = more flavor. What actually happened was the chicken couldn’t seal properly, the filling leaked out during baking, and the meat cooked dry because it lost all its moisture to the pan.
The fix is counterintuitive: use less filling than you think you need. About 2 tablespoons per breast. That’s enough for flavor in every bite without preventing the chicken from sealing shut. The other trick is pounding the chicken to an even thickness — about ½ inch — so it cooks evenly in the time it takes for the filling to warm through. Skip that step and you’ll have one end overcooked and the other end underdone.
The result is chicken thats so tender it pulls apart with a fork, with a creamy, garlicky center that stays exactly where it belongs — inside the chicken.
Everything You Need (And a Few Notes From Me)
- 4 boneless, skinless chicken breasts (about 6 oz each): Look for ones that are relatively even in thickness. If one end is way thinner than the other, save yourself the headache and buy a different package. My grocery store had a sale on organic breasts last week — these come out especially tender with good-quality chicken.
- 5 oz fresh spinach (about 4 big handfuls): Fresh only. Frozen spinach has too much water and will make the filling soggy. I’ve tested frozen exactly once. It was a mess. Learn from me.
- 4 oz cream cheese, softened: Full-fat works best here. The low-fat version makes the filling grainy and doesn’t hold together as well. Let it sit on the counter for 30 minutes before you start — cold cream cheese won’t mix evenly.
- ¼ cup grated Parmesan: The real stuff, not the green can. It adds salt and umami that ties the whole filling together.
- 2 cloves garlic, minced: Fresh garlic is non-negotiable here. The jarred stuff has a weird sweetness that throws off the filling. I use my Microplane for this — one quick pass and it’s done.
- ½ teaspoon salt, divided: Use kosher salt if you have it. Table salt is finer, so if that’s what you’re using, cut back to ¼ teaspoon.
- ¼ teaspoon black pepper: Freshly ground is worth it here. It’s not about snobbery — pre-ground pepper loses its warmth after a few months in the pantry.
- ¼ teaspoon red pepper flakes (optional): I add these on the days I’m cooking for myself and want a little kick. My kids prefer it without. I split the batch sometimes — no shame in making two versions.
- 1 tablespoon olive oil: For searing the chicken. Use an oil with a decent smoke point, not your fancy finishing oil.
What to Pull Out Before You Start
- A rimmed baking sheet or oven-safe skillet — I use a 12-inch cast iron because it holds heat evenly and gives the bottom of the chicken a beautiful golden crust.
- Plastic wrap or a zip-top bag for pounding the chicken
- A meat mallet or rolling pin (I’ve used a wine bottle in a pinch — it works)
- Toothpicks or kitchen twine — toothpicks are easier, just remember to take them out before serving
- A small skillet for wilting the spinach
- A medium bowl for the filling
I’ve made this without the meat mallet using the bottom of a heavy saucepan. It’s not as controlled, but it does the job. You don’t need fancy equipment here — just something flat and heavy.
Let’s Make It (Step by Step)
This moves fast once you start cooking, so I like to get everything prepped first. Set your chicken out about 15 minutes before you start — it cooks more evenly when it’s not straight-from-the-fridge cold.
Preheat and prep: Heat your oven to 400°F. Place a rack in the upper third of the oven — this helps the tops brown without the bottoms drying out. Line your baking sheet with parchment paper if you want easier cleanup (I always do this).
- Wilt the spinach: Heat a small skillet over medium heat. Add the spinach in handfuls, stirring until it just wilts — this takes about 90 seconds total. You’re not cooking it to death, just softening it. Transfer to a cutting board and let it cool for a minute, then press it gently with paper towels to remove excess moisture. Chop it finely — about the size of small confetti. (📸 Photo tip: You should see the steam rising as the spinach wilts. When it’s bright green and reduced to about one-third its original volume, it’s done.)
- Make the filling: In a medium bowl, combine the softened cream cheese, Parmesan, minced garlic, chopped spinach, ¼ teaspoon salt, ¼ teaspoon pepper, and red pepper flakes if using. Stir until everything is well combined. Taste it — yes, raw. It should be creamy, garlicky, and just salty enough. Adjust the salt now if needed.
- Pound the chicken: Place a chicken breast between two pieces of plastic wrap (or inside a zip-top bag). Pound it gently with the flat side of your mallet until it’s about ½ inch thick — aim for even thickness all over, not thinner at the edges. Repeat with all four breasts. This is the step I used to skip and it ruined batch after batch. It takes two minutes and makes the difference between dry chicken and juicy chicken.
- Stuff and seal: Lay a pounded breast on your work surface. Place about 2 tablespoons of filling in the center — don’t spread it to the edges, leave a 1-inch border. Fold the chicken over like a book, bringing the two sides together. Secure the edge with toothpicks — I use 3 per breast, inserted at an angle about ½ inch apart. You want the filling completely enclosed with no gaps. (📸 Photo tip: The seam should be tight with no filling visible. If you see pink cream cheese poking out, add another toothpick or use less filling next time.)
- Sear the chicken: Heat 1 tablespoon olive oil in your oven-safe skillet over medium-high heat until it shimmers — about 2 minutes. Place the stuffed breasts seam-side down in the hot oil. Cook without moving them for 3 minutes, until golden brown. Flip carefully using tongs and cook the other side for 2 minutes. That first sear is what seals the seams and keeps the filling inside. Don’t rush it.
- Finish in the oven: Transfer the skillet to your preheated oven (if your skillet isn’t oven-safe, transfer the chicken to your lined baking sheet). Bake for 15–18 minutes, until the internal temperature reaches 160°F at the thickest part. I use an instant-read thermometer for this — poking the breast through the side, not the top, so I don’t hit the filling and get a false reading.
- Rest before slicing: Remove from the oven and let the chicken rest on the pan for 5 minutes. This is crucial — the carryover cooking will bring the temperature to 165°F and the juices will redistribute so they don’t run out onto your cutting board. Remove the toothpicks before serving. I know it’s tempting to cut right in. Give it the full five minutes. I’ve cut early and watched the juices flood the plate. It’s heartbreaking.
How I Meal Prep These for the Week
I make a double batch on Sundays and we’re set for lunches through Wednesday. The key is to undercook them slightly — pull them at 155°F instead of 160°F — so the reheating doesn’t dry them out. I wrap each breast individually in foil so my teenager can grab one and reheat it without thinking too hard.
- Fridge: Store in an airtight container for up to 4 days. Reheat in a 350°F oven for 10 minutes, or microwave on 70% power for 90 seconds (it’s not quite as good but it works on busy mornings).
- Freezer: Yes, these freeze beautifully. Wrap each cooked, cooled breast tightly in plastic wrap, then foil. Freeze for up to 3 months. Thaw overnight in the fridge before reheating.
- Reheat: Oven method is best — 350°F for 12 minutes from thawed, 20 minutes from frozen. The microwave works in a pinch but the texture is noticeably softer.
Things I Wish I’d Known the First Time
- Don’t over-stuff: I know I said this already, but it’s the #1 mistake. Two tablespoons per breast. That’s it. More filling means the chicken can’t seal, which means dry meat and a pan full of leaking cream cheese.
- The toothpick angle matters: Insert them at a slight angle, not straight in. They hold better and are easier to remove after baking. I learned this after spending five minutes trying to extract straight-in toothpicks from hot chicken.
- Let the cream cheese soften: Cold cream cheese doesn’t mix evenly. You’ll end up with lumps of cold cheese in an otherwise smooth filling. Set it out 30 minutes before you start — I put mine on the counter when I pull the chicken from the fridge.
- Don’t skip the sear: The oven alone won’t give you that golden-brown crust. The two-step method — sear then bake — is what gives you the beautiful color AND the juicy interior. Even if you mess this part up a little, it’ll still taste good — I’ve done it when I was rushing and ended up with a lighter sear, and it was still a solid dinner.
Swaps That Actually Work
- Dairy-free: Use dairy-free cream cheese (Kite Hill is my go-to) and nutritional yeast instead of Parmesan. The filling will be slightly less rich but still creamy. This is the version I make for my sister-in-law who’s dairy-free — she said it’s the first stuffed chicken recipe that didn’t feel like a compromise.
- Gluten-free: This recipe is naturally gluten-free. Just double-check your Parmesan — some pre-shredded brands use wheat starch as an anti-caking agent. Buy a block and grate it yourself to be safe.
- Spicy version: Add 2 tablespoons chopped pickled jalapeños to the filling and swap the red pepper flakes for a pinch of cayenne. This is my husband’s preferred version — he adds extra hot sauce at the table.
- Kid-friendly version: Skip the red pepper flakes and add 2 tablespoons finely chopped sun-dried tomatoes to the filling. My 14-year-old refuses anything with visible green stuff, but she eats the sun-dried tomato version without complaint.
- Fancy guest version: Wrap each stuffed breast in 2 slices of prosciutto before searing. The prosciutto gets crispy in the oven and adds a salty, savory layer that’s absolutely restaurant-worthy.
Questions I Get About This Recipe All the Time
Q: Why did my filling leak out during baking?
A: Ugh, I’ve been there. Two most likely causes: You either over-stuffed the chicken (stick to 2 tablespoons) or you didn’t seal the seam tightly enough. Make sure the toothpicks are close together — about ½ inch apart — and that no filling is visible. Also check that your chicken is pounded to an even thickness — a thick end can pull the seam open as it cooks.
Q: Can I make this with chicken thighs instead?
A: Yes, and honestly, they’re even more forgiving. Use 4 boneless, skinless thighs (about 5 oz each). Pound them slightly thinner — about ⅓ inch — and use 1½ tablespoons of filling per thigh. Reduce the oven time to 12–14 minutes. Thighs stay juicier because of their higher fat content, so they’re a great option if you’re nervous about drying out the meat.
Q: How long does this last in the fridge? Can I freeze it?
A: It stays good in the fridge for up to 4 days in an airtight container. Yes, you can freeze it — wrap each cooked, cooled breast tightly in plastic wrap then foil, and freeze for up to 3 months. Thaw overnight in the fridge. To reheat, unwrap and place in a 350°F oven for 12 minutes (thawed) or 20 minutes (frozen). The texture won’t be quite as perfect as fresh, but it’s still way better than any freezer meal you can buy.
Q: What do you serve with this?
A: I usually go simple — a quick salad with lemon vinaigrette or roasted broccoli with garlic. My kids love it with buttered egg noodles on the side (which means I have to remind myself that this was supposed to be a low-carb meal). For a full spread, serve it with roasted potatoes and a simple arugula salad. The creaminess of the chicken pairs beautifully with something bright and acidic on the plate.
More Recipes My Family Makes on Repeat
If you liked this one, here are a few others that get the same reaction at our table:
- [INTERNAL LINK PLACEHOLDER: Creamy Lemon Garlic Chicken] — One skillet, 30 minutes, and a sauce so good you’ll want to drink it with a straw.
- [INTERNAL LINK PLACEHOLDER: Baked Parmesan Crusted Chicken] — My kids beg for this. It’s crispy on the outside, tender inside, and stupidly easy.
- [INTERNAL LINK PLACEHOLDER: Simple Garlic Butter Salmon] — The fancy-looking dinner that takes 20 minutes and uses six ingredients.
That first time you cut into this chicken and see the creamy filling right where it’s supposed to be — no leaks, no dry edges — it’s such a good feeling. I want that for you, especially if you’ve tried stuffed chicken before and ended up disappointed.
If you try it, drop a comment below — I love hearing how it goes for your family. Did you add the red pepper flakes? Did your kids eat the spinach without noticing? Tell me everything.
📌 This spinach stuffed chicken recipe stays juicy and doesn’t leak — save it for your next Sunday meal prep when you need a protein-packed lunch that actually tastes good.
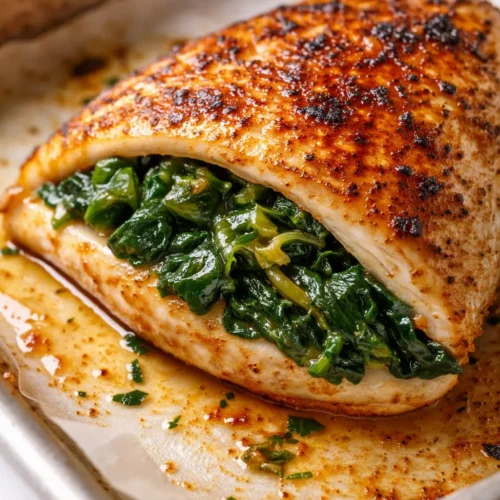
Spinach Stuffed Chicken That Doesn’t Dry Out or Leak
Equipment
- Oven-safe skillet or rimmed baking sheet
- Meat Mallet or Rolling Pin
- Toothpicks
- Small skillet
- Medium bowl
Ingredients
For the Filling
- 5 oz fresh spinach (about 4 handfuls)
- 4 oz cream cheese, softened
- 1/4 cup grated Parmesan cheese
- 2 cloves garlic, minced
- 1/2 tsp salt, divided
- 1/4 tsp black pepper
- 1/4 tsp red pepper flakes (optional)
For the Chicken
- 4 boneless, skinless chicken breasts (about 6 oz each)
- 1 tbsp olive oil
Instructions
- Wilt the spinach: Heat a small skillet over medium heat. Add the spinach in handfuls, stirring until it just wilts — about 90 seconds. Transfer to a cutting board, let cool slightly, then press with paper towels to remove excess moisture. Chop finely.
- Make the filling: In a medium bowl, combine softened cream cheese, Parmesan, minced garlic, chopped spinach, 1/4 teaspoon salt, 1/4 teaspoon pepper, and red pepper flakes if using. Stir until well combined. Taste and adjust seasoning.
- Pound the chicken: Place a chicken breast between two pieces of plastic wrap. Pound gently to about 1/2 inch thick, aiming for even thickness. Repeat with all breasts.
- Stuff and seal: Lay a pounded breast on your work surface. Place about 2 tablespoons of filling in the center — leave a 1-inch border. Fold chicken over like a book and secure edge with toothpicks, inserting them at an angle about 1/2 inch apart. Ensure no filling is visible. Repeat for all breasts.
- Sear the chicken: Heat olive oil in an oven-safe skillet over medium-high heat until shimmering. Place stuffed breasts seam-side down and cook without moving for 3 minutes, until golden brown. Flip and cook other side for 2 minutes.
- Finish in the oven: Transfer skillet to preheated 400°F oven. Bake for 15–18 minutes until internal temperature reaches 160°F at the thickest part (insert thermometer from the side).
- Rest before slicing: Remove from oven and let chicken rest on the pan for 5 minutes. Remove toothpicks before serving. Carryover cooking will bring temperature to 165°F.
Notes
Related posts:
 The Slow Cooker Cowboy Casserole That Saves Tired Weeknights (No Soggy Tots Allowed)
 Quick Lemon Ricotta Pasta for Busy Weeknights: Creamy, Bright, and on the Table in 20 Minutes
 Lemon Garlic Butter Baked Salmon in Foil That’s Ready in 25 Minutes — No Fuss, No Mess
 Lipton Onion Soup Meatloaf for Tuesday Nights: Moist, Savory, and the Only One You’ll Ever Need
 Kielbasa Sausage Cheesy Potato Casserole That Tastes Like Sunday Dinner — In Under an Hour
 Quinoa Chicken Sausage Bowls That Are Ready in 30 Minutes (And Actually Keep Well)