
I’ve tested a lot of ice cream bar recipes over the years, and the number one problem is always the same: that gorgeous, buttery shortcake crumb turns into a soggy, sad paste within hours of hitting the freezer. These bars are different. The crumb stays shatteringly crisp, the strawberry layer tastes like August at the farmers market, and the whole thing comes together without turning your kitchen into a melting disaster zone. My kids start asking if it’s ready about an hour after it goes in the freezer. Every single time.
The short version: A crunchy shortbread crust, a thick no-cook strawberry jam layer, creamy vanilla ice cream, and fresh whipped cream — all frozen into a perfect, sliceable bar.
I’ve made this recipe about fifteen times over the past two summers, tweaking the crust ratio and the strawberry thickness until it was exactly right. It’s the dessert I bring to every potluck, the one that stays put in the cooler without melting into a puddle, and the one I always come home with an empty pan for.
- Serves: 12 generous bars
- Hands-On Time: 30 min | Total Time: 6 hours 30 min (includes freezing)
- Difficulty: Easy — perfect for a weekend baking project
- Cost per serving: ~$2.50
- Calories: ~380 per serving
- Dietary Notes: Contains gluten, dairy, eggs. See variations for GF and DF swaps.
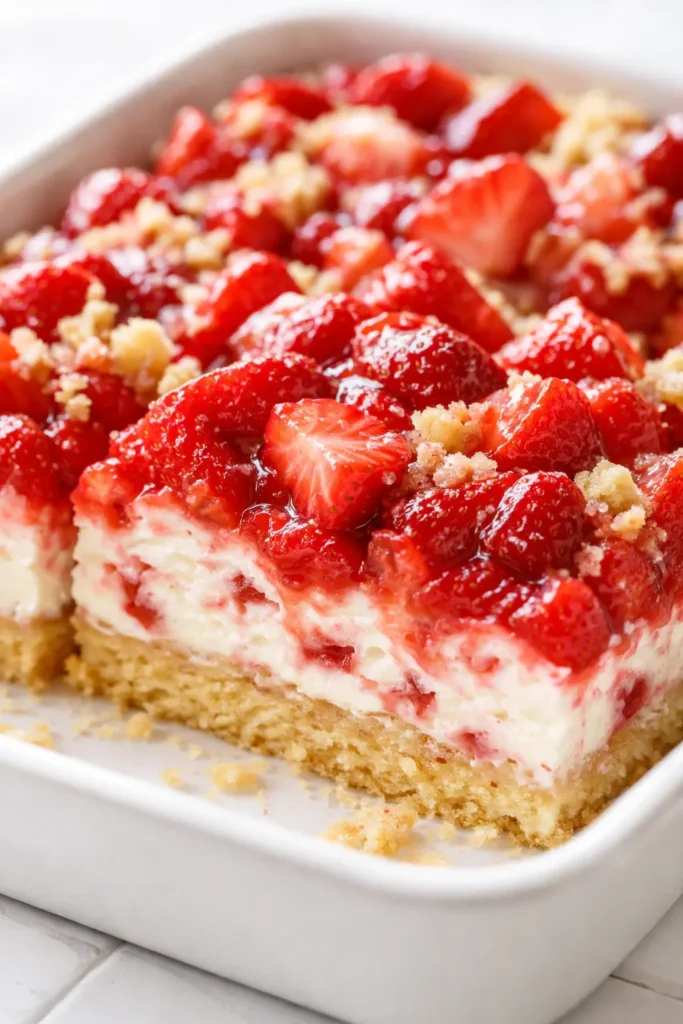
(Photo above: A clean slice of the ice cream bar on a rustic wooden board, showing the distinct layers — a golden, crumbly shortbread crust, a thick stripe of strawberry sauce studded with bright fruit, and a creamy vanilla ice cream center topped with a cloud of fresh whipped cream and a handful of ripe berries. Morning sun from the side, no fuss, just honest layers.)
The Secret to a Crunch That Lasts in the Freezer
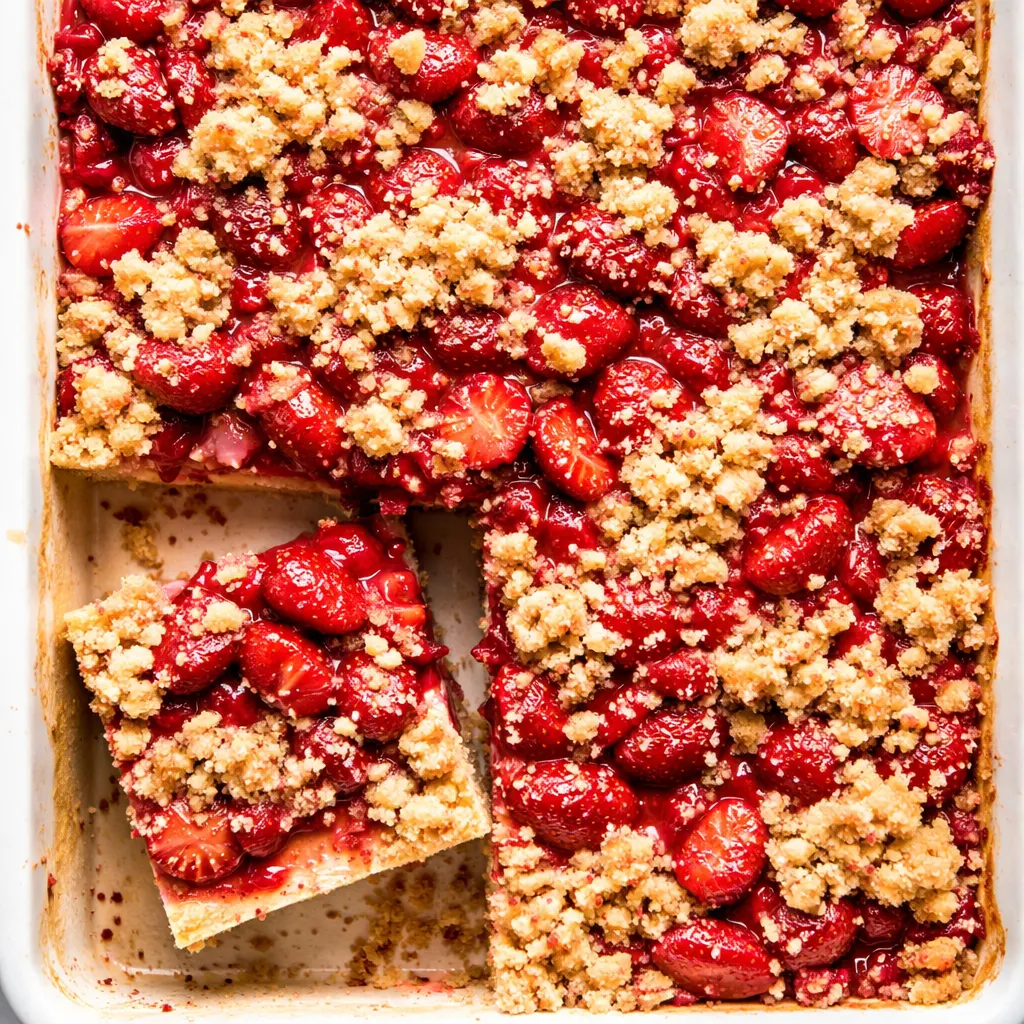
The crumb isn’t just butter and flour. There’s a specific ratio and a pre-bake trick that creates a barrier between the crust and the strawberry layer. It’s the difference between a cookie that stays crunchy when you dunk it in milk and one that dissolves into mush instantly. The egg yolk in the crust is what does the heavy lifting here — it firms up the shortbread enough that it resists the moisture from the berries and the ice cream.
The strawberry layer is a quick, macerated jam. Cooking the berries for too long releases all their water, which turns into icy shards in the freezer. By macerating them first, we pull out just enough liquid to thicken into a syrup without breaking the fruit down completely. The result is a bright, concentrated strawberry stripe that freezes soft, not icy.
The payoff is a bar you can pull out of the freezer, slice straight from the pan, and eat without it dripping down your wrist. It holds its shape perfectly, but melts into exactly what it should be in your mouth.
The Ingredients That Do the Heavy Lifting
- 1 ½ cups all-purpose flour: The structure of the crust. Nothing fancy here — just good old all-purpose.
My daughter once tried to substitute whole wheat pastry flour and the texture was too fragile. Stick with APF for this one. - ½ cup granulated sugar: For sweetness and that delicate crumbly texture.
- ½ tsp salt: Balances the sweet and keeps the crust from tasting flat.
- ½ cup cold unsalted butter, cubed: The fat that makes the crust tender. Cold is crucial — if it warms up, the crust will be tough.
I cube mine and pop it back in the fridge while I measure the flour. Every degree matters. - 1 large egg yolk: This is the secret weapon. The egg yolk gives the crumb structure so it stays crisp in the cold. Without it, the crust crumbles into dust when you try to slice the bars.
I learned this the hard way after a particularly heartbreaking pan of crumbly disaster. - 1 lb fresh strawberries, diced: Peak season berries make a noticeable difference, but good quality grocery store berries work too.
If your berries are shy on flavor, add a tiny splash of balsamic vinegar at the end. It wakes them right up. - ¼ cup granulated sugar (for the berries): Draws out the natural juices.
- 1 tbsp fresh lemon juice: Brightens the flavor and helps the berries hold their color.
- 1 tbsp cornstarch mixed with 1 tbsp water (slurry): The thickening agent that keeps the strawberry layer from freezing into a solid block of ice.
Don’t skip this. I know it looks like a little bit of nothing, but it’s doing big work. - 1.5 quarts (6 cups) good quality vanilla ice cream: The creamy center. Use one with real vanilla bean specks if you can find it.
Let it soften on the counter for 15-20 minutes before spreading. Microwaving it makes it grainy. - 1 cup heavy cream: For the topping. Fresh whipped cream freezes so much softer than Cool Whip.
My husband thinks I’m extra for whipping cream for a frozen dessert, but he’s always the first to notice when I skip it. - 2 tbsp powdered sugar + ½ tsp vanilla extract: For the whipped cream.
What to Pull Out Before You Start
- 9×13 inch baking dish — Glass or metal works fine.
- Parchment paper — The overhang trick is the only way to get these out cleanly.
- Food processor — For the crust. A pastry cutter works too, just takes a little longer.
- Saucepan — For the strawberry layer.
- Stand mixer or hand mixer — For the whipped cream.
- Sharp serrated knife — For the final slice. A warm knife makes the cleanest cuts.
Let’s Build These Bars (Layer by Layer)
This goes smoothly if you have everything ready before you start. Read through once, then dive in.
Preheat and Prep: Preheat your oven to 350°F. Line your 9×13 baking dish with parchment paper, leaving a 2-inch overhang on the two long sides. This is your lifeline for getting the block out cleanly.
- Make the Crust: In a food processor, pulse the flour, sugar, and salt until combined. Add the cold butter cubes and pulse until it looks like coarse meal with pea-sized bits of butter still visible. Add the egg yolk and pulse until the dough just starts to hold together when you squeeze it. It should feel like wet sand at the beach — the kind that holds a shape in your fist.
(📸 Photo tip: Press the mixture evenly into the bottom of the pan. Use the bottom of a flat measuring cup to get it perfectly uniform.) - Bake the Crust: Bake for 18-22 minutes, until lightly golden at the edges and it smells nutty and buttery. Let it cool completely in the pan on a wire rack. This is important — a warm crust will melt the ice cream later.
- Macerate the Berries: In a bowl, toss the diced strawberries with the sugar and lemon juice. Let them sit for 10 minutes, stirring once. You’ll see the juices pooling at the bottom of the bowl. That’s exactly what we want.
My kids love sneaking spoonfuls of the berries at this stage. I always make a tiny extra bowl just for them. - Cook the Strawberry Layer: Pour the berries and all their juices into a saucepan over medium heat. Bring to a gentle simmer, stirring occasionally. Once it’s simmering, stir in the cornstarch slurry and cook for 1-2 minutes, stirring constantly. The juices will thicken to a syrupy consistency that coats the back of a spoon. Remove from heat and let it cool to room temperature.
(📸 Photo tip: The mixture should look like loose jam — not watery, not stiff. Spread it evenly all the way to the edges of the crust.) - Layer the Strawberries: Spread the cooled strawberry mixture evenly over the cooled crust. Make sure it reaches the edges so every bar gets some berry.
- Soften and Spread the Ice Cream: Let the ice cream sit at room temperature for 15-20 minutes to soften. Transfer it to a large bowl and stir it with a rubber spatula until it’s a uniform, spreadable consistency. Scoop it over the strawberry layer and spread gently and evenly. Don’t press too hard or you’ll disturb the berry layer.
- Top with Whipped Cream: In a stand mixer or with a hand mixer, beat the heavy cream, powdered sugar, and vanilla until soft peaks form. Dollop it over the ice cream layer and spread it carefully to the edges. Smooth the top with an offset spatula.
- Freeze Firm: Cover the pan tightly with plastic wrap and freeze for at least 6 hours, or overnight. Overnight is better — the layers need time to set up together.
- Slice and Serve: Lift the block out of the pan using the parchment overhang. Place it on a cutting board. Dip a sharp serrated knife in hot water, wipe it dry, and slice cleanly through the layers. Wipe the knife between each cut for the prettiest slices.
My Sunday Prep Strategy (Make ‘Em and Forget ‘Em)
These are the ultimate summer make-ahead dessert. I make a pan on Sunday and we have dessert ready for the whole week. The texture actually improves after the first 24 hours as the layers settle together. I wrap the pan tightly in plastic wrap and then a layer of foil, and they keep perfectly for up to 3 weeks in the freezer.
- Fridge: Not recommended for the whole pan. They live in the freezer.
- Freezer: Wrapped tightly, they last 3 weeks. After that, the crust may start to lose its edge.
- Reheat/Serve: No reheating! Let the bar sit on the counter for 5 minutes before slicing if it’s straight from the deep freeze. This makes it sliceable without cracking.
Lessons from My Kitchen (I Made the Mistakes So You Don’t Have To)
- The Cornstarch Slurry is Non-Negotiable. Without it, the strawberry juices will seep into the crust and freeze into icy shards. It’s the only thing standing between you and a soggy bottom. Even if your berries look dry, use it. You’ll thank me later.
- Don’t Over-Bake the Crust. You want it golden at the edges and just barely set in the center. It will continue to firm up as it cools. An over-baked crust is crumbly and hard to slice.
- Sharp Knife, Hot Water. The cleanest slices come from a knife that’s been dipped in hot water and wiped dry between each cut. It glides through the layers instead of dragging them. I know it’s an extra step, but it’s the difference between a beautiful bar and a messy one.
- Taste the Berries First. If your strawberries are tart, add an extra tablespoon of sugar. If they’re deeply sweet, you can back off the sugar. Your palate is the guide. Marta never measured the sugar for her fruit — she tasted it and adjusted. That’s the right instinct.
Ways to Make This Bar Your Own
- Gluten-Free Shortbread: Swap the all-purpose flour for a 1-to-1 gluten-free baking blend. I’ve tested this with King Arthur’s Measure for Measure and the crust holds up beautifully. No one in my family noticed the difference.
- Dairy-Free Version: Use a high-quality dairy-free vanilla ice cream and a plant-based butter in the crust. Make sure your whipped topping is stabilized — I use a vegan cream cheese and powdered sugar whipped together. It freezes firmly and tastes rich.
- Peach Shortcake Bars: In peak peach season, swap the strawberries for diced peaches. Add a pinch of cardamom to the macerating sugar. It’s a completely different dessert and equally good.
- Fancy Guest Version: Crush a handful of freeze-dried strawberries into a powder and fold it into the whipped cream before topping. It turns the cream the most beautiful pale pink and adds an intense strawberry flavor that makes people ask what you did.
The Questions I Get About These Bars All the Time
Q: Why did my strawberry layer turn icy?
A: Missing the thickening step! The cornstarch slurry is crucial — it binds the water in the berries so they freeze smoothly instead of forming ice crystals. It’s a tiny step that makes a huge difference. Don’t skip it.
Q: Can I use frozen strawberries instead of fresh?
A: Yes! Thaw them completely, drain off the excess liquid, and proceed with the maceration and cooking step. They might be a little softer than fresh, but the flavor will still be wonderful.
Q: How long do these last in the freezer?
A: Properly wrapped in plastic and foil, they’re perfect for up to 3 weeks. After that, the crust may start to soften a little. I’ve never had a pan last longer than that in my house.
Q: What’s the best way to soften ice cream for spreading?
A: Don’t use the microwave! Let it sit in the fridge for 20-30 minutes, then stir it in a chilled bowl. It stays creamy without turning into soup. If you microwave it, it gets grainy and weepy.
Q: What do you serve with these bars?
A: Honestly, they’re perfect on their own. But if I’m feeling extra, I’ll drizzle a little warm chocolate sauce over the top or serve them with a pile of fresh berries on the side. My kids love them with a dollop of extra whipped cream, because of course they do.
More Recipes My Family Makes on Repeat
If you liked these ice cream bars, here are a few others that get the same reaction at our table:
- No-Churn Peach Ice Cream — Three ingredients, no machine, tastes like pure summer in a bowl.
- The Best Fudgy Brownies — The chewy, crackly top kind. Perfect for crumbling over ice cream.
- Easy Lemon Blueberry Trifle — Another make-ahead stunner that feeds a crowd without any stress.
The first time I pulled a perfectly sliced bar out of the freezer, I actually texted my sister a photo before I’d even tasted it. That’s the moment I knew the texture was right. I hope that’s the moment you have too — the clean slice, the faint crack of the crust, the first bite that tastes like a perfect summer afternoon saved for later.
If you make these, tag me in your photos or drop a comment below. I love seeing them in your kitchens.
📌 Save this strawberry shortcake ice cream bar recipe for your next summer party — it’s the make-ahead frozen dessert that actually stays crisp and feeds a crowd without the melting mess.
Strawberry Shortcake Ice Cream Bars
Equipment
- 9×13-inch baking dish
- Parchment Paper
- Food processor
- Saucepan
- Stand mixer or hand mixer
- Sharp Serrated Knife
- Offset Spatula
Ingredients
Shortbread Crust
- 1 ½ cups all-purpose flour
- ½ cup granulated sugar
- ½ tsp salt
- ½ cup cold unsalted butter, cubed
- 1 large egg yolk
Strawberry Layer
- 1 lb fresh strawberries, diced
- ¼ cup granulated sugar
- 1 tbsp fresh lemon juice
- 1 tbsp cornstarch mixed with 1 tbsp water (slurry)
Ice Cream Center
- 1.5 quarts (6 cups) good quality vanilla ice cream, softened
Whipped Cream Topping
- 1 cup heavy cream
- 2 tbsp powdered sugar
- ½ tsp vanilla extract
Instructions
- Preheat oven to 350°F. Line a 9×13 baking dish with parchment paper, leaving a 2-inch overhang on the long sides. This is your lifeline for getting the block out cleanly.
- Make the Crust: In a food processor, pulse the flour, sugar, and salt until combined. Add the cold butter cubes and pulse until it looks like coarse meal with pea-sized bits of butter still visible. Add the egg yolk and pulse until the dough just starts to hold together when you squeeze it. Press the mixture evenly into the bottom of the pan. Use the bottom of a flat measuring cup to get it perfectly uniform.
- Bake the Crust: Bake for 18-22 minutes, until lightly golden at the edges and it smells nutty and buttery. Let it cool completely in the pan on a wire rack. A warm crust will melt the ice cream later.
- Macerate the Berries: In a bowl, toss the diced strawberries with the sugar and lemon juice. Let them sit for 10 minutes, stirring once. You’ll see the juices pooling at the bottom of the bowl. That’s exactly what we want.
- Cook the Strawberry Layer: Pour the berries and all their juices into a saucepan over medium heat. Bring to a gentle simmer, stirring occasionally. Once it’s simmering, stir in the cornstarch slurry and cook for 1-2 minutes, stirring constantly. The juices will thicken to a syrupy consistency that coats the back of a spoon. Remove from heat and let it cool to room temperature.
- Layer the Strawberries: Spread the cooled strawberry mixture evenly over the cooled crust. Make sure it reaches the edges so every bar gets some berry.
- Soften and Spread the Ice Cream: Let the ice cream sit at room temperature for 15-20 minutes to soften. Transfer it to a large bowl and stir it with a rubber spatula until it’s a uniform, spreadable consistency. Scoop it over the strawberry layer and spread gently and evenly. Don’t press too hard or you’ll disturb the berry layer.
- Top with Whipped Cream: In a stand mixer or with a hand mixer, beat the heavy cream, powdered sugar, and vanilla until soft peaks form. Dollop it over the ice cream layer and spread it carefully to the edges. Smooth the top with an offset spatula.
- Freeze Firm: Cover the pan tightly with plastic wrap and freeze for at least 6 hours, or overnight. Overnight is better — the layers need time to set up together.
- Slice and Serve: Lift the block out of the pan using the parchment overhang. Place it on a cutting board. Dip a sharp serrated knife in hot water, wipe it dry, and slice cleanly through the layers. Wipe the knife between each cut for the prettiest slices. Let the bar sit on the counter for 5 minutes if slicing straight from the deep freeze.
Notes
Related posts:
 High-Protein Overnight Oats That Actually Taste Like Breakfast (Not a Chalky Disaster)
 The Slow Cooker Cowboy Casserole That Saves Tired Weeknights (No Soggy Tots Allowed)
 Quick Lemon Ricotta Pasta for Busy Weeknights: Creamy, Bright, and on the Table in 20 Minutes
 Lemon Garlic Butter Baked Salmon in Foil That’s Ready in 25 Minutes — No Fuss, No Mess
 Lipton Onion Soup Meatloaf for Tuesday Nights: Moist, Savory, and the Only One You’ll Ever Need
 Moist Chocolate Zucchini Bread That Doesn’t Turn Out Rubbery — Finally