
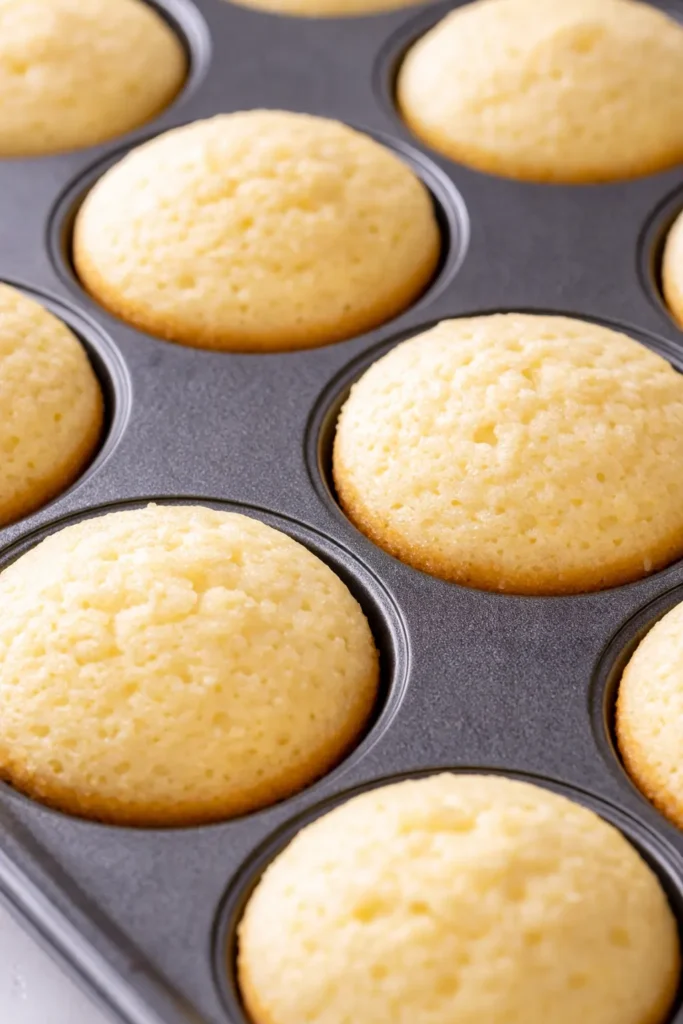
The first time I tested these mini lemon cakes, it was early April and the lavender in my front garden was just beginning to show its first purple buds. Marta’s old recipe card for lemon cake — the one she made every Easter — was propped up on the counter, and I had a bag of dried lavender from the farmer’s market sitting next to it. She never wrote down a lavender version, but she always said lemon and lavender were meant for each other. The sharpness cuts the perfumed sweetness, and the brightness keeps it from feeling heavy.
She was right, of course. The first batch was good. The fifth batch was the one I sent to my sister in a tin, and she called me from the parking lot of her daughter’s soccer practice to tell me I’d finally gotten it right. These little cakes are the result of that refinement — tender, bright, with a glaze that sets up glossy and smells like a garden in late spring.
The short version: These mini cakes come together in 40 minutes flat and taste like the best part of spring in a single, perfect bite.
I’ve made this recipe at least twice every spring for the last five years, and it never fails to surprise me how something so simple can feel so special.
- Serves: 6 mini cakes (using a 6-cavity mini bundt pan)
- Hands-On Time: 20 min | Total Time: 40 min
- Difficulty: Easy — a simple creaming method, perfect for a weekend project
- Cost per serving: ~$1.50
- Calories: ~310 per mini cake
- Dietary Notes: Vegetarian. Easily adaptable for gluten-free (see variations).
(Photo above: Overhead shot of the mini lemon cakes arranged on a vintage ceramic cake stand. The lavender glaze is thick and glossy, catching the morning light from the left. A few fresh lavender sprigs and a half lemon are scattered casually around the base. The crumbs on the cutting board tell you exactly how tender these are.)
Why These Mini Cakes Are So Tender (It’s the Little Things)
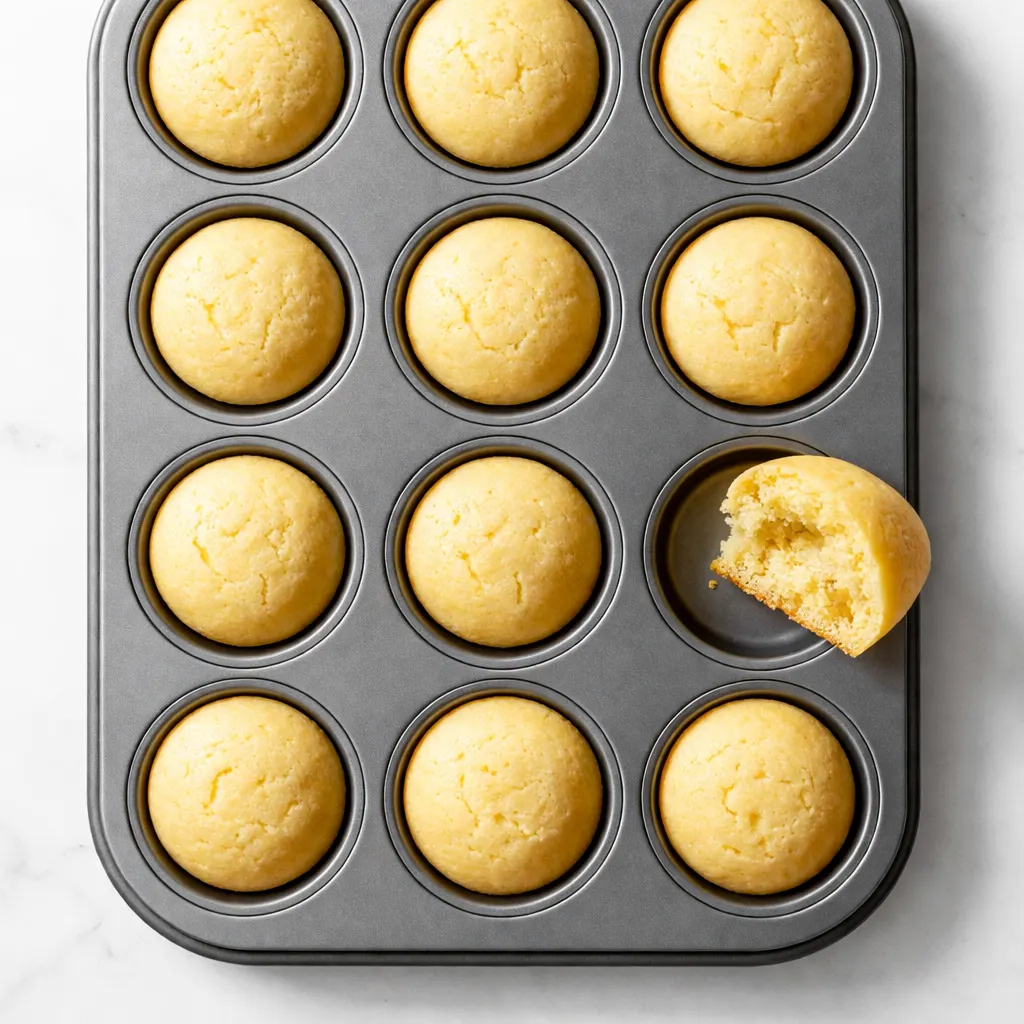
The secret to these cakes isn’t some complicated technique — it’s two small choices that make a big difference between a good cake and one you’ll want to make every single spring.
First, I soak the dried lavender. If you just stir dried lavender into the batter, it stays dry and brittle, and every so often you get a mouthful that tastes like potpourri. Not good. By warming it gently in the buttermilk before mixing, the lavender softens and its oils release into the liquid. The flavor spreads evenly through the whole batter, so every bite is balanced and floral without being overwhelming. My daughter Nora once told me it tastes like “a garden in cake form,” and that’s exactly what I was going for.
Second, I cream the butter and sugar for a full 3 minutes. Not 2. Not 90 seconds. Three minutes by the clock or by feel — until the mixture is pale, fluffy, and looks like soft sand. Marta used a wooden spoon and her own arm strength to get there. I use a mixer now, but the principle is the same: you’re creating a network of air bubbles that will expand in the oven. That’s the structure of a light, tender cake. If you skip this step, you’ll end up with something dense and heavy, and you’ll wonder where you went wrong.
The result? A cake that’s light and tender, with a fine, even crumb. The glaze sets up firm enough to hold its shape but soft enough to crack beautifully when you cut into it. My daughter, who is picky about desserts, asked me to mail her a batch to Savannah last spring. That’s the test I use for every recipe now.
Ingredients Worth Talking About
- 1 ½ cups (180g) all-purpose flour: Spoon and level it — don’t scoop straight from the bag, or you’ll end up with dense cakes. I use unbleached all-purpose here. The texture is just slightly sturdier than bleached, and I prefer it for mini cakes.
- 1 cup (200g) granulated sugar: The fine crystals cream beautifully into the butter. My kids love the smell of lemon zest grinding into sugar — I let them help with this step because it’s one of those kitchen smells that sticks with you.
- ½ cup (113g) unsalted butter, softened: Room temperature is key here. If it’s too cold, it won’t cream properly. If it’s melted, you’ll get greasy cakes. I leave mine out for about an hour before I start.
- 2 large eggs: Also room temperature. Cold eggs can seize the batter. Quick tip: if you forget to take them out, put them in a bowl of warm water for 5 minutes.
- ½ cup (120ml) buttermilk: The acidity tenderizes the gluten and makes the crumb incredibly soft. No buttermilk? Add 1 tbsp lemon juice to regular milk and let it sit 5 minutes.
- 2 tbsp fresh lemon zest (from about 2 large lemons): The most important ingredient. Make sure they’re unwaxed. Marta always said the zest is where the soul of a lemon lives. She wasn’t wrong.
- 1 tbsp dried lavender (culinary grade): A little goes a long way. Don’t use the lavender from your garden unless you know it’s pesticide-free. I buy mine from a local herb farm in Asheville, but any culinary grade works.
What You’ll Need (It’s Not Much)
- A 6-cavity mini bundt pan (or a standard 12-cup muffin tin): The mini bundt pan gives you those pretty ridges that hold the glaze beautifully. A muffin tin works perfectly too — just adjust the baking time down by a few minutes.
- Electric hand mixer or stand mixer: You can do this by hand with a wooden spoon, but it takes a solid 5 minutes of elbow grease.
- Microplane or fine grater: For zesting the lemons. A box grater works, but a microplane gives you that fine, fluffy zest that melts right into the sugar.
- Saucepan: Small one for warming the buttermilk and lavender.
Let’s Make These Mini Lemon Cakes
I promise, this comes together faster than you think. Read through once before you start — it helps to know where you’re going.
Prep and Preheat: Preheat your oven to 350°F. Butter and flour your mini bundt pan thoroughly — I use a pastry brush to get into every crevice. (📸 Photo tip: A well-prepped pan is the difference between cakes that release perfectly and cakes that crumble apart. You should see flour in every groove.)
- Infuse the lavender: In a small saucepan, warm the buttermilk and dried lavender over low heat for 3-4 minutes. Do not boil — you just want it warm enough to release the lavender oils. Take it off the heat and let it steep while you prepare the rest. The kitchen will smell like a garden at this point.
- Zest and sugar: In a small bowl, rub the lemon zest into the granulated sugar with your fingertips until the sugar is fragrant and slightly damp. This takes about a minute. (📸 Photo tip: The sugar should look like wet sand and smell intensely of lemon.)
- Cream the butter and sugar: In a large bowl, beat the softened butter and lemon sugar together on medium-high speed for a full 3 minutes, until pale, light, and fluffy. Scrape down the sides once halfway through. It should look like soft, fluffy sand.
- Add the eggs: Add the eggs one at a time, beating well after each addition. The mixture should look smooth and slightly glossy. If it looks curdled, don’t panic — it’ll come together when you add the flour.
- Alternate dry and wet: In a separate bowl, whisk the flour, baking powder, baking soda, and salt. With the mixer on low, add one-third of the flour mixture, then half of the buttermilk (strain out the lavender bits first — or leave them in if you prefer a stronger floral flavor). Repeat, ending with the flour. Mix just until combined — a few streaks of flour are better than overmixing.
- Fill the pan: Divide the batter evenly among the 6 cavities. They should be about ⅔ full. Tap the pan gently on the counter to release any air bubbles. The batter should be thick and smell intensely of lemon and lavender.
- Bake: Bake for 18-22 minutes, until the cakes are golden around the edges and a toothpick inserted in the center comes out clean. (Sensory cue: You’ll smell the lemon and toasted sugar before the timer goes off — that’s your signal to start checking.)
- Cool: Let the cakes cool in the pan for 10 minutes, then invert them onto a wire rack to cool completely. If they stick, run a thin knife gently around the edges. The sound of them releasing from the pan is deeply satisfying.
- Make the glaze: Whisk together 1 cup powdered sugar, 2 tbsp fresh lemon juice, and 1 tsp dried lavender (crushed lightly between your fingers). Add more juice or sugar to reach your desired consistency. The glaze should fall in a thick ribbon off the whisk. Drizzle over the cooled cakes.
- Set and serve: Let the glaze set for about 15 minutes before serving. The cakes are best the day they’re made, but they keep beautifully for 2-3 days in an airtight container.
Make-Ahead Tips (For a Stress-Free Morning)
I make these often for spring brunches, and I’ve learned a few tricks to get ahead. The cakes themselves are actually better the next day — the flavors mellow and deepen overnight.
- Fridge: Store unglazed cakes in an airtight container for up to 3 days. Glaze just before serving.
- Freezer: Yes! Freeze unglazed cakes for up to 3 months. Wrap individually in plastic wrap, then foil. Thaw at room temperature, then glaze.
- Reheat: The microwave works in a pinch (10-15 seconds), but I prefer them at room temperature. The texture is tender and moist without being warm.
What I’ve Learned After 8 Springs of Making These
- Don’t overbake: Mini cakes dry out fast. Start checking at 18 minutes. The edges should be golden and pulling away from the pan, and the top should spring back when you press it gently. A toothpick should come out with a few moist crumbs, not clean and dry.
- Zest carefully: Only the yellow part — the white pith is bitter and will ruin the delicate flavor. I run my microplane down the lemon in long, single strokes, turning the fruit as I go.
- Use fresh lemon juice for the glaze: Bottled juice has a flat, metallic taste that will ruin the bright flavor you worked so hard for. It’s worth squeezing a fresh lemon.
- Strain the lavender: If you’re serving these to company or kids who might balk at “bits” in their cake, strain the dried lavender out of the buttermilk before adding it to the batter. The flavor will still be there, just without the texture. I leave it in for myself because I like the little specks.
- Glaze consistency: The glaze should be thick enough to coat the back of a spoon but still runny enough to drip down the sides of the cake. If it’s too thick, add a few drops of lemon juice. Too thin, add a tablespoon of powdered sugar. Even if you mess this part up a little, it’ll still taste good — I’ve done it.
Make It Yours (A Few Easy Swaps)
- Gluten-Free: Use a 1:1 gluten-free baking flour blend. I’ve tested this with Bob’s Red Mill 1:1 and it works beautifully. Add ¼ tsp xanthan gum if your blend doesn’t include it.
- Dairy-Free: Substitute the butter with a high-quality vegan butter (I like Miyoko’s) and the buttermilk with a dairy-free milk + 1 tbsp lemon juice. The texture is slightly less tender but still very good.
- Lemon-Rosemary: Swap the dried lavender for 1 tsp of finely chopped fresh rosemary. Steep it in the buttermilk the same way. This is the version I make for fall — it feels less floral and more herbaceous.
- Lemon-Poppy Seed: Skip the lavender entirely. Add 2 tbsp poppy seeds to the dry ingredients. It’s a classic for a reason, and my kids always request this version for their birthdays.
Questions I Get Asked Every Spring
Q: Why did my cakes stick to the pan?
A: Ugh, I’ve been there. It usually means the pan wasn’t greased thoroughly enough — especially if you’re using a mini bundt pan with all those ridges. Next time, use a pastry brush to get butter into every groove, then dust with flour and tap out the excess. Also, make sure you let them cool in the pan for a full 10 minutes before inverting.
Q: Can I use fresh lavender instead of dried?
A: You can, but dried lavender is much more concentrated and consistent. Fresh lavender can be watery and less potent. If you want to use fresh, double the amount and steep it longer. Just be sure it’s culinary grade and hasn’t been treated with pesticides.
Q: How long do these keep? Can I freeze them?
A: Glazed cakes are best within 2 days. Un-glazed, they freeze beautifully for up to 3 months. I like to freeze them individually wrapped, then pull one out when I want a little treat with my afternoon tea. Glaze it fresh — it only takes a minute.
Q: What do you serve with these mini cakes?
A: I love them with a cup of Earl Grey or chamomile tea. For a spring brunch, I set them out alongside fresh berries and a dollop of clotted cream or creme fraiche. The tartness of the berries plays beautifully off the sweet floral glaze. My kids like them with a glass of cold milk — they say it’s the perfect after-school snack.
More Recipes From My Kitchen
If you loved these mini lemon cakes, here are a few other spring favorites that get the same reaction at my table:
- Classic Irish Soda Bread With Currants — The perfect companion for a spring tea party. Crusty, tender, and studded with sweet currants.
- Brown Butter Peach Galette — A rustic, free-form tart that tastes like summer. Easy enough for a weeknight but impressive enough for guests.
- Simple Strawberry Rhubarb Jam — No pectin required. This bright, tangy jam is what I make every May when the rhubarb comes in.
I hope these mini lemon cakes become a spring tradition in your kitchen the way they have in mine. There’s something about the combination of bright lemon and soft floral lavender that just feels right this time of year — a little moment of sunshine in every bite.
If you make them, tag me on Pinterest or Instagram — I absolutely love seeing your versions. And if you have questions, drop them in the comments below. I read every single one.
📌 Save this mini lemon cakes with lavender glaze recipe for your next spring brunch or tea party — it’s the bright, floral dessert that everyone will ask you to make again.
Mini Lemon Cakes With Lavender Glaze
Equipment
- 6-cavity mini bundt pan
- Electric hand mixer or stand mixer
- Microplane or Fine Grater
- Small saucepan
Ingredients
Cake
- 1 1/2 cups all-purpose flour (180g)
- 1 cup granulated sugar (200g)
- 1/2 cup unsalted butter, softened (113g)
- 2 large eggs, room temperature
- 1/2 cup buttermilk (120ml)
- 2 tbsp fresh lemon zest
- 1 tbsp dried lavender (culinary grade)
- 1 1/2 tsp baking powder
- 1/2 tsp baking soda
- 1/4 tsp salt
Glaze
- 1 cup powdered sugar
- 2 tbsp fresh lemon juice
- 1 tsp dried lavender, crushed
Instructions
- Preheat oven to 350°F. Butter and flour a 6-cavity mini bundt pan thoroughly, making sure to get into all crevices.
- In a small saucepan, warm the buttermilk and 1 tbsp dried lavender over low heat for 3-4 minutes. Do not boil. Remove from heat and let steep while you prepare the rest.
- In a small bowl, rub the lemon zest into the granulated sugar with your fingertips until fragrant and slightly damp, about 1 minute.
- In a large bowl, beat the softened butter and lemon sugar together on medium-high speed for 3 minutes, until pale, light, and fluffy. Scrape down sides once.
- Add the eggs one at a time, beating well after each addition until smooth and glossy.
- In a separate bowl, whisk together flour, baking powder, baking soda, and salt. With mixer on low, add one-third of the flour mixture, then half of the buttermilk (strain out lavender if desired). Repeat, ending with flour. Mix just until combined.
- Divide batter evenly among the 6 pan cavities, filling about 2/3 full. Tap pan gently on counter to release air bubbles.
- Bake for 18-22 minutes, until golden around edges and a toothpick inserted in center comes out clean. Cool in pan for 10 minutes, then invert onto a wire rack to cool completely.
- For the glaze: whisk together powdered sugar, lemon juice, and crushed dried lavender until smooth and thick. Adjust consistency with more juice or sugar if needed.
- Drizzle glaze over cooled cakes. Let set for about 15 minutes before serving. Best served the same day, but keep in an airtight container for up to 2 days.
Notes
Related posts:
 High-Protein Overnight Oats That Actually Taste Like Breakfast (Not a Chalky Disaster)
 Mini Quiche Recipe: The Store-Bought Crust Version That Tastes Like You Made It From Scratch
 The Slow Cooker Cowboy Casserole That Saves Tired Weeknights (No Soggy Tots Allowed)
 Quick Lemon Ricotta Pasta for Busy Weeknights: Creamy, Bright, and on the Table in 20 Minutes
 Lemon Garlic Butter Baked Salmon in Foil That’s Ready in 25 Minutes — No Fuss, No Mess
 Lipton Onion Soup Meatloaf for Tuesday Nights: Moist, Savory, and the Only One You’ll Ever Need