
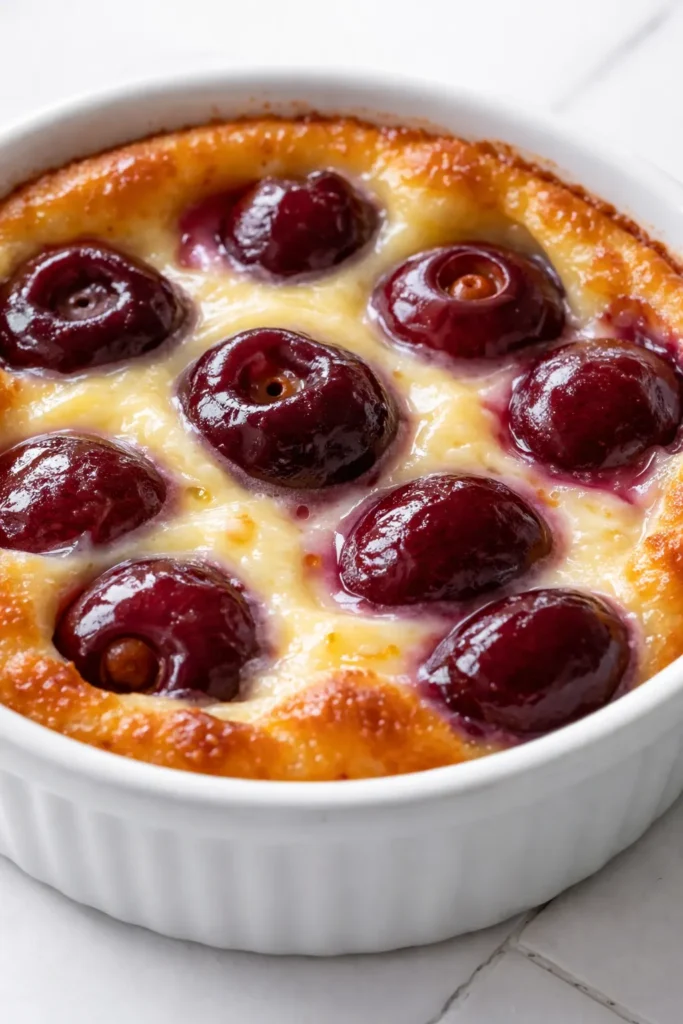
There’s a moment right before this clafoutis is done — the edges have pulled away from the dish, the center still has the faintest tremor, and the whole kitchen smells like toasted almonds and caramelized butter. That’s the moment I know it’s going to be perfect. Every single time.
The short version: A classic French custard thick with cherries, baked until golden and just-set. It’s the dessert that looks impressive but takes about 10 minutes to prep.
I’ve been making this version since I was tall enough to reach Marta’s counter, and it’s never once let me down. My daughter Nora, when she was little, used to pick the cherries out of the dish before I could even serve it. I didn’t blame her — they get jammy and intense in the oven.
- Serves: 6 as dessert
- Hands-On Time: 15 min | Total Time: 55 min
- Difficulty: Easy enough for a Tuesday, fancy enough for company
- Cost per serving: ~$2.50
- Calories: ~240 per serving
- Dietary Notes: Naturally gluten-free if using almond flour (see variations)
(Photo above: A rustic ceramic dish filled with a golden, puffed custard studded with dark cherries, sitting on a worn wooden table. A dusting of powdered sugar sits on top. Fork resting on the edge. Afternoon light filtering through the window.)
The Trick to a Silky Custard (Not an Eggy One)
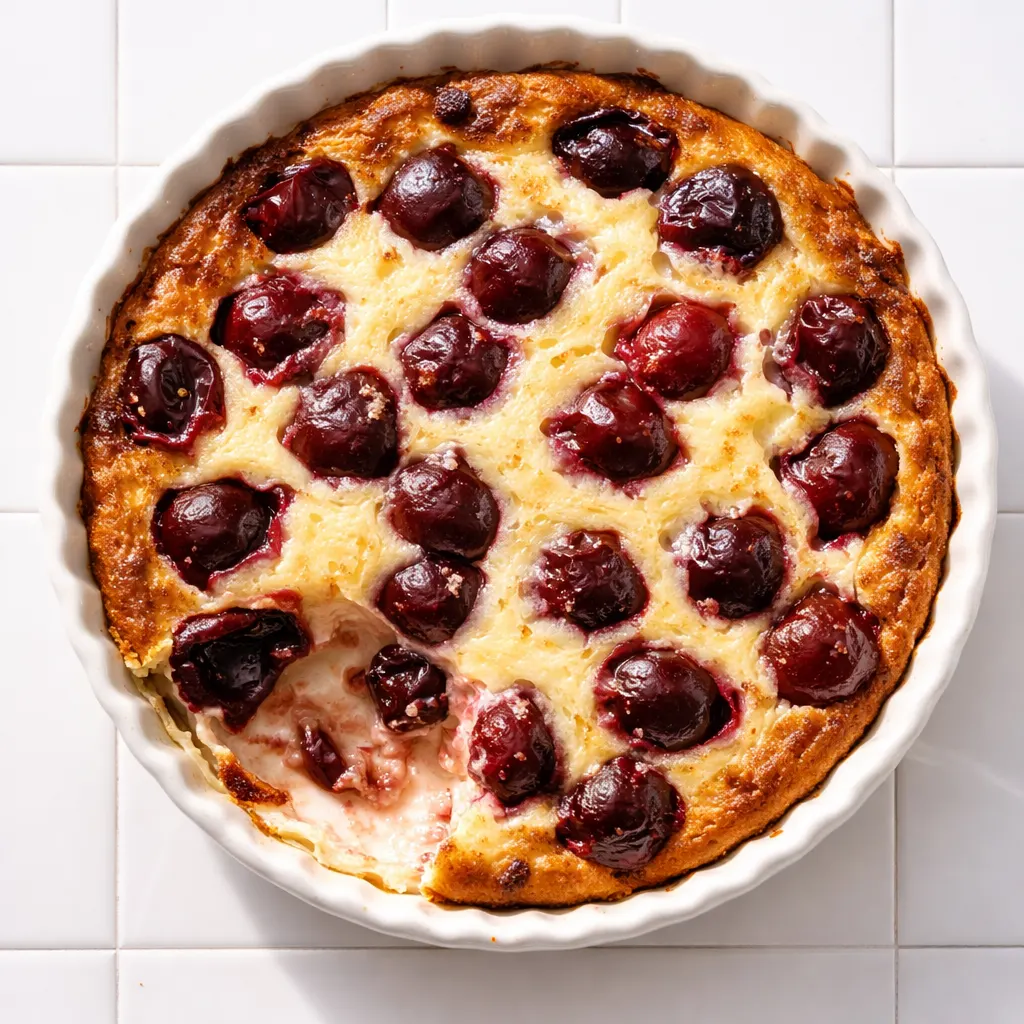
The biggest compliment you’ll get on this clafoutis is when someone asks if you spent all afternoon on it. The real answer takes about ten minutes. The trick is in the ratio of liquid to egg and how gently you treat the batter. Over-mix it or over-bake it and you’ll get a tough, slightly rubbery custard that tastes more like a scrambled egg than a dessert.
Mix it until it just comes together — a quick blitz in the blender, no more — and pull it from the oven while the center still has that soft wobble. Carryover cooking finishes the job. That’s what gives you the texture that feels almost like a creme brulee without the fuss of a water bath. It’s meant to be humble. Don’t overthink it.
Ingredients Worth Talking About
- 1 cup fresh or frozen cherries, pitted (or leave half the pits in for a subtle almond perfume): If using frozen, don’t thaw them first — toss them in straight from the freezer. I usually pit three-quarters of mine and leave the rest whole. Marta swore the pits gave the clafoutis its soul. Just warn your eaters.
- 4 large eggs, room temperature: Cold eggs don’t emulsify as well, and you’ll end up with a slightly grainy custard. Let them sit out while you preheat the oven.
- 1/2 cup granulated sugar: It’s not overly sweet — the cherries balance it perfectly.
- 1/2 cup all-purpose flour: A scant half cup. Spoon it into the measuring cup, don’t scoop, or you’ll have too much.
- 1/4 teaspoon salt: A pinch of salt in every sweet recipe. It makes everything else taste brighter.
- 1 1/4 cups whole milk: Anything less will taste thin and watery.
- 1/4 cup heavy cream: This is the secret to the silky texture. Don’t skip it.
- 1 teaspoon vanilla extract: Pure, not imitation. It makes a difference here.
- 1/4 teaspoon almond extract: Just a tiny drop. It’s strong and can overpower everything if you’re heavy-handed.
- 2 tablespoons unsalted butter, melted: For the dish. This gives the edges that glorious golden crust.
- Powdered sugar, for dusting: Right before serving. Not earlier.
Tools You’ll Actually Need
- A 10-inch cast iron skillet or a 1.5-quart ceramic baking dish. The size matters — too wide and it bakes flat like a crepe, too deep and the center is eggy and thick.
- A blender or a large mixing bowl with a whisk. The blender makes it foolproof.
- A fine-mesh sieve if you want to guarantee a silky texture. It catches any un-mixed bits of flour.
Here’s How I Do It — Start to Finish
Preheat your oven and pick through your cherries. This comes together faster than most cakes, so read through the steps once before you start.
Prep and preheat: Preheat your oven to 375°F. Place the butter in your baking dish or skillet and put it in the oven to melt while it preheats.
- Make the batter: While the dish is heating, combine the eggs, sugar, flour, salt, milk, cream, vanilla, and almond extract in a blender. Blitz for about 10 seconds until smooth. Scrape the sides if needed, then blitz once more. The batter should be thin, the consistency of heavy cream. (📸 Photo tip: You’re looking for a pale, smooth liquid with no lumps — it should pour easily off a spoon.)
- Fill the dish: Carefully remove the hot dish from the oven. Swirl the melted butter around to coat the bottom and sides. Pour the batter directly into the dish. Arrange the cherries evenly over the top. Don’t push them in — they’ll sink on their own as it bakes. (📸 Photo tip: It looks sparse at this point, but the cherries will distribute themselves. trust that.)
- Bake until golden and just set: Bake for 30-35 minutes. The edges should be deeply golden and pulling away from the pan. The center should jiggle like Jell-O when you gently shake the dish — not slosh like soup. If it still looks wet in the middle, give it five more minutes and check again.
- Cool and rest: Place the dish on a wire rack and let it cool for at least 15 minutes. The custard continues to set as it rests, and the flavor blooms as it comes down from oven-hot. Warm is glorious. Room temperature is also glorious.
- Dust and serve: Right before serving, dust the top generously with powdered sugar. I’ve learned the hard way — if you do it too early, it sinks in and disappears.
How I Meal Prep These for the Week
I make a double batch on Sunday and we’re set for weeknight desserts or afternoon snacks. It’s one of those rare things that tastes even better on day two, when the cherry flavor has fully soaked into the custard.
- Fridge: Cover tightly with plastic wrap or transfer to an airtight container. Keeps for up to 3 days. The texture firms up beautifully, almost like a custard tart filling.
- Freezer: Not recommended. The custard weeps when thawed and the texture gets watery.
- Reheat: Individual slices in a 300°F oven for 8-10 minutes. The microwave makes it rubbery — I know it’s tempting, but don’t do it.
Things I Wish I’d Known the First Time
- Don’t over-bake it: I cannot say this enough. That center wobble is your friend. Carryover cooking will finish the custard. Over-baked clafoutis deflates, cracks, and turns tough. It’s still edible, but it’s not the same.
- Pitted or not? Pick your adventure: If you leave the pits in, warn your eaters. It’s the classic French way and it adds a subtle almond note, but it’s a choking hazard. I usually pit three-quarters and leave the rest whole. Best of both worlds.
- Dust with powdered sugar right before serving: This one is easy to forget but completely worth remembering. Freshly dusted clafoutis looks ethereal. Dusted clafoutis that sat for an hour looks like a powdered donut that’s been through a rainstorm.
- Use the right dish: I’ve tried this in a too-large tart pan and a too-small ramekin. The tart pan version was flat and dry. The ramekin version was dense and eggy. A 10-inch skillet or a 1.5-quart baking dish is the sweet spot.
Swaps That Actually Work
- Dairy-Free: Use full-fat oat milk or canned coconut milk (the drinking kind, not the thick can) and a neutral oil like avocado oil instead of butter. It’s still silky and delicious.
- Gluten-Free: Replace the all-purpose flour with an equal weight of super-fine almond flour or a 1-to-1 gluten-free blend. The texture will be slightly more delicate and tender, but still wonderful.
- Other Fruits: This works beautifully with apricots, plums, pears, or even blueberries in the summer. If the fruit is very wet (like peaches), toss it with a teaspoon of flour first so it doesn’t waterlog the custard. My kids go crazy for the pear version in the fall.
- Savory Version: This is a secret weapon. Omit the sugar, vanilla, and almond extract. Add 1/2 teaspoon salt and some black pepper. Fold in 1 cup of shredded Gruyere and a handful of caramelized onions. Bake the same way. It’s an incredible light supper with a green salad.
Questions I Get About This Recipe All the Time
Q: Why did my clafoutis turn out rubbery?
A: Ugh, I’ve been there. It usually means the batter was over-mixed or the dish was over-baked. Next time, mix until just smooth in the blender (10 seconds max) and pull it out of the oven while the center still trembles. You’ve got this next time.
Q: Can I make this with frozen cherries?
A: Yes! In fact, I do it all winter long. Do not thaw them first. Toss them frozen into the batter. You might need to add 5 minutes to the baking time, so keep an eye on the center wobble.
Q: How do I know when it’s done?
A: The classic visual cue: the edges are set and deeply golden, pulling away from the pan. The center is slightly jiggly — it should wobble as one unit, not slosh like soup. I give it a gentle shake and watch the center.
Q: What do you serve with clafoutis?
A: A dollop of creme fraiche or barely-sweetened whipped cream cuts the richness perfectly. In the summer, a handful of fresh berries on the side. But honestly, it’s perfect on its own straight from the dish with just a fork.
More Recipes My Family Makes on Repeat
If you liked this one, here are a few others that get the same reaction at our table:
- My Grandmother’s Simple Apple Cake — The one that disappears before it’s fully cooled.
- The Custard Tart That Doesn’t Require a Pastry Chef — For when you want something elegant without the fuss.
- Brown Butter Peach Galette for Sunday Afternoons — Flaky, jammy, zero stress.
This is the dessert that proves you don’t need a pastry degree to make something beautiful. A few cherries, a simple batter, a hot oven — and you’ve got a dish that feels like a secret French bistro found its way into your kitchen. Make it for the ones you love. They’ll ask for it again.
If you try this cherry clafoutis, I’d love to hear how it turns out. Drop a comment below or tag me on Pinterest — it makes my day to see yours.
📌 Classic cherry clafoutis recipe with a perfectly silky custard — save this for your next summer dinner party or lazy Sunday baking session.
The Classic Cherry Clafoutis That Bakes Up Silky and Golden Every Time
Equipment
- 10-inch Cast Iron Skillet or 1.5-quart Baking Dish
- Blender or Mixing Bowl and Whisk
- Fine-mesh Sieve
Ingredients
Cherries
- 1 cup fresh or frozen cherries, pitted (or leave half the pits in for a subtle almond perfume)
Custard Batter
- 4 large eggs, room temperature
- ½ cup granulated sugar
- ½ cup all-purpose flour
- ¼ teaspoon salt
- 1 ¼ cups whole milk
- ¼ cup heavy cream
- 1 teaspoon vanilla extract
- ¼ teaspoon almond extract
For the Dish and Serving
- 2 tablespoons unsalted butter, melted
- powdered sugar, for dusting
Instructions
- Preheat your oven to 375°F. Place the butter in your baking dish or skillet and put it in the oven to melt while it preheats.
- While the dish is heating, combine the eggs, sugar, flour, salt, milk, cream, vanilla, and almond extract in a blender. Blitz for about 10 seconds until smooth. Scrape the sides if needed, then blitz once more. The batter should be thin, the consistency of heavy cream.
- Carefully remove the hot dish from the oven. Swirl the melted butter around to coat the bottom and sides. Pour the batter directly into the dish. Arrange the cherries evenly over the top. Don’t push them in — they’ll sink on their own as it bakes.
- Bake for 30-35 minutes. The edges should be deeply golden and pulling away from the pan. The center should jiggle like Jell-O when you gently shake the dish — not slosh like soup. If it still looks wet in the middle, give it five more minutes and check again.
- Place the dish on a wire rack and let it cool for at least 15 minutes. The custard continues to set as it rests, and the flavor blooms as it comes down from oven-hot.
- Right before serving, dust the top generously with powdered sugar. Serve warm or at room temperature.
Notes
Related posts:
 High-Protein Overnight Oats That Actually Taste Like Breakfast (Not a Chalky Disaster)
 The Slow Cooker Cowboy Casserole That Saves Tired Weeknights (No Soggy Tots Allowed)
 Quick Lemon Ricotta Pasta for Busy Weeknights: Creamy, Bright, and on the Table in 20 Minutes
 Lemon Garlic Butter Baked Salmon in Foil That’s Ready in 25 Minutes — No Fuss, No Mess
 Moist Chocolate Zucchini Bread That Doesn’t Turn Out Rubbery — Finally
 Creamy Homemade Strawberry Dole Whip (That Tastes Just Like the Real Thing)