
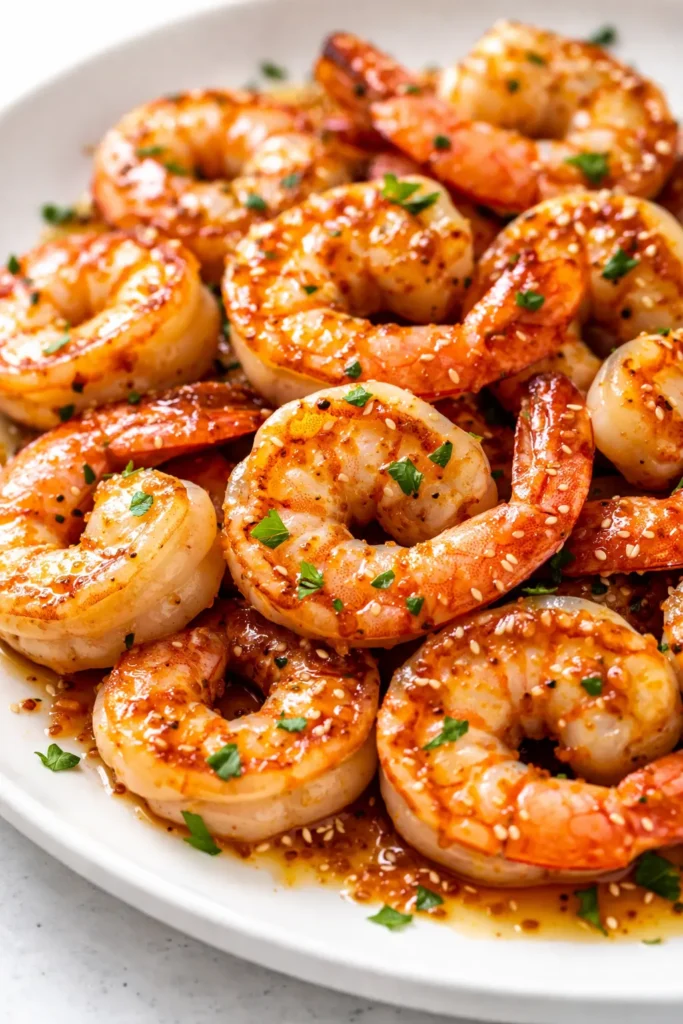
Every honey garlic shrimp I’ve ever ordered or made suffered from the same problem: a soupy, slide-off sauce that leaves a puddle on your plate instead of clinging to the shrimp. This version is different. The trick isn’t in the sauce recipe — it’s in how you cook the shrimp first. A quick, hot sear gives the shrimp a caramelized crust and creates a sticky brown base in the skillet. That base thickens the sauce into a glossy glaze that coats every single piece.
The short version: 25 minutes, one skillet, and a sauce so shiny it looks like takeout from a really good place.
My daughter Nora comes home from art school in Savannah craving weeknight dinners that feel fast and light. This is the one she asks for most — and my picky nine-year-old nephew has been known to eat three servings in one sitting.
- Serves: 4 as a main
- Hands-On Time: 15 min | Total Time: 25 min
- Difficulty: Easy enough for a school night
- Cost per serving: ~$4.50
- Calories: ~320 per serving
- Dietary Notes: Naturally high-protein, adaptable for low-carb and gluten-free
(Photo above: overhead shot of glossy honey garlic shrimp in a wide ceramic bowl, scattered with sliced green onions and toasted sesame seeds, steam rising from the dish, a set of chopsticks resting on the edge of the bowl, soft afternoon light from the kitchen window hitting the glaze.)
Why This Stays Glossy and Clingy (Not Soupy)
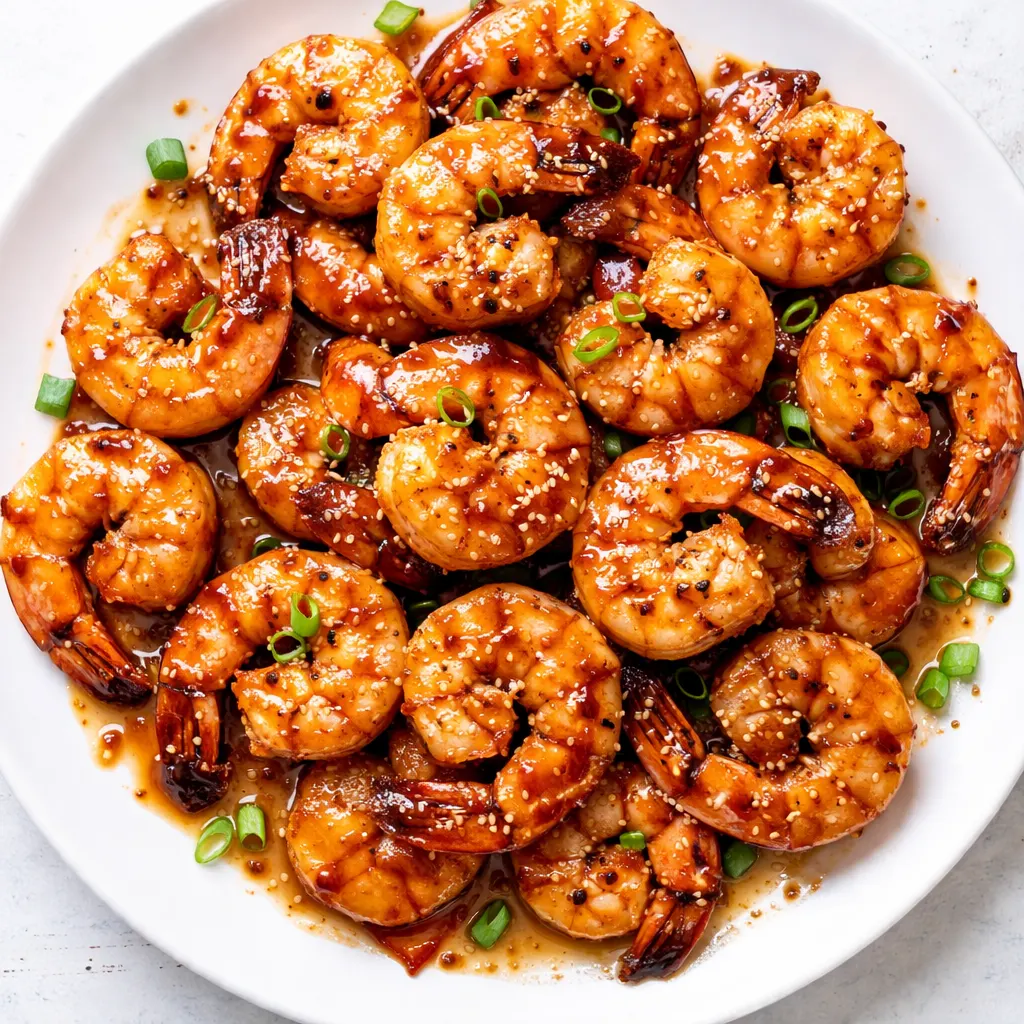
The secret isn’t a special ingredient — it’s a 90-second sear. When you pat the shrimp very dry and hit them with high heat, you get a deep amber crust on the exterior. That browning leaves behind browned bits in the pan (the good stuff) that the sauce melts into as it reduces. A lot of recipes skip this step and just dump sauce over raw shrimp in a cold pan. You end up with rubbery shrimp and a watery puddle. Here, the sauce concentrates in the same pan, clinging to the shrimp instead of pooling around them.
I learned this the hard way after way too many sad, watery dinners. A hot pan and a little patience before adding the sauce really do change everything.
What You’ll Need (Plus My Honest Notes)
- 1 lb large raw shrimp (21-25 count): Peeled and deveined saves time. Frozen works beautifully — just thaw completely and pat them extremely dry. Damp shrimp are the enemy of a good sear. I cannot stress the drying part enough. My husband once skipped it and we both regretted it.
- 3 cloves garlic: Freshly minced, not the jarred stuff. It only cooks for about 30 seconds in the sauce, so you want that bright, sharp garlic flavor to come through.
- 1/4 cup honey: Use a mild honey like orange blossom or clover. Strong buckwheat honey will overpower the garlic and soy.
- 2 tbsp soy sauce (or tamari for GF): This is the backbone of the savory-sweet balance. You need the salt.
- 1 tbsp sriracha (optional): My kids do without, but I add it to my bowl after dinner. Do what works for your table.
- 1/2 tsp red pepper flakes: Adds a tiny warmth that complements the honey without making it spicy for little ones.
- 1 tbsp butter (or avocado oil for dairy-free): A little butter at the end makes the sauce even glossier and adds richness.
- Garnish: Sliced green onions and toasted sesame seeds. Not optional — they make the dish.
What to Pull Out Before You Start
- A 12-inch non-stick or well-seasoned cast iron skillet (non-stick is easiest for beginners here).
- A small bowl for mixing the sauce.
- Paper towels for drying the shrimp (this is the most important tool in this recipe, I’m serious).
- Wooden spatula or silicon tongs.
Let’s Make It (Start to Finish)
This goes fast, so have everything prepped and ready before you turn on the heat.
Prep and Sauce: Get your ingredients measured and near the stove.
- Pat dry: Lay the shrimp out on a plate lined with paper towels. Blot the tops with more paper towels until they feel dry to the touch. Season lightly with salt and pepper on both sides.
- Mix sauce: In a small bowl, whisk together the honey, soy sauce, sriracha (if using), red pepper flakes, and minced garlic. Set it right next to the stove in your cooking area.
- Sear shrimp: Heat your skillet over high heat. Add 1 tbsp of avocado oil. When it shimmers and thins out in the pan, add the shrimp in a single layer — don’t crowd them. Cook undisturbed for 90 seconds. You’re looking for a deep amber sear on the bottom. Flip and cook for another 60 seconds. The shrimp should be just opaque and starting to curl into a loose C. (📸 Photo tip: You should see a deep amber sear on the side that hit the pan first — that’s the flavor you’re after.)
- Make the glaze: Remove the shrimp from the pan to a clean plate. Reduce the heat to medium. Pour the sauce directly into the hot pan. It will bubble up immediately — that’s the fond releasing from the bottom. Stir constantly with your spatula for 2 to 3 minutes, scraping up all those browned bits, until the sauce thickens and becomes glossy and syrupy. (📸 Photo tip: The sauce is ready when it coats the back of your spatula and a line drawn through it with your finger stays clean.)
- Coat and finish: Return the shrimp to the pan. Toss quickly to coat in the sauce — about 60 seconds. Add the butter and stir until it melts into the glaze and makes everything even shinier. Remove from heat immediately.
- Serve: Transfer to a serving plate. Top generously with green onions and sesame seeds. Serve right away with rice or roasted veggies.
Make-Ahead Notes (Though Honestly, It’s Best Right Away)
Shrimp is one of those things that really doesn’t love reheating. The texture gets rubbery fast. I highly recommend making this fresh if you can.
- Fridge: Store leftovers in an airtight container for up to 2 days. The sauce will thicken as it cools.
- Freezer: Not recommended. The shrimp will release too much water when thawed and turn tough.
- Reheat: Best method is a quick reheat in a hot skillet over medium heat for about 2 minutes, just until warmed through. Add a tiny splash of water if the sauce has thickened too much. The microwave works in a pinch, but nuke it in 30-second bursts at 50% power to avoid rubberizing it.
My Honest Advice After Making This 20+ Times
- Dry the shrimp like it’s your job: Water is the enemy of a good sear. The more moisture you remove with paper towels, the better the crust and the thicker the sauce. I go through a lot of paper towels and I do not apologize for it.
- Don’t crowd the pan: If your pan is too small, the shrimp will steam instead of sear. Cook them in two batches if you need to. It’s worth the extra five minutes.
- Keep that heat medium for the sauce: High heat at this stage will burn the sugar in the honey before the sauce has a chance to reduce properly. Medium is your friend here. Even if you mess this part up a little and it seizes, add a splash of water and keep stirring — it’ll still taste good.
- Taste before you serve: Honey brands vary wildly in sweetness. You might want a tiny pinch of salt at the end to balance it. I usually do.
Make It Yours: Easy Variations
- Dairy-Free: Skip the butter at the end. The sauce will still be glossy and delicious, just slightly less rich. Use avocado oil for cooking.
- Gluten-Free: Use tamari or coconut aminos instead of soy sauce. Everything else is naturally GF. My sister makes it this way and it’s just as good.
- Spicy (For Adults After Bedtime): Add an extra tsp of sriracha and a pinch of cayenne with the garlic. My husband loves this version — he calls it the “weekend edition.”
- Veggie Boost: Toss in a handful of snap peas or broccoli florets right after you pull the shrimp out. Sauté them in the residual sauce for 3 minutes before returning the shrimp to the pan. This is how I get my kids to eat their vegetables without complaint.
Questions I Get About This Recipe All the Time
Q: Why did my shrimp turn out rubbery?
A: Overcooking is almost certainly the culprit. Shrimp cook in minutes — once they curl into a loose C shape and turn opaque, they’re done. Take them off the heat the second they’re coated in the glaze. You’ve got this next time.
Q: Can I use frozen shrimp?
A: Yes, I do it all the time. The key is to let them thaw overnight in the fridge or under cold running water. Then — and this is important — pat them extremely dry with paper towels before seasoning. I can’t say that enough.
Q: How long does this last, and can I freeze it?
A: It keeps in the fridge for 2 days in an airtight container. I don’t recommend freezing it. The texture of reheated shrimp just isn’t the same, and the sauce can separate when thawed.
Q: What do you serve this with?
A: Steamed jasmine rice is the classic in our house — it catches all that extra glaze. For low-carb, I serve it over sautéed zucchini noodles or a big green salad with avocado. Sometimes I just double the shrimp and skip the sides entirely for a truly high-protein dinner.
More Recipes My Family Makes on Repeat
If you liked this one, here are a few others that get the same reaction at our table:
- Garlic Butter Chicken Thighs with Lemon — Juicy, crispy-skinned, and comes together in one skillet.
- Easy Sheet Pan Salmon with Asparagus — A 20-minute dinner that feels fancy but is almost no cleanup.
- 15-Minute Sesame Beef Noodles — My kids ask for this every single week.
The first time you make this, pay attention to that moment when the sauce goes from watery to glossy — it’s almost immediate, and it’s so satisfying. This is the weeknight dinner that feels like a treat, and takes you less than 30 minutes to get on the table.
If you give this honey garlic shrimp a try, let me know in the comments! I love hearing which variations your family goes for.
📌 Save this high-protein honey garlic shrimp recipe for your next weeknight dinner — it’s fast, made in one skillet, and doesn’t end up soggy!
High-Protein Honey Garlic Shrimp
Equipment
- 12-inch Non-Stick Skillet
- Small bowl
- Paper towels
- Wooden Spatula or Silicone Tongs
Ingredients
- 1 lb large raw shrimp (21-25 count), peeled and deveined
- 3 cloves garlic, minced
- 1/4 cup honey (mild like orange blossom)
- 2 tbsp soy sauce (or tamari for GF)
- 1 tbsp sriracha (optional)
- 1/2 tsp red pepper flakes
- 1 tbsp butter (or avocado oil for dairy-free)
- 1 tbsp avocado oil (for cooking)
- Salt and pepper to taste
- For garnish: sliced green onions and toasted sesame seeds
Instructions
- Pat dry: Lay the shrimp out on a plate lined with paper towels. Blot the tops with more paper towels until they feel dry to the touch. Season lightly with salt and pepper on both sides.
- Mix sauce: In a small bowl, whisk together the honey, soy sauce, sriracha (if using), red pepper flakes, and minced garlic. Set it right next to the stove.
- Sear shrimp: Heat your skillet over high heat. Add 1 tbsp of avocado oil. When it shimmers, add the shrimp in a single layer. Cook undisturbed for 90 seconds. Flip and cook for another 60 seconds. The shrimp should be just opaque and starting to curl into a loose C.
- Make the glaze: Remove the shrimp from the pan to a clean plate. Reduce heat to medium. Pour the sauce directly into the hot pan. Stir constantly for 2 to 3 minutes, scraping up all the browned bits, until the sauce thickens and becomes glossy and syrupy.
- Coat and finish: Return the shrimp to the pan. Toss quickly to coat in the sauce — about 60 seconds. Add the butter and stir until it melts into the glaze. Remove from heat immediately.
- Serve: Transfer to a serving plate. Top generously with green onions and sesame seeds. Serve right away with rice or roasted veggies.
Notes
Related posts:
 Mini Quiche Recipe: The Store-Bought Crust Version That Tastes Like You Made It From Scratch
 The Slow Cooker Cowboy Casserole That Saves Tired Weeknights (No Soggy Tots Allowed)
 Quick Lemon Ricotta Pasta for Busy Weeknights: Creamy, Bright, and on the Table in 20 Minutes
 Lemon Garlic Butter Baked Salmon in Foil That’s Ready in 25 Minutes — No Fuss, No Mess
 Lipton Onion Soup Meatloaf for Tuesday Nights: Moist, Savory, and the Only One You’ll Ever Need
 Kielbasa Sausage Cheesy Potato Casserole That Tastes Like Sunday Dinner — In Under an Hour