

That first crack of the caramelized sugar—just a spoon tap and the whole top shatters into bright, citrusy pieces—is why I keep coming back to this dessert. It’s creamy like a panna cotta but somehow lighter, brighter, and so much faster. The kind of thing you can pull together after dinner while the coffee brews. My daughter Nora, who usually wants something chocolate, asks for this every time she comes home from school. That’s saying something.
The short version: Four ingredients, one saucepan, no eggs or gelatin, and it sets up firm enough to brûlée in about three hours.
I’ve made this more times than I can count—tested it for friends who swore they couldn’t make custard, for my sister who’s dairy-free (swap in full-fat coconut milk—it works), and for busy weeknights when I needed dessert that looked impressive without the effort. This lemon posset brûlée is the version that finally clicked.
- Serves: 4 as a dessert
- Hands-On Time: 10 min | Total Time: 3 hr 10 min (includes chilling)
- Difficulty: Easy enough for a Tuesday, pretty enough for company
- Cost per serving: ~$0.75
- Calories: ~260 per serving
- Dietary Notes: Naturally gluten-free. Adaptable for dairy-free (see Variations).
(Photo above: Overhead shot of four small ramekins on a marble counter, the top of one already cracked open with a spoon, showing the pale golden custard underneath and caramelized sugar shards scattered around. Soft afternoon light from the left.)
The Thing That Makes This Posset Work Every Time
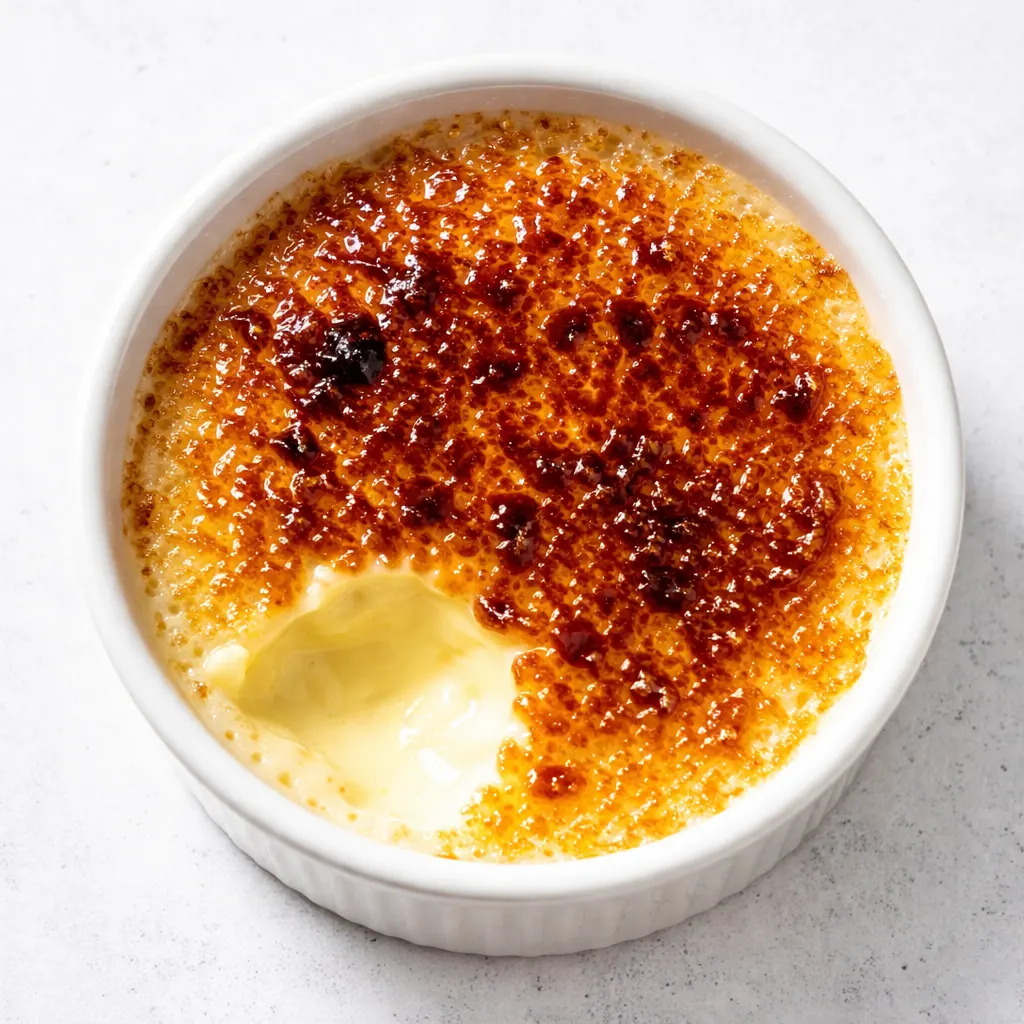
Most lemon desserts can curdle if you look at them wrong. This one doesn’t because the acid from the lemon juice reacts with the cream in a controlled way—the heat helps it thicken gently, and the chilling sets it into a silky firmness without any cornstarch or eggs. It’s basically a three-minute science experiment that tastes like it took hours.
The secret that people miss: you have to let the cream mixture simmer for exactly two minutes before adding the lemon juice. Not a full rolling boil, just a steady bubble at the edges. That brief heat changes the cream so it can handle the acid without separating. I learned this after one too many batches that looked like curdled milk—the fix is that short cook time, and it makes all the difference.
What you get is a custard so velvety it sits on your tongue, with a hit of bright lemon that’s refreshing—not puckering. Then the brûléed sugar on top gives you that satisfying crackle. My kids fight over who gets to smash it first.
Everything You Need (And a Few Notes From Me)
- 2 cups heavy cream: The higher the fat content, the creamier the set. Don’t use half-and-half here—it won’t thicken properly. I’ve tried. It’s weepy. Stick with heavy cream.
- ½ cup granulated sugar (plus extra for brûlée): Regular white sugar works best. The sugar mixed into the custard sweetens and helps stabilize. Use a spoonful of demerara or turbinado for the topping if you want extra crunch. My kids like the regular white sugar for brûlée—it caramelizes evenly and doesn’t taste burnt.
- ⅓ cup fresh lemon juice (from about 2 lemons): Bottled juice will give you a flat, sour result. Fresh is non-negotiable here. I buy extra lemons when they’re on sale and juice them into ice cube trays—works perfectly.
- 1 teaspoon finely grated lemon zest: This is where you get the bright, aromatic lemon scent. Save the rest of the zest for garnish if you want. Zest before juicing—it’s easier.
What to Pull Out Before You Start
- A medium saucepan (heavy-bottomed is best to prevent scorching)
- Four 6-ounce ramekins or shallow heatproof dishes
- A fine-mesh strainer (optional but helps with smoothness)
- Chef’s torch (or your oven’s broiler—see FAQ below)
- Measuring cups and a microplane or zester
If you don’t have ramekins, small glass bowls or even teacups work fine—just make sure they’re heatproof for the brûlée step.
Let’s Make It (Step by Step)
This goes fast, so have everything measured before you start. The whole active part takes less than ten minutes.
Prep the ramekins: Set them on a tray or baking sheet so they’re easy to move to the fridge later.
- Heat the cream and sugar: In the saucepan, combine the heavy cream and ½ cup sugar. Stir over medium heat until the sugar dissolves and the mixture comes to a gentle simmer—small bubbles around the edges, not a full boil. Let it simmer for 2 minutes, stirring occasionally. (📸 Photo tip: You should see tiny bubbles forming at the rim of the pan, but the center should still be mostly calm. If it’s boiling hard, turn the heat down.)
- Add the lemon juice and zest: Remove the pan from heat. Stir in the lemon juice and zest. The mixture will thicken slightly almost immediately—that’s the acid working. Stir until smooth, about 30 seconds. I always taste it here—it should be sweet and tart, not sour or curdled.
- Strain and pour: Pour the mixture through a fine-mesh strainer into a glass measuring cup or small pitcher (this catches any stray zest bits or tiny curds). Divide evenly among the four ramekins. (📸 Photo tip: The mixture should be pale yellow and smooth, not grainy. If you see any lumps, strain again.)
- Chill until set: Refrigerate the ramekins uncovered for at least 3 hours, or up to 24 hours. They’re ready when they jiggle like firm Jell-O—no liquid sloshing. Cover them with plastic wrap after 1 hour if you’re chilling longer than overnight.
- Brûlée the tops: Just before serving, sprinkle about 1 teaspoon of sugar evenly over each cold posset (extra for topping). Use a torch to caramelize the sugar until golden brown and bubbly. Let it sit for 1 minute to harden—then serve. If using the broiler, place ramekins on a baking sheet, broil 4–6 inches from the heat for 2–3 minutes, watching closely so they don’t burn. Let cool 2 minutes before serving.
How I Meal Prep These for the Week
I make a double batch on Sunday and we pick at them all week. The posset base keeps beautifully in the fridge, and you brûlée the sugar right before serving—that keeps the crunch intact.
- Fridge: Covered, the set possets last up to 5 days. Brûlée just before serving.
- Freezer: Not recommended. The texture gets watery and the cream separates when thawed.
- Reheat: No reheating needed. If you’ve brûléed early and the sugar softens, scrape it off, dry the top with a paper towel, and torch again—it works surprisingly well.
Things I Wish I’d Known the First Time
- Don’t boil the cream—simmer is enough. A full rolling boil can make the cream separate when you add the acid. Keep it gentle. If you accidentally boil it, let it cool for 30 seconds before adding the lemon juice.
- Fresh lemon juice is non-negotiable. I know it’s a pain to juice lemons, but bottled juice has a flat, even metallic taste that ruins the bright top note. Two lemons is nothing. Just do it.
- Patience with chilling. The posset sets as it cools. If you’re in a hurry, pop them in the freezer for 45 minutes—but I find the texture is creamier when they chill slowly in the fridge. Even if you mess up the timing a little, it’ll still taste good. I’ve served a slightly soft posset and no one complained.
- Tap the sugar before torching. To get an even caramel layer, gently tap the ramekin to settle the sugar into an even layer. If it’s clumpy, use a small sieve to dust it on.
Swaps That Actually Work
- Dairy-Free Version: Use full-fat canned coconut milk (not coconut cream from a carton). The texture is slightly less rich, but it sets beautifully and my dairy-free nephew loves it. Reduce simmer time to 1 minute because coconut milk can break if boiled too long.
- Lime or Orange Possets: Replace lemon juice with an equal amount of fresh lime juice (for a tangier version) or fresh orange juice plus 2 teaspoons lemon juice (for acidity). The orange version is sweeter and my kids’ favorite.
- Vanilla Twist: Add 1 teaspoon vanilla bean paste with the lemon juice. It rounds out the tartness—nice for more formal dinners.
- Kid-Friendly No-Torch Version: Skip the brûlée step entirely and top with fresh berries or a dollop of whipped cream. I do this when I’m making them for my kids’ friends—they love it just as much.
Questions I Get About This Recipe All the Time
Q: Why did my posset turn out grainy?
A: Ugh, I’ve been there. Grainy texture usually means the cream got too hot and started to separate when you added the lemon juice. Next time, take the pan off the heat before adding the acid, and whisk gently—no vigorous beating. If it’s already grainy, strain through a fine-mesh sieve before pouring into ramekins. It might not be perfectly smooth, but it still tastes great. You’ve got this next time.
Q: Can I make this with low-fat milk or half-and-half?
A: Honestly, no. The fat from the heavy cream is what gives this posset its thick, creamy set. I tested it with half-and-half once and it came out more like a thin pudding that never fully set. Use coconut cream for a dairy-free version—or just stick with heavy cream. Your waistline can handle a half-cup of cream per serving.
Q: How long can I keep them in the fridge after brûléeing?
A: The sugar stays crisp for about 2–3 hours if you keep the ramekins uncovered. After that, the moisture from the custard seeps through and softens the top. I only brûlée the ones I’m serving immediately. The unfilled bases keep for days. Pro tip: if you’re serving a crowd, do a quick assembly line with the torch right before dessert.
Q: What do you serve with lemon posset brûlée?
A: I usually serve them plain because the brûlée top is the star. But a few fresh raspberries on the side cut the sweetness beautifully. My kids love it with a shortbread cookie to dip. For adult dinners, I sometimes add a tiny pinch of flaky sea salt on top of the caramelized sugar—it’s unexpected and perfect with a glass of sparkling wine.
More Recipes My Family Makes on Repeat
If you liked this one, here are a few others that get the same reaction at our table:
- Five-Ingredient Chocolate Mousse — So simple, and my daughter Nora actually texts me for this one.
- No-Churn Lemon Ice Cream — All the bright lemon flavor, no ice cream maker required.
- Honey-Roasted Figs with Goat Cheese — The perfect adult dessert when you want something that feels fancy but takes 15 minutes.
This lemon posset brûlée has saved me on more busy weeknights than I can count. When I need a dessert that feels like a splurge but takes almost no effort, this is what I pull out. I hope it becomes that for you too.
If you try it, drop a comment below—I love hearing how it goes for your family. And tag me on Pinterest or Instagram so I can see your beautiful brûlée tops!
📌 Save this lemon posset brûlée recipe for your next dinner party or summer dessert table—four ingredients, no eggs, and that satisfying caramelized sugar crack everyone loves.

Lemon Posset Brûlée
Equipment
- Medium Saucepan
- Four 6-ounce ramekins
- Fine-mesh strainer
- Chef’s torch
Ingredients
Custard
- 2 cups heavy cream
- 1/2 cup granulated sugar
- 1/3 cup fresh lemon juice
- 1 teaspoon finely grated lemon zest
For the Brûlée Topping
- 4 teaspoons granulated sugar (or turbinado)
Instructions
- In a medium saucepan, combine the heavy cream and 1/2 cup sugar. Heat over medium, stirring, until the sugar dissolves and the mixture comes to a gentle simmer (small bubbles around the edges). Let it simmer for 2 minutes, stirring occasionally.
- Remove the pan from heat. Stir in the lemon juice and zest. The mixture will thicken slightly. Stir until smooth, about 30 seconds.
- Pour the mixture through a fine-mesh strainer into a glass measuring cup. Divide evenly among four 6-ounce ramekins.
- Refrigerate uncovered for at least 3 hours, or up to 24 hours, until set like firm Jell-O.
- Just before serving, sprinkle about 1 teaspoon of sugar evenly over each cold posset. Use a chef’s torch to caramelize the sugar until golden and bubbly. Let sit 1 minute to harden. Serve immediately.
Notes
Storage: Un-brûléed possets keep covered in the fridge for up to 5 days. Brûlée just before serving.
Tip: If the brûléed sugar softens, scrape it off, dry the top with a paper towel, and torch again.
Related posts:
 High-Protein Overnight Oats That Actually Taste Like Breakfast (Not a Chalky Disaster)
 Mini Quiche Recipe: The Store-Bought Crust Version That Tastes Like You Made It From Scratch
 The Slow Cooker Cowboy Casserole That Saves Tired Weeknights (No Soggy Tots Allowed)
 Quick Lemon Ricotta Pasta for Busy Weeknights: Creamy, Bright, and on the Table in 20 Minutes
 Lemon Garlic Butter Baked Salmon in Foil That’s Ready in 25 Minutes — No Fuss, No Mess
 Lipton Onion Soup Meatloaf for Tuesday Nights: Moist, Savory, and the Only One You’ll Ever Need