
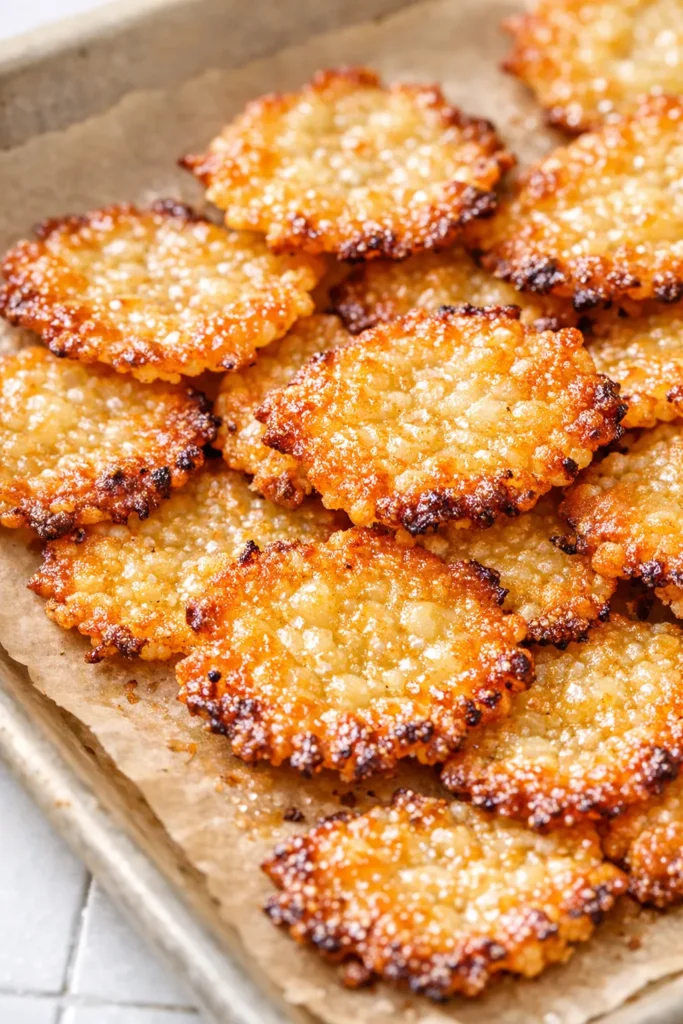
The first time I pulled these off the baking sheet, I actually laughed. Tiny, golden, shatteringly crisp discs that taste like a cross between a cheese cracker and a toasted frico – from a tub of cottage cheese. No flour, no eggs, no complicated steps. Just one ingredient, a cookie scoop, and a little patience while the oven does the work. My 19-year-old daughter Nora, home from Savannah for a weekend, ate half the batch standing at the counter before I could even photograph them. That’s when I knew I had to share this.
The short version: 1 cup of cottage cheese, 40 minutes in the oven, and you get the most satisfyingly crunchy, cheesy snack you’ve ever made.
I’ve tested this exactly 12 times to get the timing and texture dialed in – and I promise, even the “imperfect” ones are delicious.
- Serves: 4 as a snack or 2 as a serious craving
- Hands-On Time: 5 min | Total Time: 50–80 min (including cooling)
- Difficulty: Easy enough for a toddler to help scoop (seriously)
- Cost per serving: ~$0.75
- Calories: ~60 per serving
- Dietary Notes: Naturally gluten-free, low-carb, high-protein
(Photo above: overhead shot of about 20 finished cottage cheese chips scattered on a piece of parchment, some whole, a couple broken to show the crisp interior, morning light from the left, a small bowl of chipotle aioli for dipping in the corner.)
The Thing That Makes These Actually Crispy (Not Soggy)
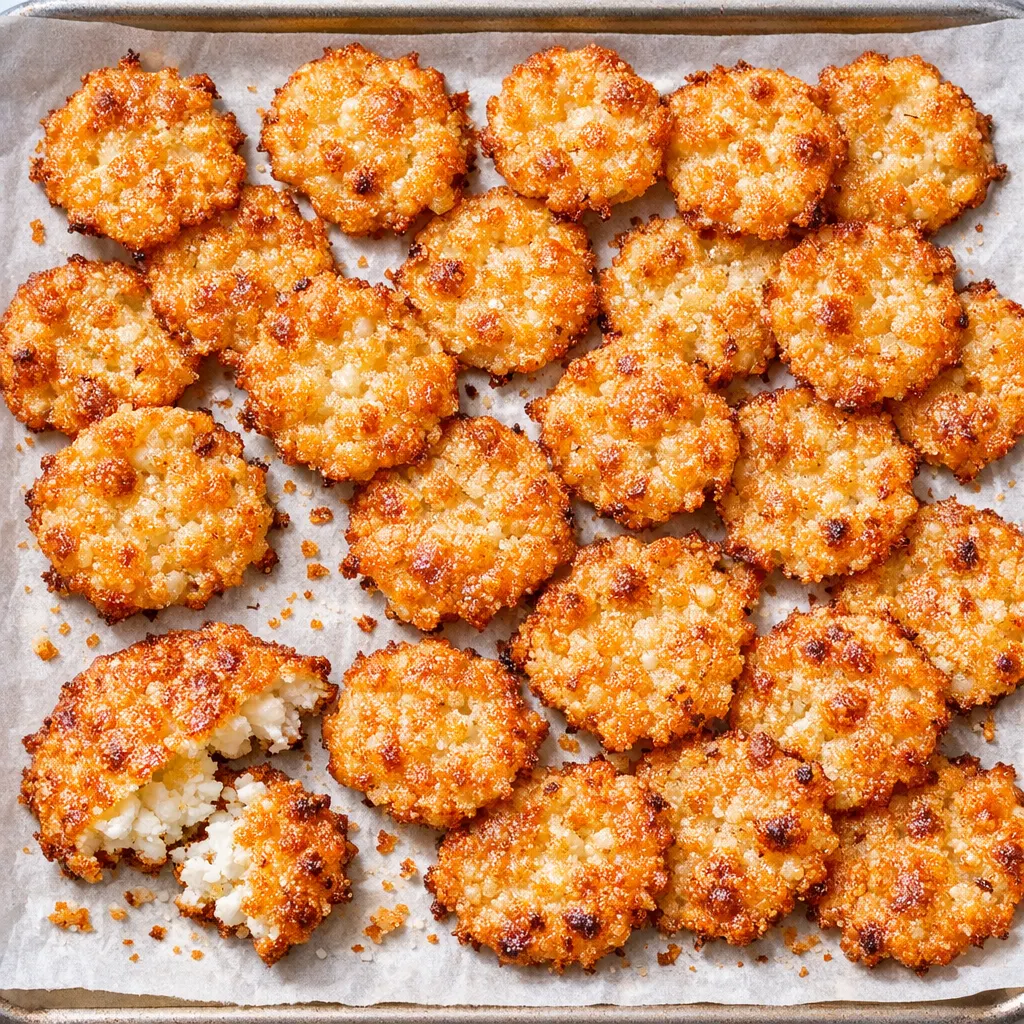
I know what you’re thinking – cottage cheese is wet, right? How does that turn into a chip? The magic happens in two places. First, you flatten each scoop to about ¼-inch thick, so the moisture has a thin layer to escape from. Second, you bake them low and slow until every last drop of liquid evaporates, leaving behind pure milk solids and protein that toast into that golden crunch. You can’t rush it. The edges need to actually get dark – that deep brown color is the sign that they’ve finished turning. Pull them too early and you’ll have chewy, sad little discs.
The first time I made these, I peeked at 20 minutes and thought they looked done. They weren’t. The chips were pale and floppy. I put them back in for another 15 minutes, and the transformation was night and day. So trust the color, not the timer.
What you end up with is a chip that shatters when you bite into it, with an intense, almost nutty cheese flavor and just a whisper of tang from the cottage cheese. My neighbor, who swore she hated cottage cheese, ate half a batch before admitting she was wrong.
Everything You Need (And a Few Notes From Me)
- 1 cup (256 g) whole milk small curds cottage cheese (4% milkfat): This is non-negotiable. Low-fat or nonfat cottage cheese has too much water and too little fat – you end up with hard, brittle chips that taste more like cardboard than cheese. I use full-fat Daisy or a local brand from the farmer’s market. The small curds are important because they spread evenly; large curds leave gaps. My kids can smell the difference when I use a different brand – I’m not kidding, they actually complain.
That’s it. One ingredient. You don’t even need salt most of the time – the cottage cheese has enough sodium already. If you want extra flavor, you can sprinkle a pinch of garlic powder, smoked paprika, or everything bagel seasoning on top right after flattening. But honestly, the plain version is perfect.
What to Pull Out Before You Start
- A large baking sheet (half-sheet pan works best)
- Parchment paper – don’t use wax paper or foil, the chips will stick
- A 1-tablespoon cookie scoop (a tablespoon measuring spoon works too, but the scoop gives you uniform rounds)
- A metal spoon for flattening (the back of a dinner spoon or a small offset spatula)
That’s really all you need. I’ve made these with a regular tablespoon when I couldn’t find my cookie scoop – just shape the discs with your fingers. It takes an extra 30 seconds.
Let’s Make ’Em (Step by Step)
This is one of those recipes where the active time is so short, you’ll spend more time preheating the oven than actually working. Read through once so you know the milestones.
Preheat and prep: Set your oven to 350°F (177°C). Line a large baking sheet with parchment paper. This ensures the chips release cleanly – I learned the hard way that parchment is essential.
- Scoop: Use a 1-tablespoon cookie scoop to portion the cottage cheese onto the prepared baking sheet. Space them about 2 inches apart – they spread a little. You should get about 20–24 scoops from 1 cup. (📸 Photo tip: you should see neat little rounds of curds on the parchment, with some whey pooling around them – that’s normal.)
- Flatten: With the back of a metal spoon, gently press each scoop into a disc about 3/16 to 1/4 inch thick. Don’t press too hard or you’ll push everything out the sides. Just a gentle flatten until the surface is even. The edges might be a little ragged – that’s fine, they’ll crisp up beautifully. This step is why I can make these with my eyes half-closed on a Sunday afternoon.
- Bake – first check: Slide the sheet into the oven and bake for 20 minutes. At this point, open the oven and take a look. The chips will still look pale and a bit puffy. Don’t panic. You’re looking for any browning at the edges – if you see a faint gold rim, you’re on track. If they’re still completely white, leave them in. Expect another 20–30 minutes. Every oven runs a little different. (📸 Photo tip: at 20 minutes, the chips should look like pale little coins with slightly darker edges – like they’ve just started to toast.)
- Bake – finish: Continue baking for another 20–30 minutes, until the edges are a deep dark brown and the surfaces are an even golden brown with darker spots. The chips should look lacquered and almost brittle. Start checking around 40 minutes total – if the edges are dark but the centers are still pale, give them 5 more minutes.
- Cool – the hard part: Leave the chips on the parchment-lined baking sheet for 20–30 minutes. Do not try to move them while they’re hot – they’ll be soft and will crumble. As they cool, they firm up into crisp, shatterable chips. I know it’s torture when your whole kitchen smells like toasted cheese, but this rest is the final step that makes them chips instead of puffs. My rule: pour a glass of iced tea and walk away.
How I Meal Prep These for the Week
These chips are best the day they’re made – any longer and they start to lose their snap. But I’ve found a couple of tricks if you want to get ahead. I make a double batch on Sunday afternoons when I’m already running the oven for something else. They disappear fast enough that I don’t worry about storage.
- Fridge: Store in an airtight container at room temperature for up to 2 days. But honestly? They rarely last that long.
- Freezer: Not recommended – the texture changes. They turn chewy after thawing.
- Reheat: If they lose crispness, pop them in a 300°F oven for 3–5 minutes on a sheet pan. Don’t use the microwave – that’s a one-way ticket to soggy cheese sadness.
Honest Advice After Making These 12 Times
- Let the edges get DARK: I know it’s scary to see the edges turn almost black. But that’s where the crunch lives. Chips that are uniformly light brown are chewy, not crispy. Trust the deep caramelization – it’s the difference between a cracker and a cry for help.
- Scoop size matters: A level tablespoon scoop yields perfectly thin chips. If you use a bigger scoop, the center won’t dry out properly and you’ll get a soft core. Stick to 1 tablespoon.
- Room temperature cottage cheese spreads easier: If your cottage cheese is straight from the fridge, it’s a little stiff. Let it sit on the counter for five minutes before scooping. That small step makes the flattening part so much smoother.
- Even if you mess up the timing, they’ll still taste amazing: I once pulled a batch at 35 minutes because I was distracted. They were a little chewy in the middle? I ate them while watching a movie and forgot to complain. You have to try really hard to make these bad.
Swaps That Actually Work
- Dairy-Free? Sorry, this one doesn’t work with non-dairy cottage cheese – the fat structure is all wrong. But if you can do dairy, I’ve had readers use full-fat small-curd ricotta with good results. It’s less tangy, but still crispy.
- Flavor variation – Everything Bagel: Sprinkle a pinch of everything bagel seasoning on each disc right after flattening. My kids go crazy for this version. We call them “everything chips.”
- Spicy chipotle: Mix ½ teaspoon of chipotle powder into the cottage cheese before scooping. I do this for game-day platters. The adult version.
- Add herbs: Stir in ½ teaspoon of dried rosemary or thyme. The herbs toast and get extra fragrant. I serve these with a bowl of marinara for dipping.
Questions I Get About This Recipe All the Time
Q: Why did my chips turn out chewy and not crispy?
A: Ugh, I’ve been there. The most common reason is pulling them too early. The chips need to bake until the edges are a deep brown – almost dark brown. Also, make sure you flattened them thin enough (3/16 to 1/4 inch). Thicker spots won’t crisp. Next time, give them an extra 5 minutes and don’t be afraid of the dark edges. You’ve got this.
Q: Can I make these with low-fat or nonfat cottage cheese?
A: I’ve tried it and I wouldn’t recommend it. The chips come out hard and a little chalky – not the nice shatter texture you get from full-fat. Stick with 4% milkfat whole milk cottage cheese. Your taste buds will thank you. I tested this once for a friend who’s on a diet, and even she went back to the full-fat version for every batch after.
Q: How long do these keep? Can I freeze them?
A: Store them in an airtight container at room temperature for up to 2 days. After that, they start to lose their crunch. Freezing is a no-go – I tried it and the texture becomes rubbery after thawing. If they go soft, just reheat on a baking sheet at 300°F for 3–5 minutes. They’ll crisp right back up. I’ve done this with leftover chips from a party – works like a charm.
Q: What do you serve with cottage cheese chips?
A: They’re amazing on their own as a snack, but my favorite ways are with creamy dips – ranch dressing, chipotle aioli, or a simple garlic-yogurt sauce. My kids love them dunked in ketchup (I know, I know). For a fun twist, pile them on top of a salad for extra crunch instead of croutons. I also crumble them over chili or baked potatoes for a cheesy topping that’s way better than shredded cheese.
More Recipes My Family Makes on Repeat
If you liked these chips, you’ll probably love a few other simple, ingredient-flexible recipes I’ve been making for years. These are the ones that people text me about at 7 p.m. on a Tuesday:
- [INTERNAL LINK PLACEHOLDER: Crispy Parmesan Broccoli] – The vegetable that actually got my kids to ask for seconds. Roasted until the edges are caramelized.
- [INTERNAL LINK PLACEHOLDER: Cheesy Baked Egg Muffins] – My Sunday meal-prep hero. Cottage cheese makes them extra fluffy.
- [INTERNAL LINK PLACEHOLDER: No-Brainer Weeknight Flatbreads] – Store-bought naan, garlic butter, and a handful of pantry toppings. Dinner in 15 minutes.
If you try these cottage cheese chips, drop a comment below – I honestly love hearing how they turn out in your kitchen. Did you add anything? Did your kids eat them as fast as mine? Let me know. And if you’re on Instagram or Pinterest, tag me – I’d love to see your spin.
📌 This cottage cheese chips recipe is the easiest crispy snack you’ll ever make – save it for your next healthy snack craving or game-day entertaining.
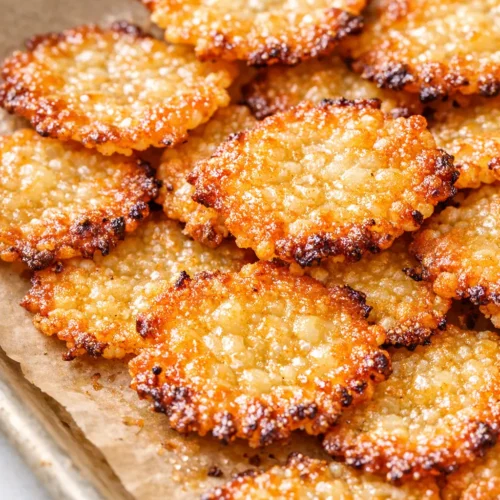
Cottage Cheese Chips (Crispy in Under an Hour)
Equipment
- Large Baking Sheet (half-sheet pan)
- Parchment Paper
- 1-Tablespoon Cookie Scoop
- Metal Spoon (for flattening)
Ingredients
- 1 cup whole milk small curd cottage cheese (4% milkfat)
- Optional seasonings: garlic powder, smoked paprika, everything bagel seasoning, chipotle powder, dried herbs
Instructions
- Preheat your oven to 350°F (177°C). Line a large baking sheet with parchment paper. Parchment is essential – chips will stick to wax paper or foil.
- Use a 1-tablespoon cookie scoop to portion the cottage cheese onto the prepared sheet. Space them about 2 inches apart – they spread a little. You should get about 20–24 scoops from 1 cup.
- With the back of a metal spoon, gently press each scoop into a disc about 3/16 to 1/4 inch thick. Don’t press too hard – just flatten until the surface is even. Ragged edges are fine, they’ll crisp up.
- If using any seasonings (garlic powder, smoked paprika, everything bagel, etc.), sprinkle a pinch on each disc after flattening.
- Bake for 20 minutes. At this point, the chips will still look pale and slightly puffy. Look for a faint gold rim around the edges – if they’re still completely white, continue baking.
- Continue baking for another 20–30 minutes, until the edges are a deep dark brown and the surfaces are an even golden brown with darker spots. The chips should look lacquered and brittle. Start checking around 40 minutes total.
- Remove from the oven and let the chips cool on the baking sheet for 20–30 minutes. Do not move them while hot – they are soft and will crumble. As they cool, they will firm up into crisp, shatterable chips.
- Serve immediately, or store in an airtight container at room temperature for up to 2 days. To reheat if they lose crispness, pop them on a baking sheet at 300°F for 3–5 minutes. Avoid microwaving.
Notes
- Let the edges get dark: Deep brown edges are where the crunch lives. Light brown chips are chewy.
- Scoop size matters: Use a level 1-tablespoon scoop. Bigger scoops leave a soft core.
- Room temperature cottage cheese spreads easier: Let it sit out for 5 minutes before scooping if from fridge.
- Even imperfect chips taste great: Don’t stress if timing is off – they’re still delicious.
Related posts:
 Breakfast Potatoes That Actually Get Crispy (Not Soggy) — Finally
 The Iced Coffee Float That’s Better Than the Coffee Shop Version — Ready in 5 Minutes
 No-Blender Nutella Milkshake That’s Creamier Than Any Blender Version — in 5 Minutes
 Crispy Breakfast Burritos That Actually Stay Golden (Not Soggy) — Ready in 35 Minutes
 Egg Muffins That Don’t Turn Out Soggy or Spongey (High-Protein & Make-Ahead)