
For two years, my healthy breakfast cereal bars were a beautiful disaster — they tasted wonderful and then fell apart the moment you picked one up. I’d wrap one for Nora and by the time she reached the end of the driveway it was granola in a napkin. The fix wasn’t more honey and it wasn’t a secret ingredient. It was one step I kept skipping because I was in a hurry, plus a little patience at the very end.
The short version: Twenty minutes of hands-on work gets you twelve chewy, naturally sweetened bars that actually hold together in a lunchbox.
I’ve made this recipe twenty-three times now, in every combination I could think of — peanut butter, almond butter, chocolate chips, dried cherries, whatever seeds were in the back of the pantry. The method is the same every single time, and the method is what matters. My sister called me after her first batch because she couldn’t believe they didn’t crumble. That’s the review I care about.
- Serves: 12 bars as a grab-and-go breakfast or snack
- Hands-On Time: 20 min | Total Time: 1 hr 20 min
- Difficulty: Easy — the only real requirement is letting them cool before you cut
- Cost per serving: about $0.35 per bar
- Calories: ~190 per bar
- Dietary Notes: Naturally sweetened and dairy-free; easily made gluten-free, nut-free, or vegan
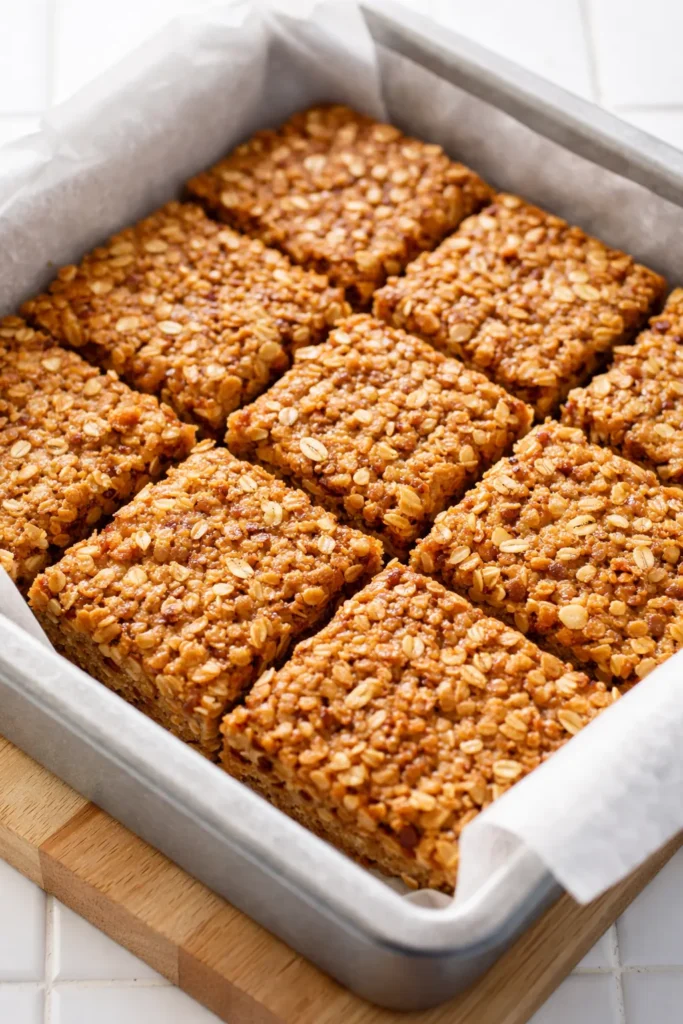
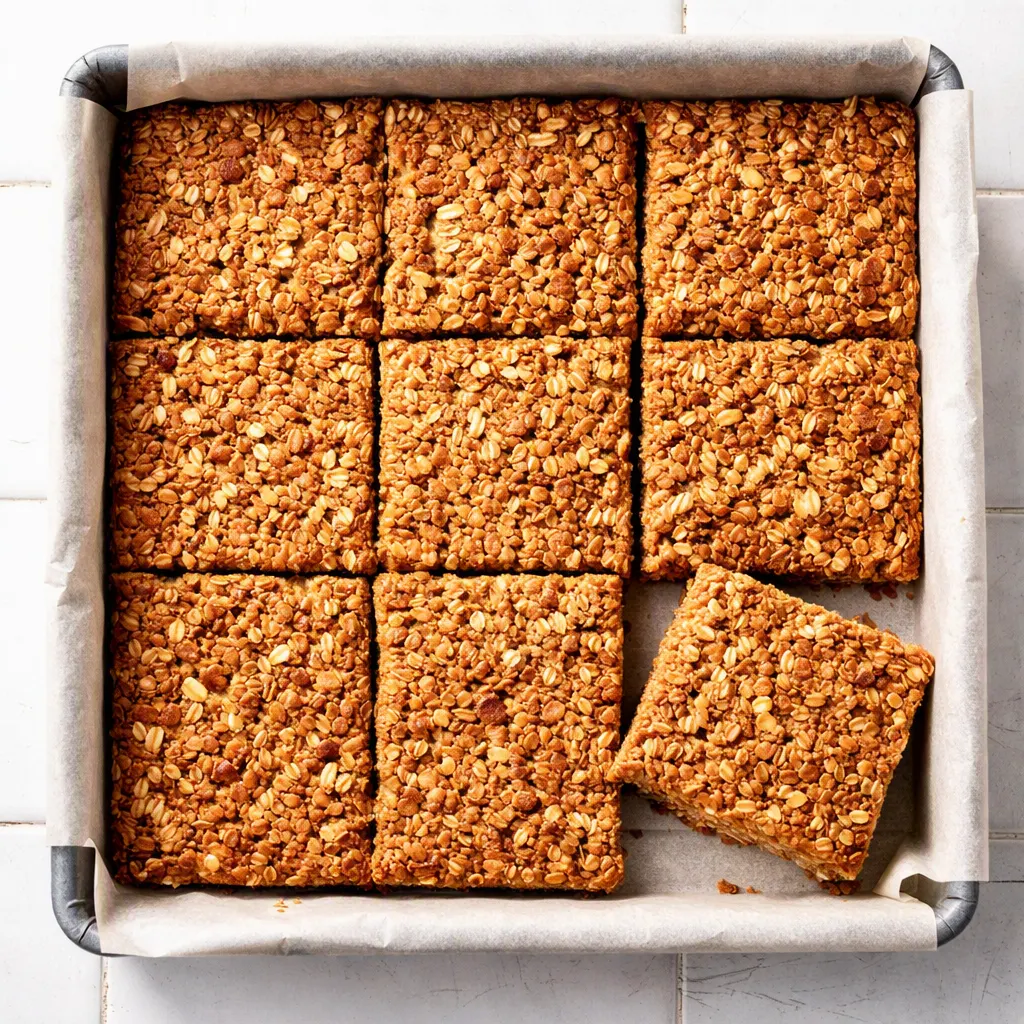
(Photo above: an overhead shot of a neat row of golden oat bars on a piece of parchment, cut into twelve even squares, a few chocolate chips peeking out of the tops, morning light coming in from the left across a wooden farmhouse table. One bar is broken in half so you can see the chewy, close-knit texture inside.)
The One Problem With Every Homemade Cereal Bar (And How I Fixed It)
Every crumbly cereal bar I ever made had the same root cause, and it wasn’t the ratios. It was the binder. If you just stir warm honey and peanut butter into oats, the mixture will taste right but it will never hold together once it cools. Something has to change in the binder itself — and that change takes about ninety seconds on the stove.
Marta never talked about food chemistry — she talked about what things looked like and felt like. When she made caramel candies at Christmas, she let the sugar syrup bubble at the edges until it turned glossy and started to pull away from the spoon in a thin sheet. The same thing happens here with honey and peanut butter. Once the mixture bubbles gently and turns shiny, it becomes sticky in a way that reaches every oat and holds every seed in place. Skip that step and you’re making fancy granola.
Then there’s the cooling. I know it feels wrong to leave a pan of good-smelling bars sitting there while you drink your coffee, but the bars finish setting as they cool. Cut them too soon and the structure never properly forms — you’ll get crumbly edges and a knife full of oats. Wait the full hour and you get clean squares you can wrap, stack, and send off to school. The first time you lift a perfect bar out of that pan — no crumbs, no crumbling, no granola in a napkin — you’ll understand why the extra time matters.
What Goes In — Plus My Honest Notes
- 2 cups old-fashioned rolled oats: These give the bars their chew. Use old-fashioned, not quick oats — quick oats turn soft and pasty and you lose the texture that makes a bar worth eating.
- 1 cup crispy brown rice cereal: This is the “cereal” in the cereal bar. It adds the light crunch from the store-bought versions. Any plain puffed rice cereal works; just avoid the heavily sweetened ones, because you’ll be adding your own sweetness.
- 1/2 cup natural peanut butter: The binder’s backbone. Use the kind where the only ingredient is peanuts, and stir it well before measuring because the oil separates. If you use the sweetened kind with palm oil, the bars will be a little greasy — still good, just different. My neighbor Audrey swears by butter in hers, and I don’t argue with her.
- 1/3 cup honey: Just enough to hold things together and taste like a treat, not a candy bar. You can use maple syrup instead — the bars will be slightly less firm, but they’ll still hold.
- 2 tbsp coconut oil: Keeps the bars from hardening too much once they cool. Butter works too, and it gives a slightly richer flavor.
- 1 tsp vanilla extract: It does more than you think. It rounds out the honey and nut butter so the bar tastes like baking, not just oats.
- 1/2 tsp ground cinnamon: A warm note that pairs beautifully with the toasted oats. Skip it if cinnamon isn’t your thing, but it’s the reason the kitchen smells like something good is happening.
- 1/4 tsp salt: If your peanut butter is salted, you can skip this. But a pinch of salt keeps everything from tasting flat, and it makes the sweetness taste sweeter.
- 1/3 cup dried fruit: Raisins, dried cranberries, or chopped apricots all work. My kids grew up on these with raisins — Nora called them “oatmeal cookies you can carry.” I like dried cherries, which make the bars look like they came from a fancy bakery.
- 2 tbsp seeds: Chia, flax, or sunflower seeds — whatever you have in the cabinet. They add a little nutrition and a nice bit of texture. If you use flax, the bars will come out a touch firmer.
- 1/4 cup chocolate chips (optional but recommended): Nora’s rule was always that chocolate chips count as a breakfast food if they’re inside a breakfast bar. I’ve also made these with dried cherries plus dark chocolate chips, and that’s the version that disappears fastest.
The Tools You’ll Actually Need
- 8×8-inch metal or glass baking pan
- Parchment paper — this is non-negotiable for lifting the whole block out cleanly
- Medium saucepan
- Large mixing bowl
- Rubber spatula
- Rimmed sheet pan for toasting the oats
- A sharp chef’s knife — a dull knife will mash the bars instead of cutting them
Let’s Make Them (Step by Step)
This comes together faster than you expect, so read through the steps once before you start. The only part that asks for patience is the very end, and I promise it’s worth it.
Preheat: Heat the oven to 350°F. Line an 8×8 pan with parchment paper, leaving two opposite sides long enough to lift the whole block out later. Spread the oats on the rimmed sheet pan.
- Toast the oats: Bake them for 10 to 12 minutes, stirring once halfway through. You’ll know they’re ready when the raw oat smell turns into something warm and nutty — like the air inside a granola bakery — and the edges of the oats are a shade past golden. This step isn’t just for flavor. Toasting gives the oats a sturdier texture that helps the bars hold their shape.
- Mix the dry ingredients: In a large bowl, stir together the toasted oats, brown rice cereal, seeds, cinnamon, salt, and dried fruit. Make sure the dried fruit isn’t clumped together — thirty seconds of stirring now saves you a bar with nothing but raisins in one corner.
- Heat the binder: In a medium saucepan over medium-low heat, warm the peanut butter, honey, and coconut oil together, stirring until smooth. Turn the heat up slightly and let it come to a gentle simmer — small bubbles around the edges, not a rolling boil. Let it bubble for 60 to 90 seconds, stirring the whole time, until it’s glossy and noticeably thicker, almost like warm caramel. This is the step I skipped for two years. Don’t skip this step. (📸 Photo tip: The binder at this stage should look glossy and smooth with just a few lazy bubbles at the edges — not foaming, not splattering.)
- Combine everything: Pour the hot binder over the oat mixture and stir with a rubber spatula until every oat and rice puff looks coated. The mixture will seem loose at first — that’s normal. Keep stirring until everything glistens. Stir in the chocolate chips last, if you’re using them, so they stay mostly intact instead of melting completely into the mix.
- Press firmly: Scrape the mixture into the prepared pan and press it down hard with the flat side of your spatula. Wet your hands slightly and press again — especially in the corners. The pressure matters; a loosely packed pan becomes a pan of crumbles. The surface should feel dense and even under your fingers. (📸 Photo tip: The top should look flat and level before it goes into the fridge — no hills, no loose clusters hanging around the edges.)
- Cool completely: This is the hardest step. Let the pan sit at room temperature for at least 1 hour, or pop it in the fridge for 30 minutes if you’re short on time. Then lift the whole block out using the parchment overhang, set it on a cutting board, and cut into 12 bars with a sharp knife, wiping the blade between cuts for clean edges. When the bars are fully set, the knife glides through with almost no crumbs — that’s how you know you did it right.
How I Make a Double Batch for School Mornings
I almost never make a single batch of these. I double the recipe and bake the oats on two sheet pans, then press everything into a 9×13-inch pan using the same parchment method. That one session means breakfast is handled for two full weeks. I wrap each bar in a little piece of parchment and stack them in a container in the fridge — Nora used to grab one and an apple on her way out the door, and that was the whole morning solved.
- Fridge: Store in an airtight container for up to 2 weeks. They’re honestly best straight from the fridge — cold bars cut cleanly and hold their shape beautifully.
- Freezer: Yes. Wrap individual bars in parchment and place them in a zip-top bag. They freeze for up to 3 months. No need to thaw — they’re great straight from the freezer, or left on the counter for 10 minutes while you pack lunches.
- Reheat: Don’t microwave these if you can help it — it softens the crunch and melts the chocolate chips into a mess. They’re made for eating cold or at room temperature.
Things I Wish I’d Known the First Time
- The simmer is the whole game: I know it sounds like ninety seconds won’t matter, but it’s the difference between a bar you can wrap and a bar you eat with a fork. I’ve tested it both ways, same ingredients, same day — the un-simmered batch crumbled by lunchtime. The simmered batch was still in one piece four days later.
- Use a real chef’s knife to cut: A butter knife will drag through the bars and push them out of shape. A sharp knife, one clean push per cut, gives you squares that look like they came out of a package. Wipe the blade between cuts — it takes two seconds and keeps the edges from catching.
- Don’t overdo the heat: If you let the binder bubble hard for several minutes instead of a gentle ninety seconds, the bars will set up hard and almost brittle — more like a honey candy than a breakfast bar. The moment you see the first few bubbles and a good gloss, pull it off the heat. Even if you mess this up a little, they’ll still taste good — you just might need to let them warm up before taking a bite.
- If the mixture feels too dry, add a spoonful of warm water: This happened to me once with a thick, dry natural almond butter. Stir in a tablespoon of warm water and the consistency comes right back to sticky. It won’t make the bars soggy — I promise. I’ve done it more than once.
Swaps That Actually Work
- Nut-free: Use sunflower seed butter in place of peanut butter. It works beautifully — the bars set the same way, just with a slightly deeper, earthier flavor. This is the version I make for my nephew who can’t do nuts, and he has no idea he’s not getting the original.
- Gluten-free: Use certified gluten-free rolled oats and double-check that your crispy rice cereal is gluten-free — most are, but some brands add barley malt. I make these for a friend with celiac and she keeps the recipe taped to her fridge.
- Vegan: Swap the honey for maple syrup and choose dairy-free chocolate chips. The bars will be slightly less firm, so give them the full hour to cool before you cut.
- Fancy guest version: After the bars cool and are cut, melt a little dark chocolate and drizzle it across the top, then finish with a pinch of flaky sea salt. This is the version I make when neighbors stop by and I want the kitchen to look like more effort went in than actually did.
- No chocolate, no problem: If you’re making these for kids who’d rather skip the chips, add two extra tablespoons of dried fruit instead. Same sweetness, no complaints.
Questions I Get About These Bars All the Time
Q: Why did my bars turn out crumbly?
A: Ugh, I’ve been there, and I’m sorry. It’s almost always one of two things: the binder never actually simmered, or you cut them too early. The binder needs to bubble gently for that full ninety seconds to get sticky enough to hold everything together, and the bars need the full cooling time to set. If you skipped either, you’ll get beautiful granola. You’ve got this next time — two small fixes and it’s a completely different bar.
Q: Can I use almond butter instead of peanut butter?
A: Yes. Natural almond butter works well, with one small note — it can be a touch drier than peanut butter, so stir a tablespoon of warm water into the binder if the mixture looks dusty when you combine it. The bars hold together just the same, with a milder nut flavor.
Q: How long do these keep, and can I freeze them?
A: In an airtight container at room temperature, they’ll last about 5 days. In the fridge, they hold for 2 weeks without losing any texture — that’s my preferred way to store them. They also freeze wonderfully for up to 3 months, individually wrapped in parchment so you can grab one at a time on a school morning.
Q: What do you serve with these?
A: They’re honestly a whole breakfast on their own with a piece of fruit and a glass of milk. But my favorite way is to crumble one over Greek yogurt with a handful of berries — it turns into a parfait with a little crunch on top. We also do them with scrambled eggs on weekends, though that might just be because everything feels like a weekend next to scrambled eggs.
More Recipes My Family Makes on Repeat
If you liked this one, here are a few others that get the same reaction at our table:
- [INTERNAL LINK PLACEHOLDER: No-Bake Oatmeal Bites] — The after-school snack version of this idea, ready in ten minutes with zero oven time.
- [INTERNAL LINK PLACEHOLDER: Morning Glory Muffins] — A reader favorite packed with carrots, apple, and raisins, and my go-to for slow weekend mornings.
- [INTERNAL LINK PLACEHOLDER: Maple Almond Granola] — When you want the same toasted oat smell filling the house, but no bars to cut.
I made a batch Monday night and by Wednesday the container was empty. That’s the one downside worth warning you about. The upside is the part I love: the bus stop, the car ride, and the lunchbox all got a little easier because of twenty minutes at the stove.
If you make these, drop a comment below and tell me how they held up — I genuinely love hearing about your first batch. And if you post a photo, tag me so I can see your kitchen smelling like mine.
📌 Healthy breakfast cereal bars that actually hold together without falling apart — save this recipe for busy school mornings when breakfast has to be easy.
Healthy Breakfast Cereal Bars That Don’t Crumble
Equipment
- 8×8 inch Baking Pan
- Parchment Paper
- Medium Saucepan
- Large Mixing Bowl
- Rubber spatula
- Rimmed Sheet Pan
- Chef’s Knife
Ingredients
- 2 cups old-fashioned rolled oats
- 1 cup crispy brown rice cereal
- 1/2 cup natural peanut butter, stirred well
- 1/3 cup honey
- 2 tbsp coconut oil or butter
- 1 tsp vanilla extract
- 1/2 tsp ground cinnamon
- 1/4 tsp salt, skip if peanut butter is salted
- 1/3 cup dried fruit, such as raisins, cranberries, or chopped apricots
- 2 tbsp seeds, such as chia, flax, or sunflower
- 1/4 cup chocolate chips, optional but recommended
Instructions
- Heat the oven to 350°F. Spread the oats on a rimmed sheet pan and toast for 10 to 12 minutes, stirring once halfway through, until the raw oat smell turns warm and nutty and the edges look a shade past golden.
- In a large bowl, stir together the toasted oats, crispy brown rice cereal, seeds, cinnamon, salt, and dried fruit, breaking up any clumps of fruit.
- In a medium saucepan over medium-low heat, warm the peanut butter, honey, and coconut oil, stirring until smooth. Turn the heat up slightly and let it come to a gentle simmer — small bubbles around the edges, not a rolling boil. Let it bubble for 60 to 90 seconds, stirring constantly, until glossy and noticeably thicker, like warm caramel. This simmering step is the key to bars that hold together.
- Pour the hot binder over the oat mixture and stir with a rubber spatula until every oat and rice puff is coated. Stir in the chocolate chips last so they stay mostly intact.
- Scrape the mixture into the prepared parchment-lined pan and press it down firmly with the flat side of your spatula. Wet your hands slightly and press again, especially in the corners, until the surface feels dense and even.
- Cool completely at room temperature for at least 1 hour, or 30 minutes in the fridge. Lift the block out using the parchment overhang, cut into 12 bars with a sharp knife, and wipe the blade between cuts for clean edges.
Notes
Related posts:
 The Slow Cooker Cowboy Casserole That Saves Tired Weeknights (No Soggy Tots Allowed)
 Lemon Garlic Butter Baked Salmon in Foil That’s Ready in 25 Minutes — No Fuss, No Mess
 Moist Chocolate Zucchini Bread That Doesn’t Turn Out Rubbery — Finally
 Creamy Homemade Strawberry Dole Whip (That Tastes Just Like the Real Thing)
 Blueberry Peach Bread That Doesn’t Sink or Turn Mushy — Finally
 Quinoa Chicken Sausage Bowls That Are Ready in 30 Minutes (And Actually Keep Well)