
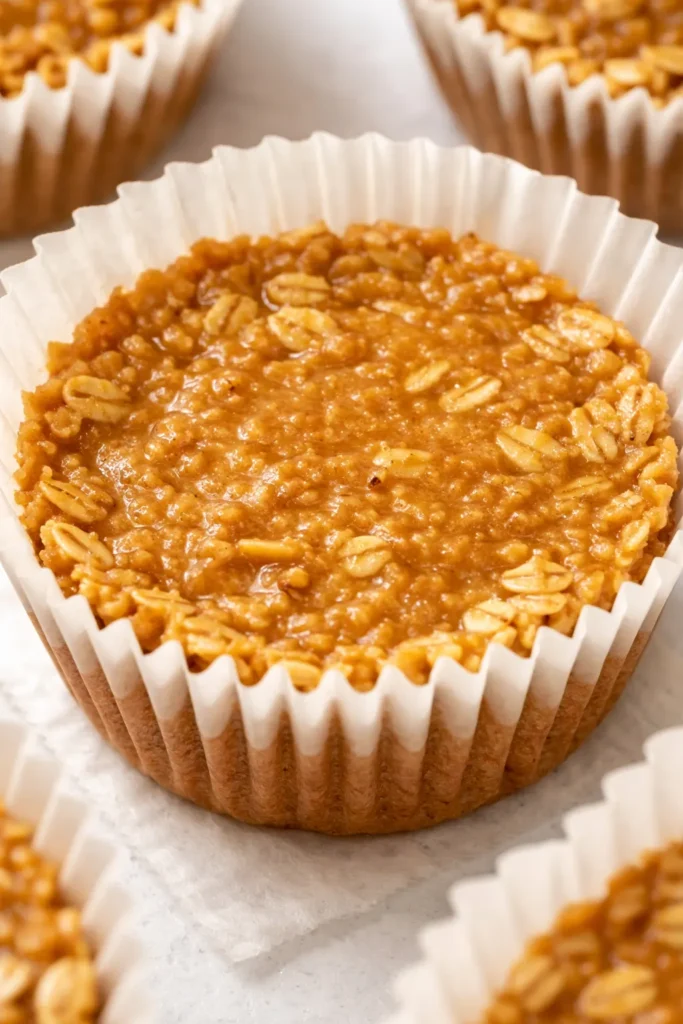
The first time I made peanut butter oat cups, they crumbled all over my kitchen floor. My daughter, Nora, was four, and I was trying so hard to be the mom with the perfect homemade snack. I’d dumped everything into a bowl, scooped it into liners, and popped them in the fridge. An hour later, we had a tray of delicious crumbs.
The problem was simple: I hadn’t let the oats rest long enough to absorb the peanut butter and honey. My grandmother Marta, who could feel when bread was ready just by tapping it, would have known better. I learned that day that the rest time isn’t optional — it’s the whole trick.
The short version: Chewy, just-sweet-enough peanut butter oat cups that actually hold together — made in 15 minutes with zero baking.
I’ve been making these for three school years now, and they’re the first snack to disappear from the lunchbox rotation. My pickiest eater has never once left one behind.
- Serves: Makes 12 cups as a snack
- Hands-On Time: 15 min | Total Time: 45 min
- Difficulty: Easy enough for a school morning
- Cost per serving: ~$0.50
- Calories: ~220 per cup
- Dietary Notes: Naturally gluten-free, no-bake, adaptable for vegans
(Photo above: overhead shot of a dozen peanut butter oat cups nested in a parchment-lined tin, with a few scattered oats and a drizzle of melted chocolate on the corner of the frame, warm afternoon light from the kitchen window casting soft shadows.)
Why These Stay Together (When Other No-Bake Cups Crumble)
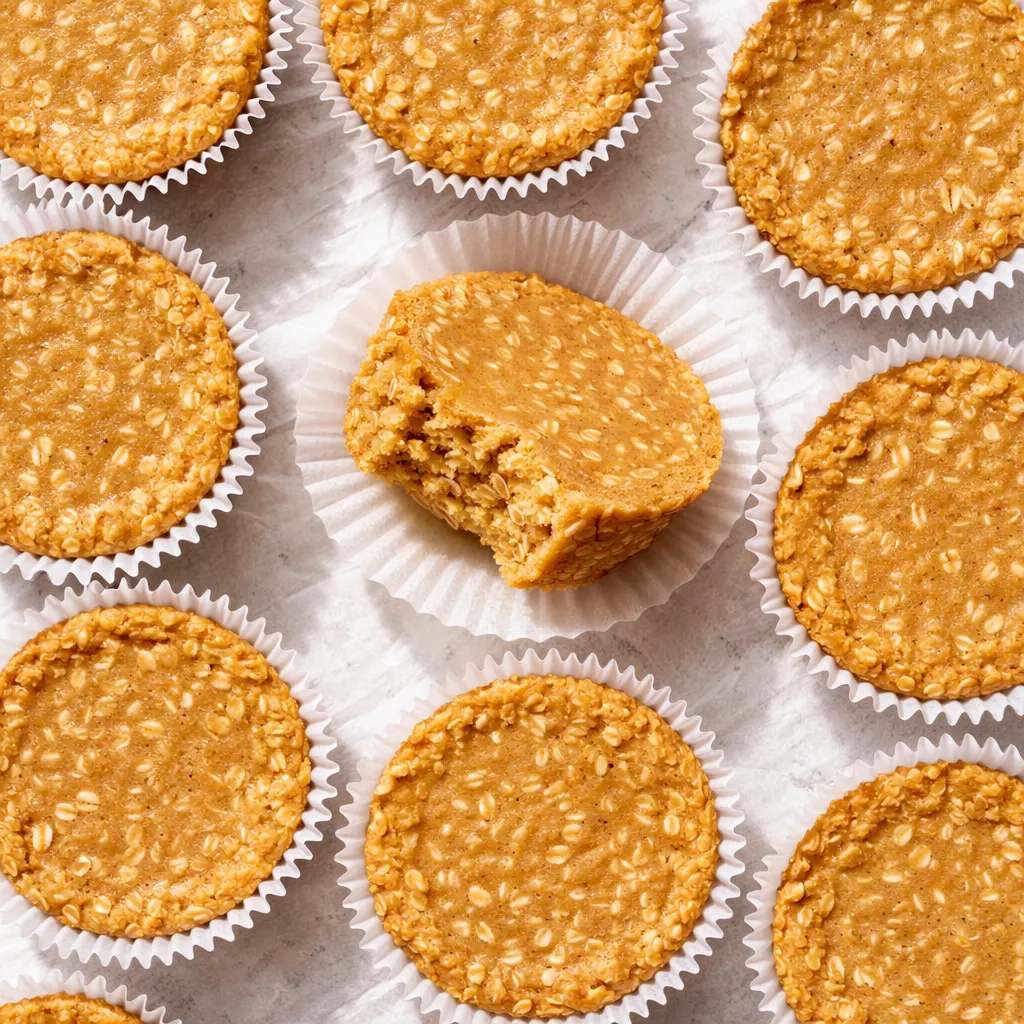
The secret is giving the oats time to drink up the peanut butter and honey mixture. It’s not just mixing — it’s letting them sit for the full ten minutes before you scoop them into the tins. Skipping that step is why most versions fall apart.
I use old-fashioned rolled oats here, not quick oats. Quick oats turn mushy when they soak up the liquid. Rolled oats keep their shape and give the cup a little chew, which is exactly what we want in a lunchbox treat.
This rest time produces a cup that holds together even at room temperature — perfect for tossing in a backpack or grabbing on the way out the door.
What Goes In (With Honest Notes From My Kitchen)
- 1 ½ cups creamy peanut butter: Use the kind that’s just peanuts and salt — the natural stuff that separates in the jar. The stabilizers in commercial peanut butter change the texture. My kids don’t love the texture when I use Skippy, so I stick with the natural kind.
- ½ cup honey (or maple syrup): Honey gives it a floral sweetness that maple can’t quite match, but maple works beautifully for a vegan version. Our neighbor keeps bees, and this is the recipe I use most of his honey in.
- 2 cups old-fashioned rolled oats: The backbone of the whole thing. Don’t use quick oats or steel-cut. Quick oats disappear into the mixture, and steel-cut stay too hard. Marta always said the ingredient list matters more than the technique.
- ½ cup mix-ins (mini chocolate chips, shredded coconut, raisins): Completely optional in my book, but my kids pick the mini chocolate chips every single time.
- Pinch of salt: Only if your peanut butter doesn’t already have salt in it.
What to Pull Out Before You Start
- Standard 12-cup muffin tin
- Parchment paper liners (or you can cut strips of parchment to make slings for each cup — this is what I do when I run out of liners)
- Medium saucepan
- Spatula or wooden spoon
- Cookie scoop (makes the portioning so much faster)
Let’s Make Them (Step by Step)
This comes together fast — I promise the hardest part is waiting for them to set.
Prep the tin: Line a standard 12-cup muffin tin with parchment paper liners. If you don’t have liners, cut strips of parchment and lay them in each cup so they overhang slightly on two sides — that way you can pull the cups out easily when they’re set.
- Warm the wet ingredients: In a medium saucepan over low heat, combine the peanut butter and honey. Stir until they’re fully melted and smooth. This takes about 2 minutes. Don’t rush it on high heat — the peanut butter can scorch and turn grainy. (📸 Photo tip: The mixture should look glossy and uniform, with no streaks of honey or peanut butter.)
- Mix in the dry: Remove the pan from the heat and stir in the rolled oats and the pinch of salt. Stir until every oat is coated in the peanut butter mixture.
- Add mix-ins: Fold in any mix-ins now. I usually add ½ cup of mini chocolate chips at this stage.
- The crucial rest: Let the mixture sit in the bowl for 10 minutes. This is the step that keeps the cups from crumbling later. (📸 Photo tip: After 10 minutes, the mixture will look less glossy and feel a bit firmer — that’s the oats absorbing the liquid.)
- Scoop and press: Divide the mixture evenly among the 12 prepared cups. I use a cookie scoop for this — it keeps them uniform. Press the mixture firmly into the cups. Really pack it down, or they’ll fall apart.
- The chill: Place the muffin tin in the refrigerator for at least 30 minutes. This sets them completely.
- Pull and enjoy: Peel away the parchment and enjoy. They’re perfect straight from the fridge.
How I Make These for the Week Ahead
I make a double batch on Sundays and they’re gone by Wednesday. Here’s how I store them to keep them at their best:
- Fridge: Store in an airtight container for up to 2 weeks. Layer them between sheets of parchment so they don’t stick to each other.
- Freezer: Yes, they freeze beautifully. Place them in a single layer on a baking sheet until frozen, then transfer to a freezer bag. They’ll keep for 3 months.
- Reheat: No reheating needed — they’re perfect straight from the fridge. If you freeze them, let them thaw for about 5 minutes at room temperature before eating.
Things I’ve Learned After Making These a Hundred Times
- Parchment over paper: Paper liners stick. Use parchment liners or make your own from parchment strips. Trust me on this one — I’ve had to chisel too many cups out of paper liners.
- Measure your oats correctly: Scoop the oats into the measuring cup with a spoon and level them off. If you scoop directly with the cup, you’ll pack in too many oats and the mixture will be dry and crumbly.
- Warm the peanut butter first: If your peanut butter is straight from the fridge, warm it gently before measuring. Cold peanut butter doesn’t incorporate evenly with the honey.
- Press hard: The biggest mistake I see is being too gentle when pressing the mixture into the tins. You want them compact so they don’t fall apart. Even if you press too hard, they’ll still be fine — I’ve done it.
Ways to Make These Your Own
- Vegan: Use maple syrup instead of honey. That’s the only swap you need. My sister-in-law makes these for her family and they disappear just as fast as the original.
- Sunflower Seed Butter Version: Swap the peanut butter for sunflower seed butter for a nut-free school lunch. One note: sunflower seed butter tends to be thinner, so add an extra ¼ cup of oats to firm things up.
- Add some crunch: Use crunchy peanut butter or toss in ¼ cup of chopped peanuts on top before they set.
- Chocolate drizzle: Melt ½ cup of dark chocolate chips with 1 teaspoon of coconut oil and drizzle it over the set cups. This is the version I make for holiday parties — it looks fancy but takes two extra minutes.
Questions You’ll Probably Have (Because I Had Them Too)
Q: Why did my cups crumble?
A: It’s almost always because the oats didn’t get enough time to absorb the liquid. Let the mixture rest for a full 10 minutes before scooping. If they’re still crumbly after that, add a tablespoon of warm honey and stir again. You’ve got this next time.
Q: Can I use quick oats?
A: You can, but the texture will be noticeably different. Quick oats absorb liquid much faster and break down, giving you a softer cup that’s more like a no-bake cookie. Rolled oats give you that chewy, substantial bite that holds together better.
Q: How long do these last at room temperature?
A: They’re fine at room temperature for about 3-4 hours, which makes them perfect for lunchboxes. For longer storage, keep them in the fridge — they last up to 2 weeks and taste best cold.
Q: What do you serve with these?
A: Honestly, they’re a complete snack on their own. But if I’m packing a lunch box, I’ll add sliced apples, some cheese sticks, and a little note. For a dessert tray, they’re beautiful alongside dark chocolate truffles and fresh berries.
More Recipes My Family Asks For Every Week
If these peanut butter oat cups disappear as fast as they do in my house, here’s what else is on heavy rotation:
- No-Bake Granola Bars — Chewy, packed with oats and honey, and they stay together better than anything from a box.
- Fluffy Peanut Butter Cookies — For the days when you want the same flavor but in a tender, melt-in-your-mouth cookie.
- School Lunch Power Muffins — Savory-adjacent muffins with cheese and zucchini that my kids actually eat.
The first time my daughter pulled one of these out of her lunchbox and it held together — no crumbs, no mess — I knew we had a winner. I hope they bring that same quiet satisfaction to your kitchen.
If you make them, would you leave a comment below? I read every single one, and your feedback helps other readers know it works.
📌 Save this no-bake peanut butter oat cups recipe for your next meal prep Sunday — they’re the lunchbox treat that actually stays together and takes 15 minutes to make.
No-Bake Peanut Butter Oat Cups
Equipment
- Standard 12-cup muffin tin
- Parchment paper liners
- Medium Saucepan
- Spatula or wooden spoon
- Cookie scoop
Ingredients
Peanut Butter Mixture
- 1 1/2 cups creamy peanut butter (natural, no added sugar)
- 1/2 cup honey (or maple syrup for vegan)
- 1 pinch salt (only if peanut butter is unsalted)
Dry Ingredients
- 2 cups old-fashioned rolled oats (not quick or steel-cut)
Optional Mix-Ins
- 1/2 cup mini chocolate chips, shredded coconut, or raisins
Instructions
- Line a standard 12-cup muffin tin with parchment paper liners. If using parchment strips, cut strips and lay them in each cup so they overhang on two sides.
- In a medium saucepan over low heat, combine the peanut butter and honey. Stir until fully melted and smooth, about 2 minutes. Do not rush on high heat or the peanut butter can scorch.
- Remove the pan from the heat. Stir in the rolled oats and pinch of salt until every oat is coated.
- Fold in any mix-ins now, such as mini chocolate chips.
- Let the mixture rest in the bowl for 10 minutes. This is crucial — the oats need to absorb the liquid so the cups hold together.
- Divide the mixture evenly among the 12 cups. Use a cookie scoop for uniformity. Press the mixture firmly into the cups — really pack it down.
- Place the muffin tin in the refrigerator for at least 30 minutes to set completely. Then peel away the parchment and enjoy. Store leftovers in the fridge for up to 2 weeks or freeze for up to 3 months.
Notes
Substitutions: For vegan, use maple syrup instead of honey. For nut-free, use sunflower seed butter and add an extra 1/4 cup oats to firm up the mixture.
Pro tip: Always use parchment liners, not paper liners, or the cups will stick.
Related posts:
 High-Protein Overnight Oats That Actually Taste Like Breakfast (Not a Chalky Disaster)
 Mini Quiche Recipe: The Store-Bought Crust Version That Tastes Like You Made It From Scratch
 The Slow Cooker Cowboy Casserole That Saves Tired Weeknights (No Soggy Tots Allowed)
 Quick Lemon Ricotta Pasta for Busy Weeknights: Creamy, Bright, and on the Table in 20 Minutes
 Lemon Garlic Butter Baked Salmon in Foil That’s Ready in 25 Minutes — No Fuss, No Mess
 Lipton Onion Soup Meatloaf for Tuesday Nights: Moist, Savory, and the Only One You’ll Ever Need