
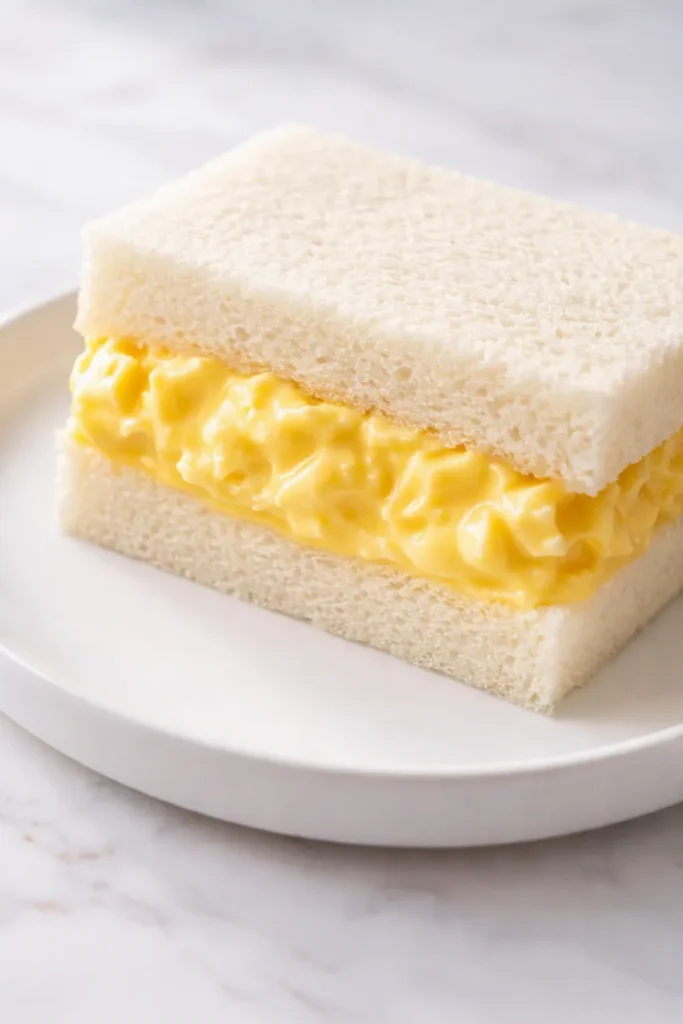
The first time I had one of these was in Savannah, at the tiny Japanese café my daughter Nora still calls “the egg sandwich place.” She ordered two, slid one across the table toward me, and watched my face. I’ve been making egg salad my whole life — my grandmother Marta’s version, with chives and a little sharp mustard — and I did not expect to be undone by a sandwich. But that first bite: bread so soft it barely registered as bread, filling so creamy and gently sweet it didn’t taste like any egg salad I’d ever eaten. The Japanese egg sandwich isn’t trying to impress you. It’s trying to be perfect — quiet perfection wrapped in plastic, the kind you remember for years. After we got home, I spent two weeks trying to recreate that texture in my own kitchen. This is the version that finally got it right.
The short version: Six eggs, three tablespoons of Kewpie mayo, and the softest bread you can find. That’s the whole list — and the whole thing is magic.
I made this six times in two weeks to get the texture right. My husband now asks “any egg sandwiches left?” before I’ve even said good morning.
- Serves: 2 as a meal, 4 as a snack or side
- Hands-On Time: 15 min | Total Time: 40 min
- Difficulty: Easy, once you know the two non-negotiables (Kewpie and soft bread)
- Cost per serving: about $1.75
- Calories: ~340 per sandwich
- Dietary Notes: Vegetarian; dairy-free with a butter swap (see variations)
(Photo above: two tamago sandos cut into neat rectangles on a pale blue ceramic plate, the pale yellow filling visible in a clean line between the thin white bread. Natural morning light from the left, a small white cup of coffee just out of frame.)
Why This Tastes Like the Real Thing (Not Just Egg Salad on Bread)
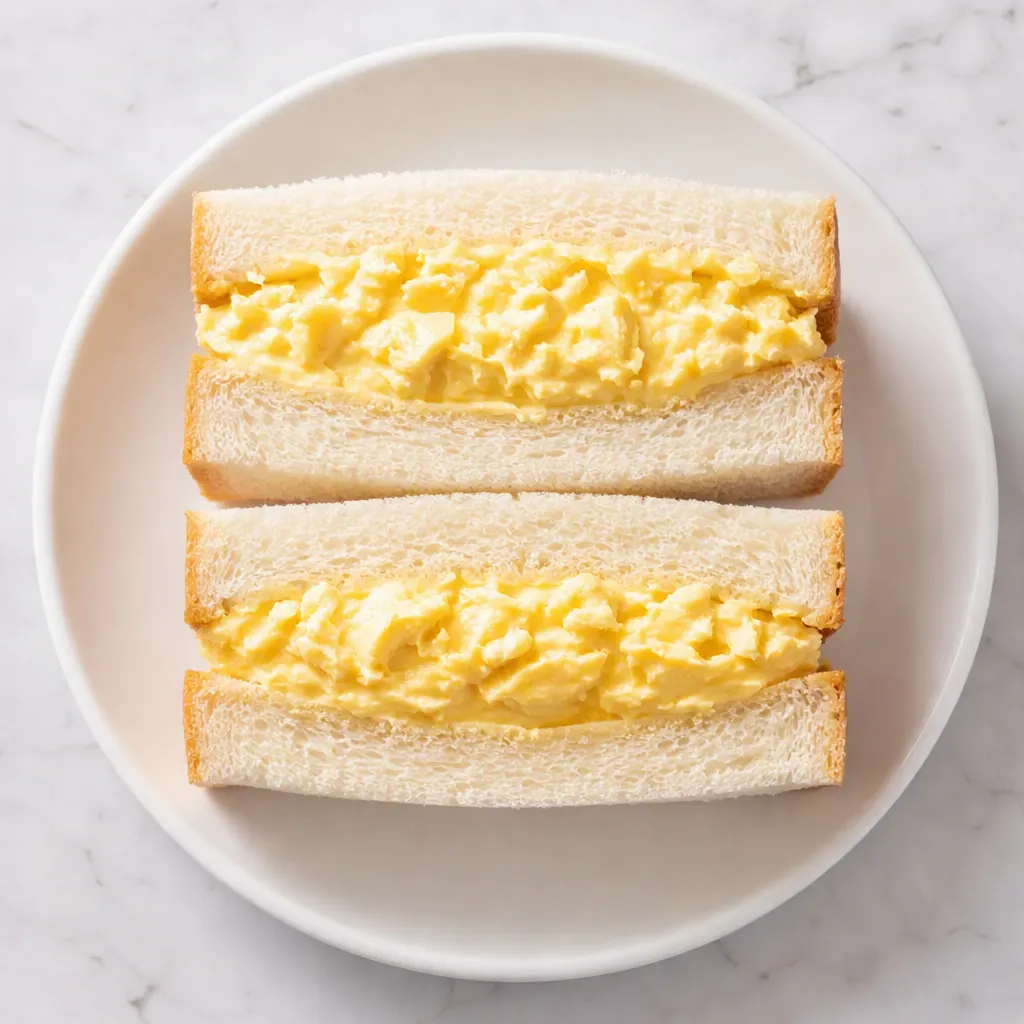
The first time I made a version of this with regular white bread and my usual mayo, I got a perfectly fine egg salad sandwich. And that was exactly the problem — fine isn’t what this is supposed to be. The real thing has three parts working together, and each one matters.
The eggs are cooked just to the edge of hard-boiled — fully set but still moist, so the yolk doesn’t turn chalky and the white doesn’t get rubbery. That’s the difference between a filling that feels creamy and one that feels like it’s been waiting in the fridge too long. The texture is the whole game.
Then there’s the bread, which is doing more work than bread usually does. Shokupan is soft and faintly sweet, with a springiness that regular sandwich bread doesn’t have. And the thin layer of butter on the bread isn’t just for flavor — it’s a moisture barrier. It keeps the egg salad from soaking in and turning everything into a sad, sagging mess. I learned that the hard way. My first attempt was unrecognizable by lunch.
What Goes Into a Tamago Sando (Plus a Few Notes From Me)
- 6 large eggs: The star. Cold from the fridge works fine here — they’re going into boiling water, and the cold egg keeps the yolk from overcooking while the white sets. Use large eggs, not jumbo; jumbo eggs cook too unevenly for this. My kids can pick the real thing out blindfolded in a tasting test, I’m not exaggerating.
- 3 tablespoons Kewpie mayonnaise: The ingredient that makes this a tamago sando and not just egg salad. Kewpie is made with only yolks, so it’s richer and silkier than American mayo, with a subtle tang I can’t describe as anything other than “that Japanese taste.” Found in the Asian foods aisle of most big supermarkets now — worth the hunt.
- 1 teaspoon sugar: I know. Sugar in egg salad sounds wrong. It’s not wrong — it’s the barely-there sweetness that makes the sandwich taste Japanese instead of American. It’s the flavor my husband keeps identifying as “something I can’t put my finger on.” That’s the sugar. Use it. This is the kid-friendly secret too — mine have never once turned down a sandwich made this way.
- 1/2 teaspoon rice vinegar: A small bright note that cuts through the richness. A squeeze of lemon works in a pinch, but rice vinegar is truer to the konbini version.
- 1/2 teaspoon fine salt: Fine salt dissolves better than flaky here. And if you have white pepper, add a small pinch — black pepper is too loud in a sandwich this delicate. White pepper just hums underneath.
- 8 slices shokupan (Japanese milk bread): The second non-negotiable. If you have an Asian grocery store anywhere near you, make the trip — the bread is sweet and pillowy in a way that commercial white bread simply isn’t. In a pinch, the softest white sandwich bread you can find will work, but seek out the real thing once and you’ll never go back.
- 1 tablespoon softened unsalted butter: For the thin barrier layer. It doesn’t need to be fancy — just soft enough to spread without tearing the bread. My trick: leave it on the counter while the eggs boil, and it’s ready exactly when I need it.
What to Pull Out Before You Start
- A medium saucepan with a lid — big enough that the eggs sit in a single layer without crowding
- A large bowl for the ice bath. You want enough cold water and ice that the eggs cool down fast
- A fork. That’s genuinely the only tool you need for the filling. If you want the ultra-smooth version, a fine-mesh sieve helps too
- Plastic wrap. Not optional — this is the trick that gives you clean cuts
- A sharp serrated knife. A dull knife squishes the bread, and squished bread means squished-out filling
Let’s Make It — It’s Faster Than You Think
This moves fast once the eggs are boiled. Read through it once before you start, and put the butter out to soften while the water heats up.
Boil the eggs:
- Boil: Bring a medium pot of water to a rolling boil. Lower the cold eggs in gently with a slotted spoon — don’t drop them; a crack in the shell means leaking white and a ruined texture. Set your timer for 9 minutes and let the water come back to a gentle, steady boil — not a violent one. A violent boil makes the eggs bounce around and crack. When the timer goes off, move the eggs straight into the ice bath for 5 minutes. Nine minutes gives you a yolk that’s fully set but still bright yellow and moist, with no gray-green ring. If you’ve seen that gray ring before, it’s your egg telling you it got cooked too long and too hard. We’re not doing that here.
- Peel: Tap the fat end of each egg — the one with the air pocket — on the counter, then roll the egg gently under your palm to crack the shell all over. Start peeling from the fat end and the shell comes off in big pieces. Rinse under cold water to catch any small bits. Peeling under the running stream helps when the shells are being stubborn.
- Mash: Into a bowl they go. Mash with a fork until the whites break down into a rough crumble — small pieces, but not a paste. You want a little structure left. For the ultra-smooth konbini-style filling, press about a third of the eggs through a sieve and mix it back in. That gives you a creamy binder with soft little bits — the best of both textures. (📸 Photo tip: Before you add the dressing, the crumble should look like soft cookie dough — dry, uniform, with no large chunks of white remaining.)
- Mix the dressing: In a small bowl, stir the Kewpie, sugar, rice vinegar, and salt together until the sugar is completely dissolved. This matters more than you’d think — if the sugar stays grainy, you’ll taste a tiny crunch that doesn’t belong there. Taste it. It should taste rich, tangy, and faintly sweet, like a sauce you could drink. I’m not saying I’ve tested that theory.
- Fold: Fold the dressing into the mashed eggs gently. Use a spatula and turn the mixture over itself a few times until the mayo is evenly distributed — but stop the moment it comes together. Overmixing turns it into a smooth paste, and you lose the little pockets of white that make each bite interesting. You’re folding, not whipping.
- Butter the bread: Spread a very thin, even layer of softened butter on all eight slices, all the way to the corners. I know it seems like this barely matters, but it’s the step that decides whether you get a beautiful sandwich or a soggy one. The butter is a shield. It prevents the egg salad from soaking into the bread. (📸 Photo tip: The butter should be a sheen, not a schmear — you should still be able to see the texture of the bread through it.)
- Fill and wrap: Divide the egg salad among four slices, spreading it gently into a soft, cloud-like layer. Don’t flatten it — a little height in the middle is what makes the first bite feel generous. Top with the remaining slices, buttered side down. Now wrap each sandwich tightly in plastic wrap — embarrassingly tight. Refrigerate for a full 15 minutes. This is not waiting time; this is working time. It lets the flavors settle and firms up the bread so it cuts cleanly. Warm sandwiches mush out at the edges. Cold ones hold their shape and look like the konbini version.
- Cut and serve: Trim the crusts if you want the full konbini look — I do, because the crustless edges are part of why it feels so soft. Use the serrated knife with a gentle sawing motion and let the knife do the work; don’t press down. Cut each sandwich into two rectangles, about two inches wide. (📸 Photo tip: You’re looking for a clean, straight edge with the pale yellow filling just barely visible — if you see the filling smeared along the cut line, the knife was too dull or the sandwich wasn’t chilled enough.) Serve immediately, with something hot and plain — tea or miso soup works beautifully.
Make-Ahead Notes (Because Breakfast Should Be Easy)
A single batch makes two sandwiches, which is exactly one for you and one for whoever’s lucky enough to be in the kitchen with you. When I’m feeding the whole family, I double everything and make it on Sunday. We’re set for Monday and Tuesday, and my kids actually pack their own now.
- Fridge: Wrapped tightly in plastic, the assembled sandwiches hold for about 24 hours — after that the bread starts to turn damp. The egg filling alone keeps for 3 days in an airtight container, and it’s just as good on toast the next morning.
- Freezer: I don’t freeze the assembled sandwiches. The bread gets dense and slightly gummy when thawed, which ruins the pillowy texture. You could freeze the filling, but it’s so fast to make fresh that I never bother.
- Reheat: Don’t. This is a cold sandwich through and through. If the filling’s been in the fridge, let it sit at room temperature for 10 minutes before you serve it — the flavors open up and it tastes like it was just made.
Things I Wish I’d Known the First Time
- The bread isn’t a suggestion. I know I’ve said it twice already, but I’m saying it again because it’s the difference between a sandwich and a memory. I tried this with a good sourdough once and got a perfectly decent egg sandwich — decent being exactly the problem. The soft, faintly sweet bread is doing a third of the work here. Find it.
- Kewpie is worth the hunt. I’ve tested this with regular mayo so I can tell you honestly: you’ll get a fine egg salad sandwich, but not a tamago sando. Kewpie’s yolk-based richness and subtle tang are the flavor. If you genuinely can’t find it, add a quarter teaspoon of rice vinegar and a tiny pinch of salt to full-fat mayo as a bridge. It gets you closer, but it’s not the same.
- Nine minutes, and not a minute more. I know it’s tempting to let the eggs go longer, but you can’t un-cook a sulfurous, gray-ringed yolk. Set a timer. The ice bath is just as important — it stops the cooking instantly, so the yolk keeps its bright color and the texture stays creamy.
- The plastic wrap is doing real work. Fifteen minutes wrapped tight in the fridge may feel like a waste when you’re hungry, but it’s the difference between a clean-cut rectangle and a squished, leaking mess. My husband thought I was overcomplicating it, so one day I made two — one chilled, one not. He ate the chilled one first. That settled it.
Swaps That Actually Work (And One That Doesn’t)
- Dairy-free: Use a plant-based butter for the barrier layer, or skip it and eat the sandwich the same day — it’ll get soft a little faster. A good vegan mayo works surprisingly well in the filling; just add an extra pinch of salt to compensate.
- Gluten-free: The softest gluten-free white bread you can find — look for one that’s sweet and cake-like rather than dense and seedy. Assemble it and eat it right away; gluten-free bread soaks up moisture much faster than shokupan.
- Spicy: A thin drizzle of sriracha or a sprinkle of shichimi togarashi over the filling before you close the sandwich. I make the kids’ sandwiches first, then add the heat to mine after they’ve left the kitchen.
- Fancy guest version: A few ultra-thin slices of cucumber folded into the filling, or a sprinkle of finely chopped chives with a flaky salt finish. There’s a café in Asheville that adds furikake to one of theirs, and it’s genuinely excellent — I’ve been trying to replicate it ever since.
- Don’t try: Onions, mustard, relish, or paprika. I love each of those in other egg salads — Marta’s version had chives and mustard, and it was wonderful. But every one of them muddies the clean, gentle flavor that makes a tamago sando taste like itself. Trust the restraint here; it’s the point.
The Questions I Get About This Recipe All the Time
Q: Why did my egg salad turn out gray and smell like sulfur?
A: Ugh, I’ve been there — it happens when eggs boil too long or too hard. The gray ring is just a reaction between the yolk and the white that shows up when the egg gets overheated. Set your timer for exactly 9 minutes at a gentle boil, then straight into an ice bath. Your next batch will look like sunshine, I promise.
Q: Can I use regular mayonnaise instead of Kewpie?
A: You can, and you’ll get a very good egg salad sandwich — I’ve done it so I can tell you honestly. But it won’t taste like a tamago sando. If you’re in a pinch, use full-fat mayo and add a quarter teaspoon of rice vinegar and a tiny pinch of salt to approximate the tang. It gets you closer.
Q: How long do these last? Can I freeze them?
A: Assembled and wrapped tightly, they’re best within 24 hours — the bread starts going damp after that. The filling alone keeps for 3 days in a covered container and is wonderful on toast if the bread runs out. I wouldn’t freeze the assembled sandwich; the bread turns gummy when it thaws.
Q: What do you serve with a Japanese egg sandwich?
A: In Japan it’s grab-and-go food — eaten on a train or a bench, or standing at a counter. At our house, I serve it with a little bowl of miso soup and quick pickled cucumbers to cut the richness. My kids also love it with tomato soup, which isn’t Japanese in any way, but it works and I’m not going to argue with a lunch that disappears.
More Recipes My Family Makes on Repeat
If you liked this one, here are a few others that get the same reaction at our table:
- [INTERNAL LINK PLACEHOLDER: My Grandmother’s Warm German Potato Salad] — The one with bacon vinaigrette that Marta made every Easter, and my kids still fight over the last spoonful.
- [INTERNAL LINK PLACEHOLDER: The Softest Scrambled Eggs, the Slow Way] — Four minutes and a low flame changed how my family does Sunday breakfast.
- [INTERNAL LINK PLACEHOLDER: Quick Cucumber and Rice Vinegar Salad] — The five-minute side dish that goes with anything, especially this sandwich.
The version at that little café in Savannah is still the one I measure against. But the sandwich I make in my own kitchen — with eggs from the farm down the road and bread I’ve learned to track down — gets a little closer every time. When you make this, and I hope you do, find a quiet minute to sit down with it. It’s a simple sandwich that asks for your full attention, and it earns it.
If you try it, drop a comment below — I love hearing how it goes for you. And tag me on your photo so I can see your version of the perfect rectangle!
📌 Japanese egg sandwich recipe that’s soft, creamy, and tastes like a Tokyo convenience store — save it for your next easy lunch or slow weekend morning.
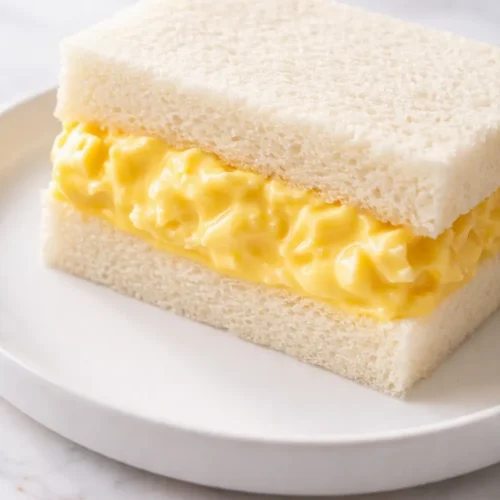
Japanese Egg Sandwich (Tamago Sando)
Equipment
- Medium saucepan with lid
- Large Bowl for Ice Bath
- Fork
- Plastic wrap
- Sharp Serrated Knife
- Fine-mesh sieve (optional)
Ingredients
For the filling
- 6 large eggs
- 3 tablespoons Kewpie mayonnaise
- 1 teaspoon sugar
- 1/2 teaspoon rice vinegar
- 1/2 teaspoon fine salt (plus a small pinch of white pepper, if you have it)
For the sandwich
- 8 slices shokupan (Japanese milk bread)
- 1 tablespoon softened unsalted butter
Instructions
- Bring a medium pot of water to a rolling boil. Lower the cold eggs in gently with a slotted spoon. Set a timer for 9 minutes and keep the water at a gentle, steady boil. When the timer goes off, move the eggs straight into an ice bath for 5 minutes.
- Crack the fat end of each egg, roll it gently under your palm to crack the shell all over, and peel starting from the fat end. Rinse under cold water to catch any small bits.
- Mash the eggs with a fork until the whites break into a rough crumble — small pieces, not a paste. For an ultra-smooth filling, press about a third of the eggs through a sieve and mix it back in.
- In a small bowl, stir together the Kewpie mayo, sugar, rice vinegar, and salt until the sugar is completely dissolved. Taste it — it should taste rich, tangy, and faintly sweet.
- Fold the dressing into the mashed eggs gently with a spatula, turning the mixture over itself until just combined. Stop the moment it comes together; overmixing makes it pasty.
- Spread a very thin, even layer of softened butter on all eight slices of bread, all the way to the corners. The butter is a moisture barrier and keeps the sandwich from turning soggy.
- Divide the egg salad among four slices, spreading it gently without flattening. Top with the remaining slices, buttered side down. Wrap each sandwich very tightly in plastic wrap and refrigerate for 15 minutes.
- Trim the crusts if you like, then cut each sandwich into two rectangles with a sharp serrated knife using a gentle sawing motion. Serve immediately with tea or miso soup.
Notes
Related posts:
 The Slow Cooker Cowboy Casserole That Saves Tired Weeknights (No Soggy Tots Allowed)
 Lemon Garlic Butter Baked Salmon in Foil That’s Ready in 25 Minutes — No Fuss, No Mess
 Moist Chocolate Zucchini Bread That Doesn’t Turn Out Rubbery — Finally
 Creamy Homemade Strawberry Dole Whip (That Tastes Just Like the Real Thing)
 Blueberry Peach Bread That Doesn’t Sink or Turn Mushy — Finally
 Quinoa Chicken Sausage Bowls That Are Ready in 30 Minutes (And Actually Keep Well)