
Every lemon garlic shrimp I tried before this one came out rubbery. Not just rubbery — those sad, overcooked curls that make you wonder why you didn’t just order takeout. This version? It’s the kind of shrimp that makes my daughter text me from Savannah asking for the recipe because her roommate tried it and won’t stop talking about it.
The short version: Fifteen minutes, one pan, and the shrimp stay tender with a lightly golden crust — not pale and watery, not tough and chewy.
I’ve made this about thirty times now, tweaking the garlic-to-lemon ratio until the balance is exactly right. It’s the dinner I make on nights when I’ve got twenty minutes before we need to eat and I still want something that feels like a real meal, not a compromise.
- Serves: 4 as a main over rice or pasta
- Hands-On Time: 10 min | Total Time: 15 min
- Difficulty: Easy enough for a Tuesday
- Cost per serving: ~$3.50
- Calories: ~250 per serving
- Dietary Notes: Naturally gluten-free; adaptable for dairy-free
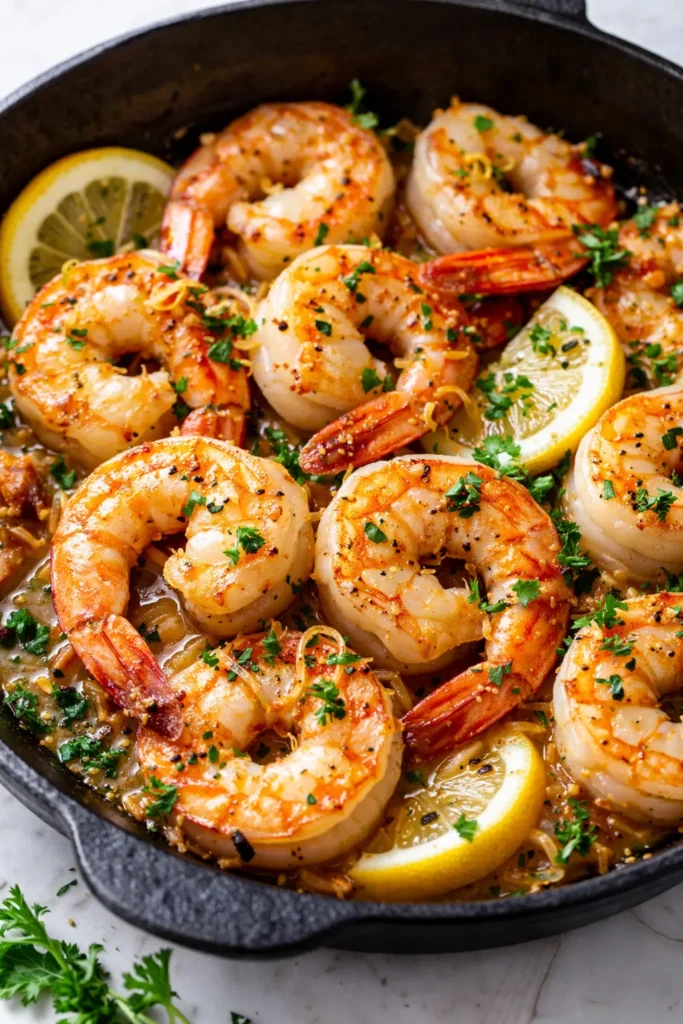
(Photo above: overhead shot of the finished shrimp in a white ceramic skillet, scattered with lemon wedges and fresh parsley, steam rising from the pan, natural light from the left showing the golden butter-garlic pool at the bottom.)
The Trick That Keeps the Shrimp Tender (And Why I Was Doing It Wrong)
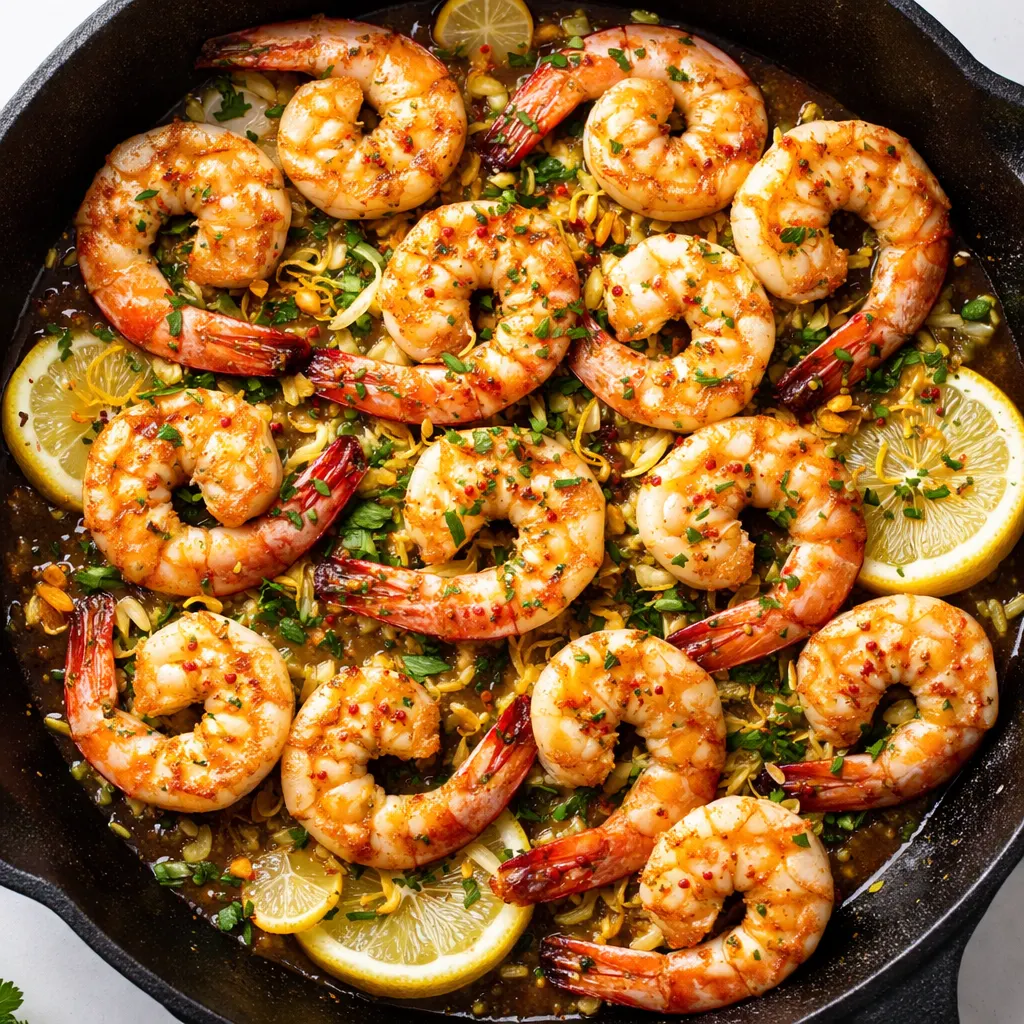
The biggest mistake I made for years was dumping raw shrimp into a hot pan and walking away. Shrimp cook fast — two minutes per side fast — and the moment they curl tight and turn opaque, they’re done. Any longer and you get that rubbery texture everyone hates.
The fix is simple: pat the shrimp completely dry with paper towels before they hit the pan. Wet shrimp steam instead of sear, and steaming gives you that pale, mushy exterior. Dry shrimp hit the hot butter and develop a thin, golden crust that locks in the moisture. I learned this after a particularly sad batch that tasted boiled, not sautéed. Never again.
This recipe gives you plump, juicy shrimp with bright lemon and mellow garlic — the kind that makes you want to spoon the pan juices over everything on your plate.
Ingredients Worth Talking About
- 1 ½ pounds large shrimp (21–25 count), peeled and deveined: Go with raw shrimp — the pre-cooked kind turns to rubber in seconds. If you can, buy wild-caught. The flavor is sweeter. My daughter insists on leaving the tails on for presentation; I take them off for easier eating on weeknights. Your call.
- 4 tablespoons unsalted butter: The base of the sauce. You can substitute a good-quality olive oil for dairy-free, but butter gives you that nutty richness. I use salted butter sometimes and just skip adding salt at the end — it works fine.
- 4 cloves garlic, thinly sliced (not minced): Thin slices melt into the butter without burning the way minced garlic does in a hot pan. My family loves garlic, so sometimes I do five cloves. Don’t tell anyone.
- 1 large lemon: You’ll use both the zest and the juice. Zest the whole lemon first, then juice it. Roll the lemon on the counter before juicing — you’ll get twice the juice.
- ½ teaspoon red pepper flakes (optional but recommended): A tiny kick that wakes up the lemon. My daughter skips it; I add it to my serving at the table.
- Salt and freshly ground black pepper: To taste. Simple.
- 2 tablespoons chopped fresh parsley or chives: Not just garnish — the fresh green makes the lemon pop. Dried parsley won’t do the same thing. Skip it and just use extra lemon zest if you don’t have fresh.
What You’ll Need (It’s Minimal)
- A large skillet — 12-inch works best, cast iron or stainless steel. Nonstick works too, but you won’t get the same golden crust on the shrimp.
- Tongs (or a slotted spatula) for flipping.
- A fine-mesh zester or microplane — if you don’t have one, use the small side of a box grater.
Let’s Make It (Step by Step)
This goes fast, so have everything ready before you turn on the stove. Read through once — you’ll see it’s mostly waiting for the pan to get hot.
Prep the shrimp: Pat the shrimp dry with paper towels. Really dry — I take an extra thirty seconds to blot each one. Season with a generous pinch of salt and a few grinds of pepper. Set aside.
- Heat the pan: Place your skillet over medium-high heat. Add the butter and let it melt, swirling the pan once or twice. When the butter stops foaming and starts smelling nutty — about 1 minute — you’re ready. (📸 Photo tip: You should see the butter bubbling around the edges of the pan, and a faint golden color starting at the center.)
- Sear the shrimp: Add the shrimp in a single layer. Don’t crowd them — cook in two batches if your skillet isn’t big enough. Let them cook undisturbed for 90 seconds. You’ll see the edges turning pink and a golden crust forming on the bottom.
- Flip and add garlic: Flip each shrimp with tongs. Scatter the sliced garlic and red pepper flakes (if using) around the pan. Cook for another 60–90 seconds, until the shrimp are just opaque and the garlic is fragrant but not brown. (📸 Photo tip: The shrimp should look pink all over with a few golden spots — not browned, just kissed by the butter.)
- Finish with lemon: Remove the pan from the heat immediately. Sprinkle the lemon zest over the shrimp, then squeeze the lemon juice over everything. Toss gently to coat. Taste a shrimp — if it needs more salt, add a pinch.
- Serve: Transfer to a serving platter or straight to plates. Spoon the pan juices over the top. Scatter with fresh parsley or chives.
How I Meal Prep This for the Week
I’ll be honest — this recipe is so fast that I rarely batch-cook it. But I do prep the shrimp ahead so dinner comes together in five minutes flat. Meal prep is mostly about having the pieces ready to go.
- Fridge: Peeled, deveined shrimp keep in a covered bowl for up to 2 days. Pat them dry right before cooking — don’t dry them ahead or they’ll get slimy.
- Freezer: Yes, with the lemon juice already in. Follow the recipe through step 4, but don’t cook it. Freeze the raw shrimp with the garlic, zest, and juice in a zip-top bag. To cook: thaw in the fridge overnight, then sear as directed (add a little extra butter because some liquid will have released).
- Reheat: The best way is in a hot skillet for 30 seconds per side. The microwave works but the shrimp lose that golden crust — still good for lunch, just not as pretty.
Things I Wish I’d Known the First Time
- Dry shrimp = crispy shrimp. I can’t overstate this one. Pat them dry until the paper towel comes away barely damp. If you skip this, the shrimp release water and steam instead of sear.
- Don’t cook past opaque. The second the shrimp turn from translucent to solid white-pink, they’re done. Overcooking by even 30 seconds makes them tough. It’s better to pull them off a tiny bit underdone — residual heat finishes them.
- Use the whole lemon. Zest adds bright citrus without the acidity that can make the sauce taste sharp. I add the zest off the heat so it stays fresh and fragrant.
- Even if you mess up the timing, don’t panic. I’ve accidentally left shrimp on the heat an extra minute — they’re still better than any frozen skillet meal you can buy. A squeeze of fresh lemon hides a multitude of sins.
Swaps That Actually Work
- Dairy-Free: Use a good-quality olive oil instead of butter. The flavor is different — more Mediterranean — but still delicious. Add a tablespoon of oil for every tablespoon of butter.
- More Vegetables: Toss in a handful of spinach or arugula after you take the pan off the heat — the residual warmth wilts it in a minute. Or add halved cherry tomatoes with the garlic in step 3.
- Kid-Friendly: Skip the red pepper flakes and add a teaspoon of honey to the butter. My daughter loved that version as a kid — it’s the sweet-salty-lemon thing.
- Company Version: Add a splash of dry white wine (a quarter cup) after the shrimp are out and let it reduce by half, then swirl in another tablespoon of cold butter. This makes a richer pan sauce that feels fancy with crusty bread.
Questions I Get About This Recipe All the Time
Q: Why did my shrimp turn out rubbery?
A: Ugh, I’ve been there. Most likely one of two things: the shrimp were overcooked (pull them off the heat sooner), or they weren’t dry enough before going in the pan. Next time, pat them extra dry and set a timer for 90 seconds on the first side. You’ve got this — it happens to all of us.
Q: Can I make this with frozen shrimp?
A: Yes, but thaw them completely and pat them very dry. Thawing in a colander under cold running water for 5 minutes works best. Then blot thoroughly — frozen shrimp hold more water. If you skip the drying step, they’ll steam instead of sear.
Q: How long does this last in the fridge? Can I freeze it?
A: Cooked shrimp keep in an airtight container in the fridge for up to 3 days. Reheat gently in a skillet — the microwave works but softens the crust. Freezing cooked shrimp is possible but I don’t love the texture after thawing. Better to freeze the raw prepped shrimp (see meal prep notes above).
Q: What do you serve with this shrimp?
A: In our house, the most common sides are: a bowl of lemony orzo (the shrimp juices soak right in), a simple arugula salad with shaved Parmesan, or crusty bread for mopping up the butter. My daughter loves it over rice with a squeeze of extra lemon.
More Recipes My Family Makes on Repeat
If you liked this one, here are a few others that get the same reaction at our table:
- [INTERNAL LINK PLACEHOLDER: Creamy Garlic Butter Chicken] — One skillet, thirty minutes, and a sauce so good you’ll want to drink it.
- [INTERNAL LINK PLACEHOLDER: One-Pan Lemon Herb Salmon] — The same bright lemon energy but with salmon that flakes perfectly every time.
- [INTERNAL LINK PLACEHOLDER: Garlic Parmesan Roasted Broccoli] — The side dish that actually gets my family excited about vegetables.
The first time I made this, my daughter ate her portion and then took the skillet off the counter to finish the pan sauce with a piece of bread. That’s when I knew I’d landed on something worth sharing. I hope it becomes that same kind of night for you — the kind where dinner comes together in a flash and everyone eats like they mean it.
If you try it, drop a comment below — I love hearing how it goes for you. Tag me on Pinterest so I can see your version!
📌 Save this lemon garlic shrimp recipe for busy weeknights when you need something fast, fresh, and family-friendly — dinner in 15 minutes, one pan, zero stress.
Lemon Garlic Shrimp
Equipment
- Large Skillet (12-inch)
- Tongs
- Microplane or fine-mesh zester
Ingredients
- 1 1/2 pounds large shrimp (21-25 count), peeled and deveined
- 4 tablespoons unsalted butter
- 4 cloves garlic, thinly sliced
- 1 large lemon
- 1/2 teaspoon red pepper flakes (optional)
- Salt and freshly ground black pepper
- 2 tablespoons chopped fresh parsley or chives
Instructions
- Pat the shrimp dry with paper towels. Season with a generous pinch of salt and a few grinds of pepper. Set aside.
- Heat a large skillet over medium-high heat. Add the butter and let it melt, swirling the pan once or twice. When the butter stops foaming and starts smelling nutty – about 1 minute – you’re ready.
- Add the shrimp in a single layer. Don’t crowd them – cook in two batches if needed. Let them cook undisturbed for 90 seconds. Edges will turn pink with a golden crust forming on the bottom.
- Flip each shrimp with tongs. Scatter the sliced garlic and red pepper flakes (if using) around the pan. Cook for another 60–90 seconds, until the shrimp are just opaque and the garlic is fragrant but not brown.
- Remove the pan from the heat immediately. Sprinkle lemon zest over the shrimp, then squeeze the lemon juice over everything. Toss gently to coat. Taste and adjust salt if needed.
- Transfer to a serving platter or plates. Spoon the pan juices over the top. Scatter with fresh parsley or chives. Serve immediately.
Notes
Related posts:
 Mini Quiche Recipe: The Store-Bought Crust Version That Tastes Like You Made It From Scratch
 Easy Shrimp Lo Mein That’s Faster Than Delivery (Ready in 30 Minutes)
 The Slow Cooker Cowboy Casserole That Saves Tired Weeknights (No Soggy Tots Allowed)
 Creamy Beef and Shells for Tuesday Nights: The One-Pot Dinner My Kids Actually Ask For
 Quick Lemon Ricotta Pasta for Busy Weeknights: Creamy, Bright, and on the Table in 20 Minutes
 Creamy Roasted Tomato and Garlic Ricotta Pasta That Tastes Like It Simmered All Day (Ready in 45 Minutes)