
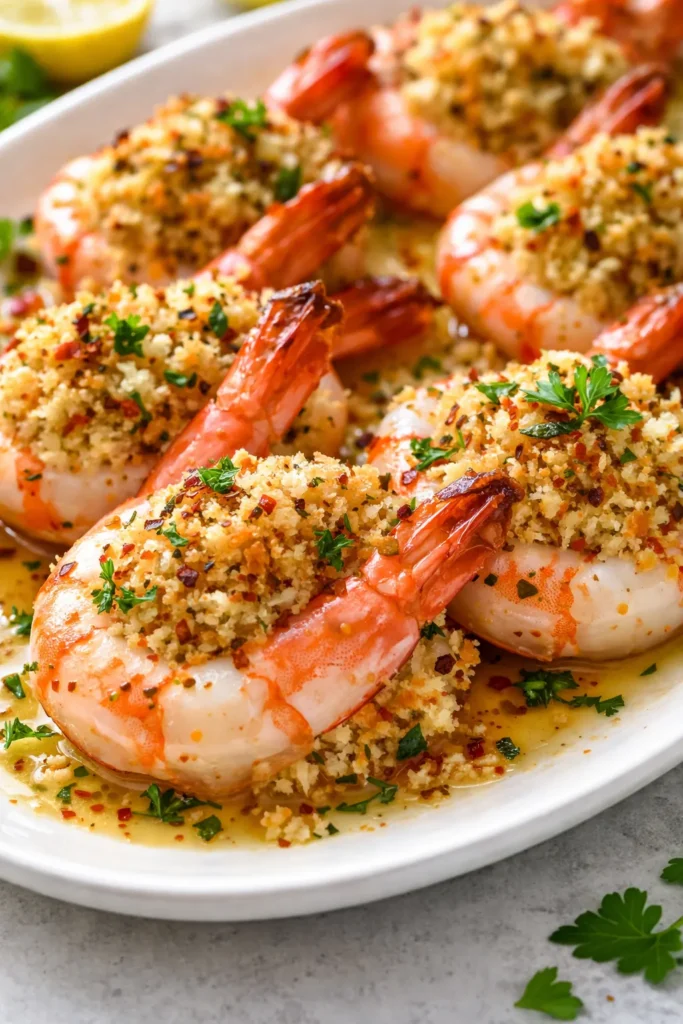
I used to reserve stuffed shrimp for restaurants. It was one of those dishes that felt like it belonged on a linen tablecloth with a $20 price tag, not something I’d ever pull off in my own kitchen on a random Tuesday. Then I spent an afternoon testing versions until I got the one that my family actually liked better than the restaurant version — and that is the one I’m giving you here. These are buttery, garlicky, and have the kind of golden-brown breadcrumb topping that shatters slightly when you bite into it. The best part? They’re ready in 35 minutes, and you don’t need any special equipment or seafood experience.
The short version: Jumbo shrimp stuffed with a creamy, garlicky breadcrumb topping, broiled until golden — and ready in 35 minutes with almost no mess.
I’ve tested this on my own family more times than I can count, and every single time, the plate comes back empty. My husband, who is usually a steak-and-potatoes guy, asked why we’d ever order these out again. That’s the kind of energy I want in your kitchen.
- Serves: 4 as an appetizer or 2 as a main
- Hands-On Time: 25 min | Total Time: 35 min
- Difficulty: Surprisingly doable — even on a weeknight
- Cost per serving: ~$5.50 as an appetizer
- Calories: ~320 per serving (appetizer portion)
- Dietary Notes: Adaptable for gluten-free
(Photo above: a cast iron skillet filled with golden-brown stuffed shrimp, lemon wedges tucked between them, fresh parsley scattered on top, warm afternoon light catching the crispy edges and melted butter pooling at the bottom.)
The Biggest Mistake People Make with Stuffed Shrimp (And How to Avoid It)
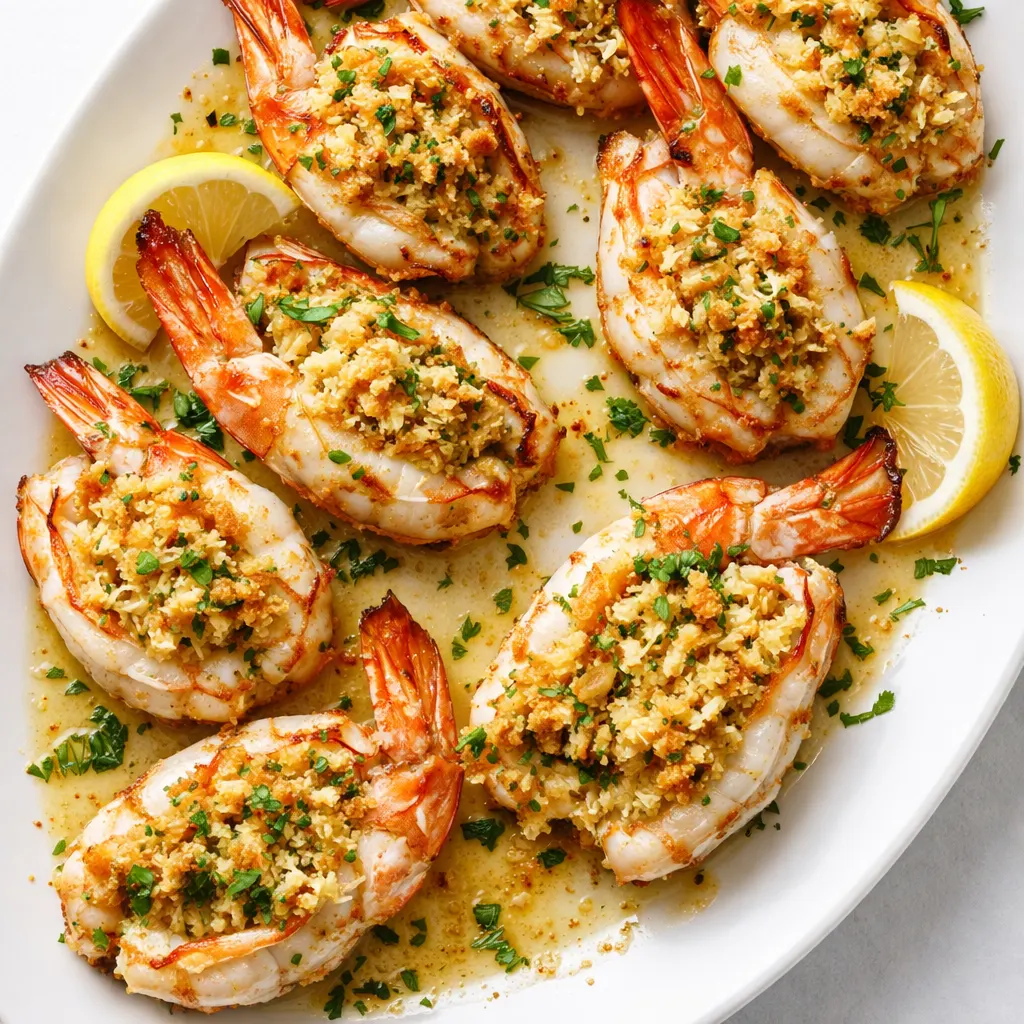
Most stuffed shrimp recipes have one problem: the topping dries out or falls off before the shrimp is done. I’ve been there — pulling a tray out of the oven with sad, dry stuffing scattered across the pan while the shrimp curl up into little balls. The trick is twofold. First, you need a binder that stays creamy under high heat — my secret is cold cream cheese straight from the fridge. It melts into a savory pocket that holds everything together without getting heavy. Second, you need to butterfly the shrimp deeply enough that they lie flat, creating a natural little boat for the stuffing. When you get both right, the topping stays put, the shrimp stay juicy, and every bite has that perfect balance of sweet seafood and savory crunch.
This method gives you a topping that’s golden and crisp on the outside but still soft and flavorful inside — the kind that clings to the shrimp and doesn’t scatter when you pick one up.
Everything You Need (Plus My Honest Notes)
- 12 jumbo raw shrimp (16/20 count): Look for peeled and deveined with the tails still on. The tails give you something to hold onto, and the larger size means they don’t overcook before the topping is ready. I buy frozen and thaw them in a bowl of cold water for 10 minutes — works every time.
- 4 oz cream cheese, softened but still cold: This is the binder that keeps everything creamy. Don’t use room-temperature butter here — cold cream cheese holds its shape better under the broiler. My kids don’t even notice it’s cream cheese — they just know the stuffing stays put.
- 1/2 cup panko breadcrumbs: Regular breadcrumbs get soggy. Panko stays crispy and gives you that shatter texture. I’ve tested this with regular breadcrumbs — don’t do it. Panko is worth the extra minute to find it at the store.
- 2 tbsp grated Parmesan: Adds a salty, nutty depth that balances the sweetness of the shrimp. The pre-shredded kind works fine here — I won’t judge.
- 2 cloves garlic, minced: One for the stuffing, one for the butter drizzle. I use a microplane for this — it melts right into the butter.
- 3 tbsp unsalted butter, melted: For richness and that golden-brown color. Don’t skimp here — butter is doing the heavy lifting.
- 1 tbsp fresh lemon juice + zest: Brightness to cut through the richness. Zest the lemon before you juice it — it’s so much easier that way.
- 2 tbsp fresh parsley, chopped: For color and freshness at the end. I grow it on my windowsill — but dried works in a pinch.
- 1/2 tsp Old Bay seasoning (or paprika): A little warmth and smokiness. Old Bay is classic for shrimp, but sweet paprika works beautifully too.
- Salt and black pepper to taste
What to Pull Out Before You Start
- A baking sheet or cast iron skillet (a 12-inch skillet fits 12 shrimp perfectly)
- A small mixing bowl for the stuffing
- A paring knife for butterflying
- A small spoon or your fingers for stuffing
- Parchment paper (makes cleanup so much easier)
That’s it. No special tools required.
Let’s Make It (Step by Step, No Fancy Skills Required)
This goes fast, so read through once before you start. The broiler moves quickly at the end, so don’t walk away.
First, preheat your broiler to high and position a rack about 6 inches from the heat source. Line your baking sheet or skillet with parchment paper.
- Butterfly the shrimp: Lay each shrimp flat on a cutting board. Use a paring knife to cut along the back, from the top to just before the tail, cutting about halfway through the shrimp. Open it flat like a book — you want a little pocket, not two separate pieces. (📸 Photo tip: You should be able to see the shrimp lying flat like a butterfly — if it’s curling up, cut a little deeper.)
- Pat them dry: Use paper towels to pat the shrimp dry on both sides. This is a small step that makes a big difference — dry shrimp brown better and don’t steam. I learned this the hard way after a tray of watery shrimp.
- Make the stuffing: In a small bowl, combine the softened cream cheese, half the panko, the Parmesan, half the minced garlic, the lemon zest, Old Bay, and a pinch of salt and pepper. Mix until just combined — don’t overwork it. The mixture should be thick enough to hold a shape when you spoon it.
- Stuff the shrimp: Spoon about 1 tablespoon of the mixture onto each butterflied shrimp, pressing gently so it stays in place. Don’t overstuff — you want a nice mound, not a volcano. (📸 Photo tip: The stuffing should sit on top like a little hat, not spill over the sides.)
- Chill for 10 minutes: Pop the tray in the fridge while you preheat the broiler. This sets the stuffing so it doesn’t slide off during cooking. Trust me on this one — 10 minutes makes a huge difference.
- Make the butter drizzle: In a small bowl, combine the melted butter, remaining minced garlic, lemon juice, and a pinch of salt. Brush or drizzle half of this over the stuffed shrimp, then sprinkle the remaining panko on top for extra crunch.
- Broil: Place the tray under the broiler for 5-7 minutes. Watch it closely after 4 minutes — the difference between golden and burnt is about 30 seconds under a hot broiler. The shrimp should be pink and opaque, and the stuffing should be deep golden brown — the color of a well-toasted marshmallow.
- Finish and serve: Drizzle the remaining garlic butter over the hot shrimp, sprinkle with fresh parsley, and serve immediately with lemon wedges. The smell that hits you when they come out of the oven is the smell of a successful dinner.
How I Meal Prep These for a Party (Or a Busy Weeknight)
These are actually perfect for entertaining because almost all the work happens ahead of time. I make a double batch on Sunday and we’re set for a fancy appetizer all week.
- Fridge: Assemble the stuffed shrimp up to 8 hours ahead. Keep them covered on a tray in the fridge. Add the butter drizzle and extra panko right before broiling. I do this for dinner parties all the time — it takes 5 minutes to finish them when guests arrive.
- Freezer: I don’t recommend freezing these. The texture of the shrimp changes, and the topping can get soggy on thawing. They’re so quick to assemble fresh that it’s not worth the trade-off.
- Reheat: If you somehow have leftovers, reheat them in a 350°F oven for 5 minutes, not the microwave. The microwave makes the shrimp rubbery and the topping soft. I’ve made this mistake — don’t be me.
Things I Wish I’d Known the First Time
- Cut deeper than you think for butterflying: The most common mistake is not cutting deep enough. If the shrimp curls up while cooking, it means you didn’t butterfly it enough. You want it to lie flat like an open book — that’s how you get a stable base for the stuffing.
- Cold cream cheese is your friend: Softened but still cold — not warm. Warm cream cheese melts too fast and slides off. I take it out of the fridge, let it sit for 10 minutes, and use it straight away.
- Don’t skip the chill step: That 10 minutes in the fridge is not optional. It sets the fat in the cream cheese so the topping stays put under the broiler. I’ve skipped it when I was in a hurry, and I regretted it.
- Watch the broiler like a hawk: Broilers vary wildly between ovens. My old oven took 7 minutes; my new one takes 5. The first time you make these, check them at 4 minutes and go from there. The breadcrumbs should be golden brown — if they’re darkening too fast, move the rack down.
Swaps That Actually Work (For Different Needs)
- Gluten-Free: Use almond flour or crushed pork rinds instead of panko. Almond flour gives a slightly nuttier flavor that works beautifully with shrimp. I make this version for a friend who has celiac — she says it’s even better than the original.
- Spicy: Add 1/4 teaspoon of red pepper flakes or a drizzle of sriracha to the cream cheese mixture. I do a half batch this way for myself when the kids want the mild version.
- Crab-Stuffed: Fold 1/4 cup of lump crabmeat into the cream cheese mixture. This is my go-to for Christmas Eve — it feels extra special without any extra work. My husband calls this the “fancy version” and requests it for his birthday.
- Dairy-Free: Use a dairy-free cream cheese alternative and vegan butter. I’ve tested this with a few brands — just make sure the cream cheese alternative is thick, not watery.
- Kid-Friendly: Skip the Old Bay and add a tiny pinch of garlic powder instead. My kids love these plain — I just add extra lemon and pepper to mine at the table.
Questions I Get About This Recipe All the Time
Q: Why did my shrimp curl up into little balls?
A: Ugh, I’ve been there. You likely didn’t cut deep enough when butterflying. The cut needs to go about halfway through the shrimp so it can lie flat. Think “butterfly book,” not “hot dog bun.” If it still curls, you can make a few small shallow cuts on the underside to help it relax — it’s an old trick that works every time.
Q: Can I use already cooked shrimp?
A: Please don’t. They’ll turn rubbery under the broiler. Raw shrimp are the way to go here — they cook perfectly in the time it takes the topping to get golden. If all you have is cooked shrimp, you could try a very quick broil (2-3 minutes) just to warm the topping, but the texture won’t be the same.
Q: Can I bake these instead of broiling?
A: You can, but the topping won’t get as crispy. If you’re nervous about the broiler, bake at 425°F for 10-12 minutes, then switch to broil for the last 1-2 minutes to brown the top. That gives you the best of both worlds.
Q: What do you serve with these?
A: A simple arugula salad with lemon vinaigrette is my go-to — the peppery greens balance the richness of the shrimp. For a bigger meal, serve them over rice or with crusty bread to soak up the garlic butter at the bottom of the pan. My kids like them with roasted asparagus on the side.
More Recipes My Family Makes on Repeat
If you liked this one, here are a few others that get the same reaction at our table:
- [INTERNAL LINK PLACEHOLDER: Garlic Butter White Wine Sauce] — The perfect quick sauce for shrimp, pasta, or dipping crusty bread
- [INTERNAL LINK PLACEHOLDER: Easy 30-Minute Cioppino] — A weeknight-friendly seafood stew that tastes like it simmered all day
- [INTERNAL LINK PLACEHOLDER: Sheet Pan Lemon Salmon with Asparagus] — My go-to for busy nights when I want something healthy and hands-off
I hope these stuffed shrimp become part of your regular rotation the way they have in mine. They’re the kind of recipe that looks like you spent way more time than you actually did — and honestly, that’s my favorite kind of cooking. When you try them, drop a comment below or tag me on Pinterest — I love seeing how it goes for you.
📌 This easy stuffed shrimp recipe looks fancy enough for a dinner party but comes together in 35 minutes — save it for your next special occasion at home.
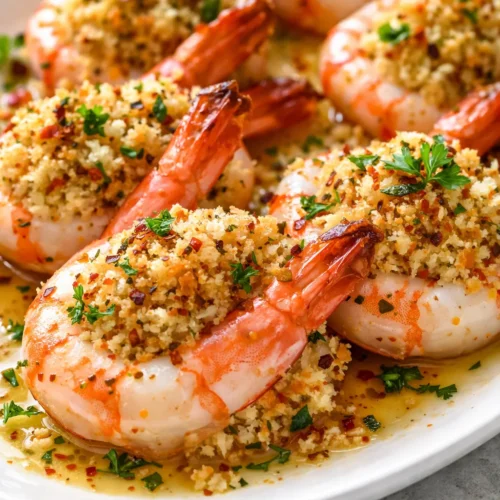
Stuffed Shrimp with Garlic Butter Breadcrumb Topping
Equipment
- Baking Sheet or Cast Iron Skillet
- Small Mixing Bowl
- Paring Knife
- Small Spoon or Fingers
- Parchment Paper
Ingredients
- 12 jumbo raw shrimp (16/20 count), peeled and deveined with tails on
- 4 oz cream cheese, softened but still cold
- 1/2 cup panko breadcrumbs
- 2 tbsp grated Parmesan cheese
- 2 cloves garlic, minced (divided)
- 3 tbsp unsalted butter, melted
- 1 tbsp fresh lemon juice
- 1 lemon zest
- 2 tbsp fresh parsley, chopped
- 1/2 tsp Old Bay seasoning or paprika
- Salt and black pepper to taste
Instructions
- Preheat your broiler to high and position a rack about 6 inches from the heat source. Line a baking sheet or cast iron skillet with parchment paper.
- Butterfly the shrimp: Lay each shrimp flat on a cutting board. Using a paring knife, cut along the back from the top to just before the tail, cutting about halfway through the shrimp. Open it flat like a book to create a small pocket.
- Pat the shrimp dry on both sides with paper towels. This helps them brown instead of steam.
- Make the stuffing: In a small bowl, combine the softened cream cheese, half the panko, the Parmesan, half the minced garlic, the lemon zest, Old Bay, and a pinch of salt and pepper. Mix until just combined – the mixture should be thick enough to hold a shape.
- Stuff the shrimp: Spoon about 1 tablespoon of the mixture onto each butterflied shrimp, pressing gently so it stays in place. Don’t overstuff.
- Chill for 10 minutes in the fridge to set the stuffing so it doesn’t slide off during broiling.
- Make the butter drizzle: In a small bowl, combine the melted butter, remaining minced garlic, lemon juice, and a pinch of salt.
- Brush or drizzle half of the garlic butter over the stuffed shrimp, then sprinkle the remaining panko on top for extra crunch.
- Broil for 5-7 minutes, watching closely after 4 minutes. The shrimp should be pink and opaque, and the stuffing should be deep golden brown.
- Drizzle the remaining garlic butter over the hot shrimp, sprinkle with fresh parsley, and serve immediately with lemon wedges.
Notes
Related posts:
 Mini Quiche Recipe: The Store-Bought Crust Version That Tastes Like You Made It From Scratch
 Easy Shrimp Lo Mein That’s Faster Than Delivery (Ready in 30 Minutes)
 The Slow Cooker Cowboy Casserole That Saves Tired Weeknights (No Soggy Tots Allowed)
 Creamy Beef and Shells for Tuesday Nights: The One-Pot Dinner My Kids Actually Ask For
 Quick Lemon Ricotta Pasta for Busy Weeknights: Creamy, Bright, and on the Table in 20 Minutes
 Creamy Roasted Tomato and Garlic Ricotta Pasta That Tastes Like It Simmered All Day (Ready in 45 Minutes)