
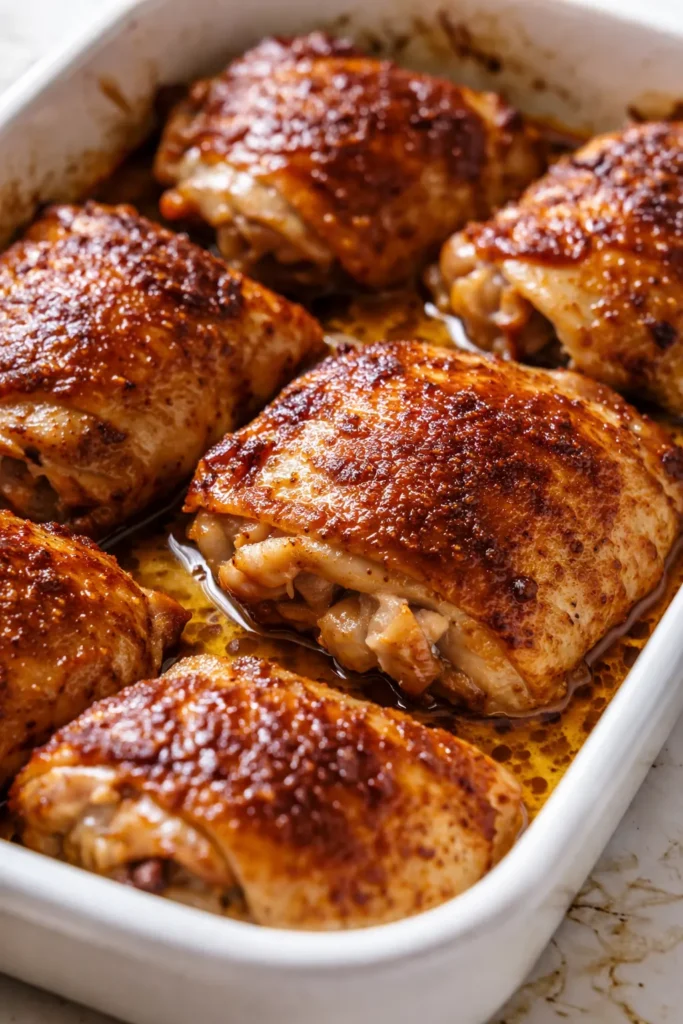
The first time I pulled these out of the oven, the skin crackled when I touched it with the tongs. That sound — that specific, shatteringly crisp sound — is what I’d been chasing for years. Every dry, bland chicken thigh I’d made before that moment? Worth it. Because this version? It’s the one my kids ask for by name on busy school nights, the one my husband texts me from work to check if we’re having. And the best part? It’s genuinely easy. No flipping, no basting, no complicated spice blends. Just golden, juicy chicken that comes out right every single time.
The short version: Bone-in, skin-on chicken thighs seasoned simply, roasted hot, and finished with a trick that keeps the meat tender and the skin crisp.
I’ve made this recipe over thirty times in the last year — tweaking temperatures, testing rack positions, even trying it with and without the one step everyone wants to skip. The version I’m sharing today is the one that passed every single test with my family. My picky nine-year-old, who once declared all chicken “boring,” ate three thighs in one sitting and asked if I could make it again tomorrow.
- Serves: 4 as a main
- Hands-On Time: 10 min | Total Time: 40 min
- Difficulty: Easy — even on a Tuesday after work
- Cost per serving: ~$2.50
- Calories: ~385 per serving
- Dietary Notes: Naturally gluten-free, low-carb, keto-friendly. Adaptable for dairy-free.
(Photo above: overhead shot of golden-brown chicken thighs arranged on a sheet pan lined with parchment, skin side up, with fresh rosemary sprigs tucked around them and a few cracks of black pepper visible — warm afternoon light from the window catching the glossy, crisp skin.)
The One Trick That Keeps These Juicy (Not Dry) Every Time
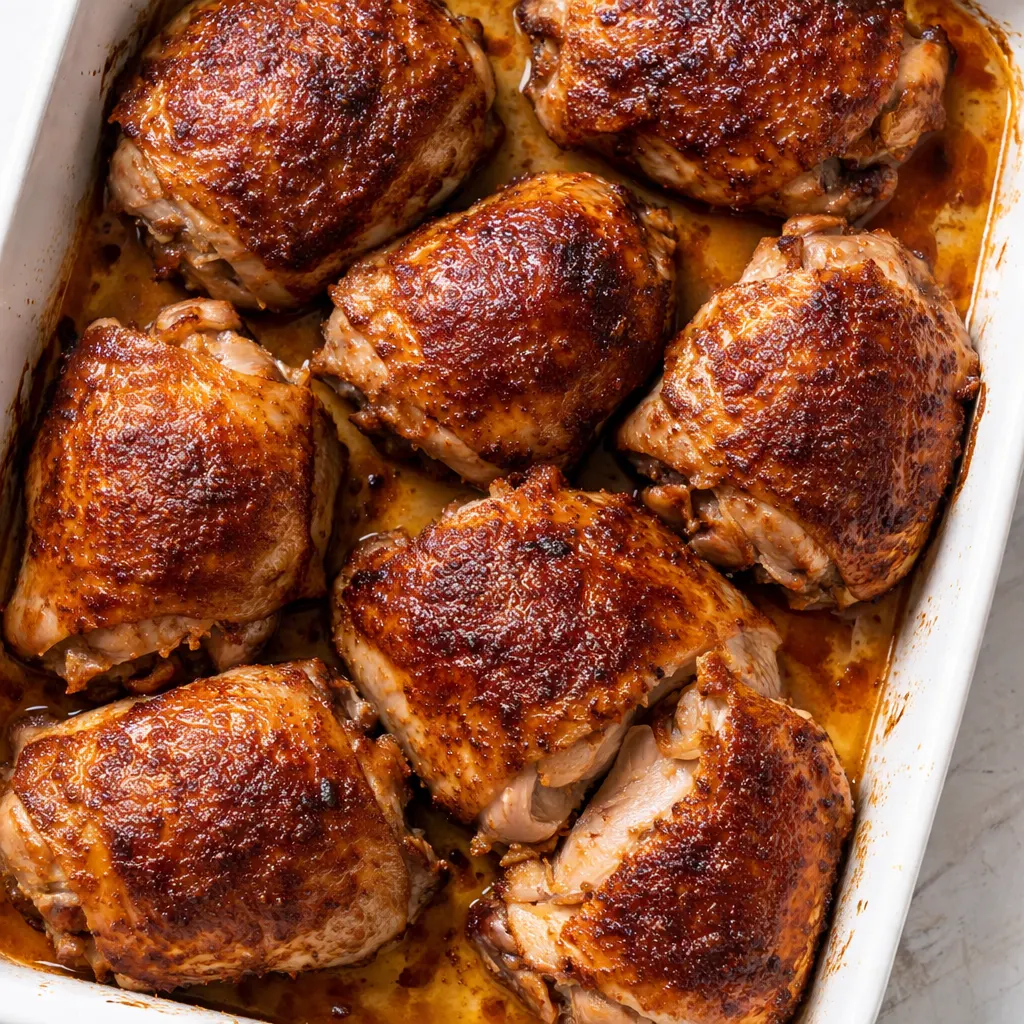
The secret isn’t complicated. It’s not a fancy brine or a marinade that takes overnight. It’s this: you start the chicken skin-side down in a cold pan, let the fat render slowly on the stovetop for a few minutes, then flip and transfer everything to a hot oven. That first step — the cold start — gives the fat time to melt evenly, which means the skin gets uniformly golden and the meat stays tender because it’s basting in its own rendered fat from the very beginning.
I learned this the hard way after way too many dry, tough thighs. I’d crank the oven to 450°F, throw the chicken in skin-side up, and wonder why the skin was flabby and the meat was dry. The problem was the fat never had a chance to render before the heat hit it. The cold start gives it that chance. And when you finally flip it? The skin is already partway there — the oven just finishes the job. I skip the flipping step in most recipes because it feels fussy. But this one? It’s two minutes of active time that changes everything.
The result is what I think of as the perfect weeknight chicken: deeply browned, crackling-crisp skin, tender meat that pulls apart with a fork, and a pan full of drippings that you’ll want to spoon over potatoes or rice.
Everything You Need (And a Few Notes From Me)
- 4 bone-in, skin-on chicken thighs (about 6–8 oz each): Bone-in is non-negotiable here. The bone keeps the meat moist as it cooks. Skin-on gives you that golden crunch. If you try this with boneless thighs, reduce the oven time by about 10 minutes and keep an eye on the internal temp. My kids actually prefer the bone-in version — they fight over the tiny bits of meat near the bone because they say it’s the most flavorful part.
- 1 tablespoon olive oil: Just enough to coat the pan and help the seasoning stick. I use a standard extra virgin, but any neutral cooking oil works. Don’t use butter for this step — it burns at the temperature we’re using.
- 1 teaspoon kosher salt: Diamond Crystal is what I use because the larger flakes distribute more evenly. If you’re using Morton’s or fine table salt, reduce to ¾ teaspoon. I learned the salt difference the hard way — oversalted a batch once and my husband very kindly said “maybe a little less next time.”
- ½ teaspoon black pepper, freshly ground: Pre-ground is fine in a pinch, but fresh makes the pepper more aromatic and less dusty-tasting.
- 1 teaspoon garlic powder: Not granulated garlic — powder dissolves better into the fat and clings to the skin. This is one of those swaps I didn’t think mattered until I tested both side by side. Granulated leaves tiny hard bits that burn. Powder disappears into the crust.
- 1 teaspoon smoked paprika: Adds color and a subtle warmth that’s not spicy. Regular paprika works if that’s what you have, but smoked gives it a deeper, almost bacon-y note. My daughter once asked if I put “campfire spice” on the chicken. That’s the smoked paprika working.
- Optional: Fresh rosemary or thyme sprigs: Tuck a few under the chicken before it goes in the oven. They perfume the meat without overwhelming it. I use rosemary when I’m feeling fancy and thyme when I just want that subtle savory background.
What to Pull Out Before You Start
- A 10- or 12-inch cast iron skillet or heavy oven-safe stainless steel pan. If you don’t have cast iron, a heavy stainless pan works — just be careful it’s oven-safe to 450°F.
- Paper towels for drying the chicken.
- Tongs for flipping.
- An instant-read thermometer (optional but recommended for peace of mind).
I’ve made this in a regular baking dish too, and it works — you just won’t get the same crispy skin because the chicken isn’t sitting in its own rendered fat the same way. If you go that route, skip the stovetop step and add 5 minutes to the oven time.
Here’s How I Do It (Step by Step)
I promise this goes fast. Read through once before you start, and you’ll have dinner on the table in about 40 minutes with maybe 10 minutes of actual hands-on time.
Preheat and prep: Set your oven rack to the middle position and preheat to 450°F. Pull the chicken out of the fridge and let it sit at room temperature while you get everything ready — about 10 minutes. This helps it cook more evenly.
- Pat the chicken dry: Use paper towels to thoroughly dry each thigh on both sides. Don’t skip this. Dry skin is what gets crispy. Wet skin steams and stays pale. (📸 Photo tip: Your chicken should look matte, not glossy, after drying — no visible moisture on the surface.)
- Season the chicken: In a small bowl, mix the salt, pepper, garlic powder, and smoked paprika. Sprinkle the mixture evenly over both sides of the chicken thighs, pressing gently to help it stick.
- Cold start on the stovetop: Place your oven-safe skillet on the stovetop over medium-low heat. Add the olive oil and swirl to coat. Place the chicken thighs in the pan, skin-side down. Don’t move them. Let them cook undisturbed for 5 minutes. You should hear a gentle sizzle — if it’s loud and aggressive, turn the heat down. The fat is rendering during this time, and the skin is starting to turn golden.
- Flip and transfer to the oven: After 5 minutes, use tongs to flip the chicken so the skin side is up. The skin should be pale gold with some darker spots — not fully browned yet, that’s okay. Transfer the entire skillet to the preheated oven. (📸 Photo tip: This is the point where the chicken goes from looking raw to starting to develop color — the edges of the skin will have a faint golden rim.)
- Roast until done: Roast for 22–28 minutes, depending on the size of your thighs. I start checking at 22 minutes. The skin should be deep golden brown and the meat should register 175–185°F on an instant-read thermometer inserted into the thickest part without touching bone. Thigh meat is forgiving — it stays juicy even at higher temps. I actually prefer it at 185°F because the fat has fully rendered and the meat pulls apart more easily.
- Rest before serving: Remove the skillet from the oven and transfer the chicken to a cutting board or serving platter. Let it rest for 5 minutes — this lets the juices redistribute so they don’t run out when you cut into it. This is the hardest step for my family because the house smells incredible by now. But trust me, it’s worth the wait.
How I Meal Prep These for the Week
I make a double batch on Sundays and we’re set for the first half of the week. These reheat beautifully — the skin stays reasonably crisp, and the meat doesn’t dry out. I wrap each thigh individually in foil or store them in a glass container with the lid slightly cracked so the skin doesn’t steam.
- Fridge: Store in an airtight container for up to 4 days. Reheat on a sheet pan at 350°F for 10–12 minutes, or in the air fryer at 375°F for 5–6 minutes.
- Freezer: Yes, they freeze well for up to 3 months. Wrap each cooled thigh tightly in plastic wrap, then foil, and place in a freezer bag. Thaw overnight in the fridge before reheating.
- Reheat: The microwave works in a pinch but the skin will get soft. For crispy reheating, use the oven or air fryer. My secret trick: reheat on a wire rack set over a sheet pan so air circulates all around — the skin comes back to life.
Things I Wish I’d Known the First Time
- Don’t crowd the pan: Four thighs is the max for a 10-inch skillet. If you try to fit six, the pan gets overcrowded and the chicken steams instead of crisping. When I need more, I use two skillets or cook in batches. Even if you only have one skillet, the stovetop step is fast enough that the first batch is resting in the oven while the second is starting on the stove.
- Let the pan come back to temperature: If you’re cooking a second batch, let the pan cool down for a couple minutes before adding more oil and chicken. A screaming-hot pan will burn the spices before the fat has a chance to render.
- Resist the urge to peek: Opening the oven door to check on the chicken every 5 minutes drops the temperature and extends the cooking time. Trust the timer. If you want to peek, do it at the 22-minute mark when it’s almost done anyway. I know it’s hard — I’ve been there — but the chicken will thank you.
- Even if the skin isn’t perfectly crackly everywhere, it’s still delicious: The first time I made this, one side of the skin was a little pale because I didn’t dry the chicken thoroughly enough. But the meat was still juicy and flavorful. Perfection is a nice goal, but a good meal is better than a perfect one that stresses you out.
Swaps That Actually Work
- Dairy-Free: This is already dairy-free as written — just use olive oil and skip any butter-based finishing. My dairy-free sister-in-law loves this recipe.
- Gluten-Free: Naturally gluten-free. Double-check your spice blends if you’re buying them pre-mixed — some contain anti-caking agents with wheat. But plain garlic powder and paprika are safe.
- Spicy version: Add ½ teaspoon cayenne pepper to the seasoning mix. My husband does this for himself and the kids get the mild version. It’s like one dish, two meals.
- Kid-friendly: Skip the paprika if your kids are sensitive to smoky flavors. I’ve made it with just salt, pepper, and garlic powder and my kids still devour it. They call it “plain chicken” but eat three pieces every time.
- For a fancier dinner: After flipping the chicken, add a splash of dry white wine or chicken broth to the pan before it goes in the oven. It creates a quick pan sauce in the same skillet while the chicken roasts. I do this when we have guests and want it to feel special without extra work.
Questions I Get About This Recipe All the Time
Q: Why did my chicken skin come out pale and flabby instead of crispy?
A: I’ve been there — it’s frustrating! The most common reason is the chicken wasn’t dry enough before seasoning. Water is the enemy of crisp skin. Pat those thighs thoroughly with paper towels, and let them sit uncovered in the fridge for 20 minutes if you have extra time. Also, make sure your pan isn’t overcrowded. Steam from crowded chicken will soften the skin before it has a chance to crisp.
Q: Can I make this with boneless, skinless chicken thighs?
A: You can, but the texture will be different. Boneless thighs cook faster — about 18–22 minutes total — and the skinless version won’t have that crackly finish. If you use boneless, I’d recommend skipping the stovetop step and just roasting them at 425°F for 20 minutes. I’ve tested it and it works! Just don’t expect the same crispy exterior.
Q: How long does this last in the fridge? Can I freeze it?
A: Up to 4 days in an airtight container in the fridge. For freezing, wrap each cooled thigh individually in plastic wrap, then foil, and store in a freezer bag for up to 3 months. Thaw overnight in the fridge. To reheat, I recommend the oven at 350°F for 15 minutes or the air fryer at 375°F for 6 minutes. The microwave is fine in a pinch but the skin will get soft. Some people actually like the soft-skin version for shredding over salads — so it’s not a mistake, just different.
Q: What do you serve with these chicken thighs?
A: In our house, we do a few different things depending on the night. My kids love them with roasted potatoes and a simple green salad. I personally love them over a warm lentil salad or with roasted broccoli and a squeeze of lemon. On busy nights, I throw some frozen vegetables in the oven next to the chicken for the last 15 minutes of roasting — easy, one-pan dinner. My husband’s favorite is with white rice and the pan drippings spooned over everything.
More Recipes My Family Makes on Repeat
If you liked this one, here are a few others that get the same reaction at our table:
- Crispy Sheet Pan Salmon with Lemon and Herbs — Forty-five minutes, one pan, and my kids fight over the crispy bits.
- My Grandmother’s German Apple Cake — The one that started it all. Every fall, I make it at least five times.
- Slow-Roasted Pork Shoulder for Sunday Suppers — Weekend cooking that fills the house with the kind of smell that makes everyone ask what time dinner is.
I hope this recipe becomes one of those go-to dinners in your kitchen — the kind you don’t have to think twice about on a busy Tuesday, the one that makes everyone around the table happy. That’s what it is in my house. And every time I pull a batch out of the oven and hear that crackling sound, I think about the version of me that made dry chicken for years and wish I could go back and share this with her.
If you try it, drop a comment below — I love hearing how it goes for you! And if you’re on Pinterest, tag me so I can see your golden, crispy results.
📌 Save this oven baked chicken thighs recipe for easy weeknight dinners — it stays juicy and gets golden crispy skin in just 40 minutes.
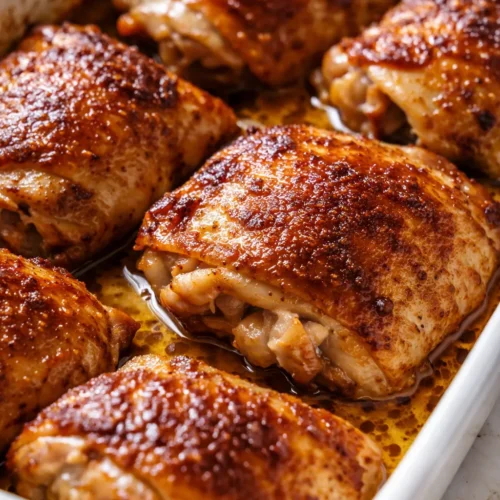
Juicy Oven Baked Chicken Thighs
Equipment
- 10- or 12-inch cast iron skillet or oven-safe stainless steel pan
- Paper towels
- Tongs
- Instant-read thermometer (optional)
Ingredients
- 4 bone-in, skin-on chicken thighs (about 6-8 oz each)
- 1 tablespoon olive oil
- 1 teaspoon kosher salt (Diamond Crystal preferred)
- 1/2 teaspoon black pepper, freshly ground
- 1 teaspoon garlic powder
- 1 teaspoon smoked paprika
- Optional: Fresh rosemary or thyme sprigs
Instructions
- Preheat your oven to 450°F with the rack in the middle. Let the chicken thighs sit at room temperature for about 10 minutes while you prep.
- Pat the chicken thighs thoroughly dry on both sides with paper towels. Dry skin is essential for crispiness – the surface should look matte, not glossy.
- In a small bowl, mix the salt, pepper, garlic powder, and smoked paprika. Sprinkle evenly over both sides of the chicken, pressing gently to adhere.
- Place your oven-safe skillet over medium-low heat. Add the olive oil and swirl to coat. Arrange the chicken thighs skin-side down in the cold pan. Cook undisturbed for 5 minutes – you want a gentle sizzle, not a loud sputter.
- Flip the chicken skin-side up using tongs. The skin should be pale gold with darker spots – not fully browned yet. Transfer the skillet to the preheated oven.
- Roast for 22-28 minutes, depending on thigh size. Start checking at 22 minutes. The skin should be deep golden brown, and an instant-read thermometer inserted into the thickest part (not touching bone) should read 175-185°F. I prefer 185°F for the most tender meat.
- Remove from the oven and transfer the chicken to a cutting board or platter. Let rest for 5 minutes before serving – this lets the juices redistribute. Serve with pan drippings spooned over rice, potatoes, or vegetables.
Notes
Related posts:
 Mini Quiche Recipe: The Store-Bought Crust Version That Tastes Like You Made It From Scratch
 Easy Shrimp Lo Mein That’s Faster Than Delivery (Ready in 30 Minutes)
 The Slow Cooker Cowboy Casserole That Saves Tired Weeknights (No Soggy Tots Allowed)
 Creamy Beef and Shells for Tuesday Nights: The One-Pot Dinner My Kids Actually Ask For
 Quick Lemon Ricotta Pasta for Busy Weeknights: Creamy, Bright, and on the Table in 20 Minutes
 Creamy Roasted Tomato and Garlic Ricotta Pasta That Tastes Like It Simmered All Day (Ready in 45 Minutes)