
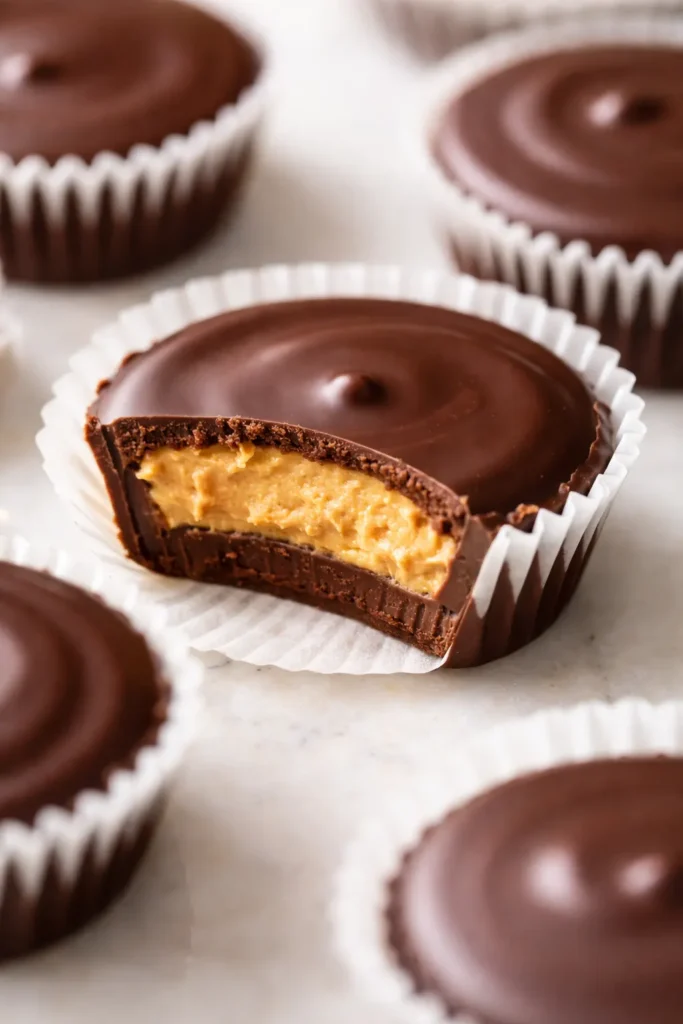
The first time I made these, I actually texted my sister a photo and said, “Tell me this doesn’t look like a real peanut butter cup.” She called me immediately and said, “Send me the recipe or I’m driving up there.” That’s the energy we’re going for today. These keto fat bombs are creamy, salty, chocolatey, and they come together so fast you’ll wonder why you ever bought the store-bought version. They’ve saved my low-carb lifestyle more times than I can count.
The short version: 15 minutes of work, 1 hour to set, and a creamy, chocolatey treat that fits perfectly in your macros.
I’ve been making these every single week for two years now. My husband—who is definitely not keto—steals them from the fridge constantly. That’s how I know they’re good.
- Serves: Makes 12 fat bombs
- Hands-On Time: 15 min | Total Time: 1 hour 15 min
- Difficulty: Easy — if you can melt coconut oil, you can make these
- Cost per serving: ~$0.75
- Calories: ~150 per serving
- Dietary Notes: Naturally Keto, Low-Carb, Gluten-Free, Vegetarian
(Photo above: a stack of chocolate fat bombs dusted with flaky sea salt and a few chunks of peanut butter on a slate board, shot top-down in bright afternoon light so the chocolate looks glossy and smooth.)
The Secret to Getting That Candy-Bar Texture (Without the Sugar)
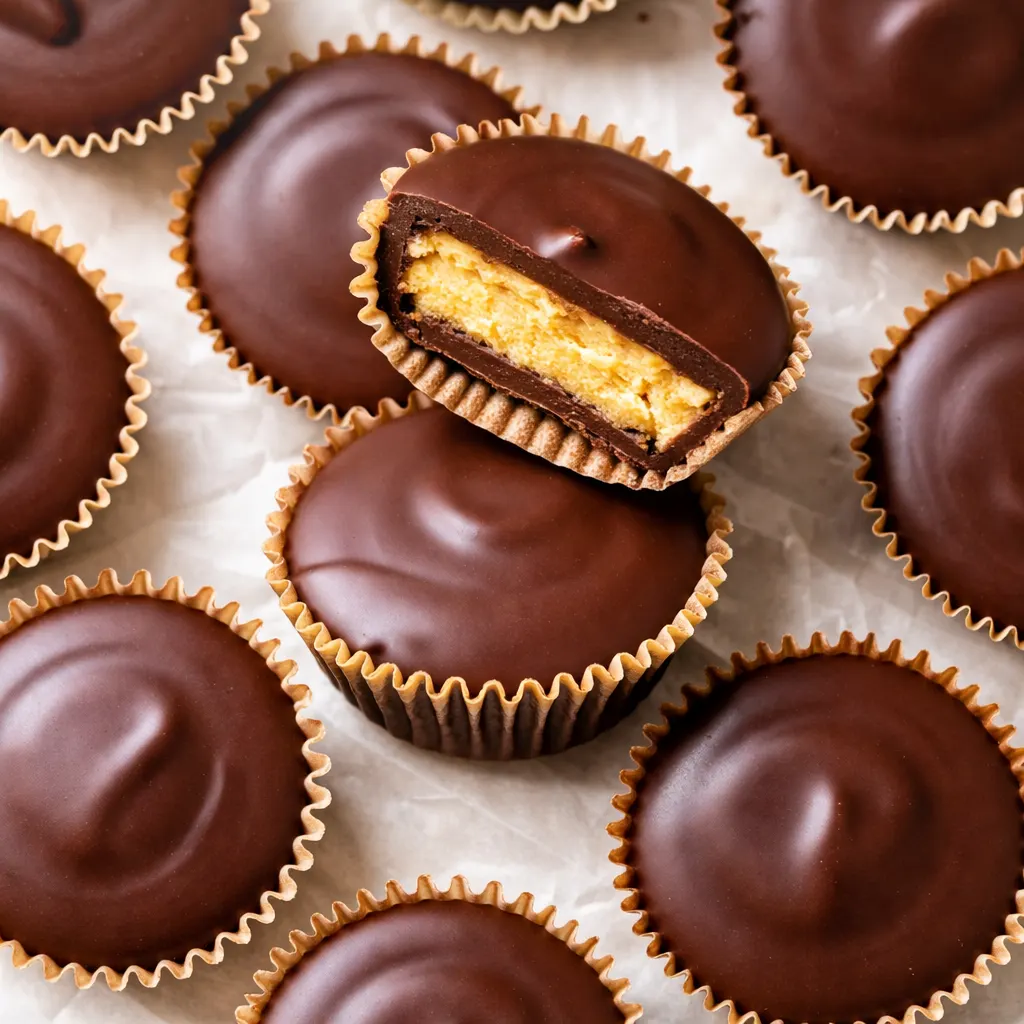
Most fat bombs end up icy or grainy. Not these. The coconut oil keeps them meltingly smooth at room temp—soft, like a real peanut butter cup—and firm enough straight from the fridge to travel. The salt cuts the richness so you can’t eat just one. The best part? They freeze beautifully. I pull one out when that afternoon “I need chocolate” feeling hits and I don’t want to undo my whole day’s progress.
What You Need (Plus My Honest Notes)
- 1/2 cup natural peanut butter: Just peanuts and salt. No sugar added. The kind that has oil sitting on top—that’s the good stuff. Stir it well before you measure. My kids can smell the difference when I use the sweetened stuff, and they’ll actually pass on these if I do. Keep it clean.
- 1/4 cup coconut oil, divided: This is what gives these fat bombs their firm-but-creamy texture. Refined or unrefined works; I use unrefined because I like a faint coconut note with the chocolate.
- 3 tbsp cocoa powder: Dutch-process gives a deeper, darker chocolate flavor. I’ve tested it with natural cocoa and it’s good, but Dutch-process really delivers that Reese’s-level chocolatey taste.
- 3 tbsp powdered erythritol: Not granular! The powdered version dissolves instantly and keeps the filling smooth. My kids can’t tell the difference between this and the real thing.
- Flaky sea salt: Optional but not optional. A little sprinkle on top balances the sweetness and makes the whole thing taste dangerously fancy for zero extra effort.
Tools for the Job (It’s a Short List)
- A microwave-safe bowl (or a small saucepan if you’re doing it old school)
- A silicone mini muffin mold (12 cavities — these pop out so cleanly)
- A small cookie scoop or tablespoon measure
- Measuring spoons
Let’s Make ‘Em (It’s Ridiculously Easy)
Line up your silicone mold first — once the peanut butter mixture is ready, you want to move fast so it doesn’t set in the bowl.
- Melt the base: In a microwave-safe bowl, combine the peanut butter and 2 tablespoons of coconut oil. Microwave in 30-second bursts, stirring between each, until smooth and fully combined.
- Sweeten it: Stir in 2 tablespoons of powdered erythritol and a pinch of salt until completely dissolved. Taste it. It should taste exactly like peanut butter filling — sweet, salty, and addicting. If it’s not quite there, add a tiny bit more sweetener. (📸 Photo tip: The mixture should be glossy and thick, not runny. If it’s too thin, add another spoonful of peanut butter.)
- Fill the mold: Divide the peanut butter mixture evenly among the 12 cavities of your silicone mold. I use a small scoop for this. Do not fill to the top — leave room for the chocolate layer. Press it down gently with the back of a spoon.
- Make the chocolate shell: In a separate bowl, combine the remaining 2 tablespoons of coconut oil, the cocoa powder, and 1 tablespoon of powdered erythritol. Whisk until glossy and smooth. (📸 Photo tip: The chocolate should drip off the whisk in a smooth ribbon. If it looks grainy, your coconut oil wasn’t warm enough — give it 10 more seconds in the microwave.)
- Top them off: Spoon the chocolate mixture over the peanut butter layer in each cavity. Tap the mold gently on the counter to let the chocolate settle evenly and pop any air bubbles. Top with flaky sea salt.
- Set and enjoy: Transfer the mold to the refrigerator for at least 1 hour, or until fully firm. Pop them out of the mold and store them in an airtight container. They’ll keep in the fridge for weeks — if they last that long.
How I Keep a Batch Ready at All Times
I make a double batch every Sunday afternoon. They’re my secret weapon for the 3pm slump when I’d normally reach for something I shouldn’t. Here’s how I store them:
- Fridge: Airtight container for up to 3 weeks. I layer them between parchment so they don’t stick together. I grab one when I want a little treat after dinner.
- Freezer: They freeze beautifully. Freeze them solid on a baking sheet, then transfer to a freezer bag. They’ll keep for 3 months. My kids grab them straight from the freezer for a quick snack.
- Thaw: No need to thaw — eat them straight from the freezer! They’re firm but still melt in your mouth. If you want a softer texture, let them sit at room temp for 5 minutes.
What I’ve Learned After Making These Every Week for Two Years
- Don’t skip the salt. The flaky salt on top is non-negotiable. It cuts the richness and makes the chocolate taste deeper. Trust me on this one — I forgot once and my husband asked me what was “off.”
- Use a silicone mold. I know paper liners are standard, but these fat bombs release so much better from silicone. Zero sticking, zero mess. They pop out like little perfect candies every single time.
- Taste as you go. The peanut butter layer should be sweet enough to stand on its own. If it tastes bland, add another pinch of salt or a touch more sweetener. I’ve saved batches this way when I was distracted and under-sweetened.
- Warm the coconut oil if it solidifies. In colder months, the coconut oil might seize up when you add it to the peanut butter. A quick 10-second zap in the microwave brings it back to liquid. No big deal, just don’t skip this or you’ll end up with lumpy fat bombs.
Ways to Make These Your Own
- Dairy-Free: They already are! Just double-check your chocolate is dairy-free if you’re using a mix. I use a standard cocoa powder and coconut oil and it’s perfect.
- Nut-Free: Swap the peanut butter for sunflower seed butter or tahini. It changes the flavor profile but is still delicious. I’ve tested this for a friend whose son has nut allergies, and he loved them.
- Spicy: Add a small pinch of cayenne pepper to the chocolate layer. My husband loves this version for a grown-up treat — it gives it a little warmth that’s really nice.
- Crunchy: Use crunchy peanut butter instead of smooth for a texture pop. I do this when I’m feeling fancy and want a little extra something in the bite.
The Questions People Always Ask Me About Fat Bombs
Q: Why did my chocolate layer turn out grainy?
A: Ugh, I’ve been there. That usually happens if the coconut oil isn’t fully melted when you mix in the cocoa powder. Make sure it’s smooth and warm before you whisk. You’ve got this next time — just zap it a little longer.
Q: Can I use granular erythritol instead of powdered?
A: You can, but it won’t dissolve completely, so you’ll end up with a slightly gritty texture. If that doesn’t bother you, go for it! I’ve done it in a pinch and they still taste great, just not quite as smooth.
Q: How long do they last at room temp?
A: These need to stay cold. They start to soften around 70°F. I keep them in the fridge when I’m not eating them. They travel fine in a lunchbox with an ice pack. I wouldn’t leave them out for more than an hour or so.
Q: What do you serve with these?
A: Honestly, they’re so rich that a single one is usually enough for me. My kids love them as a post-dinner “dessert” with a cup of hot tea, or as a quick breakfast on busy mornings when we need something to hold us over. I’ve also brought them to potlucks as a little treat for the keto crowd — they disappear fast.
More Recipes My Family Makes on Repeat
If you liked these fat bombs, here are a few other recipes that get the same reaction at our table:
- [INTERNAL LINK PLACEHOLDER: My Go-To Keto Pecan Sandies] — Buttery, nutty, and somehow still soft in the middle. My husband’s favorite.
- [INTERNAL LINK PLACEHOLDER: Creamy Avocado Chocolate Mousse] — The one that convinced my kids that healthy desserts aren’t a joke.
- [INTERNAL LINK PLACEHOLDER: Coconut Flour Blueberry Muffins] — Perfect for weekend breakfasts that won’t spike your blood sugar.
I’ve been making these since the first week I started keto, and they’ve saved me from falling off the wagon more times than I can count. There’s something about having a sweet, salty, chocolatey treat waiting in the fridge that makes sticking with this way of eating feel completely doable. If you give them a try, come back and let me know how they turned out — I love hearing what your family thinks.
📌 Save this keto fat bomb recipe for your next meal prep Sunday — they’re the 15-minute snack that keeps your chocolate cravings in check all week long.
Keto Peanut Butter Chocolate Fat Bombs
Equipment
- Silicone mini muffin mold (12 cavities)
- Microwave-safe bowl
- Small cookie scoop or tablespoon measure
- Measuring spoons
Ingredients
- 1/2 cup natural peanut butter (just peanuts and salt)
- 1/4 cup coconut oil, divided
- 3 tbsp cocoa powder (Dutch-process preferred)
- 3 tbsp powdered erythritol, divided
- Flaky sea salt (optional but highly recommended)
- Pinch of cayenne pepper (optional, for a spicy kick)
Instructions
- Line up your silicone mini muffin mold on a tray or cutting board.
- In a microwave-safe bowl, combine the peanut butter and 2 tablespoons of coconut oil. Microwave in 30-second bursts, stirring between each, until smooth and fully combined.
- Stir in 2 tablespoons of powdered erythritol and a pinch of salt until completely dissolved. Taste and adjust sweetness if needed.
- Divide the peanut butter mixture evenly among the 12 cavities of the silicone mold, filling each about halfway. Press down gently with the back of a spoon.
- In a separate bowl, combine the remaining 2 tablespoons of coconut oil, the cocoa powder, and the remaining 1 tablespoon of powdered erythritol. Whisk until glossy and smooth.
- Spoon the chocolate mixture over the peanut butter layer in each cavity. Tap the mold gently on the counter to settle and pop air bubbles. Sprinkle flaky sea salt on top.
- Transfer the mold to the refrigerator for at least 1 hour, or until fully firm. Pop the fat bombs out of the mold and store in an airtight container in the fridge for up to 3 weeks, or freeze for up to 3 months.
Notes
Related posts:
 High-Protein Overnight Oats That Actually Taste Like Breakfast (Not a Chalky Disaster)
 Mini Quiche Recipe: The Store-Bought Crust Version That Tastes Like You Made It From Scratch
 The Slow Cooker Cowboy Casserole That Saves Tired Weeknights (No Soggy Tots Allowed)
 Quick Lemon Ricotta Pasta for Busy Weeknights: Creamy, Bright, and on the Table in 20 Minutes
 Juicy Oven Baked Chicken Thighs That Stay Golden and Tender — in 40 Minutes
 Lemon Garlic Butter Baked Salmon in Foil That’s Ready in 25 Minutes — No Fuss, No Mess