
There are recipes that impress, and then there are recipes that rescue. This honey garlic lemon chicken is a full-on hero on busy weeknights. The kind of meal you pull together when you’ve had a long day and need something that feels substantial but doesn’t keep you in the kitchen for an hour. It’s one pan, it’s fast, and the sauce — a glossy, savory-sweet situation with fresh lemon and plenty of garlic — has convinced my family that takeout isn’t the only quick option.
The short version: One-pan honey garlic lemon chicken with crispy skin and a sticky, glossy sauce — ready in 30 minutes.
I’ve made this recipe about twenty times to get the balance exactly right. Not too sweet, not too sharp, just a bright, rich sauce that clings to every bite.
- Serves: 4 as a main
- Hands-On Time: 15 min | Total Time: 30 min
- Difficulty: Easy, even on a school night
- Cost per serving: ~$3.50
- Calories: ~380 per serving
- Dietary Notes: Naturally gluten-free (use tamari or coconut aminos)
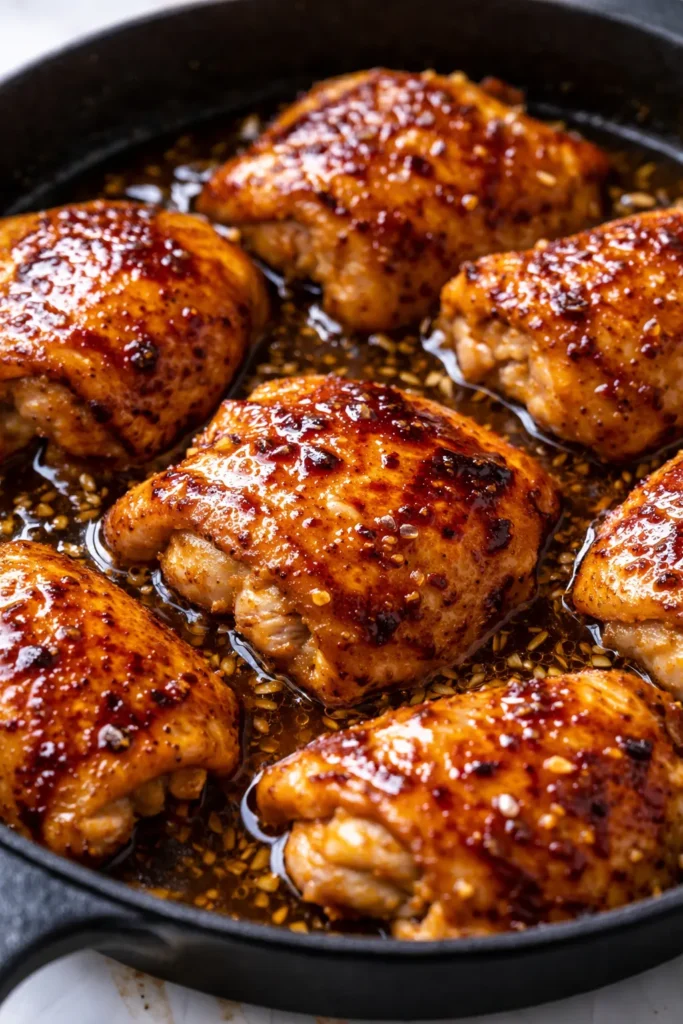
(Photo above: a close-up overhead shot of the glossy chicken thighs in a cast iron skillet, garnished with lemon slices and fresh parsley, steam rising, natural evening light from the left.)
The Thing That Makes the Sauce So Good (It’s the Timing)
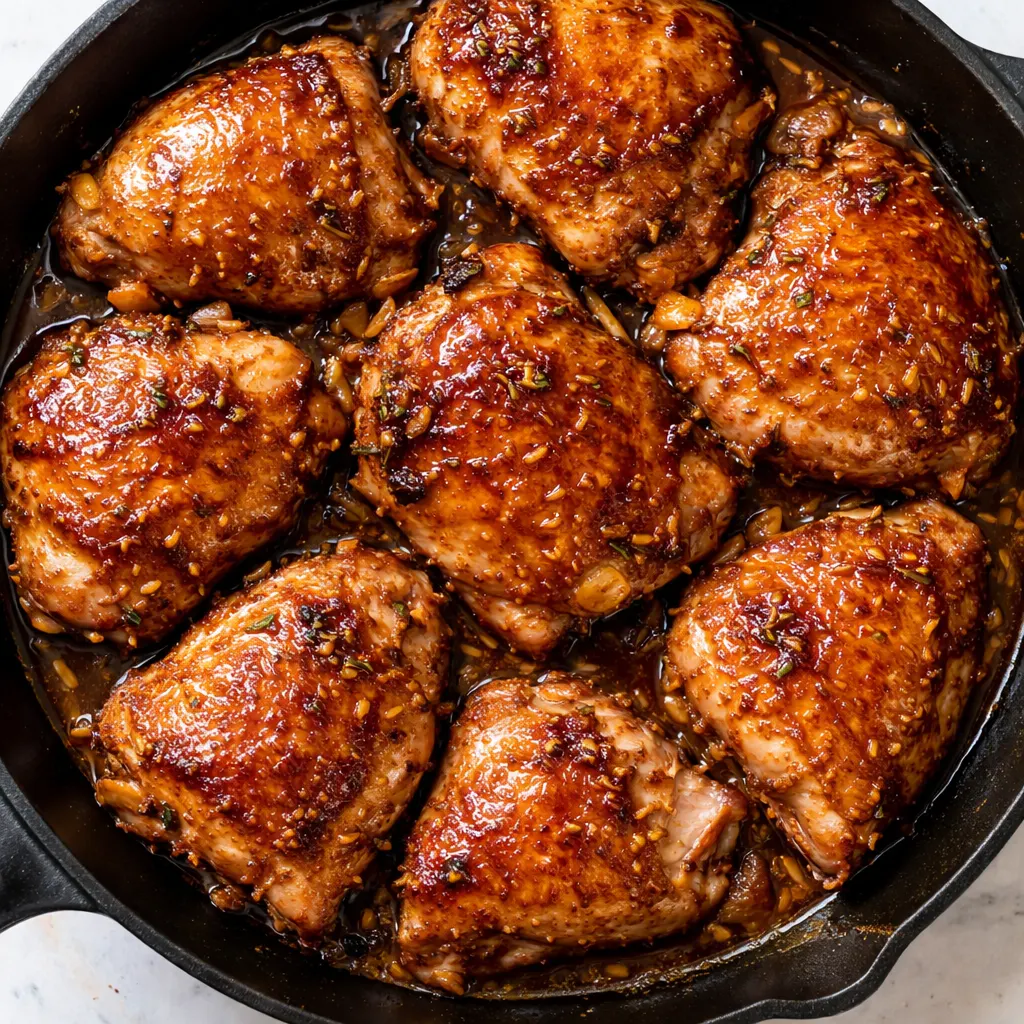
No cornstarch slurry here. I know that’s a popular shortcut, and it has its place, but this sauce thickens the old-fashioned way — by reducing. You let the honey, lemon, and soy sauce bubble and breathe together for a few minutes, and it transforms from a thin, shy glaze into something confident and clingy. It’s a small lesson in patience that pays off big.
The other trick is the order of operations. The garlic hits the pan after the chicken comes out, and you only let it cook for about 30 seconds — just until it smells amazing. Then the honey goes in, and the heat concentrates everything. If you add the garlic too early or let it burn, it turns bitter, and there’s no fixing that. Trust the sequence. It works.
The result is a sauce that coats the back of a spoon and clings to every ridge of the crispy chicken skin. It’s the kind of meal that makes everyone at the table go quiet for a few minutes.
Everything You Need (And a Few Notes From Me)
- 4 bone-in, skin-on chicken thighs: Thighs are forgiving and stay juicy. The skin is essential for that crispy texture we’re after. I sometimes use drumsticks too — just increase the cook time by about 5 minutes.
- 1/3 cup honey: Use a mild, runny honey. Something like clover or orange blossom. Avoid the thick, crystallized stuff — it can seize up in the pan. My kids can tell if I use a strong honey — they prefer the mild sweetness here.
- 4 cloves garlic, finely minced: Fresh only. Pre-minced jarred garlic has a different moisture content and can burn faster. I use a microplane for this — it melts right into the sauce.
- 1 lemon (zest and juice): Use the whole lemon, not just the juice. The zest brings a floral brightness that the juice alone can’t reach. I learned to zest over the pan from my grandmother Marta — the oils hit the heat and the whole kitchen smells like lemon.
- 2 tablespoons soy sauce (or tamari for GF): This is the savory backbone. It balances the sweetness and adds that deep umami note.
- 1 teaspoon fresh grated ginger: Optional but highly recommended. It adds a warmth that plays beautifully with the honey and garlic.
- Red pepper flakes (to taste): Just a pinch to cut through the richness. My kids tolerate a small pinch; I add a heavier hand when I’m cooking for adults.
- Salt, black pepper, and neutral oil: For seasoning and searing.
What to Pull Out Before You Start
- A 12-inch cast iron skillet: If you don’t have one, a heavy-bottomed stainless steel pan works too. The weight helps with even browning.
- Microplane or fine grater: For the garlic, ginger, and lemon zest. Small grating makes everything incorporate smoothly.
- Tongs: For flipping the chicken without tearing the skin.
Here’s How I Do It
This goes fast once you start, so I recommend reading through once and having your ingredients measured and ready. The active time is about 15 minutes, and the rest is hands-off simmering.
Prep and Preheat: Take the chicken out of the fridge about 15 minutes before you start. Pat it very dry with paper towels — moisture is the enemy of crispy skin. Season generously on both sides with salt and pepper.
- Sear the chicken skin-side down: Heat a drizzle of neutral oil in your skillet over medium-high heat until it shimmers. Place the chicken thighs skin-side down in a single layer. Don’t crowd the pan — if they’re touching, they’ll steam instead of sear. Cook without moving for 6-7 minutes, until the skin is deep golden brown and crispy. (📸 Photo tip: The skin should release easily from the pan when it’s ready. If it sticks, give it another minute. You want that deep mahogany color.)
- Flip and cook briefly: Flip the thighs and cook for 4 minutes on the other side. They won’t be fully cooked through yet — that’s fine. Transfer them to a plate and set aside.
- Sauté the aromatics: Pour off all but about 1 tablespoon of the rendered fat from the pan. Reduce heat to medium-low. Add the minced garlic and grated ginger, stirring constantly, for about 30 seconds — until fragrant. This is the step where you can go wrong if you walk away. The second it smells like garlic, you’re ready for the next step.
- Build the sauce: Add the honey, soy sauce, lemon juice, lemon zest, and a pinch of red pepper flakes. Stir to combine, scraping up all the browned bits from the bottom of the pan — that’s concentrated flavor right there. (📸 Photo tip: See it bubbling? That’s good. The sauce will look thin at first. Trust the reduction.)
- Let it reduce: Let the sauce bubble gently for 2-3 minutes, stirring occasionally, until it thickens enough to coat the back of a spoon. It should look like warm amber glass — glossy and slightly syrupy.
- Return the chicken: Nestle the chicken thighs back into the skillet, skin-side up. Spoon some of the sauce over the tops. Let them finish cooking in the sauce for 5-6 minutes, until the internal temperature reaches 185°F for thighs (they’re best cooked a little higher for tenderness).
- Optional broil for extra crisp: If you want the skin extra crispy, pop the skillet under the broiler for 1-2 minutes. Watch closely — honey can burn fast. This step is worth it when you have the time.
Let the chicken rest in the pan for about 5 minutes before serving. The sauce will settle and cling even more as it cools slightly.
How I Meal Prep These for the Week
I make a double batch on Sundays sometimes. We eat two that night, and I save the rest for busy nights when I know I’ll be running late. The sauce keeps beautifully and actually gets richer as it sits.
- Fridge: Store in an airtight container for up to 4 days. The flavors meld together overnight in the best way.
- Freezer: Yes, this freezes well! Place the cooled chicken and sauce in a freezer-safe container for up to 3 months. Thaw overnight in the fridge.
- Reheat: For crispy skin, reheat in a 350°F oven or an air fryer for about 10 minutes. The microwave works in a pinch, but the skin won’t stay crisp — still tastes great though.
Things I Wish I’d Known the First Time
- Dry the chicken obsessively. I know I said it above, but I’m saying it again. Pat the skin dry with paper towels right before it hits the pan. Any moisture left on the surface steams the skin instead of crisping it. This was the single biggest improvement I made across my early batches.
- Don’t rush the sear. It’s tempting to flip the chicken early to see the color. Let it sit. The skin needs 6-7 minutes of uninterrupted contact with the hot pan to get that deep, brittle crisp. If you try to flip it and it sticks, it’s not ready. Give it another minute and try again.
- Let the sauce do the work. I used to add a cornstarch slurry to hurry things along, but the flavor wasn’t as pure. Let the honey and lemon reduce naturally. The sauce needs about 3 minutes of gentle bubbling to reach the right consistency. It will feel thin at first — don’t panic. It’s concentrating.
- Even if the sauce separates slightly, it’s okay. If it looks a little grainy when you add the chicken back, a splash of water and a quick stir will bring it back together. I’ve done this plenty of times when I wasn’t paying close attention. It still tastes perfect.
Swaps That Actually Work
- Chicken breasts instead of thighs: Use boneless, skinless breasts pounded to even thickness. Sear for 4 minutes per side, then reduce the simmer time to 3-4 minutes. Watch the internal temp — 165°F is your target. My daughter Nora prefers breasts, so I make this version when she visits from Savannah.
- Spicy version: Add 1/2 teaspoon of red pepper flakes with the garlic, plus a drizzle of sriracha or chili crunch at the end. This is my go-to when it’s just adults at the table.
- No soy sauce? Use coconut aminos for a naturally sweeter, slightly less salty sauce. It’s a great swap for a paleo-friendly meal.
- Add veggies to the pan: Toss in some broccoli florets or green beans during the last 5 minutes of simmering. They soak up the sauce and make this a true one-pan meal.
Questions I Get About This Recipe All the Time
Q: Why did my sauce turn out bitter?
A: That’s almost always from burnt garlic or overheated lemon zest. Make sure you add the garlic on medium-low heat and only cook it for 30 seconds before adding the honey. And zest the lemon directly over the sauce so the oils hit the liquid, not the hot pan. If it does happen, a tiny pinch of sugar can help balance the bitterness — I’ve done it.
Q: Can I use boneless chicken thighs?
A: Absolutely. They’ll cook faster — about 4 minutes per side for the sear, then 3-4 minutes in the sauce. Just check for doneness at 185°F. Boneless thighs are a weeknight hero for sure.
Q: How do I store and reheat leftovers without losing the texture?
A: Fridge for 4 days, freezer for 3 months. When reheating, the microwave will soften the skin, but the sauce stays delicious. For that crispy skin experience again, reheat in a 350°F oven or air fryer for 8-10 minutes. Worth the extra few minutes.
Q: What do you serve with honey garlic lemon chicken?
A: Coconut rice or simple jasmine rice to soak up the extra sauce is our favorite. For vegetables, I usually roast broccoli or asparagus in the oven while the chicken simmers. A crisp cucumber salad with rice vinegar is also wonderful — the freshness cuts through the richness.
More Recipes My Family Makes on Repeat
If you liked this one, here are a few others that get the same reaction at our table:
- Sticky Brown Sugar Garlic Salmon — Ready in 20 minutes with a sauce so good you’ll want it on everything.
- My Go-To Weeknight Sheet Pan Lemon Chicken — The hands-off version when I need to walk away from the kitchen.
- Garlic Butter White Wine Sauce Pasta — The pasta that keeps my kids coming back for thirds.
This honey garlic lemon chicken has become one of those recipes I don’t even need to look at the card for anymore. I hope it becomes that for you too — the one you reach for on a busy Wednesday when everyone’s hungry and you need something that delivers.
If you try it, drop a comment below and let me know how it went. I love hearing about the little wins in your kitchen.
📌 Save this honey garlic lemon chicken recipe for the busy weeknights when you need a fast, flavorful dinner that feels like a real meal — it’s become my go-to rescue dinner.
Honey Garlic Lemon Chicken
Equipment
- 12-inch cast iron skillet
- Microplane or Fine Grater
- Tongs
Ingredients
- 4 bone-in, skin-on chicken thighs
- 1/3 cup mild honey (e.g. clover or orange blossom)
- 4 cloves garlic, finely minced
- 1 lemon (zest and juice)
- 2 tablespoons soy sauce (or tamari for GF)
- 1 teaspoon fresh grated ginger (optional)
- to taste red pepper flakes
- to taste salt and black pepper
- 2 tablespoons neutral oil (for searing)
Instructions
- Take the chicken out of the fridge about 15 minutes before cooking. Pat very dry with paper towels. Season generously on both sides with salt and pepper.
- Heat a drizzle of neutral oil in a 12-inch cast iron skillet over medium-high heat until shimmering. Place chicken thighs skin-side down in a single layer (do not crowd). Cook without moving for 6-7 minutes until skin is deep golden brown and crispy.
- Flip the thighs and cook for 4 minutes on the other side. Transfer to a plate (they will not be fully cooked through yet).
- Pour off all but about 1 tablespoon of rendered fat. Reduce heat to medium-low. Add minced garlic and grated ginger, stirring constantly, for about 30 seconds until fragrant.
- Add honey, soy sauce, lemon juice, lemon zest, and a pinch of red pepper flakes. Stir to combine, scraping up browned bits from the bottom of the pan. Let bubble gently for 2-3 minutes until thickened and glossy.
- Return chicken to the skillet, skin-side up. Spoon sauce over tops. Cook for 5-6 minutes until internal temperature reaches 185°F for thighs.
- Optional: Broil for 1-2 minutes for extra crispy skin (watch closely, honey burns fast). Let rest 5 minutes before serving.
Notes
Related posts:
 The Slow Cooker Cowboy Casserole That Saves Tired Weeknights (No Soggy Tots Allowed)
 Quick Lemon Ricotta Pasta for Busy Weeknights: Creamy, Bright, and on the Table in 20 Minutes
 Lemon Garlic Butter Baked Salmon in Foil That’s Ready in 25 Minutes — No Fuss, No Mess
 Lipton Onion Soup Meatloaf for Tuesday Nights: Moist, Savory, and the Only One You’ll Ever Need
 Kielbasa Sausage Cheesy Potato Casserole That Tastes Like Sunday Dinner — In Under an Hour
 Quinoa Chicken Sausage Bowls That Are Ready in 30 Minutes (And Actually Keep Well)