
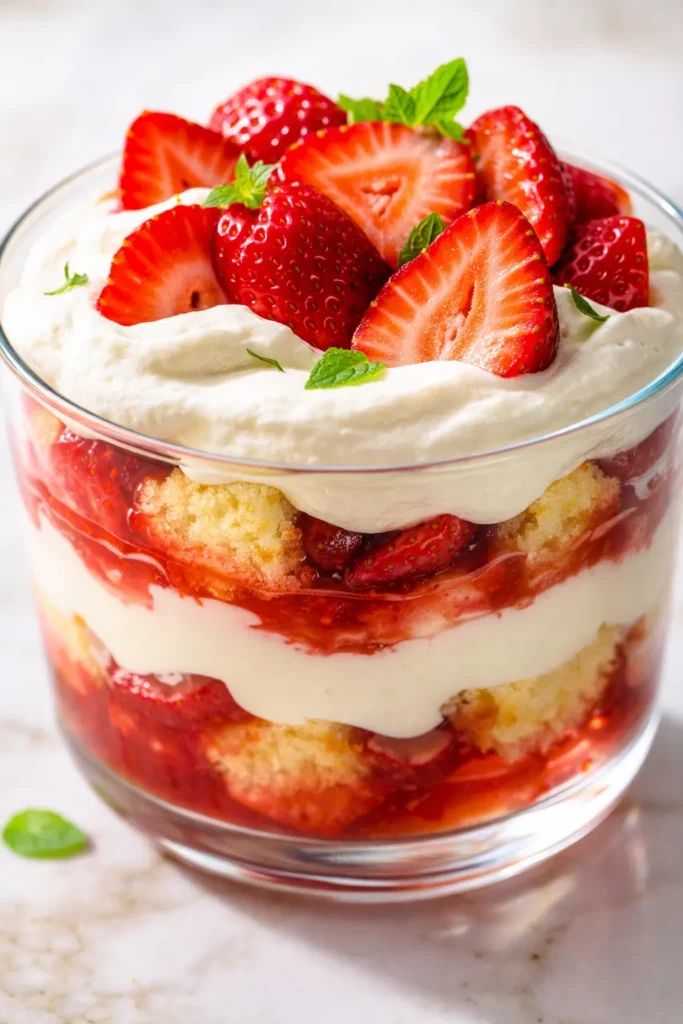
The first time you sink a spoon into a properly built strawberry cheesecake trifle — through the cloud of whipped cheesecake, past the tender cake, into the pocket of bright, jammy berries — you stop worrying about perfect slices or fancy plating. This is a dessert that asks nothing from you except a clear bowl and patience for the layers to set.
The short version: A stunning layered dessert that needs just 30 minutes of your active time and tastes like you spent an entire day in the kitchen.
I’ve been making this for over a dozen summers. It’s what I bring to every family gathering when I want something special without turning on the oven. My daughter Nora, who usually has strong opinions about desserts that “try too hard,” asked for it three times last summer.
- Serves: 10-12 as dessert
- Hands-On Time: 30 min | Total Time: 4 hrs (includes chilling)
- Difficulty: Easy enough for a beginner, impressive enough for company
- Cost per serving: ~$3.50
- Calories: ~420 per serving
- Dietary Notes: Vegetarian. Easily made gluten-free (see swaps).
(Photo above: A wide, clear trifle bowl showcases distinct layers — creamy pale cheesecake mousse, deep ruby red macerated strawberries, and golden vanilla cake cubes. An overhead shot, natural window light, a few stray mint leaves scattered on the linen napkin beneath it.)
Why This Trifle Works Every Time (It’s the Juicy Bits)
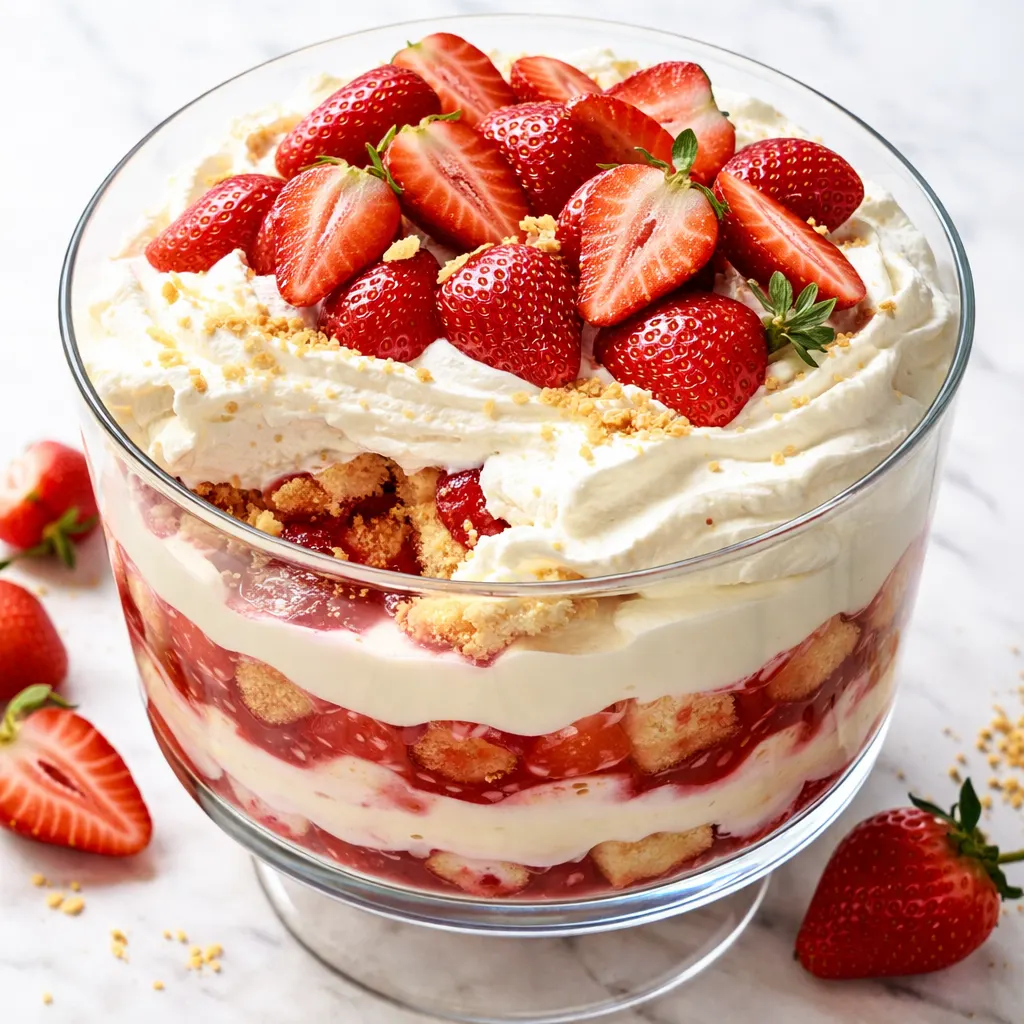
The magic of a great trifle isn’t just the cream or the cake — it’s the juice from the macerated strawberries seeping down into the layers below. That slow soak transforms simple cubes of vanilla cake into something almost pudding-like at the bottom, while the top stays light and airy. I learned this lesson the hard way after a dry, disappointing trifle years ago. Now I always let the strawberries sit in sugar long enough to release their syrup. That’s the step that makes people ask for the recipe.
The cheesecake mousse is the other piece of the puzzle. By folding freshly whipped cream into softened cream cheese, you get a filling that’s stable enough to hold distinct layers but light enough to feel like a cloud on the spoon. No baking, no water bath, no stress.
Ingredients Worth Talking About
- 2 lbs fresh strawberries, hulled and sliced: The star of the show. I use local berries when I can get them — they’re sweeter and more fragrant. Letting them sit in sugar for 30 minutes draws out their natural syrup, which is the glue that holds this whole dessert together.
- 16 oz full-fat cream cheese, softened: Don’t reach for the low-fat version here. The filling needs the structure of full-fat cream cheese to hold its shape against the heavy berries and cake. I leave mine on the counter for a good two hours before I start.
- 2 cups cold heavy cream: For whipping into stiff peaks. This is what makes the mousse light instead of dense. Chill your bowl and beaters for a few minutes beforehand — it makes a real difference.
- 1 large store-bought pound cake or 1/2 batch of your favorite vanilla cake: Cut into 1-inch cubes. I’m partial to a good pound cake because it’s sturdy enough to hold up to the berry juice. If you’re making homemade, bake it the day before so it’s slightly stale — it absorbs the syrup better.
- 1 cup powdered sugar: For the cheesecake mousse. It dissolves smoothly into the cream cheese without grit.
- 1/3 cup granulated sugar: For macerating the berries. Plus a squeeze of fresh lemon juice to brighten the flavor.
- 2 tsp vanilla extract: A must for both the berries and the mousse.
What You’ll Need to Pull This Together
- A large trifle bowl (3-4 quarts) — if you don’t have one, a large glass salad bowl works perfectly. The point is to see the layers.
- Mixing bowls (one medium, one large)
- Electric mixer (hand or stand)
- A sharp knife and cutting board for the berries and cake
- A rubber spatula for folding
Building the Trifle: Layer by Layer
This goes quickly once you have everything prepped. I like to read through the whole process once before I start.
Prep your ingredients: Take the cream cheese out to soften. Hull and slice the strawberries.
- Macerate the berries: Toss the sliced strawberries with the granulated sugar and a squeeze of lemon juice in a medium bowl. Let them sit at room temperature for at least 30 minutes, stirring once or twice. You’ll see a deep red syrup pooling at the bottom. (📸 Photo tip: The berries should look glossy and wet, with a good amount of syrup in the bowl. If they look dry, give them more time.)
- Make the cheesecake mousse: In a large bowl, beat the softened cream cheese and powdered sugar together until completely smooth — about 2 minutes. Scrape down the sides. Beat in the vanilla. In a separate clean bowl, whip the cold heavy cream to stiff peaks. Gently fold the whipped cream into the cream cheese mixture in three additions, using a rubber spatula. Be patient — you want it fully combined but still light and airy.
- Prep the cake: Cut the pound cake into 1-inch cubes. If you’re using a store-bought cake, spread the cubes on a baking sheet and toast them at 350°F for 5-7 minutes. Let them cool completely. This step is optional, but it helps the cake hold up better to the juice. (📸 Photo tip: The cubes should be golden at the edges but still soft in the center.)
- First layer — cake: Arrange half of the cake cubes in an even layer at the bottom of your trifle bowl.
- Second layer — berries: Spoon half of the macerated strawberries and their syrup evenly over the cake cubes. Let it sink in for a minute.
- Third layer — mousse: Spread half of the cheesecake mousse gently over the berries. Use an offset spatula or the back of a spoon to smooth it to the edges.
- Repeat the layers: Add the remaining cake cubes, then the remaining berries and syrup, and finish with the remaining mousse. Smooth the top.
- Chill: Cover the trifle with plastic wrap and refrigerate for at least 3 hours, or overnight. This resting time isn’t optional — it’s when the layers settle and the flavors start to find each other. The syrup slowly soaks into the cake, and the mousse firms up just enough to slice cleanly.
When you’re ready to serve, you can garnish the top with a few fresh strawberry slices or a sprig of mint for color, but it’s beautiful just as it is.
Make-Ahead Notes for a Stress-Free Weekend
This is my go-to dessert for exactly that reason — it practically begs to be made ahead. I often do the prep work on Saturday morning and assemble it in the afternoon for a Sunday dinner.
- Fridge: The assembled trifle keeps beautifully in the fridge for up to 12 hours. Cover it tightly with plastic wrap to prevent the mousse from absorbing any oniony or savory fridge smells. Longer than 12 hours and the cake at the bottom can get a little too soft for my taste.
- Freezer: I don’t recommend freezing a finished trifle. The texture of the cream and the berries changes too much during thawing, and you’ll lose that lovely light mousse.
- Reheat: This is a cold dessert, so no reheating needed! Just pull it out of the fridge about 15 minutes before serving to take the chill off.
My secret for busy weekends: I macerate the berries and make the mousse a day ahead. I keep them separate in the fridge, then assemble the trifle the morning of. It takes about 10 minutes to layer everything.
My Honest Advice After Making This Dozens of Times
- Don’t rush the maceration: Thirty minutes is the minimum. An hour is better. The syrup is the soul of the trifle, and it needs time to develop. I’ve shortchanged this step before, and the result was a dry, disappointing dessert that everyone politely ate.
- Whip your cream to stiff peaks: I know it’s tempting to stop at soft peaks, but trust me on this one. Soft peaks will deflate the moment you fold them into the cream cheese, leaving you with a dense, flat filling. You want the cream to hold a firm shape when you lift the beater.
- Let the cake cool completely: If you’re toasting the cake cubes, don’t rush the cooling step. Warm cake will melt the mousse and turn your beautiful layers into a sad, muddy mess. I spread mine on a baking sheet and let them cool while I prep the berries.
- Even if the layers get a little messy, it’ll still taste incredible: The first time I made this, I got distracted and my layers looked like a Jackson Pollock painting. You know what happened? Everyone went back for seconds. This dessert is forgiving that way.
Make It Yours: Easy Swaps and Twists
- Gluten-Free: Use a good quality gluten-free pound cake or vanilla cake. My sister-in-law has celiac disease, and this version is always a hit at our family dinners. Just make sure to toast the cubes a little longer so they hold up.
- Dairy-Free: You can make this with a dairy-free cream cheese alternative and a stabilized dairy-free whipped topping. The texture will be slightly different — a bit less firm — but the flavor is still wonderful.
- Mixed Berry: Use a combination of strawberries, blueberries, and raspberries. It’s gorgeous and tastes like summer in a bowl.
- Boozy Grown-Up Version: Brush the cake cubes with a little Grand Marnier, Chambord, or even a light strawberry wine before layering. It adds a sophisticated note that the adults will love.
- Lemon Cheesecake Trifle: Add the zest of one lemon to the cream cheese mixture and use a lemon pound cake. It’s bright, tangy, and pairs beautifully with the berries.
Questions I Always Get About This Trifle
Q: Why did my cheesecake layer turn out runny?
A: Ugh, I’ve been there. The two most common culprits are cream cheese that wasn’t fully softened, or whipped cream that wasn’t stiff enough. Make sure your cream cheese is at room temperature — leave it out for a couple of hours. And don’t stop whipping the cream until it holds a firm peak. Fix those two things, and you’ll have a perfectly stable mousse.
Q: Can I use frozen strawberries?
A: You can, but they won’t be as firm as fresh, and they’ll release a lot more liquid. Thaw them completely first, and drain off about half of the excess juice before macerating. The flavor will still be good, especially in the off-season, but the texture of the trifle will be a bit softer.
Q: How far ahead can I assemble the trifle?
A: Twelve hours is my maximum for the ideal texture. The cake absorbs the syrup beautifully during that time, but the top layers stay intact. If you go to 24 hours, the cake at the very bottom can start to break down, and the mousse might weep a little. For best results, assemble it the morning of the day you plan to serve it.
Q: What do you serve with this trifle?
A: Honestly, it’s rich enough to stand on its own. But if I’m serving it after a big meal, I love it with a tiny cup of strong black coffee or espresso. The bitterness cuts through the sweetness perfectly. For dessert parties, I sometimes set out a bowl of extra fresh berries on the side so people can add more if they want.
More Desserts My Family Repeats
If you liked this one, here are a few others that get the same reaction at our table:
- [INTERNAL LINK PLACEHOLDER: Old-Fashioned Banana Pudding] — My grandmother Marta’s recipe, and the reason I bought my first trifle bowl. It’s pure nostalgia in every spoonful.
- [INTERNAL LINK PLACEHOLDER: Easy No-Bake Lemon Cheesecake] — For those days when you want something creamy and citrusy without turning on the oven. It’s my go-to for spring luncheons.
- Fresh Berry Summer Cobbler — The warm, bubbly counterpart to this cool, creamy trifle. Sometimes I make both and let people choose their own adventure.
The best moments of summer, to me, taste exactly like this — a spoonful of cool cream, sweet fruit, and tender cake, shared around a table with the people you love. I hope it becomes one of those recipes in your kitchen, too.
If you make this strawberry cheesecake trifle, leave a comment below and let me know how it turned out. Or tag me on Pinterest — I love seeing your beautiful layers!
📌 Save this strawberry cheesecake trifle recipe for your next summer gathering or family Sunday dinner — it’s the no-fuss dessert everyone will be asking for.
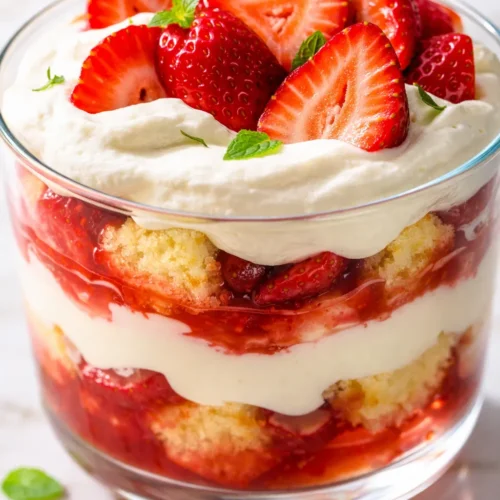
Strawberry Cheesecake Trifle for Summer Sundays: Layers of Creamy, Juicy, No-Fuss Glory
Equipment
- Large trifle bowl (3-4 quarts)
- Mixing bowls (medium and large)
- Electric mixer (hand or stand)
- Sharp Knife and Cutting Board
- Rubber spatula
Ingredients
- 2 lbs fresh strawberries, hulled and sliced
- 1/3 cup granulated sugar
- 1 tbsp fresh lemon juice
For the Cheesecake Mousse
- 16 oz full-fat cream cheese, softened
- 1 cup powdered sugar
- 2 tsp vanilla extract
- 2 cups cold heavy cream
For Assembly
- 1 large (8-10 oz) store-bought pound cake, cut into 1-inch cubes
- Optional: fresh mint leaves for garnish
Instructions
- Macerate the berries: Toss sliced strawberries with granulated sugar and lemon juice in a medium bowl. Let sit at room temperature for at least 30 minutes, stirring once or twice, until a deep red syrup forms.
- Make the cheesecake mousse: In a large bowl, beat softened cream cheese and powdered sugar until smooth, about 2 minutes. Beat in vanilla. In a separate clean bowl, whip cold heavy cream to stiff peaks. Gently fold whipped cream into cream cheese mixture in three additions using a rubber spatula until fully combined and light.
- Prep the cake: Cut pound cake into 1-inch cubes. (Optional: spread on a baking sheet and toast at 350°F for 5-7 minutes, then cool completely.)
- First layer: Arrange half of the cake cubes in an even layer at the bottom of your trifle bowl.
- Second layer: Spoon half of the macerated strawberries and their syrup evenly over the cake cubes. Let sit for a minute.
- Third layer: Spread half of the cheesecake mousse gently over the berries. Smooth to the edges with an offset spatula or spoon.
- Repeat layers with remaining cake cubes, remaining berries and syrup, and remaining mousse. Smooth the top.
- Chill: Cover with plastic wrap and refrigerate for at least 3 hours, or overnight, before serving. Garnish with fresh strawberry slices or mint if desired.
Notes
Related posts:
 High-Protein Overnight Oats That Actually Taste Like Breakfast (Not a Chalky Disaster)
 The Slow Cooker Cowboy Casserole That Saves Tired Weeknights (No Soggy Tots Allowed)
 Quick Lemon Ricotta Pasta for Busy Weeknights: Creamy, Bright, and on the Table in 20 Minutes
 Lemon Garlic Butter Baked Salmon in Foil That’s Ready in 25 Minutes — No Fuss, No Mess
 Lipton Onion Soup Meatloaf for Tuesday Nights: Moist, Savory, and the Only One You’ll Ever Need
 Moist Chocolate Zucchini Bread That Doesn’t Turn Out Rubbery — Finally