
For years, my strawberry cupcakes tasted like a vague apology for the real thing. Either the strawberry flavor disappeared in the oven, or the batter got so wet from the fruit that the texture turned dense and heavy. I made peace with it for a while — until last June, when I finally figured out the fix. It’s not complicated, but it requires a tiny bit of patience. The reward is a cake that tastes like the height of strawberry season, even in the middle of January.
The short version: Real, concentrated strawberry flavor in a tender, light crumb — no artificial syrups or gelatin required.
I tested this method every weekend for a month last summer. My neighbor, Carol, was the beneficiary of the failed batches. This one, she actually asked for the recipe. My daughter Nora, who is 19 and studying art in Savannah, calls home just to ask if I am testing them again.
- Serves: 12 cupcakes
- Hands-On Time: 25 min | Total Time: 90 min (includes cooling)
- Difficulty: Medium — the reduction needs a short watch on the stove, but the rest is straightforward
- Cost per serving: ~$1.50
- Calories: ~320 per frosted cupcake
- Dietary Notes: Vegetarian. Easily adaptable for gluten-free with a 1:1 baking blend.
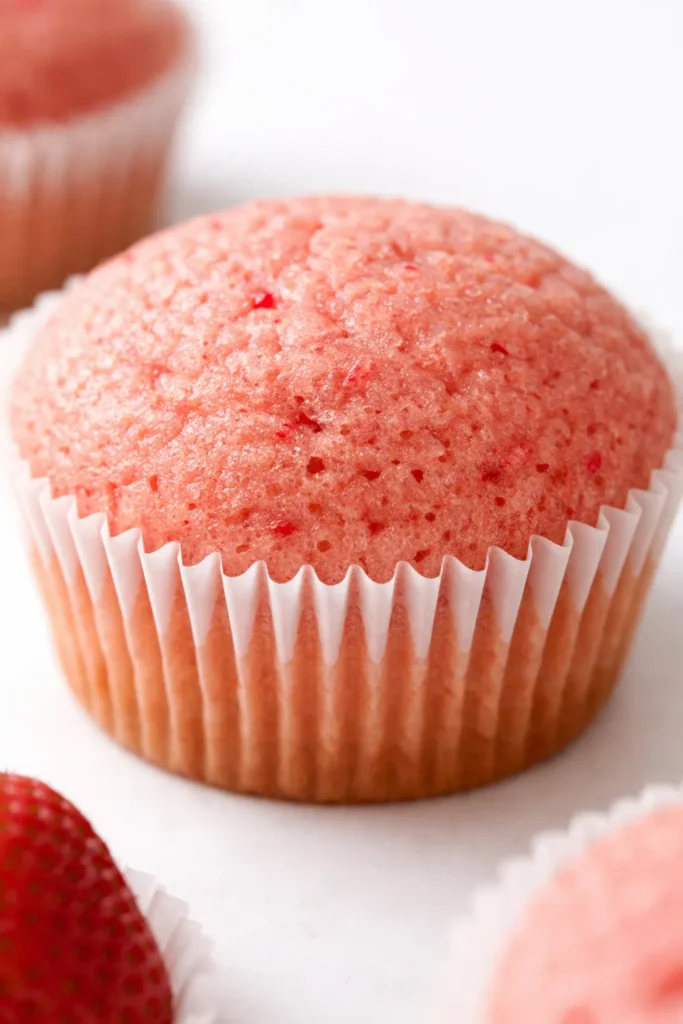
(Photo above: A single strawberry cupcake on a vintage white saucer, cross-section visible with tiny red flecks of real fruit in the crumb, topped with a swirl of pale pink buttercream and a single small strawberry fan on top. Soft, overcast window light from the left, a linen napkin folded beside it.)
The One Step Everyone Skips (And Why It Matters)
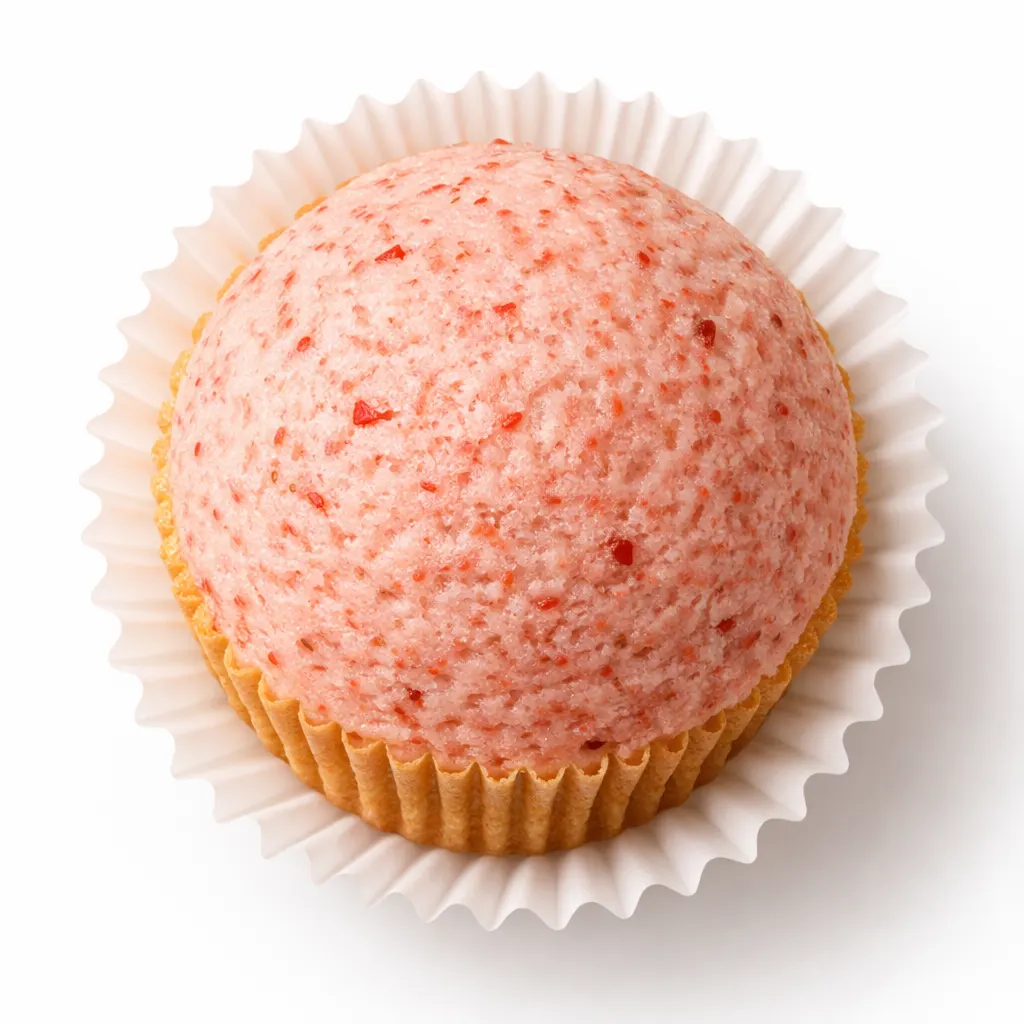
Fresh strawberries are mostly water. When you add them straight to a batter, that water turns into steam in the oven, the cake structure struggles to hold it, and the flavor dilutes across the whole batch. The fix is simple: you cook the berries down first.
Reducing the puree concentrates the flavor into something intense and jammy and removes just enough water to keep the cake tender, not wet. Marta, my grandmother, never thought about the science of it — she just knew that raw fruit made her cakes soggy. She would cook her fruit down on the stove, stirring it slowly, and tell me to “let it think for a while.” That extra ten minutes is the difference between a cupcake that is “fine” and one that stops conversation.
This method also means you can use frozen strawberries in the dead of winter and get a result that tastes like June. That alone is worth the extra step.
Ingredients Worth Talking About
- 12 oz fresh or frozen strawberries (about 2 cups): This is the heart of the recipe. Frozen berries work perfectly here — they are picked and frozen at peak ripeness, which means they often have more flavor than the pale ones at the grocery store in February. Nora calls this “the secret weapon for winter baking.”
- 1 2/3 cups all-purpose flour: Spoon and level it. Scooping straight from the bag packs in too much flour and makes the cake dry and dense.
- 1 cup granulated sugar: I have tested this with less, and the cake needs the full amount to balance the tartness of the berries.
- 1/2 cup unsalted butter, softened: Room temperature is critical here. Cold butter does not cream properly, and the cake loses its lightness.
- 2 large eggs: Also room temperature. Set them out with the butter.
- 1/2 cup whole milk: Whole milk gives the richest crumb. I haven’t tested this with alternatives, but a reader told me oat milk worked well for her.
- 1 tsp vanilla extract: Use the real stuff. The imitation kind tastes like plastic next to the delicate strawberry flavor.
- 1 1/2 tsp baking powder: Make sure it is fresh — stale baking powder is the number one reason cupcakes fail to rise properly.
- 1/4 tsp salt: A fine sea salt works best. It sharpens the sweetness.
What to Pull Out Before You Start
- A 12-cup standard muffin tin
- Paper cupcake liners (I like the unbleached brown ones — they look rustic and don’t peel away from the cake)
- A 2-quart saucepan for the strawberry reduction
- A stand mixer or hand mixer
- A fine-mesh sieve (for removing the seeds, if that matters to you — I leave them in, but my mom takes them out)
- A wire cooling rack
- A #20 cookie scoop (about 3 tablespoons) for even batter distribution
Making Strawberry Cupcakes: My Exact Process
This goes faster than you think once the reduction is done. Read through once so you know where you are headed.
- Make the strawberry reduction: Hull and roughly chop the strawberries. Place them in a small saucepan over medium heat. Cook, stirring occasionally, until they break down and the mixture thickens into a deep, concentrated red — about 8-10 minutes. You should have about 1/3 cup left. Set it aside to cool completely. Do not skip the cooling. Warm puree will melt the butter in your batter before it even hits the oven. (📸 Photo tip: You are looking for the color of a brick — dark, matte, and thick enough to coat the back of a spoon.)
- Preheat and prep: Preheat your oven to 350°F. Line your muffin tin with paper liners.
- Whisk dry ingredients: In a medium bowl, whisk together the flour, baking powder, and salt.
- Cream the butter and sugar: In a large bowl, beat the softened butter and sugar together until light and fluffy — about 3 minutes. Scrape the bowl down well. It should look pale and airy, almost like whipped butter.
- Add the eggs and vanilla: Add the eggs one at a time, beating well after each addition. Beat in the vanilla. The mixture will look smooth, glossy, and slightly thicker than before.
- Fold in the strawberry puree: Add the cooled strawberry reduction and gently fold it in by hand with a rubber spatula. The batter will turn a beautiful pale pink and smell like the most incredible strawberry jam you have ever made. Do not overmix here — a few streaks are fine.
- Alternate flour and milk: Add half the flour mixture, then half the milk, mixing on low speed until just combined. Repeat with the remaining flour and milk. Stop the mixer the moment the batter comes together. Overworking it develops gluten, and gluten makes cupcakes tough.
- Fill and bake: Divide the batter evenly among the 12 liners, filling each about 2/3 full. Bake for 18-22 minutes. My oven runs hot, so I check at 18. A toothpick inserted into the center should come out with a few moist crumbs, not wet batter. (📸 Photo tip: The edges should be just barely golden and beginning to pull away from the paper liner.)
- Cool completely: Let the cupcakes cool in the tin for 5 minutes, then transfer them to a wire rack to cool completely. Wait until they are fully cool — room temperature all the way through — before you even think about frosting. I know it is hard when the kitchen smells like strawberry jam and browned butter. It is still the right move.
Make-Ahead Notes (Because We Are All Busy)
I make the strawberry reduction on Sunday nights while I am cleaning up from dinner. It keeps in the fridge for a week and makes the actual baking day feel effortless. My husband knows not to eat it with a spoon — though I cannot blame him for trying.
- Fridge: Baked, unfrosted cupcakes keep in an airtight container on the counter for up to 3 days. The crumb stays tender.
- Freezer: Yes! Freeze unfrosted cupcakes in a single layer on a baking sheet, then wrap individually in plastic wrap and store in a freezer bag for up to 2 months. Thaw at room temperature for about an hour before frosting.
- Reheat: Do not microwave them — it makes the texture rubbery. Let them come to room temperature naturally. If you want a warm cake, pop it in a 300°F oven for 5 minutes, but honestly, I prefer these at room temperature.
Things I Wish I Had Known the First Time
- Do not rush the reduction: If you pull it off the stove too early, the strawberry puree will be too watery, and the cupcakes will bake up heavy and sunken in the middle. Cook it until it is thick enough to coat the back of a spoon. I have definitely pulled it early out of impatience, and the cupcakes always fall flat. Trust the process.
- Room temperature ingredients are not optional here: Cold eggs and milk will seize the butter the moment they hit the bowl, and you will end up with a dense, heavy batter. I leave my eggs and milk on the counter for at least 30 minutes before I start. Even my husband knows to leave them alone now.
- Use a cookie scoop for the batter: A #20 scoop (about 3 tablespoons) fills the liners evenly and keeps the mess to a minimum. I get exactly 12 perfect cupcakes every time, no guesswork.
- Trust the toothpick, not the timer: Ovens lie. Every oven runs a little differently, and the temperature on the dial is rarely the temperature inside. The toothpick test is the only truth. If it comes out with a few moist crumbs, they are done — even if the timer hasn’t gone off yet. If it comes out wet, give them 2 more minutes and test again.
Swaps That Actually Work
- Gluten-free: Substitute the all-purpose flour with a 1:1 gluten-free baking blend that contains xanthan gum. I have used Bob’s Red Mill with good results. The texture is slightly more delicate, so handle the batter gently and do not overmix.
- Strawberry Buttercream: Add 2 tablespoons of the strawberry reduction to your favorite vanilla buttercream recipe. It makes a beautiful pale pink frosting with real fruit flavor. My kids say it tastes like a strawberry milkshake, and honestly, I agree.
- Add chocolate: Fold 1/2 cup of mini chocolate chips into the batter at the end. Strawberry and chocolate is an underrated combination — my husband requests this version for his birthday every year.
- Dairy-free: Use a good-quality plant-based butter block (not the spreadable kind in a tub) and your favorite unsweetened oat or almond milk. I have tested this with oat milk, and it works.
Questions I Get About This Recipe All the Time
Q: Why did my cupcakes turn out dense and heavy?
A: A few things can cause this. The most common culprit is overmixing the batter once the flour is added. Stir until it just comes together, then stop. The second is not cooking the strawberry reduction down enough — excess water weighs down the crumb. Finally, check your baking powder. If it is older than 6 months, it loses its power. I keep a fresh can on hand just for baking.
Q: Can I use frozen strawberries?
A: Absolutely. In fact, I prefer frozen berries in the winter when fresh ones are pale and flavorless. Thaw them first, then cook them down as directed. You might need an extra minute or two on the stove to evaporate the extra water released during thawing. The result is every bit as good as fresh.
Q: How long do these last? Can I freeze them?
A: Baked and unfrosted, they stay tender in an airtight container on the counter for up to 3 days. For longer storage, freeze the unfrosted cupcakes in a freezer bag for up to 2 months. Thaw at room temperature and frost just before serving. I do not recommend freezing them once they are frosted — the texture of the frosting changes, and it never looks as pretty.
Q: What do you serve with these?
A: They are lovely on their own with a cup of tea — I am partial to a strong Earl Grey with them. For a full dessert spread, I pair them with a dark chocolate tart and a bowl of fresh berries on the side. My kids just want a tall glass of cold milk, and honestly, that is the perfect pairing too.
More Recipes My Family Makes on Repeat
If this method of concentrating fruit flavor speaks to you, here are a few others that get the same reaction at our table:
- [INTERNAL LINK PLACEHOLDER: Lemon Blueberry Scones] — The same logic applies here: reducing the blueberries keeps the scones light and tender.
- [INTERNAL LINK PLACEHOLDER: Fresh Strawberry Frosting] — My go-to buttercream that uses the leftover strawberry reduction.
- [INTERNAL LINK PLACEHOLDER: Simple Vanilla Cupcake Base] — The master recipe I use when I want a blank canvas for any fruit or frosting combo.
That first bite — when the crumb is tender and the strawberry flavor hits clean and bright — is exactly why I keep a bag of frozen berries in my freezer year-round. It tastes like June, no matter what month it actually is.
If you make these, let me know how they turn out. Drop a comment below or tag me on Pinterest. I love seeing your versions.
📌 Real strawberry cupcakes that skip the artificial flavoring and soggy texture — save this recipe for your next spring bake sale, Valentine’s Day treat, or whenever you need a taste of summer.
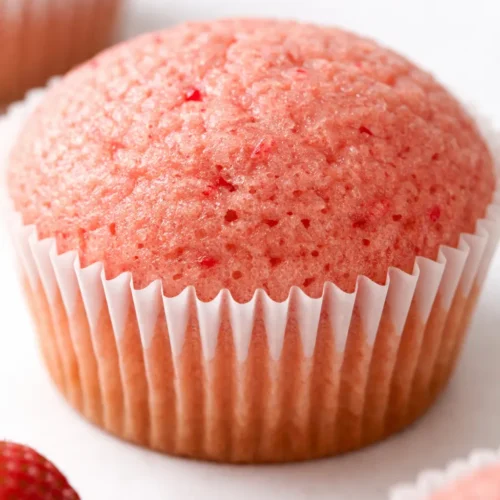
Strawberry Cupcakes: The Reduced Puree Method That Actually Tastes Like Real Berries
Equipment
- 12-cup standard muffin tin
- Paper cupcake liners
- 2-quart saucepan
- Stand mixer or hand mixer
- Fine-mesh sieve (optional)
- Wire cooling rack
- #20 cookie scoop (about 3 tablespoons)
Ingredients
- 12 oz fresh or frozen strawberries (about 2 cups)
- 1 2/3 cups all-purpose flour, spooned and leveled
- 1 cup granulated sugar
- 1/2 cup unsalted butter, softened
- 2 large eggs, room temperature
- 1/2 cup whole milk, room temperature
- 1 tsp vanilla extract
- 1 1/2 tsp baking powder
- 1/4 tsp fine sea salt
Instructions
- Make the strawberry reduction: Hull and roughly chop the strawberries. Place them in a small saucepan over medium heat. Cook, stirring occasionally, until they break down and the mixture thickens into a deep, concentrated red – about 8-10 minutes. You should have about 1/3 cup left. Set aside to cool completely. Do not skip the cooling – warm puree will melt the butter in your batter.
- Preheat oven to 350°F. Line a 12-cup muffin tin with paper liners.
- Whisk dry ingredients: In a medium bowl, whisk together the flour, baking powder, and salt.
- Cream the butter and sugar: In a large bowl, beat the softened butter and sugar together until light and fluffy – about 3 minutes. Scrape the bowl down well. It should look pale and airy.
- Add the eggs and vanilla: Add the eggs one at a time, beating well after each addition. Beat in the vanilla. The mixture will look smooth, glossy, and slightly thicker.
- Fold in the strawberry puree: Add the cooled strawberry reduction and gently fold it in by hand with a rubber spatula until just combined. The batter will turn pale pink. Do not overmix – a few streaks are fine.
- Alternate flour and milk: Add half the flour mixture, then half the milk, mixing on low speed until just combined. Repeat with remaining flour and milk. Stop the mixer the moment the batter comes together.
- Fill and bake: Divide the batter evenly among the 12 liners, filling each about 2/3 full. Bake for 18-22 minutes. A toothpick inserted into the center should come out with a few moist crumbs, not wet batter. The edges should be just barely golden and beginning to pull away from the paper liner.
- Cool completely: Let the cupcakes cool in the tin for 5 minutes, then transfer to a wire rack to cool completely. Wait until fully room temperature before frosting. Enjoy!
Notes
Related posts:
 The Super Simple Chocolate Cake for Dad That Disappears in Minutes
 Easy French Toast Cups You Can Make in 20 Minutes (They Taste Like Custard-Filled Pastry)
 My Grandmother’s Peach Cobbler with the Biscuit Topping That Stays Crispy Every Time
 My Grandmother’s Chocolate Wafers for the Ultimate Homemade Oreo Ice Cream Sandwiches
 Lemon Zucchini Bread That’s Actually Moist (Not Soggy) — The One Trick That Makes It Perfect
 The Slow Cooker Cowboy Casserole That Saves Tired Weeknights (No Soggy Tots Allowed)