
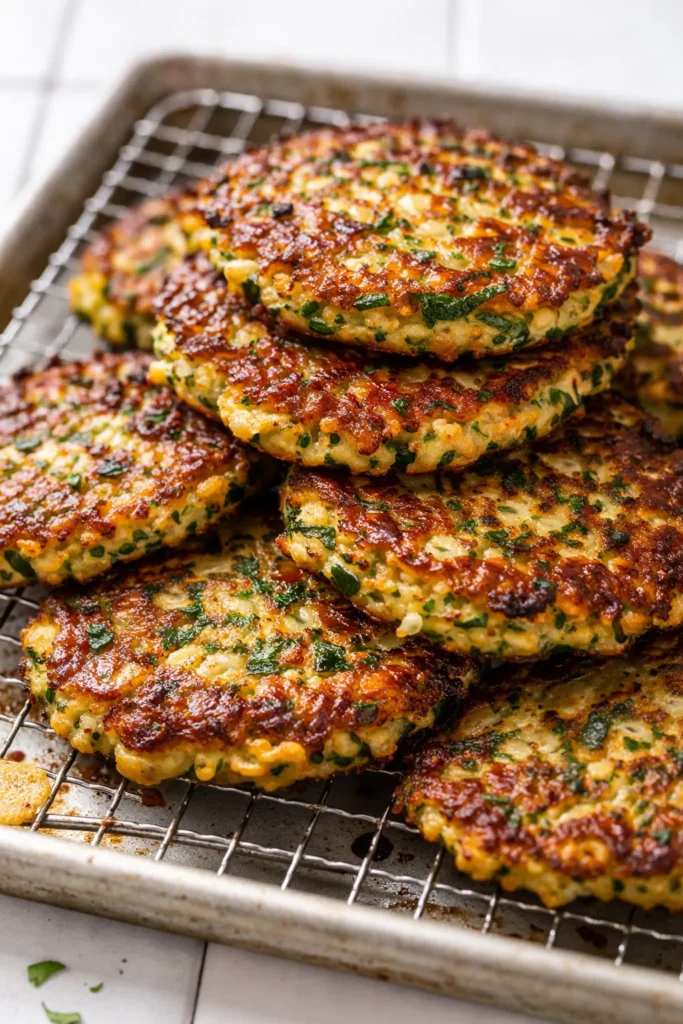
Every batch of zucchini fritters I made for years came out of the pan wrong — pale, greasy, and crumbling apart the second I tried to flip one. This version? The first time I pulled a skillet of these off the stove, my daughter Nora ate six standing at the counter before I could even get the sour cream bowl out. The edges were lacy and deep amber. The centers were tender and light. And they held together perfectly. No special equipment. No complicated tricks. Just one non-negotiable step that changes everything.
The short version: Salty, golden fritters with crispy edges and tender centers that actually stay together — 30 minutes start to finish.
I’ve made this exact recipe at least forty times now, testing different flours, different binders, different ways of wringing out the zucchini. This is the version that works every single time.
- Serves: 4 as a side / 2 as a main
- Hands-On Time: 20 min | Total Time: 30 min
- Difficulty: Easy enough for a Tuesday
- Cost per serving: ~$2.50
- Calories: ~280 per serving (4 fritters)
- Dietary Notes: Vegetarian. Adaptable for Gluten-Free.
(Photo above: a stack of golden-brown fritters on a blue-and-white checked kitchen towel, a bowl of herbed sour cream alongside, natural morning light catching the crispy, lacy edges.)
The Trick That Keeps Them Crispy (Not Soggy)
The enemy of a good zucchini fritter is water. Zucchini is basically a sponge full of moisture, and if you skip the step that gets it out, you end up with steamed pancakes that fall apart in the pan. I know this because I learned it the hard way — three soggy batches in one afternoon while Marta’s voice echoed in my head saying “you’re rushing it.”
The trick is salting the grated zucchini and letting it sit for ten minutes. That draws the water out so you can wring it away in a towel. What you’re left with is pure zucchini flavor and a texture that actually fries instead of steams. The second piece of the puzzle is the binder ratio. Too much flour and they’re dense and doughy. Too little and they disintegrate. I’ve tested this exact ratio more times than I can count — half a cup of flour for a pound of zucchini is the sweet spot.
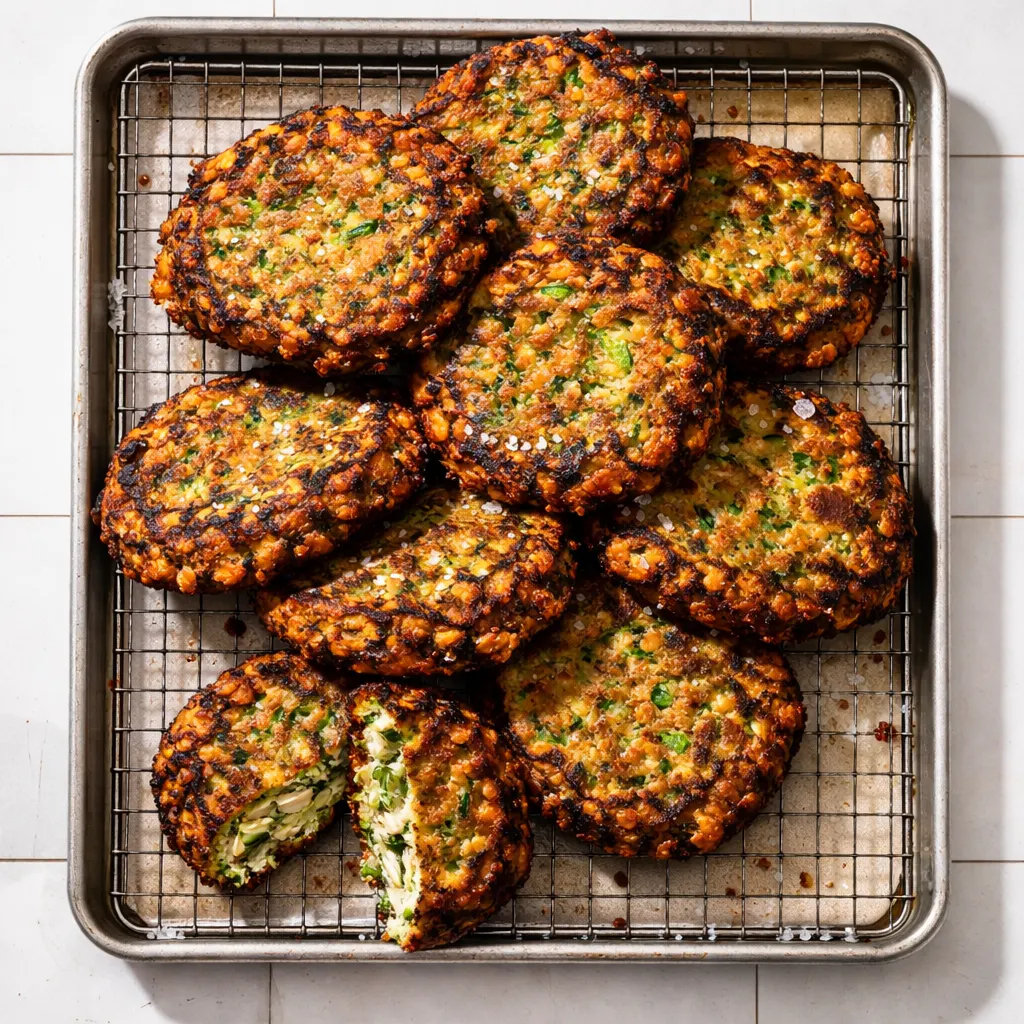
What you get is a fritter with shatteringly crisp edges, a tender center, and absolutely zero sogginess. My kids ask for these the second they see zucchini on the counter.
Everything You Need (Plus What I’ve Learned About Each One)
- Zucchini, 2 medium (about 1 lb): The medium ones are sweeter and less watery than the monsters that take over your garden in August. If you only have large ones, that’s fine — just expect to squeeze out a little more liquid.
I’ve tested this with yellow squash too, and it works beautifully. - Salt, 1 tsp: This isn’t just for flavor — it’s doing the structural work. It draws the moisture out of the zucchini so the fritters hold together and fry up crisp.
Don’t skip this. I know it looks like a small step, but it’s the whole game. - Egg, 1 large: The binder that holds everything together.
- All-purpose flour, 1/2 cup: Just enough to hold them without making them heavy.
I’ve tried almond flour and oat flour here — they work, but AP flour gives the best texture. - Parmesan, 1/3 cup finely grated: The kind in the green can won’t melt the same way here. Grate it fresh if you can — it melts into the batter differently, and the saltiness is gentler.
My kids can smell the difference between fresh and pre-grated, I’m not joking. - Corn kernels, 1/2 cup (optional, but my secret ingredient): Adds little pops of sweetness that catch in the crisp edges. Frozen corn works great — just thaw and pat it dry.
Nora calls these “the crunchy ones with the surprise inside.” - Green onion, 2 thinly sliced: A mild bite that keeps the fritters from feeling one-note.
- Oil for frying: Avocado or vegetable oil. Something with a high smoke point that won’t burn while you’re getting that deep golden color.
What to Pull Out Before You Start
- Box grater or food processor with grating disc — I use the box grater because it’s one less thing to clean, but the processor is faster if you’re making a double batch.
- Clean kitchen towel or cheesecloth — This is the most important tool. You need something you can really twist and wring.
- Large mixing bowl
- Cast iron skillet or heavy-bottomed non-stick pan — I use my cast iron skillet. It holds heat evenly and gives the best crust.
- Spatula
- Wire rack set over a baking sheet — This keeps the fritters crisp. Trust me on this one. Paper towels make them soggy on the bottom.
Let’s Make Them (Step by Step)
Set a wire rack over a baking sheet near the stove before you start. That’s where the fritters go when they’re done, and having it ready saves you from scrambling with a hot pan in your hand.
- Grate the zucchini: Use the large holes of your box grater. Don’t peel it first — the skin adds color and a tiny bit of texture. You should have about 4 cups of loosely packed shreds. (📸 Photo tip: You’ll see the shreds look fluffy and light, not wet and matted.)
- Toss with salt and rest: Put the shreds in a bowl, sprinkle the salt over them, and toss to combine. Let it sit for 10 minutes. This is the step that changes everything. (📸 Photo tip: After 5 minutes, you’ll see beads of moisture forming on the surface of the shreds. That’s the water leaving.)
- Wring it out: Transfer the zucchini to your clean kitchen towel. Gather the corners and twist tight over the sink. Squeeze with everything you’ve got. You’ll be shocked at how much green-tinted water comes out. This is the golden rule of fritters — the drier the zucchini, the crispier the fritter.
- Mix the batter: In the same bowl (wipe it dry first), whisk the egg until it’s broken up. Add the flour, parmesan, corn kernels, and green onion. Stir until just combined. Add the squeezed zucchini and fold it in gently. Don’t overmix — a few streaks of flour are fine.
- Heat the oil: Add about 1/8 inch of oil to your skillet and heat over medium. Let it get hot before you add any batter. Drop a tiny pinch of batter in — if it sizzles immediately and bubbles form around the edges, you’re ready.
- Cook the fritters: Scoop 1/4 cup portions of batter into the pan. Flatten them gently with the back of the scoop to about 1/2 inch thick. Don’t crowd the pan — give them room to crisp. Cook 3-4 minutes per side, until the edges are lacy and deep amber and the center is golden. (📸 Photo tip: The edges should look dark and lacy before you flip them. If they’re pale, let them go longer.)
- Rest on the rack: Transfer the fritters to the wire rack as they come out of the pan. Sprinkle with a little flaky salt immediately — it sticks to the hot oil and makes a difference. They stay shatteringly crisp this way.
How I Make These for Busy Weeks
I’ve done every variation of make-ahead for these. Here’s what actually works without losing the texture you’re making them for.
- Fridge: Keep cooked fritters in an airtight container for up to 3 days. Reheat in a 375°F oven or air fryer — the microwave makes them soft, and you’ve worked too hard for that.
- Freezer: Freeze the uncooked fritter patties on a baking sheet, then transfer to a freezer bag. Cook them straight from frozen — just add 2-3 minutes per side. This is what I do on Sunday nights when I’m already standing at the stove.
- Reheat: Oven at 375°F for 6-8 minutes or air fryer at 375°F for 4-5 minutes. They come back almost as good as fresh.
Things I’ve Learned After Making These About 40 Times
- Don’t skip the salting step: I know it adds ten minutes to the process. I know you’re hungry. But those ten minutes are the difference between a fritter that shatters when you bite it and a fritter that disintegrates into a greasy pile in the pan. I’ve skipped it exactly once to save time and immediately regretted it.
- Don’t crowd the pan: The temperature of the oil drops when you add the batter. If you crowd the pan, the oil can’t recover, and you end up with greasy, pale fritters. Three or four at a time in a 12-inch skillet is the limit. Even if you have to do multiple batches, it’s worth it.
- Use a wire rack, not paper towels: Paper towels trap steam against the bottom of the fritters and soften the crust you just spent time building. A wire rack lets air circulate around the whole fritter, keeping every side crisp. This is one of those small things that makes a big difference.
- The leftovers rule: Even if you mess up a batch a little — maybe the first one didn’t hold together, or you flipped one too early — they’ll still taste good. I’ve done it. Everyone ate them. The kitchen still smelled amazing.
Swaps That Actually Work (I’ve Tested Them)
- Gluten-Free: Use a 1:1 gluten-free flour blend. I’ve tested this with my nephew who has celiac, and he ate a whole plate of them without asking if they were different.
- Dairy-Free: Skip the parmesan or use a dairy-free nutritional yeast blend. The texture will be slightly less rich, but the crispiness holds up.
- More Veggies: Swap half the zucchini for shredded carrot or yellow squash. I do this when I have odds and ends in the fridge. Just squeeze the carrot too — it holds almost as much water as zucchini.
- Kid-Friendly: Leave out the green onion and add a little garlic powder instead. My kids ate these for years before I added the corn, and they loved them both ways.
- Brunch Version: Top each fritter with a soft-cooked egg and a drizzle of hot honey. It’s what I make when I want something that feels special but takes less than 30 minutes.
The Zucchini Fritter Questions I Get All the Time
Q: Why did my fritters fall apart?
A: Ugh, I’ve been there. The most common reason is that the zucchini still had too much water in it. Next time, really go for it when you’re wringing it out in the towel — you want it almost dry to the touch. The other culprit is a pan that wasn’t hot enough when the batter went in. A good hot pan sets the egg and flour quickly and holds everything together.
Q: Can I use frozen zucchini?
A: Yes, but you need to thaw it completely and then wring it out extra hard. Frozen zucchini holds even more water than fresh. I’ve done it in the middle of winter when I had zucchini from the summer in my freezer, and it works — just be patient with the squeezing step.
Q: How long do these last in the fridge?
A: In an airtight container, they’ll keep for up to 3 days. The texture won’t be as shatteringly crisp as fresh, but reheating them in the oven or air fryer brings most of it back. I make a double batch on purpose so we have them for lunch the next day.
Q: What do you serve with these?
A: A bowl of herbed sour cream or Greek yogurt is my go-to — just stir in some chopped dill, chives, and a squeeze of lemon. They’re also amazing alongside a simple tomato salad, or as a side to crispy chicken thighs. My kids love them with ketchup, which I pretend not to notice.
More Recipes My Family Makes on Repeat
If you loved these, here are a few others that get the same reaction at our table:
- [INTERNAL LINK PLACEHOLDER: Crispy Baked Chicken Thighs] — Juicy, golden, and so much easier than frying
- [INTERNAL LINK PLACEHOLDER: Simple Summer Tomato Salad] — The one I make every single week of August
- [INTERNAL LINK PLACEHOLDER: Easy Skillet Cornbread] — Buttery, tender, and ready in 25 minutes
The moment these come out of the pan, the kitchen smells like browned butter and parmesan and something that feels like a slow summer evening even if it’s a frantic Tuesday. That smell is not a coincidence. It’s the reward for not skipping the steps that matter.
If you make them, drop a comment below — I love hearing how they turned out for you. Or tag me on Pinterest so I can see your stack of golden fritters.
📌 These crispy zucchini fritters with parmesan and corn hold together perfectly and stay golden — save this recipe for your next summer dinner or quick weeknight side.
Crispy Zucchini Fritters That Actually Stay Golden — in 30 Minutes
Equipment
- Box Grater
- Clean Kitchen Towel
- Large Mixing Bowl
- Cast Iron Skillet
- Spatula
- Wire Rack
Ingredients
Fritter Batter
- 2 medium zucchini (about 1 lb)
- 1 tsp salt
- 1 large egg
- 1/2 cup all-purpose flour
- 1/3 cup finely grated Parmesan cheese
- 1/2 cup corn kernels (optional)
- 2 green onions, thinly sliced
- oil for frying (avocado or vegetable)
Instructions
- Grate the zucchini using the large holes of your box grater. Don’t peel it first. You should have about 4 cups of loosely packed shreds.
- Toss the shreds with salt and let sit for 10 minutes. This draws out the water.
- Transfer the zucchini to a clean kitchen towel, gather the corners, and wring it tight over the sink. Squeeze out as much water as possible.
- In the same bowl, whisk the egg. Add flour, parmesan, corn, and green onion. Stir until just combined. Fold in the squeezed zucchini.
- Heat about 1/8 inch of oil in a skillet over medium heat. Test with a pinch of batter – it should sizzle immediately.
- Scoop 1/4 cup portions of batter into the pan, flatten gently. Cook 3-4 minutes per side, until edges are lacy and deep amber.
- Transfer to a wire rack and sprinkle with flaky salt immediately. Serve hot.
Notes
Related posts:
 Mini Quiche Recipe: The Store-Bought Crust Version That Tastes Like You Made It From Scratch
 The Slow Cooker Cowboy Casserole That Saves Tired Weeknights (No Soggy Tots Allowed)
 Quick Lemon Ricotta Pasta for Busy Weeknights: Creamy, Bright, and on the Table in 20 Minutes
 Juicy Oven Baked Chicken Thighs That Stay Golden and Tender — in 40 Minutes
 Lemon Garlic Butter Baked Salmon in Foil That’s Ready in 25 Minutes — No Fuss, No Mess
 Lipton Onion Soup Meatloaf for Tuesday Nights: Moist, Savory, and the Only One You’ll Ever Need